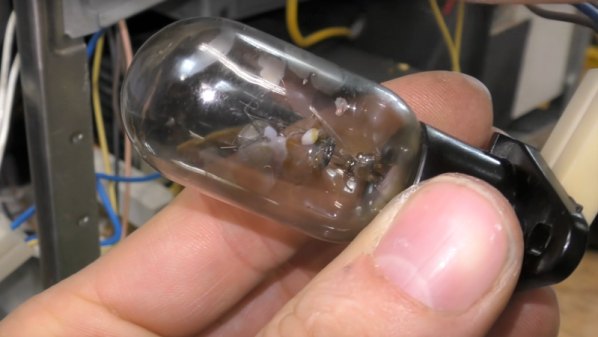
Surely a blown light bulb can’t kill a microwave oven, right? You might not expect it to, but that was indeed the root cause of a problem that [mikeselecticstuff] recently investigated; the cascade of failures is instructive to say the least.
While the microwave that made its way to [mike]’s bench wasn’t exactly engineered to fail, it surely was not designed to succeed. We won’t spoil the surprise, but suffice it to say that his hopes for a quick repair after the owner reported a bang before it died were dashed by an arc across the interior light bulb that put a pulse of mains voltage in places it didn’t belong. That the cascade of failures killed the appliance is a testament to how designing to a price point limits how thoroughly devices can be tested before production runs in the millions are stuffed into containers for trips to overseas markets.
Even though [mike] made his best effort to adhere to the Repair Manifesto, the end result was a scrapped microwave. It wasn’t a total loss given the interesting parts inside, but a disappointment nonetheless unless it forces us to keep in mind edge-case failure modes in our designs.
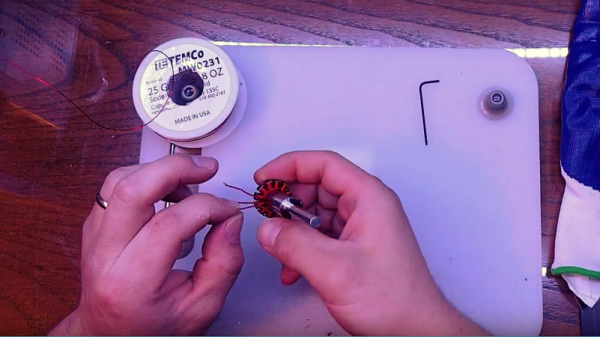
You’re happily FPVing through the wild blue yonder, dodging and jinking through the obstacles of your favorite quadcopter racing course. You get a shade too close to a branch and suddenly the picture in your goggles gets the shakes and your bird hits the dirt. Then you smell the smoke and you know what happened – a broken blade put a motor off-balance and burned out a winding in the stator.
What to do? A sensible pilot might send the quad to the healing bench for a motor replacement. But [BRADtheRipper] prefers to take the opportunity to rewind his burned-out brushless motors by hand, despite the fact that new ones costs all of five bucks. There’s some madness to his method, which he demonstrates in the video below, but there’s also some justification for the effort. [Brad]’s coil transplant recipient, a 2205 racing motor, was originally wound with doubled 28AWG magnet wire of unknown provenance. He chose to rewind it with high-quality 25AWG enameled wire, giving almost the same ampacity in a single, easier to handle and less fragile conductor. Plus, by varying the number of turns on each pole of the stator, he’s able to alter the motor’s performance.
In all, there are a bunch of nice tricks in here to file away for a rainy day. If you need to get up to speed on BLDC motor basics, check out this primer. Or you may just want to start 3D printing your own BLDC motors.
There are persistent rumors that the main ingredient in JB Weld is magic. This two-part epoxy that you would normally find on a shelf next to your basic 5-minute epoxy, Titebond, various cyanoacrylates, and Gorilla glue is somehow different. Stories of ‘some guy’ in the Yukon using JB Weld on a cracked engine block abound. These stories are of course met with skepticism.
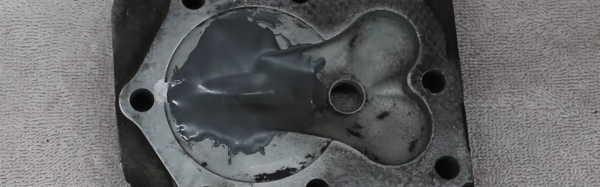
Now, finally, we have evidence you can use JB Weld to fix an engine. [Project Farm] over on YouTube gave it the ultimate test: he took the cylinder head off a lawnmower, took a grinder to the head, and patched the hole with JB Weld. The head had good compression, and the engine actually ran for 20 minutes before the test was concluded.
If this were a test of a field repair, it would be a test of an extremely crappy field repair. [Project Farm] made no attempt to ensure the piston didn’t make contact with the blob of JB Weld, and in fact, there was some slight knocking from the piston tapping against a blob of epoxy. Still, this repair worked.
While this serves as proof of the feasibility of repairing an engine block with JB Weld, there is one ultimate test of JB Weld epoxy: build an engine out of it. For years, I’ve been casting my leftover JB Weld into a small square plastic container. In a few more years, I’ll have a block of JB Weld ‘stock’, large enough to machine the parts for a small (.049 cc) glow engine, like what you would find in ye olde tymie model planes and cars. Will it work? I have no idea, but now I can’t wait to find out.
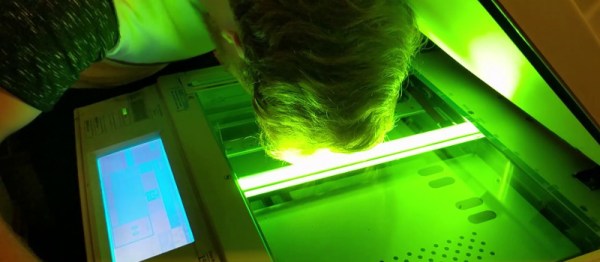
You’ll all remember my grand adventure in acquiring a photocopier. Well, it’s been a rollercoaster, I tell ya. While I still haven’t found a modification worthy enough to attempt, I have become increasingly frustrated. From time to time, I like to invite my friends and family over for dinner, and conversation naturally turns to things like the art on the walls, the fish in the aquarium, or perhaps the photocopier in the living room. Now, I dearly love to share my passions with others, so it’s pretty darned disappointing when I go to fire off a few copies only to have the machine fail to boot! It was time to tackle this problem once and for all.
When powered up, the photocopier would sit at a “Please Wait…” screen for a very long time, before eventually coughing up an error code — SC990 — and an instruction to call for service. A bunch of other messages would flash up as well; Address Book Data Error, Hard Drive Data Error, and so on. In the end I realized they all centered around data storage.
Pictured: the author, in his happy place, at peace with the copier.
Now, I’d already tried diving into the service menu once before, and selected the option to format the hard drive. That had led to the problem disappearing for a short period, but now it was back. No amount of mashing away at the keypad would work this time. The format commands simply returned “Failed” every time. What to do next? You guessed it, it was time for a teardown!
Thankfully, photocopiers are designed for easy servicing — someone’s paying for all those service calls. A few screws and large panels were simply popping off with ease; completely the opposite of working on cars. Spotting the hard drive was easy, it looked like some sort of laptop IDE unit. With only SATA laptops around the house to salvage parts from, I wasn’t able to come up with something to swap in.
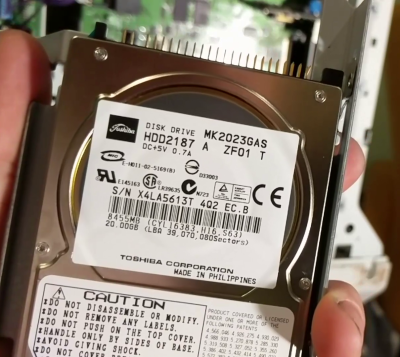
A bit of research (and reading the label) taught me that the drive was a Toshiba MK2023GAS/HDD2187. Replacements were available on eBay, but if I waited two weeks I’d probably be wrist deep in some other abandoned equipment. It had to be sorted on the night. In the words of [AvE], if you can’t fix it… well, you know how it goes. I yanked the drive and, lo and behold – the copier booted straight up! Just to be sure I wasn’t hallucinating, I churned out a few copies, and other than the continued jamming on all-black pages, everything was fine. Literally all it took to get the copier to boot was to remove the ailing drive. Suffice to say, I was kind of dumbfounded.
The hard drive a.k.a. the villain of the piece.
I’m happy to chalk up the win, but I have to draw issue with Ricoh’s design here. The copier is clearly capable of operating perfectly well without a hard drive. It will give up its document server and address book abilities, but it will still make copies and print without a problem.
Yet, when the copier’s drive fails, the unit fails completely and refuses to work. This necessitates a service call for the average user to get anything at all happening again — causing much lost work and productivity. A better design in my eyes would have the copier notify users of the lost functionality due to the failed drive and the need to call service, but let them copy! Any IT administrator will know the value of a bodged work around that keeps the company limping along for the day versus having a room of forty agitated workers with nothing to do. It’s a shame Ricoh chose to have the photocopier shut down completely rather than valiantly fight on.
Feel free to chime in with your own stories of minor failures that caused total shutdowns in the comments. Video below the break.
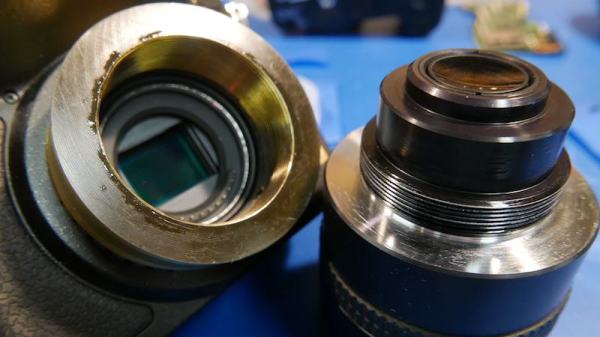
Anyone who is into photography knows that the lenses are the most expensive part in the bag. The larger the aperture or f-stop of the lens, the more light is coming in which is better for dimly lit scenes. Consequently, the price of the larger glass can burn a hole in one’s pocket. [Anthony Kouttron] decided that he could use a Rodenstock TV-Heligon lens he found online and adapt it for his micro four-third’s camera.
The lens came attached to a Fischer Imaging TV camera which was supposedly part of the Fluorotron line of systems used for X-ray imaging. We find [Anthony’s] exploration of the equipment, and discovery of previous hacks by unknown owners, to be entertaining. Even before he begins machining the parts for his own purposes, this is an epic teardown he’s published.
Since the lens was originally mounted on a brass part, [Anthony Kouttron] knew that it would be rather easy to machine the custom part to fit standardized lens adapters. He describes in detail the process for cleaning out the original mount by sanding, machining and threading it. Along the way you’ll enjoy his tips on dealing with a part that, instead of being a perfect circle on the outside, had a formidable mounting tab (which he no longer needed) protruding from one side.
The video after the break shows the result of shooting with a very shallow depth of field. For those who already have a manual lens but lack the autofocus motor, a conversion hack works like a charm as well.
You may still have some luck getting those selfies off of your SD card, even if it will no longer mount on your computer. [HDD Recovery Services] shows us a process to directly access the NAND memory of a faulty micro SD card to recover those precious files you thought about backing up but never got around to.
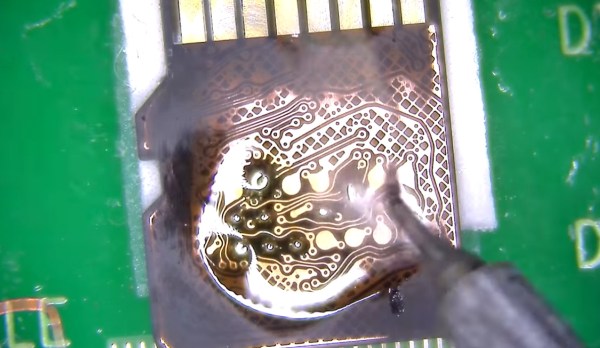
On a Micro SD card you may have noticed there are two slightly longer pins than the rest. These are VSS and VCC pins. As long as they are not a dead short between the two the SD card controller isn’t completely trashed and we can go ahead and get into that little sucker. With a bit of know how — along with sandpaper, enameled wire, and a NAND reader — an image of your lost data can be recovered with a bit of patience and some good soldering skills.
Working your way down from a relatively high grit sand paper, slowly sand away the plastic on the underside of the SD card until you can clearly see the copper traces hidden away inside. Then solder your enameled wire onto the small solder pads to hook it up to a NAND reader and you should be able to read the data that was previously unreachable via conventional means. Of course you’re still going to need to make sense out of the NAND dump. That’s a topic for a different article.
If you ever find yourself in need of an SD card recovery tool you could always roll your own DIY NAND reader. We will likely give this process a try just to play round with the concept. Hopefully we’ll never need to do SD card recovery!
Oh Nexus 5X, how could you? I found my beloved device was holding my files hostage having succumbed to the dreaded bootloop. But hey, we’re hackers, right? I’ve got this.
It was a long, quiet Friday afternoon when I noticed my Nexus 5X was asking to install yet another update. Usually I leave these things for a few days before eventually giving in, but at some point I must have accidentally clicked to accept the update. Later that day I found my phone mid-way through the update and figured I’d just wait it out. No dice — an hour later, my phone was off. Powering up led to it repeatedly falling back to the “Google” screen; the dreaded bootloop.
Stages of Grief
I kept my phone on me for the rest of the night’s jubilant activities, playing with it from time to time, but alas, nothing would make it budge. The problem was, my Nexus still had a full day’s video shoot locked away on its internal flash that I needed rather badly. I had to fix the phone, at least long enough to recover my files. This is the story of my attempt to debrick my Nexus 5X.