Print A Sacrificial Magnet Square

Here’s your quick and dirty hack for the day. Sometimes you just need something that will work for what you’re trying to do, and you don’t want to go through the motions of doing what’s prescribed. When this happens, it’s a cheap, disposable tool that fits the bill. No, we’re not talking about Harbor Freight—we mean those need-driven tools you make yourself that get the job done without fuss. If you’re really lucky, you can use them a couple of times before they break.

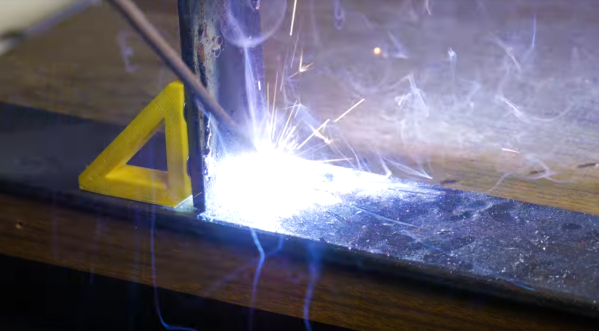
This is one of those tools. [Jake’s Workshop] wanted to be able to quickly tack a corner weld without getting out the clamps, so he thought, why not print some magnet squares? [Jake] hollowed out the triangle to save filament, but this also gives it a nice advantage over store-bought magnet squares: instead of grasping and pulling it off,  you can hook your finger through it and then hang it on the pegboard for next time.

[Jake] got lucky with the pocket sizes and was able to press fit the magnets in place, but it would be worth it to add a drop of CA glue to help with strain. He seems to have forgotten to upload the files for his various styles, but a hollow triangle with chamfers and magnet pockets should be easy enough to replicate in OpenSCAD or  SolidWorks, which he used in the video below.

There’s something special about a cheap tool you make yourself. Even though you know it won’t last forever, it’s just more meaningful than some cheap, rage-inducing tchotchke or assemblage from a place where the air is ~85% offgasses. We love necessity-driven self-built tools around here so much that we gave them their own Hacklet.

Continue reading “Print A Sacrificial Magnet Square”

44 Layers Of Katharine Burr Blodgett

Whether you realize it or not, Katharine Burr Blodgett has made your life better. If you’ve ever looked through a viewfinder, a telescope, or the windshield of a car, you’ve been face to face with her greatest achievement, non-reflective glass.

Katharine was a surface chemist for General Electric and a visionary engineer who discovered a way to make ordinary glass 99% transparent. Her invention enabled the low-cost production of nearly invisible panes and lenses for everything from picture frames and projectors to eyeglasses and spyglasses.

Katharine’s education and ingenuity along with her place in the zeitgeist led her into other fields throughout her career. When World War II erupted, GE shifted their focus to military applications. Katharine rolled up her sleeves and got down in the scientific trenches with the men of the Research Lab. She invented a method for de-icing airplane wings, engineered better gas masks, and created a more economical oil-based smokescreen. She was a versatile, insightful scientist who gave humanity a clearer view of the universe.

Continue reading “44 Layers Of Katharine Burr Blodgett”

Watch Video On A Oscilloscope With An ESP32

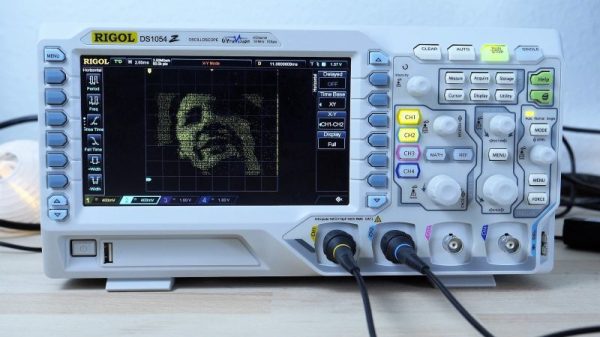
[bitluni] got a brand new scope, and he couldn’t be happier. No, really — check the video below; he’s really happy. And to celebrate, he turned his scope into a vector display using an ESP32.

Using a scope in X-Y mode is nothing new, of course. The technique is used to display everything from Lissajous patterns from an SDR to bouncing balls from an analog computer. Taken on as more of an exercise to learn how to use his new tool than a practical project, [bitluni]’s project starts by using two DACs on an ESP32 to create simple Lissajous patterns to learn about the scope’s controls. Next he built some code to display 3D point clouds, but learned that the native DAC code wasn’t up to the job. A little hacking improved the speed 27-fold, which was enough for great 3D images and live video from an I²S camera module. The latter was accomplished by grabbing frames from the camera and rendering them pixel by pixel, CRT style. The results are pretty clean, and there’s a lot to be learned about both using scopes as X-Y displays and tweaking the ESP32 for maximum performance.

Need more background on the ESP32? Start by checking out these ESP32 tutorials.


Continue reading “Watch Video On A Oscilloscope With An ESP32”

VFD Puts The Suck Back Into Desoldering Station

A dedicated desoldering station is a fantastic tool if you’re in the business of harvesting components from old gear. Having heat and suction in a single tool is far more convenient than futzing with spring-loaded solder suckers or braid, but only as long as the suction in the desoldering tool has a little oomph behind it. So if the suction on your solder sucker is starting to suck, this simple VFD can help restore performance.

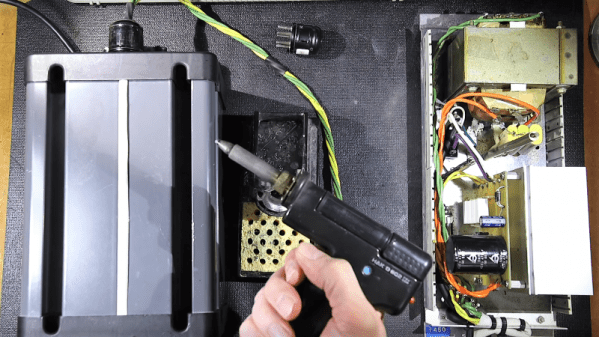
Luckily for [Mr. Carlson], his Hakko 470 desoldering station is equipped with an AC induction motor, so it’s a perfect candidate for a variable frequency drive to boost performance. He decided to build a simple VFD that boosts the frequency from 60-Hz mains to about 90-Hz, thereby jacking the motor speed up by 50%. The VFD is just a TL494 PWM chip gating the primary coil of a power transformer through a MOSFET. Duty cycle and frequency are set by trimmers, and the whole thing is housed in an old chassis attached to the Hakko via an anachronistic socket and plug from the vacuum tube days. That’s a nice touch, though, because the Hakko can be returned to stock operation by a simple bridging plug, and the video below shows the marked difference in motor speed both with and without the VFD plugged in.

We’ve marveled at [Mr. Carlson]’s instrument packed lab before and watched his insider’s tour of a vintage radio transmitter. Here’s hoping we get to see more of his hopped-up solder sucker in action soon.

Continue reading “VFD Puts The Suck Back Into Desoldering Station”

Logic Analyzer Pushes The Limits Of Miniaturization

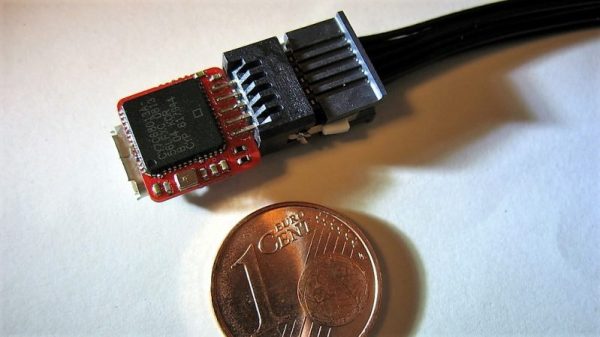
Careful not to sneeze while using this diminutive logic analyzer — you could send it flying across the bench.

Undertaken more for the challenge than as a practical bench tool, [Uwe Hermann]’s tiny logic analyzer is an object lesson on getting a usable circuit as small as possible. Sure, some sacrifices had to be made; it’s only an eight-channel instrument without any kind of input protection at all, and lacks niceties like an EEPROM. But that allows it to fit on a mere 11 x 11-mm fleck of PCB. That’s a pretty impressive feat of miniaturization, given that the Cypress microcontroller running the show is in QFN package that takes up 64-mm² all by itself. A micro-USB connector takes up much of the back side of the board and allows the analyzer to talk to sigrok, an open-source signal analysis suite.

Everything about the project is totally open, including the PCB files, so you can build your own if you feel up to the challenge. We’d strongly suggest you check out this primer on logic analyzers first, though, especially since it focuses on the capabilities of the sigrok suite.

Old Scanner Finds New Life In DIY PCB Fab

Cheap, high-quality PCBs are truly a wonder of our age. That a professionally fabricated board with silkscreen and solder mask can be ordered online and delivered to your door has lowered the bar between a hobbyist project and a polished product. But the wait can be agonizing, and it can throw a wrench into the iterative design process. What to do?

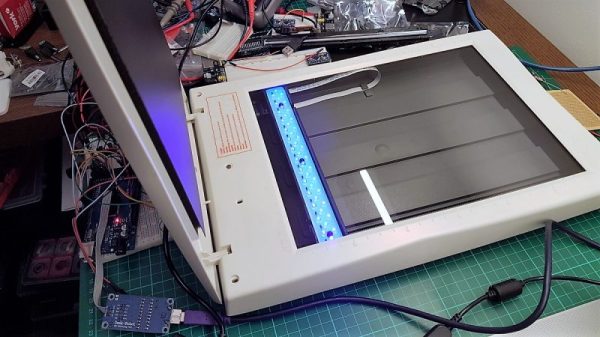
[Andras Kabai] knows the answer to that, and this former flatbed scanner turned into a UV exposer is the centerpiece of his DIY board fab. The old Mustek scanner was a couple of bucks secondhand, and provided not only the perfect form-factor for a board scanner but a trove of valuable parts to reuse. [Andras] replaced the original fluorescent light bar with a long, narrow PCB stuffed with UV LEDs, and added an Arduino Mega to control the original stepper drive. The project looks like it went through a little feature creep, with an elaborate menu system and profiles that include controls for exposure time, the brightness of the LED array via PWM, and the length of board that gets exposed. It’s clearly a work in progress, but early results are encouraging and we’ll be watching to see how [Andras]’ in-house fab shapes up.

This approach to PCB fab is only one of many, of course. You can turn a budget 3D-printer into a PCB machine, or even use an LCD to mask the boards during exposure. The latter intrigues us — an LCD mask and a scanning UV light source could make for a powerful PCB creation tool.

The Miracle Of Injection Molding: How Does It Work?

Pretty much any household item nowadays has an involved, extremely well-thought-out manufacturing method to it, whether it’s a sheet of paper, an electrical outlet, a can of tuna, or even the house itself. Some of the stories of how these objects came to be are compelling, though, as one of the recent videos from [This Old Tony] shows as he takes a deep dive into a $5 ball valve, and uses it to talk about all of the cool things you can do with injection molding.

Injection molding is the process of casting molten plastic into more useful pieces of plastic. In this case it’s a plumbing valve which might seem simple on the surface, but turns out to be much more involved. These ball valves are extremely reliable but have a very small price tag, meaning that a lot of engineering must have gone into their design. What is unearthed in the video is that injection molding allows parts to be cast into the molds of other parts, and the means by which those parts don’t all melt together, and how seals can be created within the part itself. All of this happens with a minimal number of parts and zero interaction from a human, or from any robot that isn’t the injection mold itself.

The video goes into exceptional detail on these valves specifically but also expounds on various techniques in injection molding. Similar to the recognition the seemingly modest aluminum can deserves, the injection molded ball valve deserves a similar amount of respect. While [This Old Tony] usually focuses on metalworking, he often tackles other interesting topics like this and this video is definitely worth checking out.

Continue reading “The Miracle Of Injection Molding: How Does It Work?”