Pedaling Away Under The Cover Of Your Desk

[Wayne Venables], like many of us, found himself sitting more than usual the past few months.  Armed with a Bluetooth-enabled under desk exercise bike, he quickly found the app to be rather sub-optimal and set about reverse-engineering the protocol of his bike.

Custom GUI for the exercise bike

The first step was to use some apps on his Android phone to reveal the profiles on the bike, which showed his particular machine used a Nordic Bluetooth UART. This meant the only work would be decoding the stream of bytes coming off the wireless serial port. Using Wireshark and Bluetooth logs on his phone, [Wayne] was able to correspond the various commands to points in the video. There were still a few bytes that he wasn’t able to identify, but [Wayne] had enough to whip up a quick .NET app that can start a workout and log it all to a database. The code for his app is on his GitHub.

While [Wayne] doesn’t specifically name the bike he uses in this project, we tracked down the image he shows on his writeup to the Exerpeutic 900e. It appears to be discontinued but the reverse engineering approach should be usable on a range of Bluetooth-connected machines. This isn’t the first bike we’ve seen liberated by reverse engineering here at Hackaday. And we have a feeling it won’t be the last.

WiFive55: More Than A Smart 555 Replacement

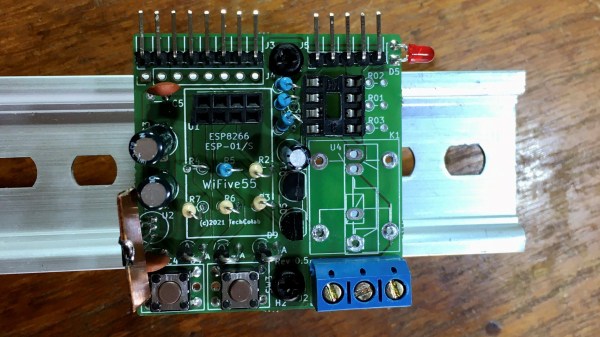
“You could’ve done that with a 555 timer.” But what if all you have on hand is an ESP8266? [TechColab] needed to control a solenoid valve with a short pulse via a solid-state relay (SSR) but found that the trusty 555 timer was tricky to set properly. Additionally, they wanted to add features, such as fixed pulse length, that were difficult to implement—even with multiple timers. Still wanting to keep things cheap and accessible, [TechColab] has created the WiFive55, a 555 replacement based on the ESP-01 ESP8266 board.

[TechColab] began by investigating existing ESP-01 solid-state relay boards but found that many of them momentarily enable the output on startup—a risk [TechColab] deemed unacceptable. This was resolved in the WiFive55 by adding an RC filter to the SSR output, eliminating the output glitches at the cost of slowing switching time to around 20 ms—an acceptable trade for many SSR applications.

Since they were going to design a new PCB to support this improved ESP-01 SSR controller, [TechColab] decided to go all-out. To support loads of widely varying sizes, the PCB supports an optoisolator that switches up to 1 A, a MOSFET that switches up to 2 A, and an on-board relay or SSR that can switch up to 3 A. For heavy loads, it includes connections for an off-board SSR, which allow it to switch whatever current the SSR can handle (easily over 50 A). Because the ESP-01 is slightly more capable than the 555, the WiFive55 supports control via WiFi, GPIO, serial, and push-button. Keeping with the WiFive55’s original role as a 555 replacement, it even includes a header exposing a 555-like trigger and output interface!

We always like seeing inexpensive boards like the ESP-01 being used to their full potential, and we can’t wait to see what software [TechColab] cooks up for this! If you’re interested in getting started with the ESP-01, you might consider starting with this guide to blinking an LED over WiFi.

18650 Brings ESP8266 WiFi Repeater Along For The Ride

We’re truly fortunate to have so many incredible open source projects floating around on the Internet, since there’s almost always some prior art you can lean on. By combining bits and pieces from different projects, you can often save yourself a huge amount of time and effort. It’s just a matter of figuring out how all the pieces fit together, like in this clever mash-up by [bethiboothi] that takes advantage of the fact that the popular TP4056 lithium-ion battery charger module happens to be almost the exact same size of the ESP-01.

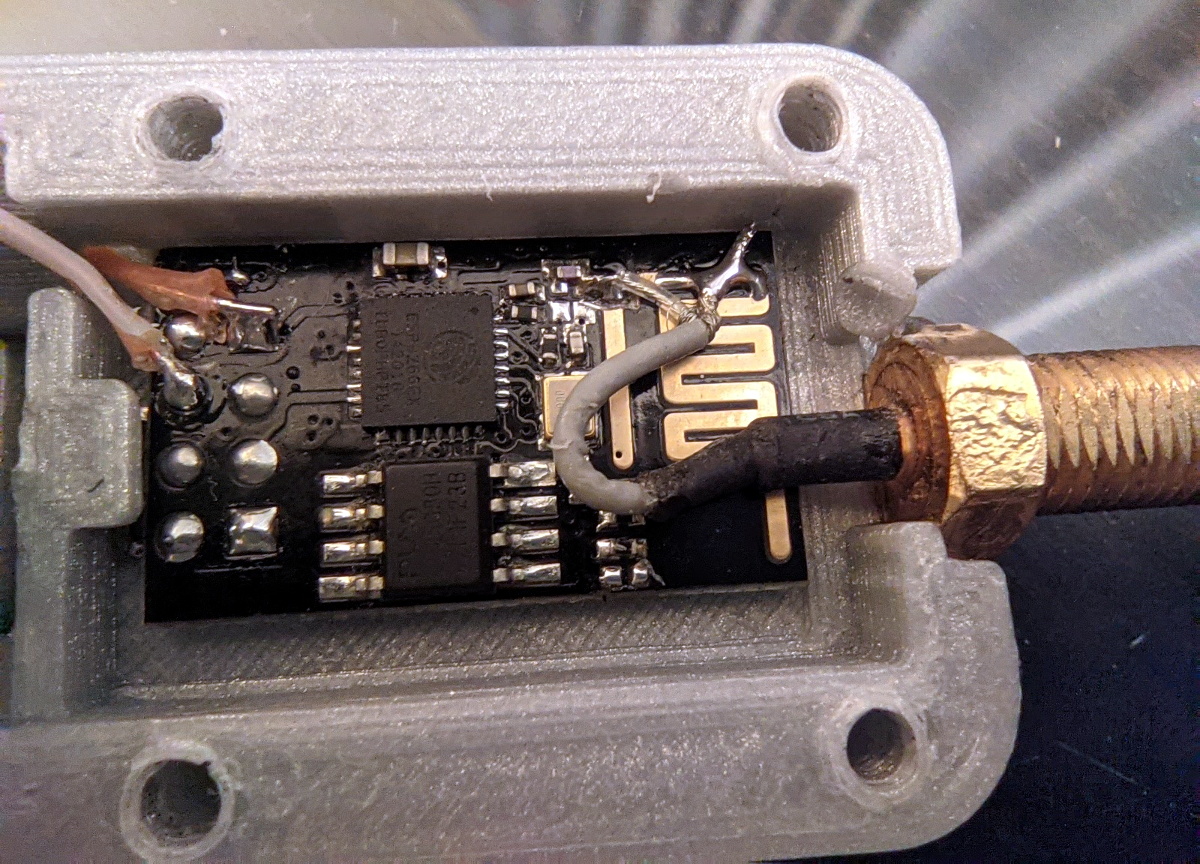
By taking a 3D printed design intended to attach a TP4056 module to the end of an 18650 cell and combining it with an ESP8266 firmware that turns the powerful microcontroller into a WiFi repeater, [bethiboothi] ended up with a portable network node that reportedly lasts up to three days on a charge. The observed range was good even with the built-in PCB antenna, but hacking on an external can get you out a little farther if you need it.

While it doesn’t appear that [bethiboothi] is using it currently, the esp_wifi_repeater firmware does have an automatic mesh mode which seems like it would be a fantastic fit for this design. Putting together an impromptu mesh WiFi network with a bunch of cheap battery powered nodes would be an excellent way to get network connectivity at an outdoor hacker camp, assuming the ESP’s CPU can keep up with the demand.

Fan-tastic Misuse Of Raspberry Pi GPIO

[River] is a big fan of home automation. After moving into a new house, he wanted to assimilate two wirelessly controlled fan lights into his home automation system. The problem was this: although the fans were wireless, their frequency and protocol were incompatible with the home automation system.

Step one was to determine the frequency the fan’s remote used. Although public FCC records will reveal the frequency of operation, [River] thought it would be faster to use an inexpensive USB RTL-SDR with the Spektrum program to sweep the range of likely frequencies, and quickly found the fans speak 304.2 MHz.

Next was to reverse-engineer the protocol. Universal Radio Hacker is a tool designed to make deciphering unknown wireless protocols relatively painless using an RTL-SDR. [River] digitized a button press with it and immediately recognized it as simple on-off keying (OOK). With that knowledge, he digitized the radio commands from all seven buttons and was quickly able to reverse-engineer the entire protocol.

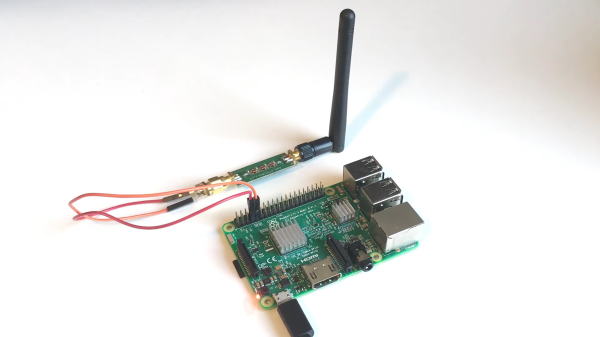
[River] wanted to use a Raspberry Pi to bring the fans into his home automation system, but the Raspberry Pi doesn’t have a 304.2 MHz radio. What it does have is user-programmable GPIO and the rpitx package, which converts a GPIO pin into a basic radio transmitter. Of course, the Pi’s GPIO pin’s aren’t long enough to efficiently transmit at 304.2 MHz, so [River] added a proper antenna, as well as a low-pass filter to clean up the transmitted signal. The rpitx package supports OOK out of the box, so [River] was quickly able get the Pi controlling his fan in no time!

If you’d like to do some more low-cost home automation, check out this approach to using a Raspberry Pi to control some bargain-bin smart plugs.

A Deep Dive Into E-Ink Tag Hacking

Over the last decade or so, e-ink price tags have become more and more ubiquitous, and they’ve now reached the point where surplus devices can be found inexpensively on various websites. [Dmitry Grinberg] found a few of these at bargain-basement prices and decided to reverse engineer and hack them into monochrome digital picture frames.

Often, the most difficult thing about repurposing surplus hardware is the potential lack of documentation. In the two tags [Dmitry] hacked, not only are the labels not documented at all, one even has an almost-undocumented SoC controlling it. After some poking around and some guesswork, he was able to find connections for both a UART and an SWD debugging interface. Fortunately, the manufacturers left the firmware unprotected, so dumping it was trivial.

Even with the firmware dumped, code for controlling peripherals (especially wireless devices) is often inscrutable. [Dmitry] overcomes this with a technique he calls “Librarification” in which he turns the manufacturer’s firmware into libraries for his custom code. Once he was able to implement his custom firmware, [Dmitry] developed his own code to wirelessly download and display both gray-scale and two-color images.

Even if you’re not interested in hacking e-ink tags, this is an incredible walk-through of how to approach reverse-engineering an embedded or IoT device. By hacking two different tags with completely different designs, [Dmitry] shows how to get into these systems with intuition, guesswork, and some sheer persistence.

If you’d like to see some more of [Dmitry]’s excellent reverse-engineering work, take a look at his reverse-engineering and ROM dump of the PokeWalker. If you’re interested in seeing what else e-ink tags can be made to do, take a look at this weather station made from the same 7.4″ e-ink tag.

A Crash Course On Sniffing Bluetooth Low Energy

Bluetooth Low Energy (BLE) is everywhere these days. If you fire up a scanner on your phone and walk around the neighborhood, we’d be willing to bet you’d pick up dozens if not hundreds of devices. By extension, from fitness bands to light bulbs, it’s equally likely that you’re going to want to talk to some of these BLE gadgets at some point. But how?

Well, watching this three part video series from [Stuart Patterson] would be a good start. He covers how to get a cheap nRF52480 BLE dongle configured for sniffing, pulling the packets out of the air with Wireshark, and perhaps most crucially, how to duplicate the commands coming from a device’s companion application on the ESP32.

Testing out the sniffed commands.

The first video in the series is focused on getting a Windows box setup for BLE sniffing, so readers who aren’t currently living under Microsoft’s boot heel may want to skip ahead to the second installment. That’s where things really start heating up, as [Stuart] demonstrates how you can intercept commands being sent to the target device.

It’s worth noting that little attempt is made to actually decode what the commands mean. In this particular application, it’s enough to simply replay the commands using the ESP32’s BLE hardware, which is explained in the third video. Obviously this technique might not work on more advanced devices, but it should still give you a solid base to work from.

In the end, [Stuart] takes an LED lamp that could only be controlled with a smartphone application and turns it into something he can talk to on his own terms. Once the ESP32 can send commands to the lamp, it only takes a bit more code to spin up a web interface or REST API so you can control the device from your computer or other gadget on the network. While naturally the finer points will differ, this same overall workflow should allow you to get control of whatever BLE gizmo you’ve got your eye on.

Continue reading “A Crash Course On Sniffing Bluetooth Low Energy”

ESP8266-Powered Receipt Printer Puts RESTful API On Dead Trees

Taking his digital information into the real-world, [Davide Gironi] has built his own note transcriber from a point-of-sale receipt printer and an ESP8266.

You’ve seen these receipt printers at the order window of restaurants. A server puts in an order from any of the machines throughout the restaurant and a paper summary spits out for the chef line to start in on (and even cuts itself off from the roll).  Why shouldn’t we have this convenience in our own lives?

The printer communicates using a variant of the Epson Standard Code for Printers, for which [Davide] has written a library and thankfully shared the code. Adding an ESP8266 using a couple voltage regulators and some passive components makes this wireless, except for power. It has all the fun bells and whistles to set up the WiFi credentials and once running, just push the button on the base and it’ll spit out your data.

But wait, where is that data coming from? The web-based settings page lets you configure a URI to the RESTful source of your choosing. (XKCD has one, don’t they?) It also lets you configure header, footer, error messages, and of course your company hacker logo.

One of our favorite receipt-printer moments was when Hackaday editor of yore [Eliot Phillips] brought a selfie receipt printer to Supercon. We couldn’t find any pictures of that one, so we’ll leave you with the excellent hack [Sam Zeloof] pulled off by cramming one of these into a Polaroid camera.

Continue reading “ESP8266-Powered Receipt Printer Puts RESTful API On Dead Trees”