We around the Hackaday shop never get tired of seeing new ways to mark the passage of time. Hackers come up with all manner of interesting timekeeping modalities using every imaginable material and method of moving the mechanism once per whatever minimum time unit the hacker chooses to mark.
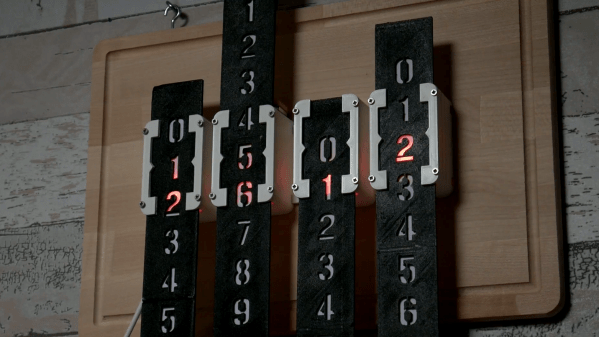
But honestly, there are only so many ways to make a clock, and while we’re bound to see some repeats, it’s still nice to go over old ground with a fresh approach. Take this linear sliding stencil clock for instance. [Luuk Esselbrugge] has included some cool design elements that bear a closer look. The video below shows that the display is made up of four separate stepper motors, each driving a vertical stencil via a rack-and-pinion mechanism. There a simple microswitch for homing the display, and a Neopixel for lighting things up.
The video below shows that the stencils move very, very slowly; [Luuk] says that this is to keep the steppers as quiet as possible. Still, this means that some time changes take more than a minute to accomplish, which is a minor problem. The Neopixel also doesn’t quite light up just one digit, which should be a pretty easy fix for version 2. Still, even with these issues, we like the stately movements of this clock, and appreciate [Luuk]’s attempts to make it easier to live with.
Don’t let the number of clocks you see on these pages dissuade you from trying something new, or from putting your twist on an old design. Start with fridge magnets, an old oscilloscope, or even a bevy of steel balls, and let your imagination run wild. Just make sure to tell us all about it when you’re done.
Continue reading “A Linear Stencil Clock Built For Quiet Operation”