RGB Disk Goes Interactive With Bluetooth; Shows Impressive Plastic Work

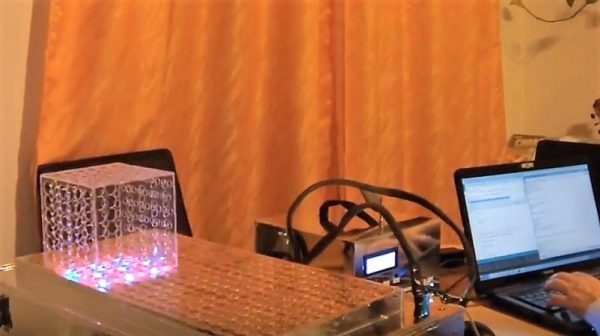
[smash_hand] had a clear goal: a big, featureless, white plastic disk with RGB LEDs concealed around its edge. So what is it? A big ornament that could glow any color or trippy mixture of colors one desires. It’s an object whose sole purpose is to be a frame for soft, glowing light patterns to admire. The disk can be controlled with a simple smartphone app that communicates over Bluetooth, allowing anyone (or in theory anything) to play with the display.

The disk is made from 1/4″ clear plastic, which [smash_hand] describes as plexiglass, but might be acrylic or polycarbonate. [smash_hands] describes some trial and error in the process of cutting the circle; it was saw-cut with some 3-in-1 oil as cutting fluid first, then the final shape cut with a bandsaw.

The saw left the edge very rough, so it was polished with glass polishing compound. This restores the optical properties required for the edge-lighting technique. The back of the disc was sanded then painted white, and the RGB LEDs spaced evenly around the edge, pointing inwards.

The physical build is almost always the difficult part in a project like this — achieving good diffusion of LEDs is a topic we talk about often. [smash_hands] did an impressive job and there are never any “hot spots” where an LED sticks out to your eye. With this taken care of, the electronics came together with much less effort. An Arduino with an HC-05 Bluetooth adapter took care of driving the LEDs and wireless communications, respectively. A wooden frame later, and the whole thing is ready to go.

[smash_hands] provides details like a wiring diagram as well as the smartphone app for anyone who is interested. There’s the Arduino program as well, but interestingly it’s only available in assembly or as a raw .hex file. A video of the disk in action is embedded below.

Continue reading “RGB Disk Goes Interactive With Bluetooth; Shows Impressive Plastic Work”

Debugging With Serial Print At 5333333 Baud

Debugging with printf is something [StorePeter] has always found super handy, and as a result he’s always been interested in tweaking the process for improvements. This kind of debugging usually has microcontrollers sending messages over a serial port, but in embedded development there isn’t always a hardware UART, or it might already be in use. His preferred method of avoiding those problems is to use a USB to Serial adapter and bit-bang the serial on the microcontroller side. It was during this process that it occurred to [StorePeter] that there was a lot of streamlining he could be doing, and thanks to serial terminal programs that support arbitrary baud rates, he’s reliably sending debug messages over serial at 5.3 Mbit/sec, or 5333333 Baud. His code is available for download from his site, and works perfectly in the Arduino IDE.

The whole thing consists of some simple, easily ported code to implement a bare minimum bit-banged serial communication. This is output only, no feedback, and timing consists of just sending bits as quickly as the CPU can handle, leaving it up to the USB Serial adapter and rest of the world to handle whatever that speed turns out to be. On a 16 MHz AVR, transmitting one bit can be done in three instructions, which comes out to about 5333333 baud or roughly 5.3 Mbit/sec. Set a terminal program to 5333333 baud, and you can get a “Hello world” in about 20 microseconds compared to 1 millisecond at 115200 baud.

He’s got additional tips on using serial print debugging as a process, and he’s done a followup where he stress-tests the reliability of a 5.3 MBit/sec serial stream from an ATMega2560 at 16 MHz in his 3D printer, and found no missed packets. That certainly covers using printf as a debugger, so how about a method of using the debugger as printf?

Cable Cutting Machine Makes Fast Work Of A Tedious Job

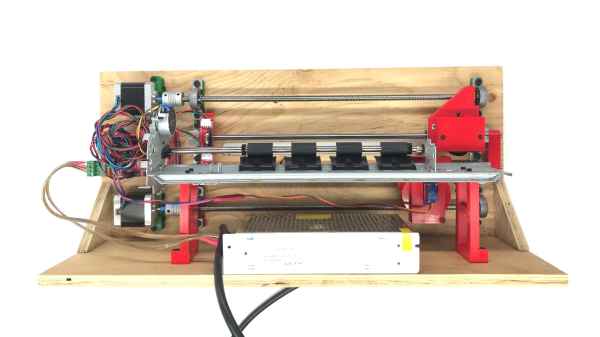
We’ve all been there: faced with a tedious job that could be knocked out manually with a modest investment of time, we choose instead to overcomplicate the task and build something to do it for us. Such was the impetus behind this automated wire cutter, but in this case the ends justify the means.

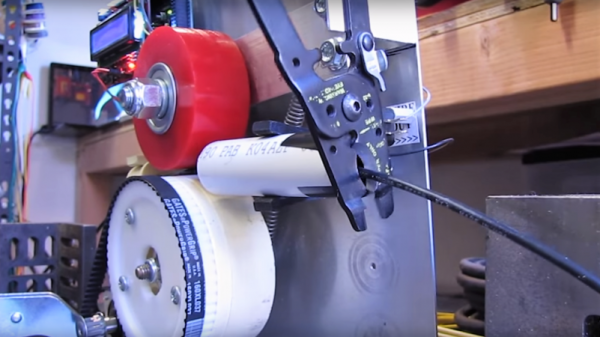
That [Edward Carlson] managed to stretch a twenty-minute session with wire cutters and a tape measure into four days of building and tweaking this machine is pretty impressive. The build process was jump-started by modifying an off-the-shelf wire measuring machine, of the kind one finds in the electrical aisle of The Big Orange Store. Stripped of the original mechanical totalizer and with a stepper added to drive the friction wheels, the machine can now measure cable by counting steps. A high-torque servo drives a stout pair of cable shears through a nifty linkage, or the machine can just measure the length of cable without cutting. [Edward]’s solution in search of a problem ends up bringing extra value, so maybe the time spent was worth it after all.

If the overall design looks familiar, you may be thinking of a similar of another cable-cutting bot we featured a while back. That one used a filament extruder and was for lighter gauge wires than this machine. Continue reading “Cable Cutting Machine Makes Fast Work Of A Tedious Job”

A Stepper Motor For Two Dimensions

We’ve all heard linear motors, like those propelling Maglev trains, described as “unrolled” versions of regular electric motors. The analogy is apt and helps to understand how a linear motor works, but it begs the question: what if we could unroll the stator in two dimensions instead of just one?

That’s the idea behind [BetaChecker’s] two-axis stepper motor, which looks like it has a lot of potential for some interesting applications. Build details are sparse, but from what we can gather from the videos and the Hackaday.io post, [BetaChecker] has created a platen of 288 hand-wound copper coils, each of which can be selectively controlled through a large number of L293 H-bridge chips and an Arduino Mega. A variety of sleds, each with neodymium magnets in the base, can be applied to the platen, and depending on how the coils are energized, the sled can move in either dimension. For vertical applications, it looks like some coils are used to hold the sled to the platen while others are used to propel it. There are RGB LEDs inside the bore of each coil, although their function beyond zazzle is unclear.

We’d love more details to gauge where this is going, but with better resolution, something like this could make a great 3D-printer bed. If one-dimensional movement is enough for you, though, check out this linear stepper motor that works on a similar principle.

Continue reading “A Stepper Motor For Two Dimensions”

OpenBraille Is An Impressive DIY Embosser

In 2024, the Braille system will have been around for 200 years. What better way to mark the occasion than with an open source project devoted to making embossing equipment affordable for the visually impaired? This long overdue cause became the plight of [ccampos7], who couldn’t find a DIY embosser kit and set out to build one himself.

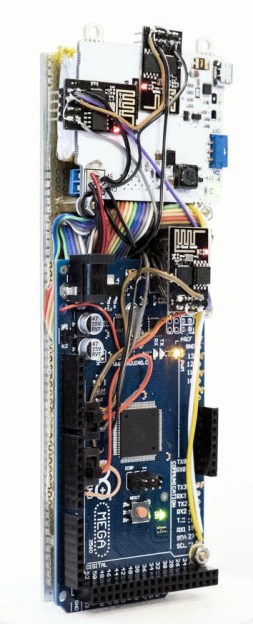
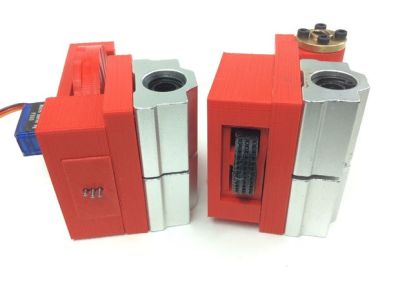
While other embossers forcibly punch the letters in one go, OpenBraille takes a more gradual approach to ensure a clean impression with a rolling motion. Paper is placed between a mechanical encoder with moving pins and a dimpled roller that provides resistance and a place to land. The embossing head is driven by an Arduino Mega and a standard RAMPS board, as the rest of the system relies on Cartesian movement.

The encoder and roller.

The encoder mechanism itself is pretty interesting. A micro servo drives a 3D printed wheel with three distinct tracks around half of the edge. The peaks and valleys encoded in these plastic tracks actuate the embossing pins, which are made from nails embedded through the sides of hex nuts. There’s a quick demo of the encoder movement after the break, and another video of it in action on the OpenBraille Facebook page.

[ccampos7] has all the files up on Thingiverse and plans to post the software soon. You should also check out this compact embosser that was recognized in the first round of the 2017 Hackaday Prize which is a nice all-print Braille concept. Continue reading “OpenBraille Is An Impressive DIY Embosser”

SID Organ Pulls Out All The Stops

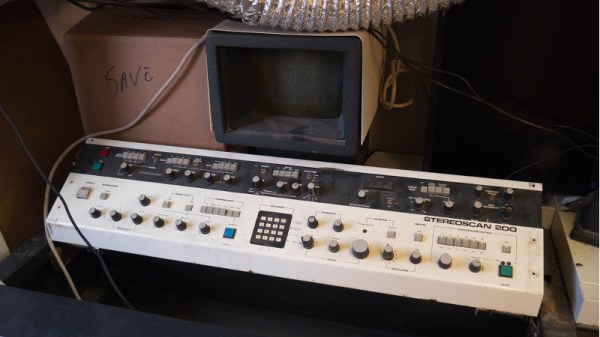
Someone left this organ out in the rain, but [Tinkartank] rescued it and has given it a new life as a SID controller. What’s a SID, you ask? That’s the sound chip Commodore used in the C64, a remarkable chip revered among retro gamers that was way ahead of its time.

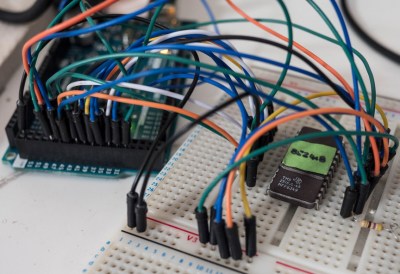
He threw out everything but the keyboard assembly for the build. Each key press now drives a momentary button, and those are all wired up to an Arduino Mega through some I/O expansion boards left over from another project. The Mega drives the MOS6581 SID chip which generates those sweet chiptunes. There are four CV outs for expanding the organ’s horizons with Eurorack modules.

Our favorite part is the re-use of the stop knobs — particularly that they are actuated the same way as before. The knobs still technically control the sound, but in a new way — now they turn pots that change the arpeggio, frequency, or whatever he wants ’em to do.

The plans for the future revolve around switching to a Teensy to help out with memory issues. Although it’s a work in progress, this organ already has a ton of features. Be sure to check them out after the break.

Once you dive down the chiptunes rabbit hole, you might want to take them everywhere.  When you get to that point, here’s a portable SID player. A SIDman, if you will.

Continue reading “SID Organ Pulls Out All The Stops”

Roller Coaster Tycoon IRL

Additive manufacturing has come a long way, but surely we’re not at the point where we can 3D-print a roller coaster, right? It turns out that you can, as long as 1/25th scale is good enough for you.

Some people build model railroads, but [Matt Schmotzer] has always had a thing for roller coasters. Not content with RollerCoaster Tycoon, [Matt] decided to build an accurate and working model of Invertigo, a boomerang coaster at King’s Park, the coaster nirvana in Cincinnati, Ohio. Covering a sheet of plywood and standing about 3′ tall, [Matt]’s model recreates the original in painstaking detail, from the supporting towers and bracing to the track sections themselves. It appears that he printed everything in sections just like the original was manufactured, with sections bolted together. Even though all the parts were sanded and vapor smoothed, the tracks themselves were too rough to use, so those were replaced with plastic tubing. But everything else is printed, and everything works. An Arduino Mega controls the lift motors, opens and closes the safety bars on the cars, and operates the passenger gates and drop floor in the station. The video below shows it in action.

Fancy a coaster of your own, but want something a little bigger? We understand completely.

Continue reading “Roller Coaster Tycoon IRL”