Staying In And Playing Skyrim Has Rarely Been This Healthy

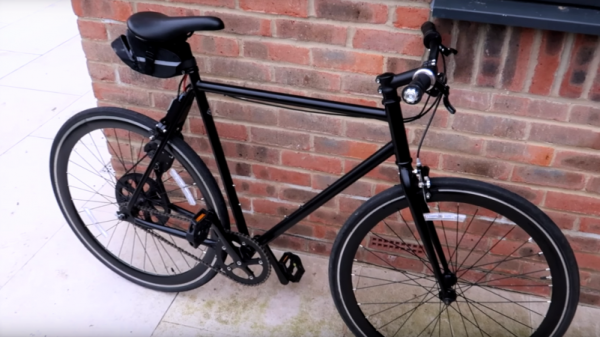
Looking to add some activity to your day but don’t want to go through a lot of effort? [D10D3] has the perfect solution that enables you to take a leisurely bike ride through Skyrim. A standing bicycle combines with an HTC Vive (using the add-on driver VorpX which allows non-vr enabled games to be played with a VR headset) and a Makey Makey board to make slack-xercise — that’s a word now — part of your daily gaming regimen.

The Makey Makey is the backbone of the rig; it allows the user to set up their own inputs with electrical contacts that correspond to keyboard and mouse inputs, thereby allowing one to play a video game in some potentially unorthodox ways — in this case, riding a bicycle.

Setting up a couple buttons for controlling the Dragonborn proved to be a simple process. Buttons controlling some of the main inputs were plugged into a breadboard circuit which was then connected to the Makey Makey along with the ground wires using jumpers. As a neat addition, some aluminium foil served as excellent contacts for the handlebars to act as the look left and right inputs. That proved to be a disorienting addition considering the Vive’s head tracking also moves the camera. Continue reading “Staying In And Playing Skyrim Has Rarely Been This Healthy”

Mechanical Horse-Bike

Oh [Rodger Cleye]! You had us at “unicycle, duct tape, styrofoam, and tie wraps”. But watching the horse-bike in action (video below) is just about enough for us to go out and make one ourselves. (For our child, naturally. We’re far too dignified.)

If you trawl around [Rodger]’s YouTube channel, you’ll see no end of odd motorized vehicles. Like last year’s motorized horse project, or this stormtrooper speeder. But there’s just something about the way that the horse’s legs move along with the rider that is slightly more enchanting. (That’s the “unicycle” part of the build.) And, we assume, the rider gets a little bit more exercise to boot.

We’ve featured a few builds of [Rodger]’s before, including his motorized couch build that’s obviously controlled from the seat-mounted coconut, and of course a pneumatic Boba Fett rocket.

A Strandbeest Bicycle

“If you’re asking ‘why,’ you don’t get it.” So said [JP] when he told us about his strandbeest bicycle build. After all, who in their right mind would graft a complex multi-leg mechanical walking mechanism to the rear end of a perfectly good bicycle? But to expand on his sentiment, to not understand his creation is to miss the whole essence of our movement. Sometimes you just have to make something, because you can.

3D printed strandbeest bike proof of concept

If you aren’t familiar with the strandbeest, it is the creation of Dutch artist [Theo Jansen]. Complex skeletal walking machines powered by the wind, that in the case of [Jansen]’s machines autonomously roam the beaches of the Netherlands. Hence the name, from Dutch: “Beach beast”.

[JP]’s strandbeest bike came together over 8 months of hard work. It started with a conceptual CAD design and 3D print, and progressed through many iterations of fine-tuning the over 400 parts required to put four legs on the back of a bicycle frame. It’s an impressive achievement and it is fully rideable, though we suspect we won’t be seeing it at the Tour de France any time soon.

He’s posted several videos of the bike in action, you can see one of them below the break.

Continue reading “A Strandbeest Bicycle”

Boost Around Town With This 3D Printed Bicycle Assist

[MechEngineerMike]’s bike boost is just a pleasure to look at, and, we’re certain, a relief to use. While it’s not going to rocket you down the street, it will certainly take some of the pain away. (Just like the professionals!)

It’s one thing to design a device that can fit one bicycle. It’s quite another feat if it can support multiple frames. On top of that, it’s even simple. It attaches at one point and transfers the power to the wheel easily. There’s even just one wire to connect, an RCA cable, to engage the boost.

We really like the clever way [Mike] used the rotating shell of an outrunner motor as the surface that presses against the wheel. We wonder if a cast polyurethane rubber tire for the motor would help, or just help overheat the motor?

The parts for the device are 3D printed and pretty chunky. They should hold up. Check out the video of it boosting [Mike] to the grocery store, where he can, presumably, buy less with all the calories he saved after the break.

Continue reading “Boost Around Town With This 3D Printed Bicycle Assist”

Bike Power Meter With Crank-mounted WiFi Strain Gauges

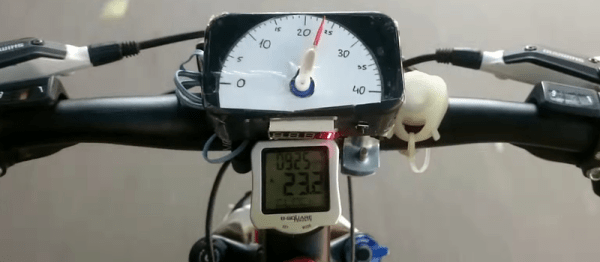
In any motorsport, the more you know about how the engine is performing, the better a driver is likely to do in a race. That holds for bicycles, too, where the driver just happens to also be the engine. There are plenty of cheap bike computers on the market, but the high-end meters that measure power output are a bit pricey. [chiprobot] is looking to change that with a home-brew, low-cost bike power meter.

The project still appears to be in the proof-of-concept phase, but it’s an interesting concept for sure. The stock crank arms are carefully fitted with two pairs of tiny strain gauges. The gauges are wired in a Wheatstone bridge arrangement, with one gauge in each pair mounted perpendicular to the force on the crank to serve as a static reference. Output from the bridge is fed to an HX711 instrumentation amplifier. The demo video below shows how sensitive the bridge and 24-bit amp are.

The goal is to send crank data to a handlebar-mounted UI via WiFi with a pair of ESP8266 modules. We like the idea of a bicycle area network, but [chiprobot] has his work cut out for him in terms of ruggedizing and weatherproofing all this gear. We’ll be sure to keep an eye on this project. In the meantime, there’s plenty to learn from this bike power meter project we covered last year.

Continue reading “Bike Power Meter With Crank-mounted WiFi Strain Gauges”

Blinky LED Bike Bag

Bicycle riders can never be too visible: the more visible you are, the less chance there is someone will hit you. That’s the idea behind the Arduibag, a neat open-source project from [Michaël D’Auria] and [Stéphane De Graeve]. The project combines a joystick that mounts on the handlebars with a dot matrix LED display in a backpack. By moving the joystick, the user can indicate things such as that they are turning, stopping, say thank you or show a hazard triangle to warn of an accident.

The whole project is built from simple components, such as an Adafruit LED matrix and a Bluno (an Arduino-compatible board with built-in Bluetooth 4.0) combined with a big battery that drives the LED matrix. This connects to the joystick, which is in a 3D printed case that clips onto the handlebars for easy use. It looks like a fairly simple build, with the larger components being mounted on a board that fits into the backpack and holds everything in place. You then add a clear plastic cover to part of the backpack over the LED matrix, and you are ready to hit the road, hopefully without actually hitting the road.

Continue reading “Blinky LED Bike Bag”

Anodized aluminium phone mount for a bike

Anodized Phone Mount For Your Bike

There’s a slew of apps out there for tracking your bike rides. If you want to monitor your ride while using the app, you’ll need it securely affixed to your bike. That’s where [Gord]’s No Dropped Calls build comes in. This aluminium mount was hand milled and anodized, which gives it a professional finish.

The mount consists of 3 parts which were machined out of stock 6061 aluminium. The plans were dreamt up in [Gord]’s head, and not drawn out, but the build log gives a good summary of the process. By milling away all of the unnecessary material, the weight of the mount was minimized.

Once the aluminium parts were finished, they were anodized. Anodization is a process that accelerates the oxidization of aluminum, creating a protective layer of aluminium oxide. [Greg] does this with a bucket of sulphuric acid and a power supply. Once the anodization is complete, the part is dyed for coloring. If you’re interested, [Gord] has a detailed writeup on home anodization.

The final product looks great, puts the phone within reach while biking, and prevents phone damage due to “dropped calls.”