Wildlife Camera

Remote Controlled Wildlife Camera With Raspberry Pi

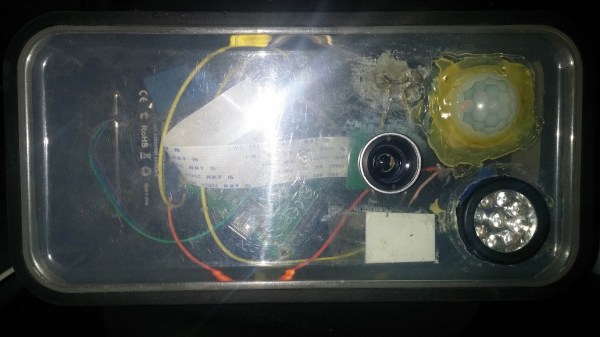
If you are interested in local wildlife, you may want to consider this wildlife camera project (Google cache). [Arnis] has been using his to film foxes and mice. The core components of this build are a Raspberry Pi and an infrared camera module specifically made for the Pi. The system runs on a 20,000 mAh battery, which [Arnis] claims results in around 18 hours of battery life.

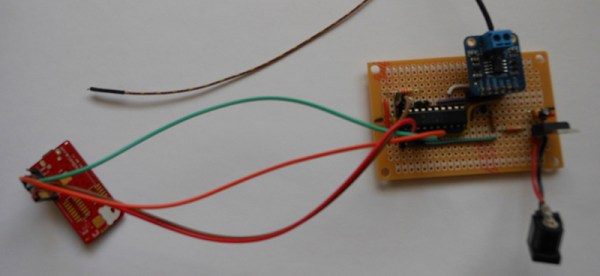
[Arnis] appears to be using a passive infrared (PIR) sensor to detect motion. These sensors work by detecting sudden changes in the amount of ambient infrared radiation. Mammals are good sources of infrared radiation, so the sensor would work well to detect animals in the vicinity. The Pi is also hooked up to a secondary circuit consisting of a relay, a battery, and an infrared light. When it’s dark outside, [Arnis] can enable “night mode” which will turn on the infrared light. This provides some level of night vision for recording the furry critters in low light conditions.

[Arnis] is also using a Bluetooth dongle with the Pi in order to communicate with an Android phone. Using a custom Android app, he is able to connect back to the Pi and start the camera recording script. He can also use the app to sync the time on the Pi or download an updated image from the camera to ensure it is pointed in the right direction. Be sure to check out the demo video below.

If you like these wildlife cameras, you might want to check out some older projects that serve a similar purpose. Continue reading “Remote Controlled Wildlife Camera With Raspberry Pi”

bluetooth snes headphones

SNES Headphones Cry For Bluetooth Has Been Answered

A year and a half ago we ran a post about a SNES controller modified into a pair of headphones. They were certainly nice looking and creative headphones but the buttons, although present, were not functional. The title of the original post was (maybe antagonistically) called: ‘SNES Headphones Scream Out For Bluetooth Control‘.

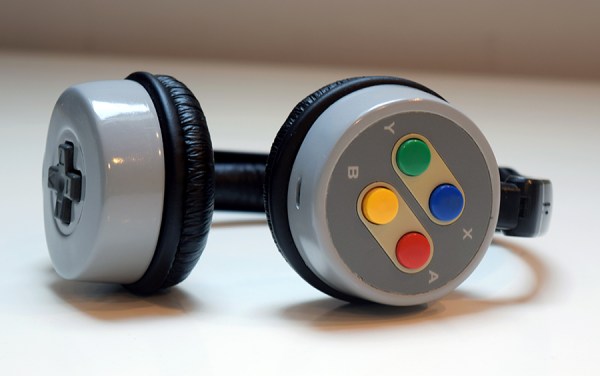
Well, headphone modder [lyberty5] is back with a vengeance. He has heeded the call by building revision 2 of his SNES headphones… and guess what, they are indeed Bluetooth! Not only that, the A, B, X and Y buttons are functional this time around and have been wired up to the controls on the donor Bluetooth module.

To get this project started, the SNES controller was taken apart and the plastic housing was cut up to separate the two rounded sides. A cardboard form was glued in place so that epoxy putty could be roughly formed in order to make each part completely round. Once cured, the putty was sanded and imperfections filled with auto body filler. Holes were drilled for mounting to the headband and a slot was made for the Bluetooth modules’ USB port so the headphone can be charged. The headphones were then reassembled after a quick coat of paint in Nintendo Grey. We must say that these things look great.

If you’d like to make your own set of SNES Bluetooth Headphones, check out the build video after the break.

Continue reading “SNES Headphones Cry For Bluetooth Has Been Answered”

Calibrating The MSP430 Digitally Controlled Oscillator

The MSP430 is a popular microcontroller, and on board is a neat little clock source, a digitally controlled oscillator, or DCO. This oscillator can be used for everything from setting baud rates for a UART or for setting the clock for a VGA output.

While the DCO is precise – once you set it, it’ll keep ticking off at the correct rate – it’s not accurate. Without a bit of code, it’s difficult to set the DCO to the rate you want, and the code to set that rate will be different between different chips.

When [Mike] tried to set up a UART between an MSP430 and a Bluetooth module, he ran into a problem. Setting the MSP to the correct baud rate was difficult. Luckily, there’s a way around that.

There’s an easy way to set the DCO on the MSP programatically; just set two timers – one that interrupts every 512 cycles, with its clock source set to the DCO, and another that interrupts every 32768 cycles that gets its clock from a 32.768kHz crystal. The first timer clicks off every second, and by multiplying the first timer by 512, the real speed of the DCO can be deduced.

After playing around with this technique and testing the same code on two different chips, [Mike] found there can be a difference of almost 1MHz between the DCOs from chip to chip. That’s something that would have been helpful to know when he was playing around with VGA on the ‘430. Back then he just used a crystal.

Wireless SNES Controller

SNES Controller Modified To Be Completely Wireless

[Pat] was looking for a way to wirelessly control his Fire TV unit. He could have just went with one of many possible consumer products, but he decided to take it a step further. He modified a unit to fit inside of an original SNES controller. All of the buttons are functional, and the controller even features a wireless charger.

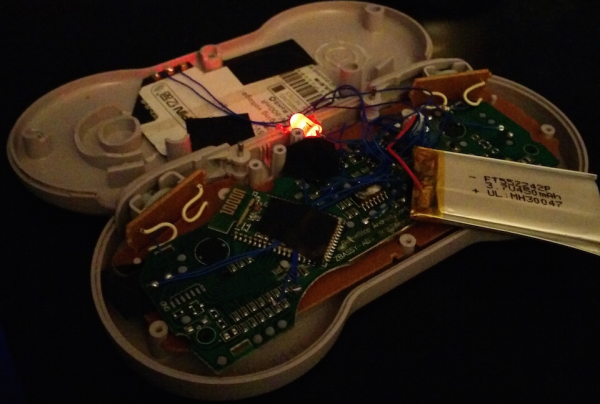
[Pat] started out with a Bluetooth video game controller marketed more playing video games on tablets. The original controller looked sort of like an XBox controller in shape. [Pat] tore this controller open and managed to stuff the guts into an original SNES controller. He didn’t even have to remove the original SNES PCB. [Pat] mentions that it was rather tedious to rewire all of the buttons from the original controller, but in the end it wasn’t too difficult. The only externally visible modification to the original controller is a small hole that was made for a power button.

In order to make this unit completely wireless, [Pat] also installed a Qi wireless charging module. Now, placing the controller on a charging pad will charge up the small LiPo battery in just about 45 minutes. This controller would be the perfect addition to a RetroPi or other similar project. If you’re not into Bluetooth, you can try using a Logitech receiver instead. Continue reading “SNES Controller Modified To Be Completely Wireless”

An Adventure Into Android Makes The VIC-20 Speak

History and [Bil Herd] teaches us that Commodore begged, borrowed, or stole the engineers responsible for the Speak & Spell to add voice synthesis to a few of the computers that came after the C64. This didn’t quite work out in practice, but speech synthesis was something that was part of the Commodore scene for a long time. The Votrax Type ‘n Talk was a stand-alone speech synthesizer that plugged into the expansion port of the VIC-20. It was expensive, rare, but a few games supported it. [Jan] realized the state of speech synthesis has improved tremendously over the last 30 years, and decided to give his VIC a voice with the help of a cheap Android phone.

A few VIC-20 games, including [Scott Adams] adventure games, worked with the Votrax speech synthesizer by sending phonemes as text over the expansion port. From there, the Votrax would take care of assembling everything into something intelligible, requiring no overhead on the VIC-20. [Jan] realized since the VIC is just spitting out characters for each phoneme, he could redirect those words to a better, more modern voice synthesizer.

A small Bluetooth module was wired up to the user port on the VIC, and this module was paired with a cheap Android smartphone. The smartphone receives the serial stream from an adventure game, and speaks the descriptions of all the scenes in these classic adventure games.

It’s a unique experience judging from the video, but the same hardware and software can also be added to any program that will run on the VIC-20, C64, and C128. Video below.

Continue reading “An Adventure Into Android Makes The VIC-20 Speak”

An ATTiny Bluetooth Board

Since just about everyone who would be interested in electronics has a decent cellphone now, there’s an idea that we don’t need USB or weird serial adapters anymore. Bluetooth LE is good enough for short-range communication, and there are a ton of boards and Kickstarter projects out there that are ready to fill the need.

[Michah] has built what is probably the lowest-spec and cheapest BTLE board we’ve ever seen. It’s really just an ATTiny85 – a favorite of the crowd that’s just slightly above Arduino level – and an HM-10 Bluetooth 4.0 Low Energy module.

This board was developed as a means to connect sensors for a vintage motorcycle to an iOS device for display and data logging. A small, cheap board was needed that could be powered by a LiPo battery, and [Micah] created a board that fit his needs perfectly.

Four of the six IO pins on the ‘Tiny85 are broken out on a pin header; two are used to communicate with the BTLE module. It’s simple, fairly cheap, and can be powered by a battery. Exactly what you need if you want a wireless sensor board. All the files can be found in the Git repo and everything is open source. Not bad.

Hacking The Nike+ Fuelband

[Simone] was trying to reverse-engineer the Bluetooth protocol of his Nike+ Fuelband and made some surprising discoveries. [Simone] found that the authentication system of the Fuelband can be easily bypassed and discovered that some low-level functions (such as arbitrarily reading and writing to memory) are completely exposed to the end user or anyone else who hacks past the authentication process.

[Simone] started with the official Nike app for the Fuelband. He converted the APK to a JAR and then used JD-Gui to read the Java source code of the app. After reading through the source, he discovered that the authentication method was completely ineffective. The authenticator requires the connecting device to know both a pin code and a nonce, but in reality the authentication algorithm just checks for a hard-coded token of 0xff 0xff 0xff 0xff 0xff 0xff rendering the whole authentication process ineffective.

After he authenticated with the Fuelband, [Simone] started trying various commands to see what he could control over the Bluetooth interface. He discovered that he could send the device into bootloader mode, configure the RTC, and even read/write the first 65k of memory over the Bluetooth interface–not something you typically want to expose, especially with a broken authentication mechanism. If you want to try the exploit yourself, [Simone] wrote an Android app which he posted up on GitHub.