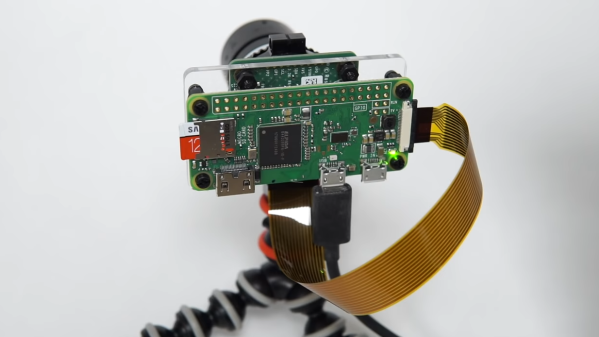
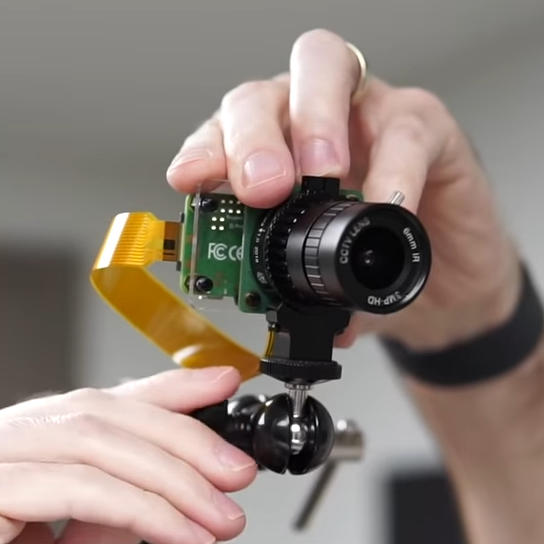
More people working from home has had an impact on the cost and availability of USB webcams, so [Jeff Geerling] got around the issue with a DIY solution that rang in around $100. It consists of a Raspberry Pi and HQ camera module acting as a USB webcam, and there is no messy streaming of ffmpeg over the network masquerading as a camera device or anything. It works just as a USB camera should.
[Jeff] chose a Raspberry Pi Zero and HQ camera module for his unit, making a tidy package that might not be quite as small as commercial webcams, but is certainly perfectly respectable as a USB camera. That being said, there are a few drawbacks, namely the lack of a microphone or autofocus, latency issues at higher resolutions, and the need to shut down the Pi cleanly.
Check out the GitHub repository for everything needed to set up your own, including a complete hardware list and some options for mounting. [Jeff] also tested whether the camera would work with the new keyboard-embedded Raspberry Pi 400, and it absolutely does. Embedded below is a video walkthrough and demonstration of the whole project, so check it out.
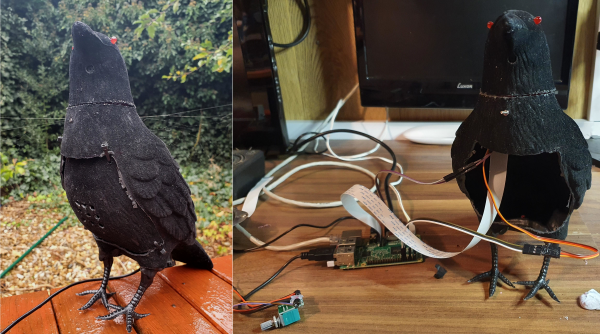
The worst thing about holiday decorations is that while you could leave them up all year, your neighbors probably won’t like you very much for it. Christmas lights on your house are one thing, but as far as Halloween decorations go, [MisterM]’s raven security camera is one of the few exceptions to this rule.
Nevermore will [MisterM] wonder who goes there. As soon as this raven lays its beady red LED eyes on whatever is lurking in the garden, it comes to life with a bit of head swiveling and some random sounds. The bird either goes CAW! or quotes Christopher Lee’s reading of Edgar Allen Poe’s “The Raven”.
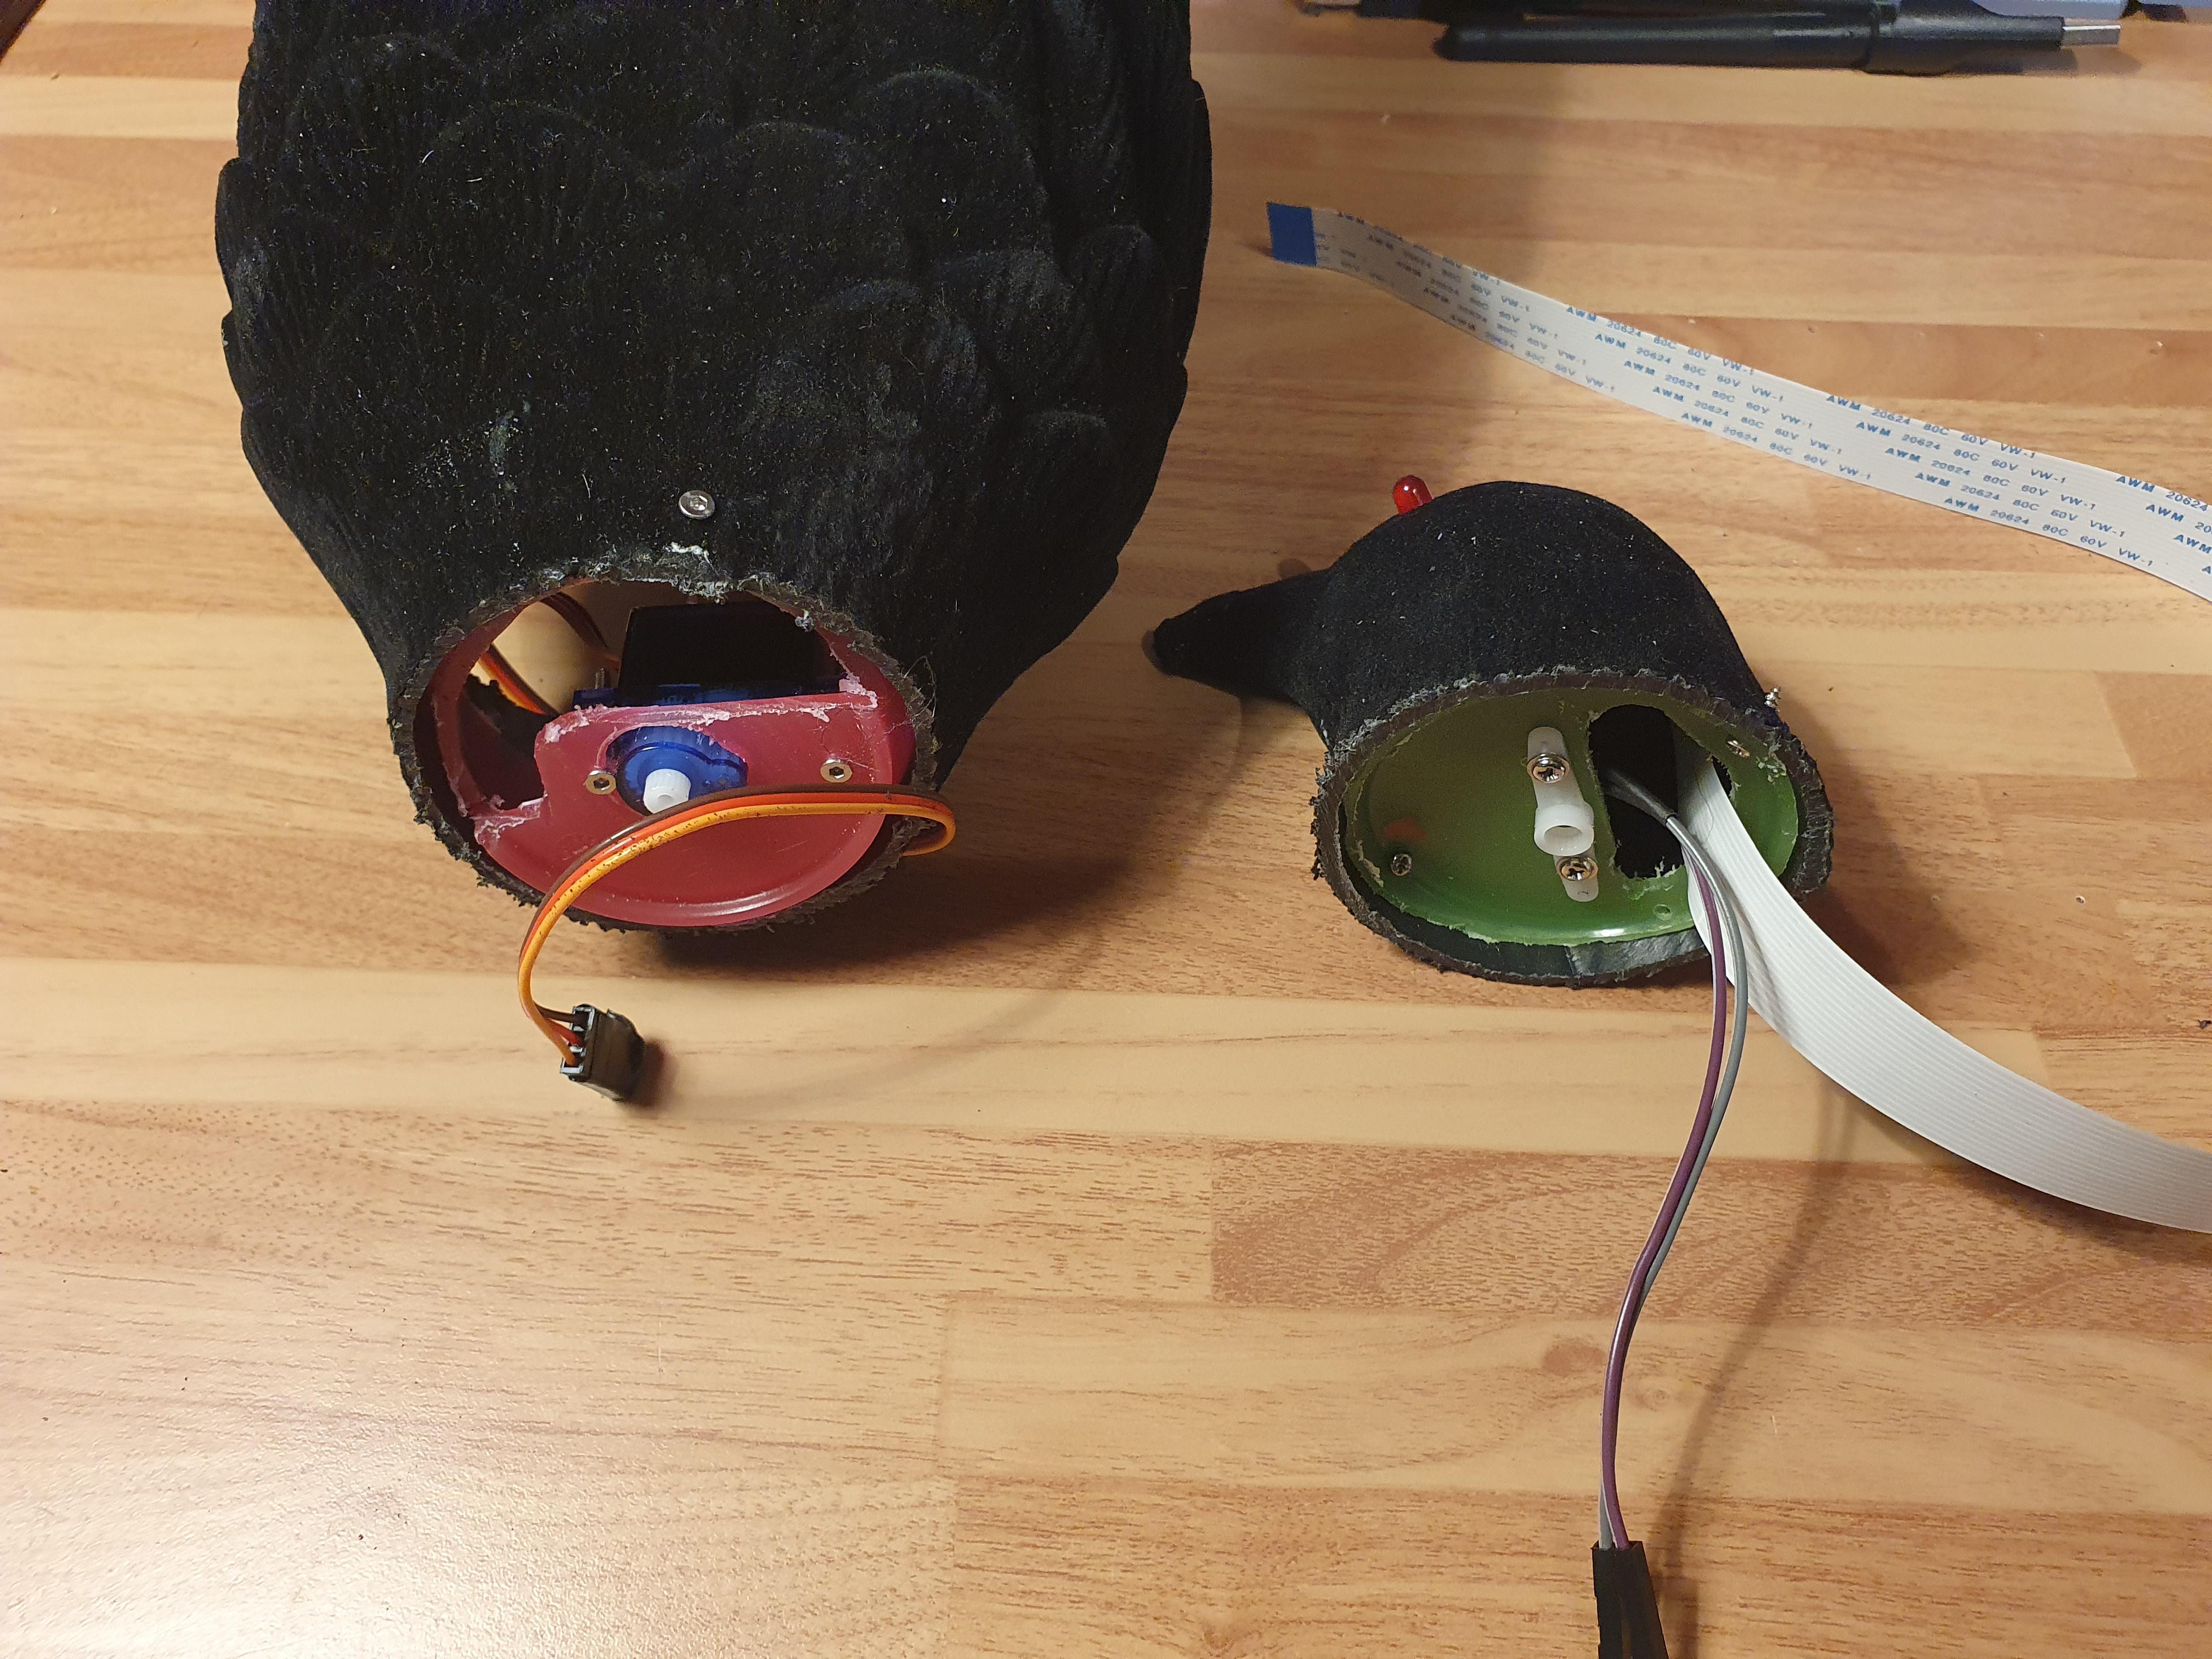
Inside this bird’s chest cavity is a Raspberry Pi 2 and standard camera, a servo to swivel the head, and an audio amplifier and speaker. This bird is running MotionEye on top of the Raspi OS so it can run a script whenever it senses motion.
We like that [MisterM] was able to find right-sized bits of plastic to mount the servo in the neck and the horn to the head. It just goes to show that not everything needs a 3D printer, a CNC, or woodworking. Check out the scary demo after the break.
We’d love to say that all of our projects worked perfectly on the first try, but the average Hackaday reader is a bit too experienced to buy a fib like that. The reality is, DIY projects rarely get everything right out of the gate. It takes some time to identify issues and work out all the kinks. But of course, that’s half the fun.
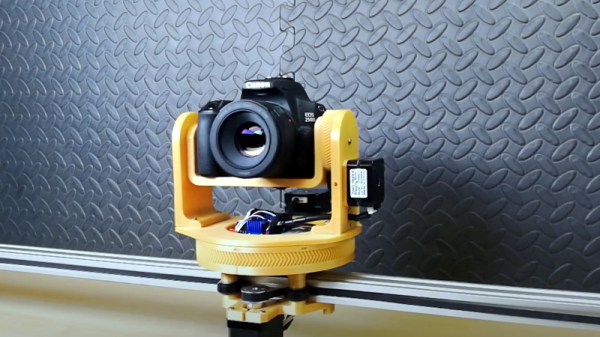
For a perfect example of this process, check out the latest update on the 3D printed DSLR camera mount that [isaac879] has been working on. When we last checked in with this project over the summer the mount was already impressive, but with the latest improvements and the addition of a whole new axis of movement, this homebrew camera motion system is an extremely compelling project for anyone who wants to take their project videos to the next level.
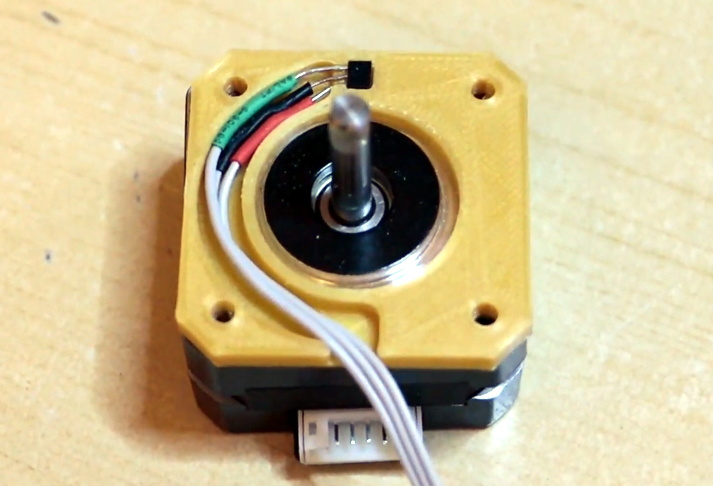
The new Hall effect sensor mounts are a very nice touch.
Back in June, the mount [isaac879] showed off was only capable of pan and tilt. But as you can see in the video after the break, he’s since mounted that to a track made of 20×40 aluminum extrusion and added another stepper motor. This allows the pan/tilt mount to move itself back and forth on the track to get those slick panning shots that all the cool kids use in their videos nowadays.
But even if you’re not interested in the slider aspect, the core pan/tilt mount has also received a number of refinements over the last few months. Perhaps the most obvious is the switch over to thinner and lighter stepper motors. Reducing mass is always an improvement with a moving system like this, and in the case of the pan motor, the shorter can prevents a potential collision with the camera itself. Obviously the smaller motors are weaker, but [isaac879] considers that a feature; the mini motors will just start skipping steps if things get bound up instead of potentially damaging your expensive camera.
He’s switched to flange bearings to help hold the frame together, improved wire routing, added a mounting point for the electronics, reprinted the pinion gears in a flexible filament to help absorb some vibrations, and switched over to TMC2208 stepper drivers. The new drivers may actually be one of the biggest usability upgrades, as they allow the entire mount to move faster and more accurately. Critically, [isaac879] also reports the new drivers have solved a troublesome vibration issue he was seeing when the camera was moving slowly.
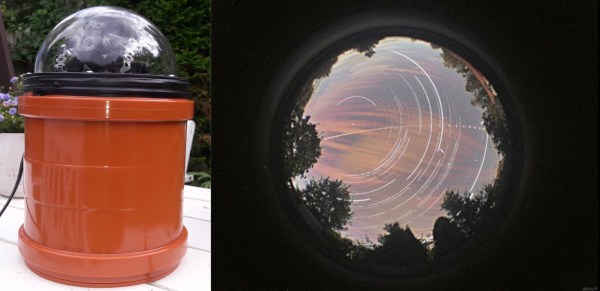
Combining a Raspberry Pi HQ camera and a waterproof housing, [jippo12] made an all-sky, all-Pi meteorite tracking camera on the cheap, and it takes fantastic photos of the heavens. It’s even got its own YouTube channel. Inside there’s a Raspberry Pi 4 plus an HQ camera to take the pictures. But there’s also a system in place to keep everything warm and working properly. It uses a Raspberry Pi 3+, a temperature sensor, and a relay control HAT to pump pixies through a couple of 10 W resistors, making just enough heat to warm up the dome to keep it from fogging.
If we count all the screens in our lives, it takes a hot minute. Some of them are touchscreens, some need a mouse or keyboard, but we are accustomed to all the input devices. Not everyone can use the various methods, like cerebral palsy patients who rely on eye-tracking hardware. Traditionally, that only works on the connected computer, so switching from a chair-mounted screen to a tablet on the desk is not an option. To give folks the ability to control different computers effortlessly [Zack Freedman] is developing a head-mounted eye-tracker that is not tied to one computer. In a way, this is like a KVM switch, but way more futuristic. [Tony Stark] would be proud.
An infrared detector on the headset identifies compatible screens in line of sight and synchs up with its associated HID dongle. A headset-mounted color camera tracks the head position in relation to the screen while an IR camera scans the eye to calculate where the user is focusing. All the technology here is proven, but this new recipe could be a game-changer to anyone who has trouble with the traditional keyboard, mouse, and touchscreen. Maybe QR codes could assist the screen identification and orientation like how a Wii remote and sensor bar work together.
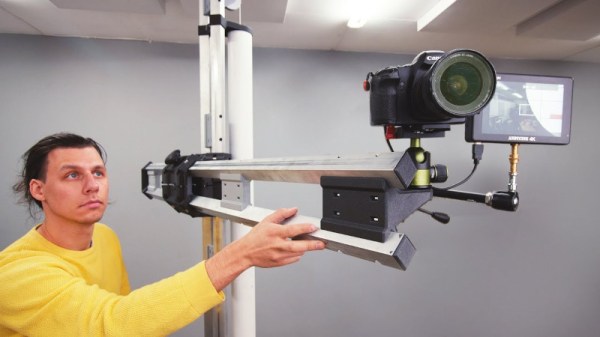
One of the first purchases for anyone looking to shoot video should be a tripod. Key to getting clean and stable shots, they can nevertheless be limiting in their range of motion. Wanting something a little more high-end, but dissatisfied with the high cost of commercial options, [Alexandre Chappel] decided to build his own camera arm.
The build is based around square alumiunium tubing, with the high-tolerance material acting as the arm’s vertical and horizontal rails. 3D printed brackets and adapters are used to bolt everything together, along with several printed components used as drilling guides to help accurately machine the aluminium tubes. Adjustment is built into the carriages that travel along the rails, to help account for any slop in the 3D printed parts. A counterweight system is then installed to ensure the camera doesn’t hit the floor when not in the locked position.
It’s a tidy build, and one that has given [Alexandre] far more flexibility to shoot than his existing tripods. Additionally, adjusting the camera position is much quicker than before. Of course, when you’re building your own rigs, the sky is the limit. Video after the break.
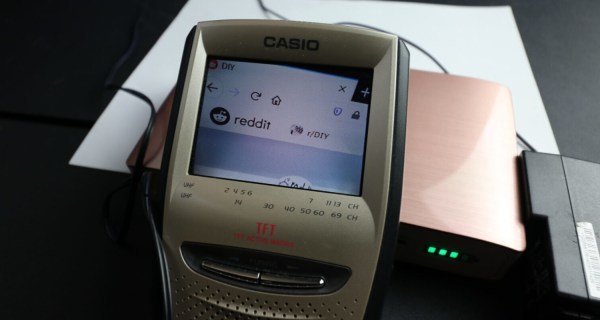
Those little pocket TVs were quite the cool gadget back in the ’80s and ’90s, but today they’re pretty much useless at least for their intended purpose of watching analog television. (If someone is out there making tiny digital-to-analog converter boxes for these things, please let us know.)
Our favorite part of this project is the way that [technichenews] leveraged what is arguably the most useless part of the TV — the antenna — into the star. Their plan is to use the camera to peer into small engines, so by mounting it on the end of the antenna, it will become a telescoping, ball-jointed, all-seeing eye. You can inspect the build video after the break.
 [Jeff] chose a Raspberry Pi Zero and HQ camera module for his unit, making a tidy package that might not be quite as small as commercial webcams, but is certainly perfectly respectable as a USB camera. That being said, there are a few drawbacks, namely the lack of a microphone or autofocus, latency issues at higher resolutions, and the need to shut down the Pi cleanly.