Cassette Synth Plays With Speed Control

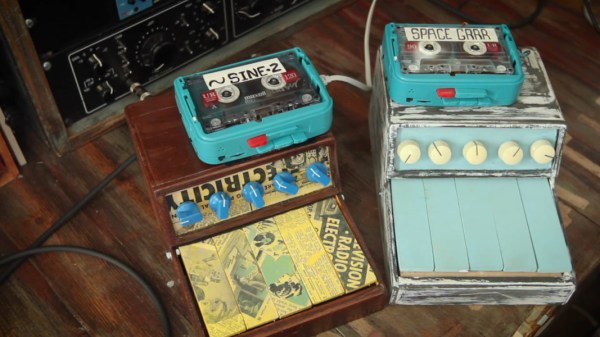
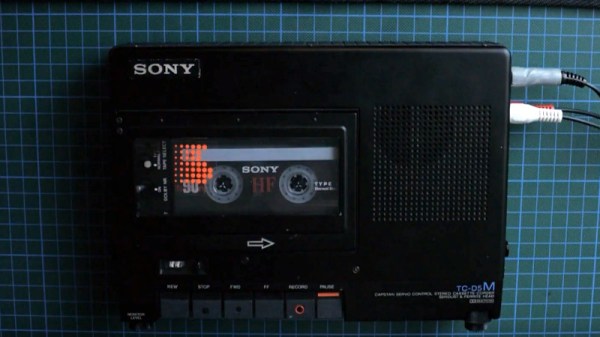
Tape may not sound that great compared to vinyl, but cassette players can be tons of fun when it comes to making your own music. See for instance the Mellotron, or this relatively easy DIY alternative, [Rich Bernett]’s Cassettone cassette player synth.

The Cassettone works by substituting the trim pot that controls the speed of the tape player’s motor with a handful of potentiometers. These are each activated with momentary buttons located underneath the wooden keys. In the video after the break, [Rich] gives a complete and detailed guide to building your own. There’s also a polished Google doc that includes a schematic and the pattern pieces for making the cabinet.

Speaking of which, isn’t the case design nice? It’s built out of craft plywood but aged with varnish and Mod-Podged bits and bobs from vintage electronics magazines. This really looks like a fun little instrument to play.

Would you rather control your tape synth with a MIDI keyboard? Just add Arduino.

Continue reading “Cassette Synth Plays With Speed Control”

Booting A PC From Vinyl For A Warmer, Richer OS

If you’ve scrolled through the list of boot options offered on any PC’s BIOS, it reads like a history of storage technology. Up top we have the options to boot from disk, often a solid-state drive, then USB disk, optical drive, removable media, and down the bottom there’s usually an option to boot from the network. Practically no BIOS, however, has an option to boot a PC from a vinyl record — at least until now.

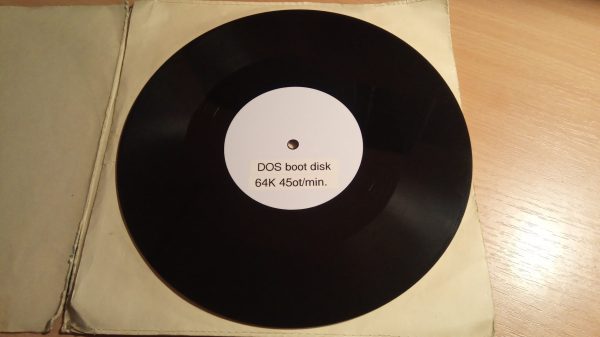
Clearly a project from the “Because why not?” school of hacking, [Jozef Bogin] came up with the twist to the normal booting process for an IBM-PC. As in the IBM-PC — a model 5150, with the putty-colored case, dual 5-1/4″ floppies, and one of those amazing monochrome displays with the green slow-decay phosphors. To pull off the trick, [Jozef] leverages the rarely used and little known cassette tape interface that PCs had back in the early days. This required building a new bootloader and burning it to ROM to make the PC listen to audio signals with its 8255 programmable peripheral interface chip.

Once the PC had the right bootloader, a 64k FreeDOS bootable disk image was recorded on vinyl. [Jozef] provides infuriatingly little detail about the process other than to mention that the audio was sent directly to the vinyl lathe; we’d have loved to learn more about that. Nonetheless, the resulting 10″ record, played back at 45 RPM with some equalization tweaks to adapt for the RIAA equalization curve of the preamp, boots the PC into FreeDOS just fine, probably in no more time than it would have taken to boot from floppy.

It’s may not be the first time we’ve seen software on vinyl, but it’s still a pretty cool hack. Want to try it yourself but lack a record-cutting lathe? Maybe laser-cutting your boot disc will work.

Continue reading “Booting A PC From Vinyl For A Warmer, Richer OS”

Proper Cassettes For Your FPGA Retrocomputer

You can tell the age of someone in our community with a simple question: what were the first removable data storage media you used? Punched cards for the venerable, cassettes for the middle-aged, floppies for the thirtysomethings, Flash cards for the twentysomethings, and maybe even “What’s a removable storage medium?” for the kids brought up on cloud services.  Even with refreshed interest in retrocomputing the cassette hasn’t made a comeback, but maybe that owes something to the hardware. Createing a cassette interface for an FPGA is a task that’s often overlooked, and that’s a project [zpekic] has tackled.

Cassette data recordings are frequency shift keyed, with the 0 and 1 of the binary information represented by different tones. An expected solution to detect these might be to use a Fourier transform, but instead he opts for a simpler solution of counting zero crossings and timing their interval. The resulting stream of data is fed into a UART from which the data itself can be reconstructed. All this is implemented on a Mercury FPGA board which contains a Xilinx Spartan 3A FPGA, but it’s a technique that could be used on other devices too.

So your FPGA retrocomputer deserves an authentic cassette interface, and now it can have one. We’d be especially impressed if all this 2020s wizardry could produce a more stable chuntey field, but we guess that might take a bit more work.

As a final aside, the project is dedicated to the memory of the pioneering Yugoslavian broadcaster [Zoran Modli], whose innovative 1980s radio show featured broadcasts of tape software for the computers of the time including our Hackaday colleague [Voja Antonić]’s Galaksija. Broadcasting software over the radio? That’s a cool hack.

Retro Computer Trainer Gets A Raspberry Pi Refit

We know what you’re thinking: this is yet another one of those “Gut the retro gear for its cool old case and then fill it up with IoT junk” projects. Well, rest assured that extending and enhancing this 1970s computer trainer is very much an exercise in respecting the original design, and while there’s a Pi inside,  it doesn’t come close to spoiling the retro goodness.

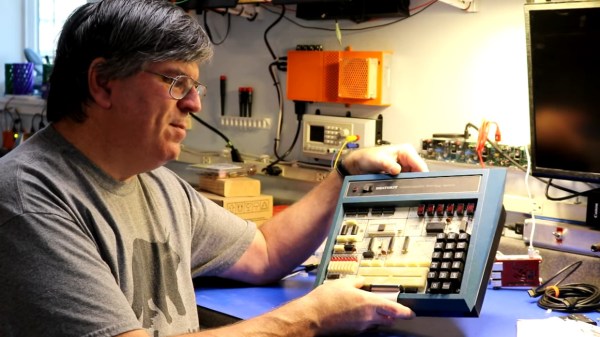
Like many of a similar vintage as [Scott M. Baker], the Heathkit catalog was perhaps only leafed through marginally less than the annual Radio Shack catalog. One particularly desirable Heathkit item was the ET-3400 microcomputer learning system, which was basically a 6800-based computer surrounded by a breadboarding area for experimentation. [Scott] got a hold of one of these, but without the optional expansion accessory that would allow it to do interesting things such as running BASIC or even supporting a serial port. So [Scott] decided to roll his own expansion board.

The expansion card that [Scott] designed is not strictly a faithful reproduction, at least in terms of the original BOM. He turned to more modern — and more readily available — components, but still managed to provide the serial port, cassette interface, and RAM/ROM expansion of the original unit. The Raspberry Pi is an optional add-on, which just allows him to connect wirelessly if he wants. The card fits into a 3D-printed case that sits below the ET-3400 and maintains the original trainer’s look and feel. The longish video below shows the build and gives a tour of the ET-3400, both before and after the mods.

It looks as though trainers like these and other artifacts from the early days of the PC revolution are getting quite collectible. Makes us wish we hadn’t thrown some things out.

Continue reading “Retro Computer Trainer Gets A Raspberry Pi Refit”

Full-Colour, Full-Motion Video – On An Audio Cassette!

A lot of projects we feature use video in some form or other, but that video is invariably digital, it exists as a stream of numbers in a computer memory or storage, and is often compressed. For some of us who grew up working with composite video there is a slight regret that we rarely get up-close and personal with an analogue stream, so [Kris Slyka]’s project putting video on a conventional audio cassette is a rare opportunity.

It's fair to say this isn't the highest quality video.
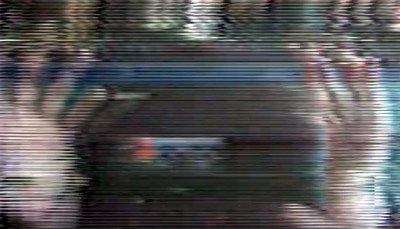
It’s fair to say this isn’t the highest quality video.

Readers with long memories may recall the Fisher-Price PixelVision toy from the late 1980s which recorded black-and-white video on a conventional cassette running at many times normal speed. This system does not take that tack, instead it decreases resolution and frame rate to a point at which it can be recorded at conventional cassette speeds. The result is not particularly high quality, but with luminance on one side of a stereo recording and chrominance on the other it does work.

The video below the break is a run through the system, with an explanation of how video signals work. Meanwhile the code for both encoder and decoder are available through the magic of GitHub. If you’re interested further, take a look at our examination of a video waveform.

Continue reading “Full-Colour, Full-Motion Video – On An Audio Cassette!”

A Ploopy Pick And Place

A fair number of hackers reach that awkward age in their careers – too old for manual pick and place, but too young for a full-fledged PnP machine. The obvious solution is to build your own PnP, which can be as simple as putting a suction cup on the Z-axis of an old 3D-printer. Feeding parts into the pick and place, though, can be a thorny problem.

Or not, if you think your way through it like [Phil Lam] did and build these semi-automated SMD tape feeders. Built for 8-mm plastic or paper tapes, the feeders are 3D-printed assemblies that fit into a rack that’s just inside the work envelope of a pick and place machine. Each feeder has a slot in the top for the tape, which is advanced by using the Z-axis of the PnP to depress a lever on the front of the case. A long tongue in the tape slot gradually peels back the tape’s cover to expose a part, which is then picked up by the PnP suction cup. Any machine should work; [Phil] uses his with a LitePlacer. We like the idea that parts stay protected until they’re needed; the satisfyingly clicky lever action is pretty cool too. See it briefly in action in the video below.

It looks like [Phil] built this in support of his popular Ploopy trackball, which is available both as a kit and fully assembled. We think the feeder design is great whether you’re using PnP or not, although here’s a simpler cassette design for purely manual SMD work.

Continue reading “A Ploopy Pick And Place”

Retrotechtacular: Car Navigation Like It’s 1971

Anyone old enough to have driven before the GPS era probably wonders, as we do, how anyone ever found anything. Navigation back then meant outdated paper maps, long detours because of missed turns, and the far too frequent stops at dingy gas stations for the humiliation of asking for directions. It took forever sometimes, and though we got where we were going, it always seemed like there had to be a better way.

Indeed there was, but instead of waiting for the future and a constellation of satellites to guide the way, some clever folks in the early 1970s had a go at dead reckoning systems for car navigation. The video below shows one, called Cassette Navigation, in action. It consisted of a controller mounted under the dash and a modified cassette player. Special tapes, with spoken turn-by-turn instructions recorded for a specific route, were used. Each step was separated from the next by a tone, the length of which encoded the distance the car would cover before the next step needed to be played. The controller was hooked to the speedometer cable, and when the distance traveled corresponded to the tone length, the next instruction was played. There’s a long list of problems with this method, not least of which is no choice in road tunes while using it, but given the limitations at the time, it was pretty ingenious.

Dead reckoning is better than nothing, but it’s a far cry from GPS navigation. If you’re still baffled by how that cloud of satellites points you to the nearest Waffle House at 3:00 AM, check out our GPS primer for the details.

Continue reading “Retrotechtacular: Car Navigation Like It’s 1971”