Measure 1024 Times, Cut Once

Typically, someone’s first venture into coding doesn’t get a lot of attention. Then again, most people don’t program a CNC table saw right out of the gate. [Jeremy Fielding] wasn’t enticed with “Blink” or “Hello, world,” and took the path less traveled. He tackled I/O, UX, and motion in a single project, which we would equate to climbing K2 as a way to get into hiking. The Python code was over 500 lines, so we feel comfortable calling him an over-achiever.

The project started after he replaced the fence on his saw and wondered if he could automate it, and that was his jumping-on point, but he didn’t stop there. He automated the blade height and angle with stepper motors, so the only feedback is limit switches to keep it from running into itself. The brains are a Raspberry Pi that uses the GPIO for everything. There is a manual mode so he can use the hand cranks to make adjustments like an ordinary saw, but he loses tracking there. His engineering background shines through in his spartan touchscreen application and robust 3D model. The built-in calculator is a nice touch, and pulling the calculations directly to a motion axis field is clever.

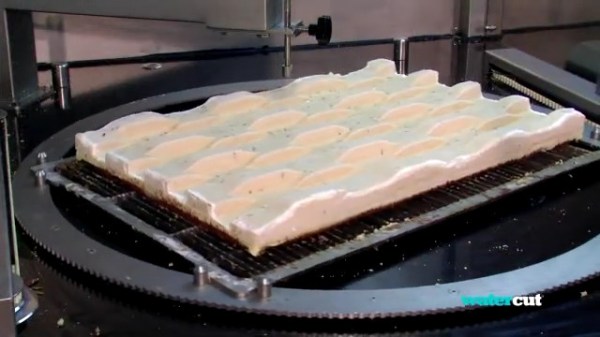
We’ve covered [Jeremy]’s DIY dynamometer and look forward to whatever he builds next. Until then, check out a light-duty approach to CNC that cuts foam in two-and-a-half dimensions.

Continue reading “Measure 1024 Times, Cut Once”

A Backlit Calendar For All Eternity

The advantage of the irregularities in the Gregorian calendar combined with the seven-day week is that they provide a constant source of yearly revenue for the paper calendar industry. Long before sustainability became a trending topic, people invented reusable, perpetual calendars, but the non-digital versions of these are sometimes complicated tables that are hard to interpret. [andrei.erdei] created an automated perpetual calendar that is mostly hardware but uses some digital tricks to overcome these problems.

The calendar consists of sandwiched panels of smoked acrylic which are backlit by some strips of WS2812Bs. Although the panels could have been processed with a laser cutter, [andrei.erdei] used a CNC which gave him the possibility to mill some grooves in the back panel to hold the LED strips. The stencil for the numbers was simply printed out on paper and the background made opaque by printing several times over the same piece of paper. The electronics consist of an ESP8266 which takes the date from an NTP server and lights up the corresponding LEDs in different colors for weekdays and weekends.

The classic version of this type of perpetual calendar uses a sliding frame but we have also seen completely different versions based on moving gears.

Video after the break.

Continue reading “A Backlit Calendar For All Eternity”

Easy Focus Stacking With Your CNC Machine

Macro photography is the art of taking photos of things very close up, and ideally at great detail. Unfortunately cameras have poor depth of field at close ranges, so to get around this, many use focus stacking techniques. This involves taking many photos at different focal lengths and digitally compositing them together. To help achieve this, [gtoal] realized that garden variety CNC machines would be perfect for the job.

To focus stack effectively, it’s desirable to move the camera in very small increments of sub-mm precision, in order to get different parts of the subject in focus. For this, a CNC machine excels, as it’s designed to move tool heads in very tiny, precise movements.

To achieve a bargain focus stacking rig, [gtoal] used a Dremel tool mount for cutting discs. It’s repurposed here, used as an easy way to fit a Raspberry Pi camera to a CNC tool head through its mounting holes. From there, it’s a simple manner of stepping the CNC a tiny amount at a time on the Z-axis, while taking photos with the Raspberry Pi along the way. [gtoal] notes that it would be simple for an experienced CNC user to whip up a program to automate the entire process.

We’ve seen other budget focus stacking rigs before, and even a busted 3D printer that was turned into an automated scanning microscope. If you’ve got your own tricks for top notch macro photography, drop us a note in the tipline!

The B-Sides: Curious Uses Of Off-the-Shelf Parts

I admit: a few years of prototyping without easy machine shop access really whets my tastebuds for turning metal chips. But all that time spent away from proper machine tools has also pushed me to re-imagine part catalogs, something I see almost every day. Without any precision metalworking tools handy, stock mechanical parts have become my supplement for complexity. And so a former dogma to machine-everything-thyself has been transformed into a hunt for that already-made-part-that-does-it-for-you.

But with part catalogs featuring tens of thousands of purpose-built parts, I started reimagining some of them for other misdeeds. And after a few years spent reinventing use cases for some of these parts, I’m about ready to tell you how to misuse them properly. So today I’d like to show you some of my favorite mechanical part B-sides, so to speak. These are ordinary parts in unorthodox places–something you surely won’t find in the datasheet! Now let’s have a look. Continue reading “The B-Sides: Curious Uses Of Off-the-Shelf Parts”

Laser-Etching Photos On To Eggs

CNC machines are every maker’s dream. Capable of churning out accurate parts from CAD designs with a minimum of manual labor, they’re a great tool to have in the workshop. Alternatively, you can use them for more entertaining pursuits. [Leo]’s project is one of the latter – etching greyscale photos on to eggs.

The first thing you’ll need is an egg-compatible CNC machine. The Eggbot is a popular option, else a fourth-axis on an existing machine can also do the job as in [Leo]’s case. Coupling the egg is a delicate task, for which some rubber paper rollers are salvaged from an old printer and put to work. Then, a laser needs to be fitted to the CNC head, and the egg depth mapped with a probe to ensure the entire etching is in focus. Then it’s simply a matter of loading up an image, and turning the greyscale data into the relevant G-code to burn it onto the egg.

Using eggs coated in black ink, the results [Leo] achieves are impressive. The eggs would make an amusing Easter gift, or serve as a great cheap way to teach students about CNC techniques. Obviously, eye protection is a must, and be sure to mount your laser securely to avoid any unintentional exposures. Video after the break.

Continue reading “Laser-Etching Photos On To Eggs”

Mini CNC Mill Goes Horizontal To Reuse CD Drives

Here at Hackaday, we pride ourselves on bringing you the freshest of hacks, preferably as soon as we find out about them. Thanks to the sheer volume of cool hacks out there, though, we do miss one occasionally, like this e-waste horizontal CNC mill that we just found out about.

Aptly called the “CDCNC” thanks to its reliance on cast-off CD drive mechanisms for its running gear, [Paul McClay]’s creation is a great case study on what you can do without buying almost any new parts. It’s also an object lesson in not getting caught in standard design paradigms. Where most CNC mills mount the spindle vertically, [Paul] tilted the whole thing 90 degrees so the spindle lies on its side. Moving it back and forth on a pair of CD drive mechanisms is far easier than fighting gravity for control, and as a bonus the X- and Y-axes have minimal loading too. The video below shows the mill in action, and it’s easy to see how the horizontal arrangement really helps make this junk bin build into something special.

We think [Paul] did a great job of thinking around the problem with this build, and we’re glad he took the time to tip us off. Apparently it was the upcoming CNC on the Desktop Hack Chat that moved him to let us know about this build. Here’s hoping he drops by for the chat and shares his experience with us.

Continue reading “Mini CNC Mill Goes Horizontal To Reuse CD Drives”

Seeing The Skill Is Better Than Seeing The Project

Pulling off a flashy project that gets the viral-media hug of widespread approval feels great. Getting there is no easy path to walk and often times the craft that went into a finished project doesn’t even take the back seat but gets no mention at all. Often I find I’m more impressed by — or a least my attention is more strongly captured by — the skills put on display as prominently as the finished build.

Case-in-point this week comes from the model railroad work of [Diorama111]. Seeing an OLED screen in the nose of an HO scale locomotive just like the real-life version is impressive, but how many people missed the one-off soldering masterpiece that went into this one? You’ll marvel at the SMD techniques used with through-hole protoboard on this one.

Occasionally we do get to look over the shoulder of the master as decades of skills are shared for the purpose of passing them on. So was the case back in May when we watched as [Leo] walked through his tips and tricks for prototyping at the electronics bench. This included a lot of non-obvious but clever stuff; tips on working with copper tape for solder buses, using Teflon tubing with bare wire instead of stripping PVC-insulated wire, and a deep dive into copper clad prototyping.

So remember all of us hardware geeks when you look to tell the story of your project. We want to know how it was done at least as much as what was done. There was a time when electronic designers were a separate work group from electronic technicians (and wow, those technicians were in a league of their own). These days we all have that technician hat hanging on our workbenches and I’m always interested in packing in yet another unlearnt skill. Throw us a bone!