Control An IRL Home From Minecraft

Minecraft seems to be a game in which anything is possible, both in the virtual world and in the real one. As a sandbox-style game, we’ve seen all kinds of things implemented in it including arithmetic logic units and microcontroller emulators. On the other end of reality we’ve also seen a lot of projects in which real-world interfaces impact the virtual world in some way. As a game, the lines between these two worlds often seem to blur, and that’s no different for this project that allows for control of a smart home from within the game itself.

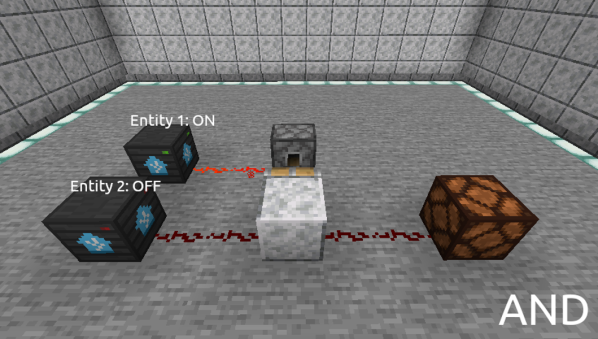
The project is called HomeAssistantMC and is built with Forge. The mod interfaces directly with a Minecraft game. From within the game, players can create a model of their home complete with light switches and other control interfaces. A WebSocket API listens to the game for changes to these devices, and interfaces with real-world controllers which control the home in real life. The game uses special state blocks to handle the control, and the entire control system can be configured in-game once all of the appropriate software has been installed.

For anyone willing to experiment with this software, all of the code for this project is available on its GitHub page. One of the other interesting things about this project is the ability to use other creations within Minecraft for home automation. For example, building logic gates allows for nuanced control of the home automation setup with creations we’ve already seen in Minecraft before. And, if you really want to go deep into the weeds, you could even build a complete 6502 processor from within the game as well.

Modifying A SNES Rom To Be Widescreen

Turning a game like Super Mario World for SNES into a widescreen game is not a small task, but [Vitor Vilela] accomplished just that. [Vitor] has a long list of incredible patches such as optimizing code for better frame rates and adding code to take advantage of the SA-1 accelerator chip, so out of anyone he has the know-how to pull a widescreen mod off. This patch represents a true labor of love as many levels were designed with a specific screen width in mind. [Vitor] went through each of these single-screen width levels and expanded them by writing the extra assembly needed.

On a technical level, this hack was achieved by using the panning feature built into the game. The left and right shoulder buttons allowed a player to pan the camera to the left and right. The viewport is considered to be two times the screen resolution and so items will be rendered within the widescreen resolution. By taking away the panning feature and render a larger section of the viewport to the screen, you get a widescreen view. However, to save cycles, enemies and items don’t start moving until they get close to the screen edge. So how do you make a game widescreen without ruining the timing of every enemy that spawns? Suddenly the hours of muscle memory that fans have drilled in over the years is a disadvantage rather than a strength. The answer is a significant time investment and an eye for detail.

All the code is available on GitHub. A video of a playthrough of the mod is after the break.

Continue reading “Modifying A SNES Rom To Be Widescreen”

2:3 Scale VT100 Terminal Gets Closer To Its Roots

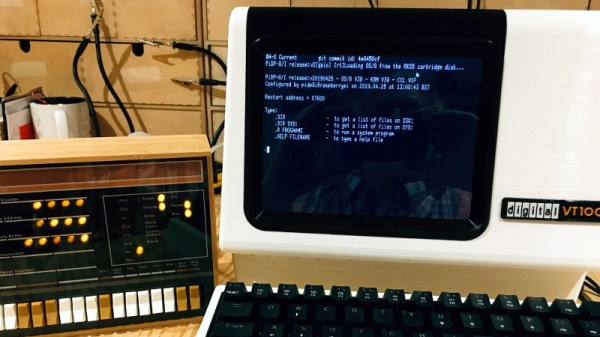
When [Michael Gardi] finished his scaled down DEC VT100 replica a few months ago, he made it very clear that the project was only meant to look like a vintage terminal on the outside. A peek into the case revealed nothing more exotic than a Raspberry Pi running its default operating system, making the terminal just as well suited to emulating classic games as it was dialing into a remote system. But as any hacker knows, some projects end up developing a life of their own.

It started simply enough. The addition of an RS-232 Serial HAT to the Raspberry Pi meant that the 3D printed VT100 could actually operate as a serial terminal using software such as minicom. Then [Lars Brinkhoff] got involved. He loved the look of the printed VT100, and thought it deserved better than a generic terminal emulator. So he went ahead and started developing a custom terminal simulator for it to run.

Reliving those CRT glory days.

The idea here is that an an 8080 emulator actually runs an original VT100 firmware ROM, warts and all. It makes all the beeps and chirps you’d expect from the real hardware, and there’s even some OpenGL trickery used to mimic an old CRT display, complete with scan lines and a soft glow around characters.

Naturally the visual effects consume a fair amount of processing power, so [Lars] cautions that anything lower than the Pi 4 will likely experience slowdowns. Of course, nothing is stopping you from running the simulator on your desktop machine if you’re looking for that classic terminal experience.

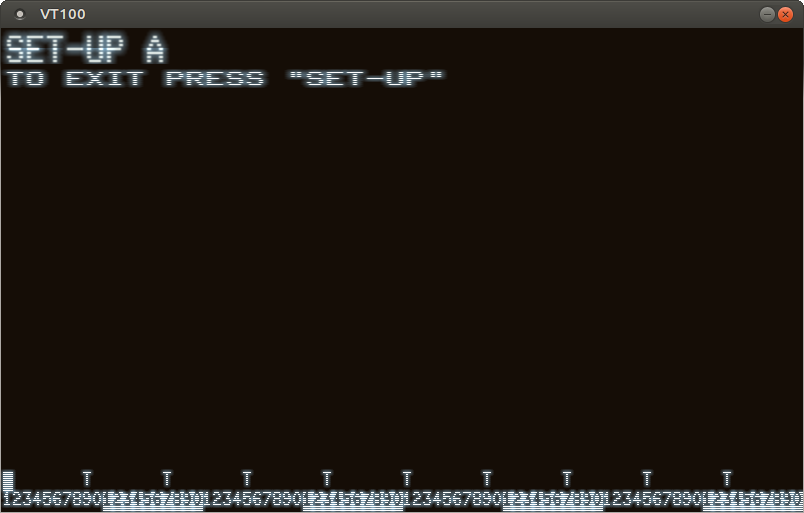
Did this gorgeous recreation of the VT100 need to have a true serial interface or a simulator that recreates the unique menu system of the original? Not at all. Even without those additions, it blew us away when [Michael] first sent it in. But are we happy that these guys have put in the time to perfect this already stellar project? We think you already know the answer.

An Emulator That Only Plays One Game

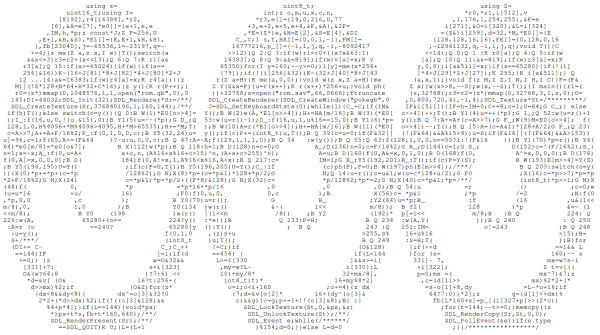
[Ben Smith] had previously implemented a GameBoy Color emulator but decided to make a new emulator that to play just one game called pokegb. The game is, of course, the popular blue edition of Pokemon. While this emulator could play other GameBoy games, the way it was implemented was to support only the opcodes and features that Pokemon Blue used. What’s perhaps even more amazing is that this full emulator is just 582 lines of C++ (using SDL for graphics and input). There is also an obfuscated version that comes in at just 68 lines and in the shape of three Pokeballs. All the code for pokegb can be found on GitHub.

[Ben] goes through a detailed listing of each opcode of the processor, memory, the graphics unit (PPU), and how it interacts with a modern operating system. We love the idea of implementing each opcode one by one and gradually seeing the emulator make it farther and farther through the ROM. The only feature that’s noticeably absent is sound, which would require a significant amount of code to emulate properly.

If you’re interested in a deep dive into the audio chips inside a Gameboy Color, [Ken Shirriff] has already done the research for you.

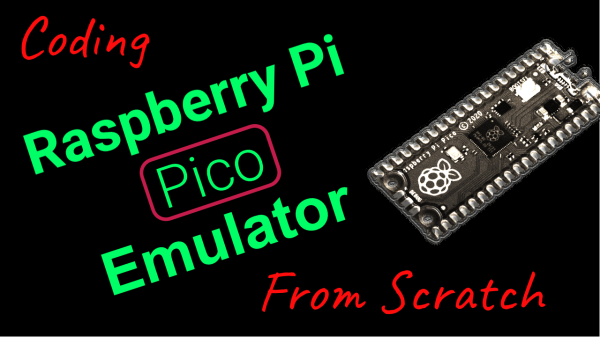
Gdbdiff: Diff-ing A Real RP2040 MCU Against An Emulated MCU

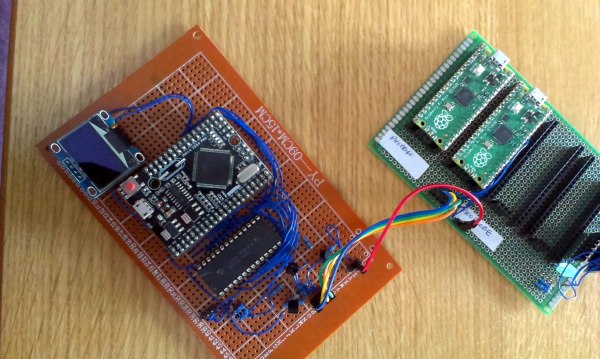
What to do when developing an RP2040 emulator but validating the emulator instruction by instruction is a slow and tedious process? Why, automatically compare it against the real hardware if you’re [Uri Shaked], of course. This is the purpose of gdbdiff. This project uses the GDB remote serial protocol via OpenOCD to run test firmware step by step.

During a livestream (video linked via the above link), this allowed [Uri] to find a number of instruction bugs in the emulator this way. These issues involved issues such as incorrect flags in the APSR register and an edge case in the LSRS register. This gdbdiff livestream is part of an entire series of live-coding sessions during which [Uri] writes an RP2040 emulator from scratch.

We applaud [Uri] for creative thinking here, and assume that this way the livestream was probably more entertaining to watch than when doing instruction-level debugging purely by hand :)

Adding In-Game Reset To Classic Playstations

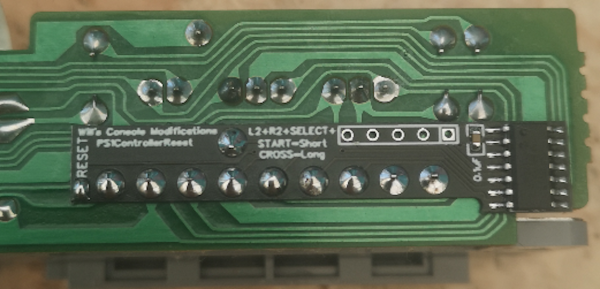
The first Playstation is quickly approaching three decades since its release, and while this might make some of us who were around for that event feel a little aged, the hardware inside these machines isn’t getting any younger either. Plenty of people are replacing the optical drive in the original hardware with an optical drive emulator as they begin to fail, and with that comes the option for several other modifications to the hardware like this in-game reset mod.

In-game reset is a function that allows a console to be reset via a controller button combination rather than pressing the console’s reset button directly. Especially for devices modified with either the XStation or PSIO drive emulators, this can be a handy feature to have as this method can more easily take the user back to the emulator menu as well as physically reset the device. The modification is a small PCB which attaches to the controller port and, unlike previous versions, only requires a single pin to be soldered to the Playstation’s control board.

If you’re someone who enjoys playing games on original hardware rather than a patchwork of emulators, this could be an excellent addition to your PS1 that still allows most of the original feel and experience the PS1 offered. The drive emulator can greatly expand the range of the hardware as well, much like this NES cartridge which similarly expands the capabilities of that much older system.

NeoPill Is The NeoPixel Emulator You’ve Always Wanted

NeoPixels and other addressable LED strings are a technology that have made vibrant, glowing LED projects accessible to all. Of course, it’s nice to be able to simulate your new glowy project in software before you actually set up your LED strings in practice. [Randy Elwin]’s NeoPill simulator can help with that!

The NeoPill consists of an STM32F103 development board, into which one simply hooks up a NeoPixel data line. The microcontroller then decodes the data using a combination of its onboard timers and SPI hardware. This data is then passed to a PC over the onboard USB serial connection, where it’s decoded by a custom Python app. The app takes the data and displays the pixels on screen, so you can verify they operate as expected before you hook up a single real LED.

It’s a great tool, one that costs very little and yet does the job well. It can even be used with LEDs in circuit to verify if problems are related to the data output or the hardware itself. [Randy] demonstrates the software working with strings of up to 256 LEDs at once; we’d love to see how far it can be pushed before breaking. Code is available on Github for those keen to get their own NeoPill operational.

It’s not the only NeoPixel simulator out there, but it is the first one we’ve seen that can be used to debug actual signals from real hardware, and that’s an incredibly useful thing to have in your toolbelt. Video after the break.

Continue reading “NeoPill Is The NeoPixel Emulator You’ve Always Wanted”