A Slightly Scientific Examination Of Epoxies

Two-part epoxy is one of those must-have items in your toolbox, albeit kept in a ziploc bag to keep all that goo off the rest of your tools. It’s a glue with a million uses, but which brand is best? Should you keep some cheap five-minute epoxy around, or should you splurge for the fancy, long-setting JB Weld. It’s not a perfect analysis, but at least [Project Farm] has done the experiment. This is a test of which two-part epoxy you can find at your local home supply store is strongest.

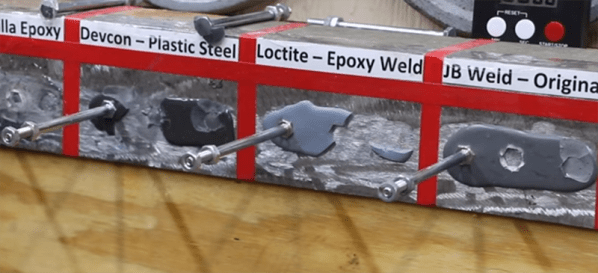
The epoxies tested include Gorilla epoxy, Devcon Plastic Steel, Loctite Epoxy Weld, JB Weld original, JB Weld Kwik Weld, and JB ExtremeHeat. This more or less covers the entire gamut of epoxies you would find in the glue aisle of your local home supply store; the Gorilla epoxy is your basic 5-minute epoxy that comes in a double barrel syringe, and the JB Welds are the cream of the crop.

The testing protocol for this experiment consisted of grinding a piece of steel clean, applying a liberal blob of each epoxy, and placing three bolts, head down, in each puddle. The first test was simply suspending weights in 2.5-pound increments to each bolt as a quick test of shear strength. Here, the losers in order were the JB Weld ExtremeHeat, JB Weld KwikWeld, Loctite, Gorilla Epoxy, Devcon Plastic Steel, and finally the JB Weld Original. Your suspicions are confirmed: those fancy new versions of JB Weld aren’t as good as the original. The fact that they’re worse than 5-minute epoxy is surprising, though. The second test — torquing the bolts out of the epoxy — gave similar results, with Devcon Plastic Steel beating the JB Weld Original just barely.

So, what do these results tell us? Cheap five-minute epoxy isn’t terrible, and actually better than the fancy new versions of JB Weld. Loctite is okay, and the Devcon and original JB Weld are at the top of their game. That’s not that surprising, as you can cast cylinder heads for engines out of JB Weld.

Continue reading “A Slightly Scientific Examination Of Epoxies”

Super-Blue CNC Part Fixturing

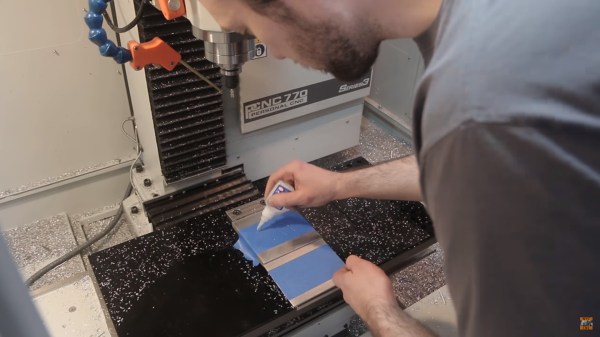
Simple clamps are great if you need to keep the pressure on two parallel surfaces, but if you have an irregular plane, or you need to cut through it, clamps are not the correct tool. The folks at [NYC CNC] feature a video with a clever hack borrowing from other disciplines. Painters tape is applied to the top of a level mounting surface in the machine and then burnished. The same is done to the bottom of the workpiece. Superglue is drizzled between the tape layers and pressed together so now the stock is held firmly below the toolhead.

Some parts are machined in the video, which can be seen below, and the adhesion holds without any trouble. One of the examples they cut would be difficult to hold without damage or stopping the machine. The accepted wisdom is that superglue holds well to a slightly porous surface like tape, but it doesn’t like do as well with smooth surfaces like metal. Removing residue-free tape at the end of a cut is also cleaner and faster than glue any day.

If you have yet to cut your teeth, you can watch our very own Elliot Williams getting introduced to CNC machines or a portable machine even a child can use.

Continue reading “Super-Blue CNC Part Fixturing”

Locally Sourced: PLA Adhesive

When I first started getting into 3D printed projects that would require final assembly from multiple parts, I wanted to make sure I had an adhesive that would really hold up. I couldn’t imagine anything worse than spending 10’s of hours printing and assembling something, only to have it fall apart because my adhesive wasn’t up to the task. So I spent a lot of time trolling 3D printing message boards and communities trying to find the best way of gluing PLA. It should come as no surprise that, like everything else in the world, there are a ridiculous number of opinions on the subject.

If you’re printing with ABS, the general wisdom is that solvent welding with acetone is the best bet. You put some acetone on the printed parts, rub them together, and the plastic fuses together. This happens because the ABS melts slightly when exposed to the acetone, so they end up essentially melding into one piece. This sounded like exactly what I wanted, but unfortunately, acetone doesn’t have this same effect on PLA.

After some more research I found people suggesting Weld-On #16, an acrylic adhesive that will actually melt PLA. A little of this applied to the parts, they said, and you can solvent weld PLA just like acetone on ABS. Sure enough, the stuff works great and I’ve used it to put together nearly everything I’ve printed in PLA over the last few years. Only problem is, this stuff is a bit nasty, takes 24 hours to fully cure, and nobody has it locally.

So as an experiment I thought I’d take a look at a few adhesives sold at the local big box retailer and see if I couldn’t find something comparable. Do I need to keep ordering this nasty goop online every time, or can I pick something up off the shelf? More to the point, is solvent welding PLA really any better than just gluing it?

Continue reading “Locally Sourced: PLA Adhesive”

3D Printering: Printing Sticks For A PLA Hot Glue Gun

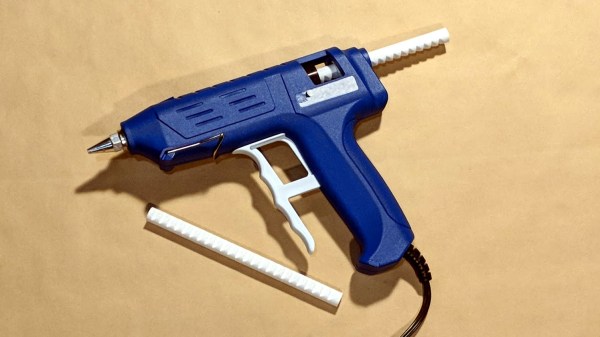
When is a hot glue stick not a hot glue stick? When it’s PLA, of course! A glue gun that dispenses molten PLA instead of hot glue turned out to be a handy tool for joining 3D-printed objects together, once I had figured out how to print my own “glue” sticks out of PLA. The result is a bit like a plus-sized 3D-printing pen, but much simpler and capable of much heavier extrusion. But it wasn’t quite as simple as shoving scrap PLA into a hot glue gun and mashing the trigger; a few glitches needed to be ironed out.

Why Use a Glue Gun for PLA?

Some solutions come from no more than looking at two dissimilar things while in the right mindset, and realizing they can be mashed together. In this case I had recently segmented a large, hollow, 3D model into smaller 3D-printer-sized pieces and printed them all out, but found myself with a problem. I now had a large number of curved, thin-walled pieces that needed to be connected flush with one another. These were essentially butt joints on all sides — the weakest kind of joint — offering very little surface for gluing. On top of it all, the curved surfaces meant clamping was impractical, and any movement of the pieces while gluing would result in other pieces not lining up.
An advantage was that only the outside of my hollow model was a presentation surface; the inside could be ugly. A hot glue gun is worth considering for a job like this. The idea would be to hold two pieces with the presentation sides lined up properly with each other, then anchor the seams together by applying melted glue on the inside (non-presentation) side of the joint. Let the hot glue cool and harden, and repeat. It’s a workable process, but I felt that hot glue just wasn’t the right thing to use in this case. Hot glue can be slow to cool completely, and will always have a bit of flexibility to it. I wanted to work fast, and I wanted the joints to be hard and stiff. What I really wanted was melted PLA instead of glue, but I had no way to do it. Friction welding the 3D-printed pieces was a possibility but I doubted how maneuverable my rotary tool would be in awkward orientations. I was considering ordering a 3D-printing pen to use as a small PLA spot welder when I laid eyes on my cheap desktop glue gun.

Continue reading “3D Printering: Printing Sticks For A PLA Hot Glue Gun”

Try This For 3D Printing Without Support

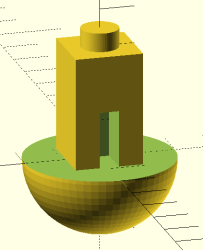
Have a look at the object to the right. Using a conventional fused deposition printer, how would you print the object? There’s no flat surface to lay on the bed without generating a lot of overhangs. That usually requires support.

In theory, you might be able to print the bottom of the sphere down, but it is difficult to get that little spot to adhere to the bed. If you have at least two extruders and you are set up to print support material, that might even be the best option. However, printing support out of the same material you are printing with makes it hard to get a good clean print. There is another possibility. It does require some post-processing, but then again, not as much as hacking away a bunch of support material.

A Simple Idea

The idea is simple and — at first — it will sound like a lot of trouble. The basic idea is to cut the model in half at some point where both halves would be easy to print and then glue them together.  Stick around (no pun intended), though, because I’ll show you a way to make the alignment of the parts almost painless no matter how complex the object might be.

The practical problem with gluing together half models is getting the pieces in the exact position, but that turns out to be easy if you just make a few simple changes to your model. Another lesser problem is clamping a piece while gluing. You can use a vise, but some oddly-shaped parts are not conducive to traditional vise jaws.

In Practice

Starting with an OpenSCAD object, it is easy to cut the model in half. Actually, you could cut it anywhere. Then it is easy to rotate half of it so the cut line is at the bottom of each part. That doesn’t solve the alignment problem nor does it help you clamp when you glue.

The trick is to build a flange around each part. The flanges mate with a few screws after printing so alignment is perfect and bolts through the flange holes can keep the parts together and immobilized while your glue of choice sets. The kicker is that I even have an automated process to make the design side of this trick very easy.

Continue reading “Try This For 3D Printing Without Support”

Cardboard And Paper Gun Shows Off Clever Construction

This project by [blackfish] shows off a cardboard lookalike of an MP5 that loads from a working magazine, has a functional charging handle, and flings paper projectiles with at least enough accuracy to plink some red party cups. It was made entirely from corrugated cardboard, paper, rubber bands, and toothpicks.

In the video (embedded below) you can see some clever construction techniques. For example, using a cyanoacrylate adhesive to saturate areas of wood, cardboard, or paper to give them added strength and rigidity. The video is well-edited and worth a watch to see the whole process; [blackfish] even uses a peeled piece of cardboard — exposing the corrugated part — as a set of detents (6:56) to retain the magazine.

Continue reading “Cardboard And Paper Gun Shows Off Clever Construction”

Innovating A Better Printing Platform

Just because you have a fancy new 3D printer doesn’t mean that innovation should stop there. Almost everyone has had a print go foul if the first layer doesn’t properly adhere to the printing platform — to say nothing of difficulty in dislodging the piece once it’s finished. Facing mixed results with some established tricks meant to combat these issues, [D. Scott Williamson] — a regular at Chicago’s Workshop 88 makerspace — has documented his trials to find a better printer platform.3D Printer Steel Print Plate 1

For what he had (a printer without a heated plate), painter’s tape and hairspray wasn’t cutting it, especially when it came time to remove the print as the tape wouldn’t completely come off the part. How then, to kill two birds with one stone? Eureka! A flexible metal covering for the printing plate.

Continue reading “Innovating A Better Printing Platform”