Home Automation Terminal With Cyberpunk Style

The OLKB-Terminal designed by [Jeff Eberl] doesn’t have a battery, can’t fold up (even if it seems like it could), and is only portable in the sense that you can literally pick it up and move it somewhere else. So arguably it’s not really a cyberdeck per se, but it certainly does look the part. If you need to be furiously typing out lines of code in a dimly lit near-future hacker’s den, this should do you nicely.

[Jeff] has provided everything you’d need to recreate this slick little machine on your own, though he does warn that some of the hardware decisions were based simply on what he had on-hand at the time, and that better or cheaper options may exist. So for example if you don’t want to use the Raspberry Pi 4, you can easily swap it out for some other single-board computer. Though if you want to change something better integrated, like the LCD panel, it will probably require modifications to the 3D printed components.

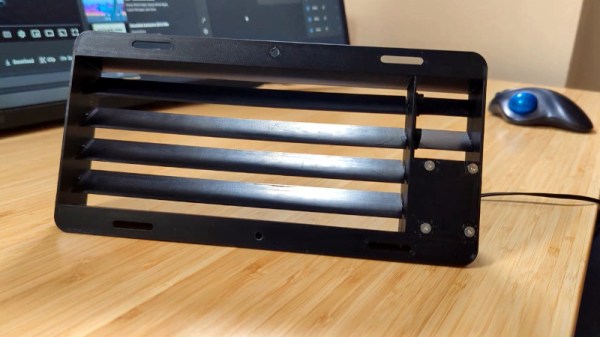
The rear electronics tray offers plenty of room for expansion.

The slim mechanical keyboard that [Jeff] used for the OLKB-Terminal, which in some ways set the tone for the whole design, is actually a completely separate open source project from [Victor Lucachi]. The VOID30 is a 3D printed, 30% handwired ortholinear keyboard that runs the popular QMK firmware on an Arduino Pro Micro. He’s implemented a couple tweaks, namely using a USB-C equipped Arduino clone, but otherwise it’s the same as upstream. So if you’re not in the market for a little bedside cyberpunk terminal but love its sleek keyboard, you’re in luck.

Software wise, [Jeff] has the OLKB-Terminal hooked into his larger Home Assistant system. This gives him an attractive status display of the whole network, and with just a tap on the terminal’s seven inch touch screen, he’s able to directly control devices around the home. That said, at the end of the day it’s just a Raspberry Pi, so it could really run whatever you want.

While cyberdeck builds might be all the rage right now, we do appreciate projects that bring those same design tenets to the desktop. From the gorgeous faux-retro designs of [Oriol Ferrer Mesià] to modernized pieces of vintage hardware, truly personal computers that can be easily upgraded and repaired don’t have to be limited to something you can lug around with a guitar strap.

Samsung Shuttering Original SmartThings Hubs

Samsung is causing much angst among its SmartThings customers by shutting down support for its original SmartThings home automation hub as of the end of June. These are network-connected home automation routers providing Zigbee and Z-Wave connectivity to your sensors and actuators. It’s not entirely unreasonable for manufacturers to replace aging hardware with new models. But in this case the original hubs, otherwise fully functional and up to the task, have intentionally been bricked.

Users were offered a chance to upgrade to a newer version of the hub at a discount. But the hardware isn’t being made by Samsung anymore, after they redirected their SmartThings group to focus entirely on software. With this new dedication to software, you’d be forgiven for thinking the team implemented a seamless transition plan for its loyal user base — customers who supported and built up a thriving community since the young Colorado-based SmartThings company bootstrapped itself by a successful Kickstarter campaign in 2012. Instead, Samsung seems to leave many of those users in the lurch.

There is no upgrade path for switching to a new hub, meaning that the user has to manually reconnect each sensor in the house which often involves a cryptic sequence of button presses and flashing lights (the modern equivalent of setting the time on your VCR). Soon after you re-pair all your devices, you will discover that the level of software customization and tools that you’ve relied upon for home automation has, or is about to, disappear. They’ve replaced the original SmartThings app with a new in-house app, which by all accounts significantly dumbs down the features and isn’t being well-received by the community. Another very popular tool called Groovy IDE, which allowed users to add support for third-party devices and complex automation tasks, is about to be discontinued, as well.

Continue reading “Samsung Shuttering Original SmartThings Hubs”

Control An IRL Home From Minecraft

Minecraft seems to be a game in which anything is possible, both in the virtual world and in the real one. As a sandbox-style game, we’ve seen all kinds of things implemented in it including arithmetic logic units and microcontroller emulators. On the other end of reality we’ve also seen a lot of projects in which real-world interfaces impact the virtual world in some way. As a game, the lines between these two worlds often seem to blur, and that’s no different for this project that allows for control of a smart home from within the game itself.

The project is called HomeAssistantMC and is built with Forge. The mod interfaces directly with a Minecraft game. From within the game, players can create a model of their home complete with light switches and other control interfaces. A WebSocket API listens to the game for changes to these devices, and interfaces with real-world controllers which control the home in real life. The game uses special state blocks to handle the control, and the entire control system can be configured in-game once all of the appropriate software has been installed.

For anyone willing to experiment with this software, all of the code for this project is available on its GitHub page. One of the other interesting things about this project is the ability to use other creations within Minecraft for home automation. For example, building logic gates allows for nuanced control of the home automation setup with creations we’ve already seen in Minecraft before. And, if you really want to go deep into the weeds, you could even build a complete 6502 processor from within the game as well.

Home Automation For Fans Of Quick-and-Dirty Solutions

At Hackaday, we celebrate all kinds of projects, but we’ll have to admit that the polished and professional-looking builds tend to catch our eye a lot more than perhaps they should. There’s plenty of love to be had for the rougher builds, though, of which this quick-and-dirty home automation system is a perfect example.

Before anyone rushes to state the obvious with, “Should have used some relays,” consider that [MAKE_IT_WITH_ME]’s stated goal was to get the basics of a home automation system built with pretty much nothing but what can be found in one of those Arduino starter kits. And further, consider that landlords might not look kindly on tenants who wire a bunch of SSRs or Sonoff switches into the walls of their building. So this minimalist build is perfect for certain use cases. Its interface to the building’s electrical system is 100% mechanical, via a servo that travels along the bank of switches on a stepper-driven leadscrew. The servo has a modified horn to properly flick the rocker-style switches, and although changing from switch to switch is a bit slow, it works surprisingly well. The video below shows it in action.

While we can see it possibly working as-is for Decora-style switches that are seen in some markets, we’d think some mods would be in order for the more standard toggle-style switch — perhaps a finger extending out from the horn, along with a second servo to tilt the whole assembly away from the wall to allow it to clear the switch bats.

Continue reading “Home Automation For Fans Of Quick-and-Dirty Solutions”

DIY Air Quality Sensor


[Andrew Lamchenko], who has built a number of small e-ink-based sensors this year, released another design called the eON Indoor Air Quality Sensor. As his previous sensor designs, the eON boasts a striking appearance with all the spit and polish of a commercially made product. Except [Andrew]’s design is completely open-source.

Besides showing air quality, it also shows basic weather conditions, and there’s a built-in weather forecasting algorithm as well. It can operate standalone or use the radio module to send readings to a smart home system.

The core sensor is the SGP40, which detects volatile organic compounds (VOCs) in the air while consuming less than 3 mA (compared to the 48 mA of the previous generation). There’s a temperature, barometric pressure, humidity, and light sensors in the package as well. Like many projects these days, [Andrew] encountered parts supply issues along the way. Because of that, and to make the design more flexible, several versions of the board have been made to accommodate the different permutations of:

  • Displays
    • 2.13-inch e-ink display
    • DES e-ink display, coming soon
  • Radio, four flavors
    • MINEW MS88SF3 (nRF52833, nRF52840)
    • MINEW MS50SFA1 (nRF52810, nRF52811)
    • MINEW MS50SFA2 (nRF52832)
    • EBYTE E73-2G4M08S1C (nRF52833, nRF52840)
  • Temp / Pressure sensor:
    • BME280
    • BMP280
    • SHTC3

[Andrew] not only designed the sensor but has done a thorough job on the documentation. Check out the GitHub repository of the project for a complete data package covering all aspects of the design, including the weather forecasting app note by John Young (an NXP engineer, not the astronaut). Last week the design was named as a finalist of the 2021 Hackaday Prize. We’re excited to see where he goes with this between now and the end of October!

Do you use an air quality sensor in your home? If so, is it only for informational purposes or do you take action based on the data, such as automatically turning on a fan or escaping to the countryside? Let us know in the comments below.
PiNet — One Small Project Grows Unexpectedly

A few years ago, [Gregory Sanders] aka [Dr Gerg] had one simple wish in mind when he started what is now the PiNet project — to know whether his garage door was open or closed. Instead of searching out off-the-shelf solutions, he looked at the project as a learning opportunity. After picking up Python, he built a system from a Raspberry Pi, a 12V gel cell battery, and a power supply / charger circuit. Thus project Overhead Door (ohd) was complete (see the ohd GitHub repository) and [Dr Gerg] was done.

Or so he thought. After getting a swimming pool installed, he got the itch again, and started a new project called Pool Controls, because:

The controls for your average backyard in-ground pool are pathetic. I felt like I could do better with a Raspberry Pi, a relay board and some Python. And so I did, and frankly, it’s awesome.

Then he built his own weather station to replaced a commercial one which had died twice in as many years, followed by his own web-based UI framework. Next was the integration of an outdoor security camera system. And finally, although we don’t believe it’s really final, he ripped out the cloud-based controls from his shop air conditioner and added his own Raspberry Pi-based solution. All of these projects are available on his GitHub page.

[Dr Gerg]’s goal in posting all this work is not necessarily so people can duplicate it, although that is okay as well. Instead, he hopes that people will realize that they can build these types of projects on their own, perhaps leaning some things and picking up new skills along the way — have fun doing it. We like the way you think, [Dr Gerg]. Do you know of any small projects which grew and grew and took on a life of their own?

Home Automation Controller Uses Chalk

Responding to the Rethink Displays challenge of the 2021 Hackaday Prize contest, freelance design engineer [Rick Pannen] brings a retro look to his DIY home automation controller. You could be forgiven for not even realizing it is a controller at first glance. [Rick] built this using a magnetic chalk board and installed all the control electronics on the back. The main processor is a Raspberry Pi 400 running Raspian with IOBroker and Node-Red. Panel lettering and graphics are done free-hand with, you guessed it, chalk.

The controls on this panel are an eclectic hodgepodge of meters, switches, and sensors that [Rick] scored on eBay or scavenged from friends. We are curious about the simple-looking rotary dial that sends a pulse train based on the number set on the dial — this seems to have all the functionality of an old phone’s rotary dial without any of the fun.

But [Rick]’s design allows for easy changes — dare we say, it encourages them — so maybe we’ll see a salvaged rotary dial added in future revisions. Also note the indoor lighting ON/OFF switch that must be a real joy to operate. We wonder, is there any way the controls could be magnetized and moved freely around the board without permanently attaching them? Maybe an idea for version 4 or 5.

This design has a lot of possibilities, and we look forward to any upgrades or derivative versions of this unique home automation controller. Let us know in the comments below if you have any suggestions for expanding upon this idea.