DIY Magsafe Charger Feeds Off 12 V Solar Battery

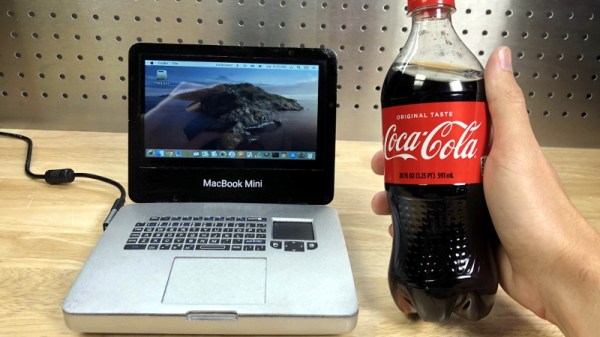
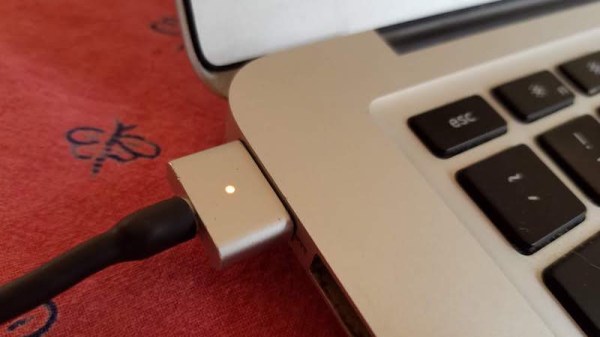
[Steve Chamberlin] has a spiffy solar-charged 12 V battery that he was eager to use to power his laptop, but ran into a glitch. His MacBook Pro uses Apple’s MagSafe 2 connector for power, but plugging the AC adapter into the battery via a 110 VAC inverter seemed awfully inefficient. It would be much better to plug it into the battery directly, but that also was a problem. While Apple has a number of DC power adapters intended for automotive use, none exist for the MagSafe 2 connector [Steve]’s mid-2014 MacBook Pro uses. His solution was to roll his own MagSafe charger with 12 VDC input.

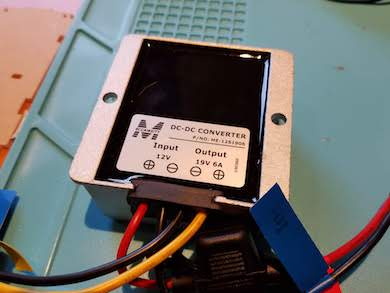
Since MagSafe connectors are proprietary, his first duty was to salvage one from a broken wall charger. After cleaning up the wires and repairing any frayed bits, it was time to choose a DC-DC converter to go between the MagSafe connector and the battery. The battery is nominally 12 volts, so the input of the DC-DC converter was easy to choose, but the output was a bit uncertain. Figuring out what the MagSafe connector expects took a little educated guesswork.

The original AC adapter attached to the charger claimed an output of 20 volts, another Apple adapter claimed a 14.85 V output, and a third-party adapter said 16.5 volts. [Steve] figured that the MagSafe connectors seemed fine with anything in the 15 to 20 V range, so it would be acceptable to use a 12 V to 19 V DC-DC boost converter which he had available. The result worked just fine, and [Steve] took measurements to verify that it is in fact much more efficient than had he took the easy way out with the inverter.

MagSafe has been displaced by USB-C nowadays, but there are plenty of MagSafe devices still kicking around. In a pinch, keep in mind that a little bit of filing or grinding is all that’s needed to turn MagSafe 1 into MagSafe 2.

Faking Your Way To USB-C Support On Laptops Without It

Is there no end to the dongle problem? We thought the issue was with all of those non-USB-C devices that want to play nicely with the new Macbooks that only have USB-C ports. But what about all those USB-C devices that want to work with legacy equipment?

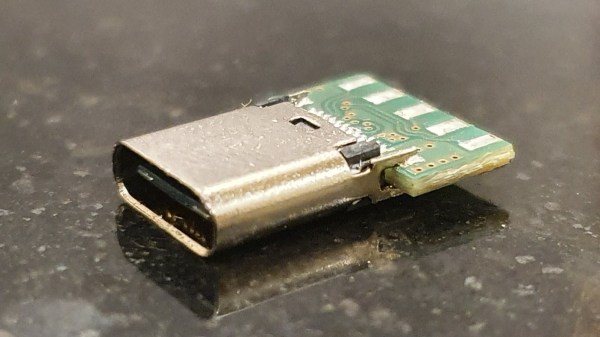
Now some would say just grab yourself a USB-C to USB-A cable and be done with it. But that defeats the purpose of USB-C which is One-Cable-To-Rule-Them-All[1]. [Marcel Varallo] decided to keep his 2011 Macbook free of dongles and adapter cables by soldering a USB-C port onto a USB 2.0 footprint on the motherboard.

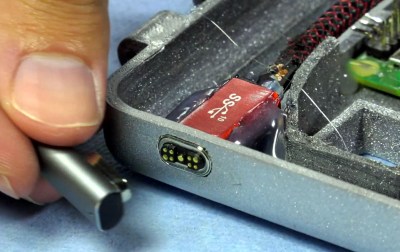
How is that even possible? The trick is to start with a USB-C to USB 3 adapter. This vintage of Macbook doesn’t have USB 3, but the spec for that protocol maintains backwards compatibility with USB 2. [Marcel] walks through the process of freeing the adapter from its case, slicing off the all-important C portion of it, and locating the proper signals to route to the existing USB port on his motherboard.

[1] Oh my what a statement! As we’ve seen with the Raspberry Pi USB-C debacle, there are actually several different types of USB-C cables which all look pretty much the same on the outside, apart from the cryptic icons molded into the cases of the connectors. But on the bright side, you can plug either end in either orientation so it has that going for it.

Liquid Damaged MacBook Saved With A Keen Eye

Even among those of us with a penchant for repairing electronics, there are some failures which are generally considered too severe to come back from. A good example is liquid damage in a laptop; with so many components and complex circuits crammed into such a small area, making heads or tails of it once the corrosion sets in can be a real nightmare. Especially in the case of an older laptop, the conventional wisdom is to try and recover your files and then buy a new one.

But as we’ve come to learn, [Jason Gin] is not a man who often finds himself concerned with conventional wisdom. After finding an older MacBook with suspected liquid damage, he decided to see what it would take to restore it to working order. According to a note on the device, the screen was dead, the USB ports were fried, the battery didn’t take a charge, and it wouldn’t boot. No problem then, should be easy.

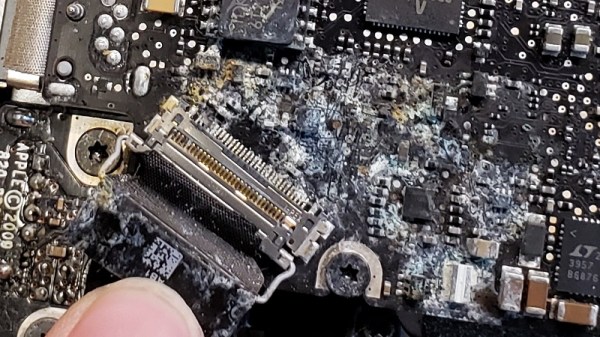
Upon opening up the circa-2012 laptop, [Jason] found the machine to be riddled with corrosion. We’re not just talking surface gunk either. After giving everything a good cleaning with isopropyl alcohol, the true extent of the damage became clear. Not only had traces on the PCB rotted away, but there were many components that were either damaged or missing altogether. Whatever spilled inside this poor Mac was clearly some nasty stuff.

[Jason] used OpenBoardView to pull up schematics and diagrams of the motherboard, and started the arduous task of visually comparing them to his damaged unit. In some areas, the corrosion was so bad he still had trouble locating the correct traces and pads. But with time and effort, he was able to start probing around and seeing what components had actually given up the ghost.

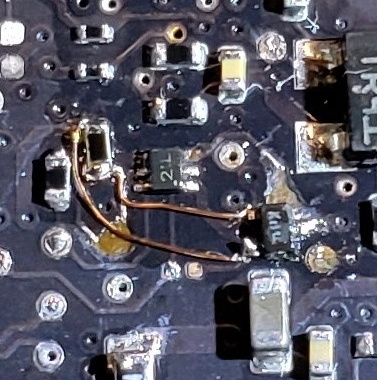
For the USB ports it ended up being a bad 10-microfarad ceramic capacitor, but for the LCD, he ended up having to replace the entire backlight driver IC. The prospect of working on this tiny BGA-25 device might have been enough for some to throw in the towel, but compared to the hand-soldered magnet wire repairs required elsewhere on the board, [Jason] says the installation of the new LP8550 chip was one of the easier aspects of the whole operation.

The write-up is a great read if you like a good repair success story, and we especially like the way he documented his diagnosis and resulting work on a per-system basis. It makes it much easier to understand just how many individual fires [Jason] had to put out. But if you’re more interested in feats of steady-handed soldering, check out his recent project to add a PCI-E slot to the Atomic Pi.

Upgrade Your Mac With A Touchscreen, For Only A Dollar

Imagine how hard it could be to add a touch screen to a Mac laptop. You’re thinking expensive and difficult, right? How could [Anish] and his friends possibly manage to upgrade their Mac with a touchscreen for only a dollar? That just doesn’t seem possible.

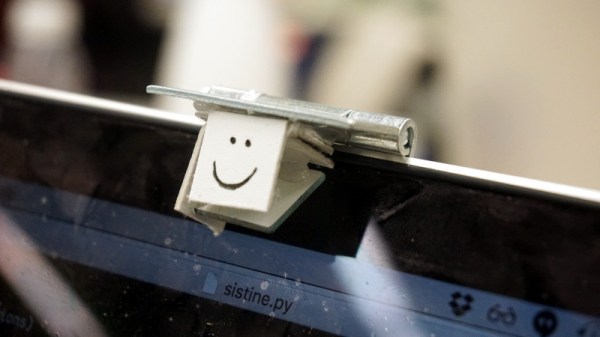
The trick, of course, is software. By mounting a small mirror over the machine’s webcam, using stiff card, hot glue, and a door hinge. By looking at the screen and deciding whether the image of a finger is touching its on-screen reflection, a remarkably simple touch screen can be created, and the promise of it only costing a dollar becomes a reality. We have to salute them for coming up with such an elegant solution.

They have a video which we’ve put below the break, showing a few simple applications for their interface. Certainly a lot less bother than a more traditional conversion.

Continue reading “Upgrade Your Mac With A Touchscreen, For Only A Dollar”

Repairing A Macbook Charger… With A Pistachio Nut

Laptop chargers face a hard life. They’re repeatedly plugged and unplugged, coiled up, stuffed into bags, thrown around, and just generally treated fairly poorly. Combine this with fairly lightweight design and it’s not uncommon for a laptop charger to fail after a few years. It’s usually the connector that goes first. Such was the case when I found myself face to face with a failed Macbook charger, and figured it’d be a simple fix. Alas, I was wrong.

Unlike most PC manufacturers, who rely on the humble barrel jack and its readily available variants, Apple liked to use the Magsafe connector on its Macbook line. This connector has many benefits, such as quick release in the event someone trips over the cable, and the fact that it can be plugged in without regard to orientation. However, it’s not the easiest to fix. When the charger began failing, I noticed two symptoms. The first was that the charger would only function if the cable was held just so, in exactly the right orientation. The other, was that even when it would charge, the connector would become very hot. This led me to suspect an intermittent connection was the culprit, and it was quite a poor one at that; the high resistance leading to the heat issue.

It’s at this point with any other charger that you get out your trusty sidecutters, lop the end off, and tap away at Digikey to get a replacement part on the way. With Magsafe? No dice. Replacement parts simply aren’t available — a common problem with proprietary connectors. I endeavoured to fix the problem anyway. I began to strip away the metal shell around the back of the connector with my sidecutters, and eventually an angle grinder. A Dremel would have been the perfect tool for the job, actually, but I persevered regardless. After much consternation, I had the connector peeled back and was able to identify the problem.

Continue reading “Repairing A Macbook Charger… With A Pistachio Nut”

CNC’d MacBook Breathes Easy

Sick of his 2011 Macbook kicking its fans into overdrive every time the temperatures started to climb, [Arthur] decided to go with the nuclear option and cut some ventilation holes into the bottom of the machine’s aluminum case. But it just so happens that he had the patience and proper tools for the job, and the final result looks good enough that you might wonder why Apple didn’t do this to begin with.

After disassembling the machine, [Arthur] used double-sided tape and a block of scrap wood to secure the Macbook’s case to the CNC, and cut out some very slick looking vents over where the internal CPU cooler sits. With the addition of some fine mesh he found on McMaster-Carr, foreign objects (and fingers) are prevented from getting into the Mac and messing up all that Cupertino engineering.

[Arthur] tells us that the internal temperature of his Macbook would hit as high as 102 °C (~215 °F) under load before his modification, which certainly doesn’t sound like something we’d want sitting in our laps. With the addition of his vents however, he’s now seeing an idle temperature of 45 °C to 60 °C, and a max of 82 °C.

In the end, [Arthur] is happy with the results of his modification, but he’d change a few things if he was to do it again. He’s somewhat concerned about the fact that the mesh he used for the grill isn’t non-conductive (he’s using shims of card stock internally to make sure it doesn’t touch anything inside), and he’d prefer the peace of mind of having used epoxy to secure it all together rather than super-glue. That said, it works and hasn’t fallen apart yet; basically the hallmarks of a successful hack.

It’s worth noting that [Arthur] is not the first person to struggle with the Macbook’s propensity for cooking itself alive. A few years back we covered another user who added vents to their Macbook, but not before they were forced to reflow the whole board because some of the solder joints gave up in the heat.

Dedicated Button For Toggling Screens

Anyone who regularly presents to an audience these days has known the pain of getting one’s laptop to work reliably with projection hardware. It’s all the more fraught with pain when you’re hopping around from venue to venue, trying desperately to get everything functioning on a tight schedule. [Seb] found that the magic keystrokes they used to deal with these issues no longer worked on the Macbook Pro Touchbar, and so a workaround was constructed in hardware.

The build itself is simple – an Adafruit Trinket serves as the brains, with a meaty 12mm tactile button used for input. The Trinket emulates a USB keyboard and sends the Cmd-F1 keypress to the computer when the button is pressed. The button’s even mounted in a tidy deadbugged fashion.

While it’s not at all complicated from a build standpoint, the key to this project is that it’s a great example of using the tools available to solve real-life problems. When you’re in a rush with 300 people waiting for your talk to start, the last thing you need to be worrying about is a configuration issue. [Seb] now has a big red button to mash to get out of trouble and get on with the job at hand. It does recall this much earlier hack for emulating a USB keyboard with an Arduino Uno or Mega. It’s a useful skill to have!