HALWOP Recreates Retro Style With The Raspberry Pi

Modern computers are incredible feats of engineering, but there are many that still yearn for the simpler times. When keyboards clacked and a desktop computer quite literally dominated the top of your desk. There’s a whole community of folks who scratch that itch by restoring vintage computers, but not everyone has the time, money, or skill for such pursuits. Plus, even the most lovingly cared for Apple II isn’t going to help you watch YouTube.

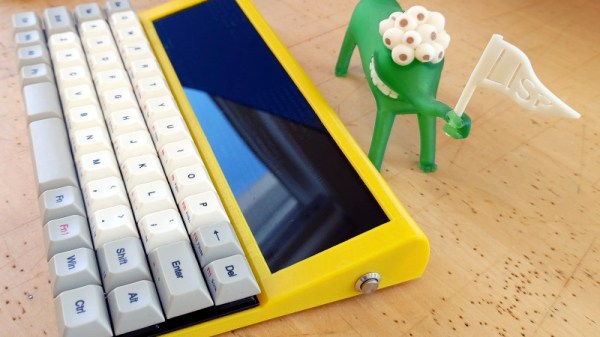
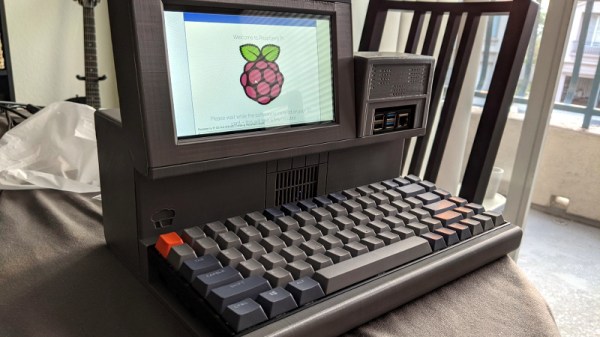
Those who wish to recreate the look and feel of a vintage computer with modern internals will certainly be interested in the HALWOP by [Maz_Baz]. While its 3D printed case isn’t a replica of any one computer, it does draw inspiration from iconic machines like the Apple Lisa and IBM XT. It’s an amalgamation of design ideas that seemed like a good idea circa 1982 or so, with plenty of 90° angles and air vents to go around.

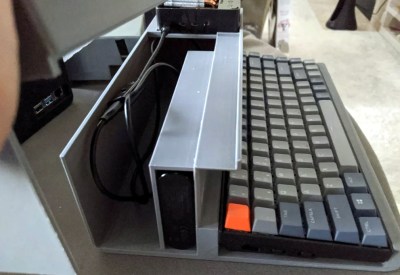
Considering the size of the Raspberry Pi 4 that powers the HALWOP, most of the case is just hollow plastic. But of course, the whole idea depends on it being almost comically large. On the plus side, [Maz_Baz] says you can use one of those empty compartments to hold a Anker PowerCore 26800 battery pack. At least in theory that makes it a “luggable” computer, though good luck trying to move it around.

In addition to the Pi 4 and battery pack, the HALWOP also uses a seven-inch touch LCD and Keychron K2 Bluetooth mechanical keyboard. Since everything is so modular, assembly is about as simple as it gets. Outside of the USB cables that power everything, you just need a long enough ribbon cable to connect the LCD to the Pi.

We know the purists don’t like the idea of a “retro” computer based on the Raspberry Pi, but of course, such projects aren’t about maintaining historical accuracy. They are a way to bridge the gap between modern technology and the unique aesthetics of a bygone era. Designs like the HALWOP allow a new generation to experience a taste of what computing was like in the early days, without giving up the ground that’s been gained in the intervening years.

Porting QMK To A Cheap Mechanical Keyboard

Over the last couple of years, we’ve seen an incredible number of DIY keyboard builds come our way. Some have had their switches nestled into laser-cut aluminum and others 3D printed plastic. They may be soldered together on a custom PCB, or meticulously hand-wired. But however they were built, they almost all shared one thing in common: they ran some variant of the open source QMK keyboard firmware.

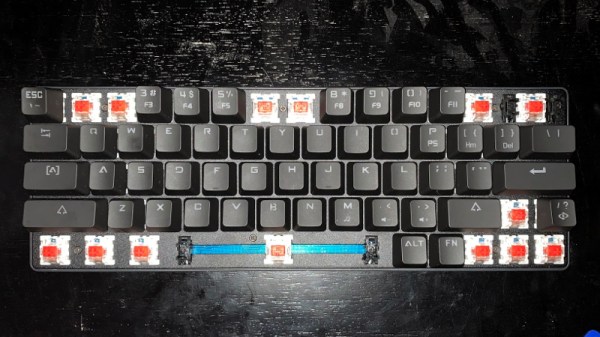
But what if you just want to run an open firmware on the keyboard you picked up for $50 bucks on Amazon? That’s exactly where [Stephen Peery] found himself nine months ago with this DK63 gaming keyboard. Since so many of these small RGB LED mechanical keyboards are very similar to existing open source designs, he wondered what it would take to blow out the original firmware and replace it with a build of QMK.

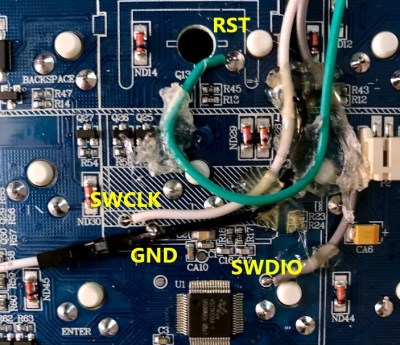
While [Stephen] doesn’t have everything working 100% yet, he’s nearly reached the end of his epic reverse engineering journey. The first step was tearing apart the keyboard and identifying all the components it used, then pulling the original firmware out of the updater. From there, between Ghidra and Serial Wire Debug, he was able to figure out most of what the stock firmware was doing so he could replicate it in QMK.

According to his README, the RGB LEDs and Bluetooth functionality don’t currently work, but other than that it seems QMK is up and running. If you’re OK with those concessions, he has information on the page about flashing his build of QMK to the stock DK63 with the ST-Link V2 so you can give it a shot. Though you do so at your own risk; we wouldn’t recommend doing this on your only keyboard.

We’ve seen commercially manufactured keyboards running QMK before, but it usually involves completely replacing the original controller with new electronics. That [Stephen] got this all working on stock hardware so other owners can follow in his footsteps is really a considerable accomplishment.

[Thanks to Baldpower for the tip.]

A Big Computer Needs A Big Keyboard

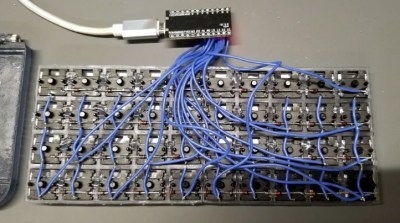
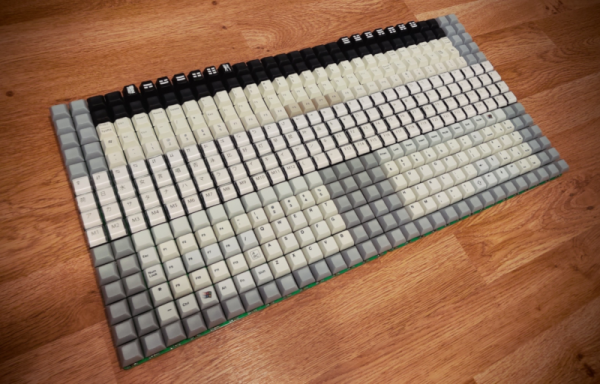
It seems like many keyboard aficionados have been gravitating towards ever smaller boards, but not [Ren]. He’s mostly completed a 433% keyboard with a whopping 450 distinct keys. Using two off the shelf PCBs and Teensy to control it all, this keyboard means you’ll never need to strain to make some awkward chord.

The PCBs have a diode matrix arrangement for 225 keys, which we would have thought was big enough. After all, a Scrabble board has 225 squares, so we assume that’s why the vendor calls them scrabbleboards. Honestly, we’re jealous someone has the desk space for this monster. We were also thinking what other sorts of switch-like sensors you could use with this board. Imagine a home system, for example, with 225 occupancy sensors, each with its own key you could easily read via USB.

There was a time when building your own keyboard of any sort would have been challenging. But now there’s a cottage industry supplying chips, switches, caps, and PCBs to those looking to craft their own custom input devices. The ready availability of 3D printers has also sparked a minor revolution in custom keyboard enclosures and keycaps.

If you’re a fan of the tiny keyboards, we’ve seen some impressive specimens that might catch your fancy. If nothing else, at least they require less soldering. Especially when they only have seven keys.

Thanks [ptkwilliams] for the tip!

Split Keyboard Finder Stacks Them Up For Your Approval

Tired of a boring, single piece keyboard? Thinking about a change but don’t know what all your options are? Well prospective-keyboard-shopper, today is your lucky day. We at the Hackaday are here to facilitate the habit with two excellent resources for the eager keyboard shopper; [pvinis]’s awesome-split-keyboards and [jhelvy]’s splitkbcompare.

As indicated by its title, awesome-split-keyboards is an awesome list of split keyboards 50 examples strong. Every split we’ve come across seems to be represented here, many with at least an image or two along with links to more information about how to build or buy the model in question. If that’s not enough, the bottom of the page has a wealth of background information about building or buying your own.

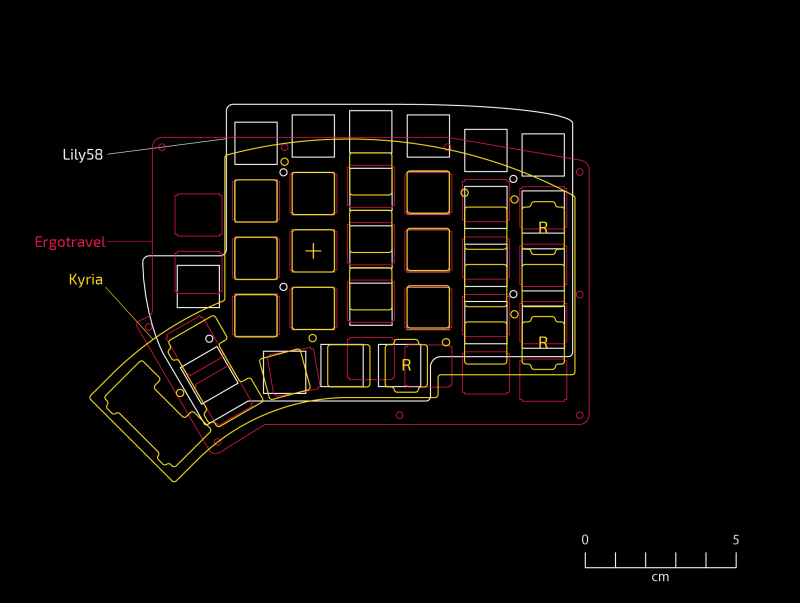
But before making such an important decision it’s important to make sure the keyboard in question will be a good fit in the hands. This is where splitkbcompare comes in, providing a visualization of many popular split layouts. If we hadn’t just found awesome-split-keyboards this filterable list and wide selection would have been the highlight here. But what does stand out is the ability to generate 1:1 scale printouts of the layouts in question, even stacking them for comparison, allowing a prospective buyer get a hands on feel for what they’re considering.

Not enough clackin’ action? Recently we’ve been producing a fierce amount of keyboard related content, of particular highlight is [Kristina Panos’]’ series called Inputs of Interest. Earlier in the summer she even built her own Ergodox split keeb.

[Main image source: HeliDox by diimdeep]

Breakaway Keyboard PCB Makes Customization A Snap

Once upon a time, keyboards were something that you took with you from computer to computer, because most of them were built quite nicely. After a few dark decades of membrane keyboards being the norm, the rise of the mechanical keyboard community has shined a light on what is possible with open source designs. Anyone can join in, because quality clackers now exist on every level, whether you want to design the perfect split ortho with OLEDs, rotary encoders, and rear view mirrors, or just want to fork over some money and get to punching switches.

Break me off a piece of that candy bar keeb.

Building your own keyboard doesn’t have to be daunting. It can be as easy or as involved as you want. There’s still a fair amount of soldering simply because it’s a keyboard. But there are plenty of options if you don’t want to do a whole lot beyond soldering switches (or hot swap sockets!) and putting a case together.

Take for instance the JNAO (Just Need An Ortho) build that [Jared] just finished. It starts with a PCB and on-board controller, and the idea is to customize it from there. You’re left to 3D print, laser cut, or otherwise carve your own case and a plate to stabilize the key switches, and then get down to business deciding on switches and keycaps.

The interesting thing about the JNAO is the breakaway row of keys on the bottom. The standard grid is 12×5, but if you don’t need the dedicated number row along the top like [Jared], you’re not stuck with it. And you’re not stuck with the default layout, either. Flashing to a standard Planck layout didn’t go as easily as [Jared] might have liked, but we think he was wise to get the firmware squared away before ever turning on the soldering iron.

Don’t know what to do with such a small keyboard? They’re pretty much perfect for cyberdeck builds.

Hackaday Podcast 077: Secret Life Of SD Cards, Mining Minecraft’s Secret Seed, BadPower Is Bad, And Sailing A Sea Of Neon

Hackaday editors Mike Szczys and Elliot Williams are deep in the hacks this week. What if making your own display matrix meant a microcontroller board for every pixel? That’s the gist of this incredible neon display. There’s a lot of dark art poured into the slivers of microSD cards and this week saw multiple hacks digging into the hidden test pads of these devices. You’ve heard of Folding@Home, but what about Minecraft@Home, the effort to find world seeds from screenshots. And when USB chargers have exposed and rewritable firmware, what could possibly go wrong?

Take a look at the links below if you want to follow along, and as always, tell us what you think about this episode in the comments!

Take a look at the links below if you want to follow along, and as always, tell us what you think about this episode in the comments!

Direct download (60 MB or so.)

Continue reading “Hackaday Podcast 077: Secret Life Of SD Cards, Mining Minecraft’s Secret Seed, BadPower Is Bad, And Sailing A Sea Of Neon”

Ergo Keyboard Build Issue Becomes Crystal Clear

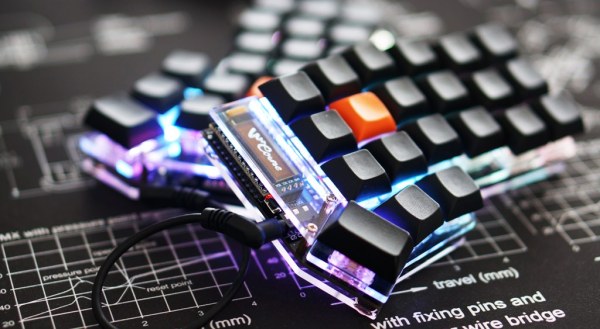
Somewhere between the onset of annoying hand pain and the feeling of worn-out, mushy switches, [sinbeard]’s keyboard dissatisfaction came to a head. He decided it was time to slip into something bit more ergonomic and settled on building an Iris — a small split keeb with an ortholinear (non-staggered) key arrangement.

The Iris is open source and uses an on-board controller, so you can have the boards fabbed and do a lot of SMD soldering, or get a pair of PCBs with all of that already done. [sinbeard] went the latter route with this build, but there’s still plenty of soldering and assembly to do before it’s time to start clackin’, such as the TRRS jacks, the rotary encoders, and of course, all the switches. It’s a great way for people to get their feet wet when it comes to building keyboards.

Everything went according to plan until it was time to flash the firmware and it didn’t respond. It’s worth noting that both of the Iris PCBs are the same, and both are fully populated. This is both good and bad.

It’s bad you have two on-board microcontrollers and their crystals to worry about instead of one. It’s good because there’s a USB port on both sides so you can plug in whichever side you prefer, and this comes in mighty handy if you have to troubleshoot.

When one side’s underglow lit up but not the other, [sinbeard] busted out the ISP programmer. But in the end, he found the problem — a dent in the crystal — by staring at the board. A cheap replacement part and a little hot air rework action was all it took to get this Iris to bloom.

Want to build a keyboard but need a few more keys? Check out the dactyl and the ErgoDox.