Homemade Shop Vise Packs A Hydraulic Punch

It’s a sad day when one of the simplest and generally most reliable tools in the shop – the bench vise – gives up the ghost. With just a pair of beefy castings and a heavy Acme screw, there’s very little to go wrong with a vise, but when it happens, why not take it as an opportunity to make your own? And, why not eschew the screw and go hydraulic instead?

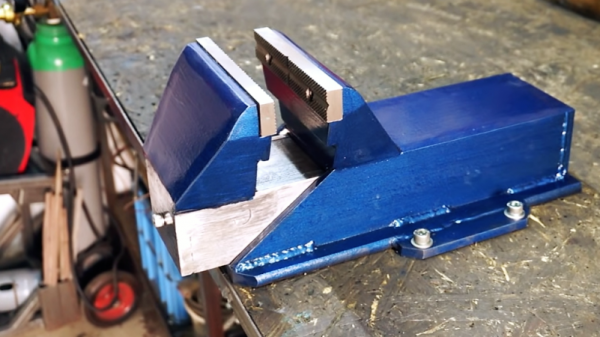
That’s the path [Darek] plotted when his somewhat abused vise reached end-of-life with an apparently catastrophic casting failure. His replacement is completely fabricated from steel bar and channel stock, much of it cut on his nifty plasma cutter track. The vice has a fixed base and rear jaw, with a moving front jaw. Hiding inside is a 5-ton single-acting hydraulic cylinder. A single acting cylinder won’t open the vise on its own, so [Darek] came up with a clever return mechanism: a pair of gas springs from a car trunk.

With a pair of hardened steel jaws, some modifications to the power cylinder to allow foot operation, and a spiffy paint job, the vise was ready for service. Check out the build in the video below; we’re impressed with the power the vise has, and hands-free operation is an unexpected bonus.

Yes, most people buy vises, but from the small to the large, it’s nice to see them built from scratch too.

Continue reading “Homemade Shop Vise Packs A Hydraulic Punch”

A Three Axis Mill For The End Of The World

A mill is one of those things that many hackers want, but unfortunately few get their hands on. Even a low-end mill that can barely rattle its way through a straight cut in a piece of aluminum is likely to cost more than all the other gear on your bench. A good one? Don’t even ask. So if something halfway decent is out of your price range, you might as well throw caution to the wind and build one.

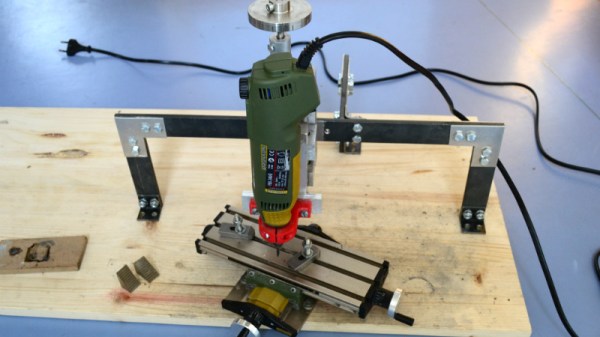
That’s more or less the goal behind this extremely basic three axis mill built by [Michael Langeder]. Designed around a cheap rotary tool, it’s hard to imagine a more simplistic mill. Almost all the components are stuff you could pick up from the local hardware store, or probably even the junk pile if you were really in a pinch. It won’t be the best looking piece of gear in your shop, but it’s good enough to learn the basics on and just might be able to bootstrap a second-generation mill RepRap-style.

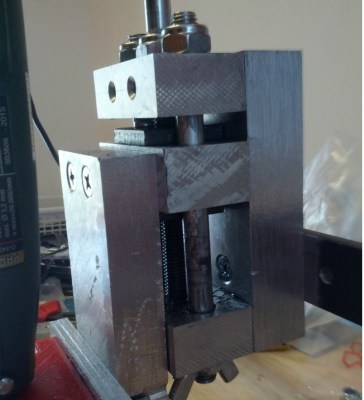
Made out of scrap blocks of aluminum and some threaded rod, the Z axis itself represents the bulk of the work on this project. It gives the user fine control over the height of the rotary tool by way of a large knob on the top. It’s held over the work piece with some flat steel bars and corner brackets rather hastily cut out of aluminum sheet.

While the tool holder is 3D printed, you could probably hack something up out of a block of wood if you didn’t have access to a printer. The only part of the mill that’s really “cheating” is the cross slide table, but at least they can be had for relatively cheap. If you really wanted to do this with junk bin finds, you could always replicate the Z axis design for X and Y.

If you’re not looking for something quite so austere, we’ve covered slightly more advanced DIY mills in the past. You could always go in the opposite direction and put a cross slide vise on your drill press, but do so at your own risk.

Retrotechtacular: The Iron Giants That Built The Jet Age

In the closing months of World War II, the Axis and the Allies were throwing everything they had at each other. The tide was turning to the Allies’ favor, but the Germans were showing a surprising resilience, at least in terms of replacing downed fighter and bomber aircraft. When the Allies examined the wreckage of these planes, they discovered the disturbing truth: the planes contained large pieces forged from single billets of metal, which suggested a manufacturing capability none of the Allies possessed and which allowed the Germans to quickly and cheaply make better and faster planes.

When the war was over, the Allies went looking for the tools the Germans had used to make their planes, and found massive closed-die forging presses that could squeeze parts out of aluminum and magnesium alloys in a single step. The Soviets carted off a 30,000 ton machine, while the Americans went home with a shipload of smaller presses and the knowledge that the Russians had an edge over them. Thus began the Heavy Press Program, an ultimately successful attempt by the US military to close a huge gap in strategic manufacturing capabilities that [Machine Thinking] details in the excellent video below.

One doesn’t instantly equate monstrous machines such as the Mesta 50,000-ton press, over nine stories tall with half of it buried underground and attached directly to bedrock, with airplane manufacture. But without it and similar machines that came from the program, planes from the B-52 to the Boeing 747 would have been impossible to build. And this isn’t dead technology by any means; sold to Alcoa in 1982 after having been operated by them for decades, the “Fifty” recently got a $100 makeover after cracks appeared in some castings, and the press and its retro-brethren are still squeezing out parts for fighters as recent as the F-35.

Continue reading “Retrotechtacular: The Iron Giants That Built The Jet Age”

Building A Knife By Hand Is Just As Hard As You Think

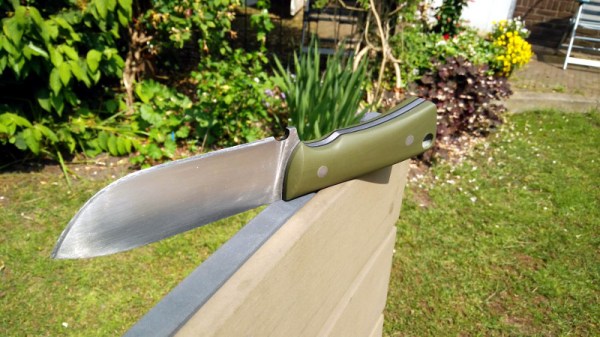
Carl Sagan once said: “If you wish to make an apple pie from scratch, you must first invent the universe.” In other words, the term “scratch” is really a relative sort of thing. Did you grow the apples? Did you plant the wheat to make the flour? Where do you keep your windmill, incidentally? With Carl’s words in mind, we suppose we can’t say that [Flannagill] truly built this incredible knife from scratch, after all, he ordered the sheet steel on Amazon. But we think it’s close enough.

He was kind enough to document the epic build in fantastic detail, including (crucially), the missteps he made along the way. While none of the mistakes were big enough to derail the project, he mentions a few instances where he wasted time and money trying to take shortcuts. Even if making your own knives at home isn’t on your short list of summer projects, we’d wager there’s something in this build log you can learn from regardless.

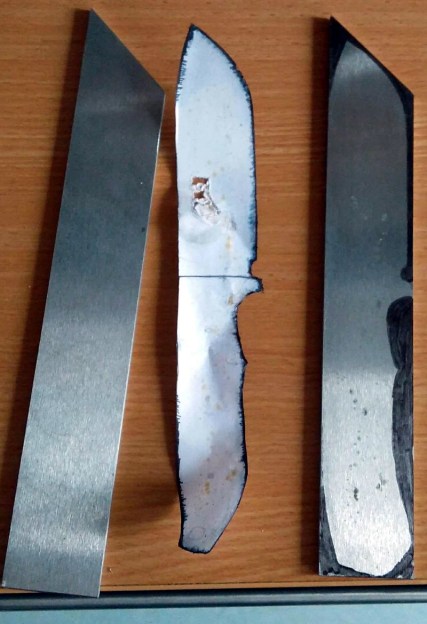
So how does one build a knife? Slowly and methodically, if what [Flannagill] has written up is any indication. It started with a sketch of the knife on a piece of paper, the outline of which was then transferred to a piece of tool steel with nothing more exotic than a permanent marker. An angle grinder was then used to follow the outline and create the rough shape of the final knife.

From there, the process is done almost entirely with hand files. Here [Flannagill] gives one of his most important pieces of advice: don’t cheap out on the tools. He bought the cheapest set of files he could, and paid the price: he says it took up to 14 hours to complete just one side of the knife. Once he switched over to higher quality files, the rest of the work went much faster.

After filing and sanding the knife blank, it went into a charcoal fire to be hardened, followed by a total of 4 hours in a 200 C (~400 F) oven to heat temper it. Finally the handle pieces (which are officially known as “scales”) were attached, and finished with considerably less labor intensive woodworking methods. The final result is a gorgeous one of a kind specimen that [Flannagill] is rightly very proud of.

If you’re worried this process looks a bit too quick and easy for you, don’t worry. You can always go the [Bil Herd] route and make a forge out of your old sink if you’d rather start your apple pie a bit closer to the tree.

Shutter Bug Goes Extreme With Scratch-Built Film Camera

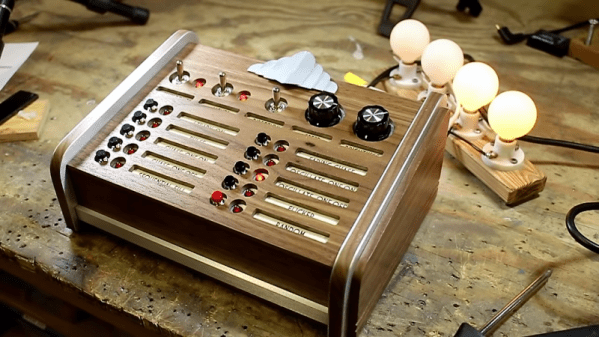
Should a camera build start with a sand mold and molten aluminum? That’s the route [CroppedCamera] took with this thoroughly impressive camera project.

When we think of cameras these days, chances are we picture the ones that live inside the phones in our pockets. They’re the go-to image capture devices for most of us, but even for the more photographically advanced among us, when a more capable camera is called for, it’s usually an off-the-shelf DSLR from Canon, Nikon, or the like. Where do hand-built cameras fall in today’s photography world? They’re a great way to add a film option to your camera collection.

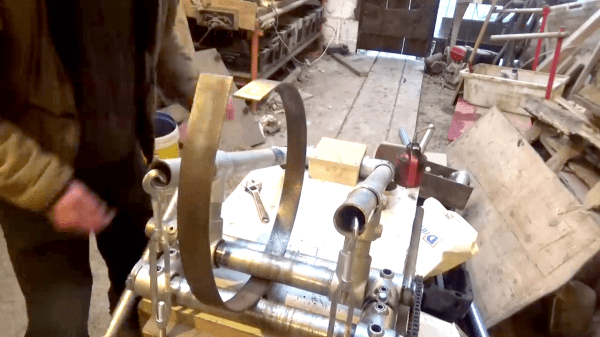
[CroppedCamera] previously built a completely custom large-format view camera, but for this build he decided that something a bit more portable might do. The body of the camera is scratch-built from aluminum, acting as the lightproof box to hold the roll film and mount the leaf-shutter lens. There’s an impressive amount of metalwork here — sand casting, bending, TIG welding, and machining all came into play, and most of them new skills to [CroppedCamera]. We were especially impressed with the shrink-fit of the lens cone to the body. It’s unconventional looking for sure, but not without its charm, and it’s sure to make a statement dangling around his neck.

It’s tough to find non-digital DIY camera builds around here — best we could do were these laser-cut plywood modular cameras. Then again, you can’t beat this wearable camera for functional style.

Continue reading “Shutter Bug Goes Extreme With Scratch-Built Film Camera”

Hackaday guide to Lathes

Buying Machine Tools: Foreign Or Domestic, New Or Used?

The last time we discussed machine tools, we talked about how to choose the size of the new metalworking lathe that your wallet is itching to pour itself into. The next big decision to make is “new or used?” If you’re in North America, this question has a lot of overlap with the classic question “Import or American?”. The answer boils down to what your needs are, and what you want to get out of this machine.

If you are new to machining, and want to learn the skills, I recommend starting with an Asian import machine. If you’re careful which one you select, you’ll end up with a very reasonably priced lathe that can do precise work right out of the crate. If your interest is in learning how these tools work, and in doing a restoration project, an old American machine is a great choice. Let’s look at these two routes in more detail.

Continue reading “Buying Machine Tools: Foreign Or Domestic, New Or Used?”

Building A Tricorder Prop Worthy Of Mr Spock

We’ve all been there. You want to assemble a proper Star Trek: The Original Series landing party prop set, but the TOS tricorders you can find on the market are little more than overpriced toys. Imagine the embarrassment of beaming down to Cestus III with a plastic tricorder. The Metrons wouldn’t have even bothered with the trial by combat with such a sorry showing.

Unhappy with the state of Star Trek props, [Dean O] decided to take matters into his own hands. He purchased a TOS tricorder from Diamond Select Toys and set out to modify it into something a bit closer to Starfleet standards. Anything painted metallic silver on the toy was replaced with a machined aluminum duplicate, adding some much needed heft. He even spruced up the controls and display.

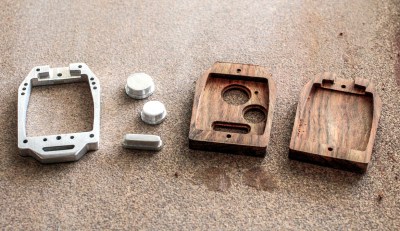
To start, [Dean] stripped the tricorder down, separating all of the silver plastic parts and finding aluminum stock that was close enough to the desired dimensions. This ended up being .125″ plate for the sides, and .500″ bars for the horizontal dividers. To make the side panels he placed the original plastic parts over the aluminum, marked the mounting holes with a punch, and used the belt sander to shape them.

[Dean] then put in a more screen accurate Moire disc, and went as far as to get real watch crowns for the buttons (just like the prop used in the show). In a particularly bold move, he even drilled out the center of watch crowns to install plastic light pipes for LED illumination.

Last year we saw a build that crammed a Raspberry Pi into the same Diamond Select tricorder toy to excellent effect. Now somebody just needs to combine both projects and they’ll have the slickest tricorder in the Alpha Quadrant.