STM32 Gets Up Close And Personal With Mandelbrot

The Mandelbrot set is a curious mathematical oddity that, while interesting in its own right, is also a useful tool for benchmarking various types of computers. Its constant computing requirement when zooming in and out on the function, combined with the fact that it can be zoomed indefinitely, means that it takes some quality hardware and software to display it properly. [Thanassis] has made this a pet project of his, running Mandelbrot set visualizations in different ways on many different hardware platforms.

This particular one is based on an STM32 board called the Blue Pill, which [Thanassis] chose because he hadn’t yet done a continuous Mandelbrot zoom on a microcontroller yet. The display is handled by a tiny 16K IPS color screen, and some clever memory tricks had to come into play in order to get smooth video output since the STM has only 20 kB available. The integer multiplication is also tricky on a platform this small while keeping the continuous zoom function, so it’s limited to fixed point multiplication.

Even with the limitations of the platform, he is still able to achieve nearly double-digit FPS rates with this one. If you want to play around with graphics like this on an STM platform, [Thanassis] has released all of the source code on his GitHub page, but if you’d like to see more Mandelbrot manipulation you can check out one of his older projects where he built a similar project on an FPGA.

Continue reading “STM32 Gets Up Close And Personal With Mandelbrot”

Spin The Video Track With A Mechanical Flair

One of the most difficult user interfaces to get right is video editing. It is complex and fiddly with large amounts of precision required even after four or five hours of straight editing. Seeking to bring some of that interface out into the real world, [Zack Freedman] built a mechanical video editing keyboard.

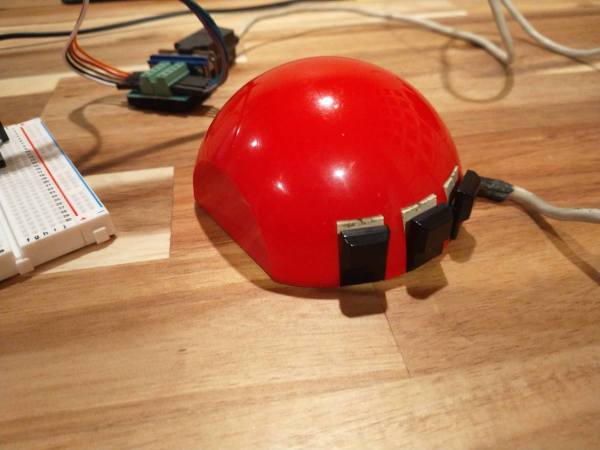
The keyboard in question features popular shortcuts and keys to breeze through different parts of editing. The biggest feature is, of course, the large scrubbing knob, allowing [Zack] to fly through long video with precision. We’ve seen our fair share of mechanical keyboards that aren’t traditional keyboards on Hackaday before, such as this number pad or this macro pad.

One of the unique constraints of this project was the fact that Zack had a deadline of two days. This self-imposed deadline was to help focus the work and drive it towards completion. This meant that it had to be designed in such a way that roadblocks or troublesome features could be designed around or cut out altogether. At its heart, this project is just 14 mechanical switches, 4 potentiometers, and a Teensy to drive it all. It is the design, prototyping, and thought that went into this project that makes it noteworthy. There are plenty of lessons here about how to manage a project’s timeline and advice about how to actually finish it.

Code, STL’s, diagrams, and instructions are all on his GitHub.

Continue reading “Spin The Video Track With A Mechanical Flair”

Developing An Open Source Electronics Trainer

It’s a safe bet that most Hackaday reader’s interest in electronics started at a young age, and that their early forays into the world of hardware hacking likely involved some form of “playground” kit. As long as you didn’t lose any of the components, these kits promised the user that hundreds of possible projects were just a few jumper wires away. Extra points awarded for when you decide to toss away the manual and fly solo.

While there’s still no shortage of such products on the market, [Josh Kittle] felt the concept could do with a freshening up. His open hardware “Microcontroller Trainer” harkens back to those old multi-kits, but adds in the sort of high-tech gadgetry that makes the modern DIY world go round.

It’s still got the traditional layout: a center mounted breadboard surrounded by an array of LEDs, a handful of buttons, and a pair of potentiometers. But there’s also sockets for the Raspberry Pi, ESP8266, ESP32, and Arduino. Plus a few of their most popular friends to keep them company: a .96″ OLED, 2.4″ Touch TFT, and a BC05 Bluetooth module.

Originally [Josh] created this design to help clean up his own workspace, figuring he could just put his most used components on a single compact board. But as you might expect, others expressed interest in the concept. Now he’s producing them as kits, and even working his way towards a third hardware revision that adds features such as an integrated 18650 battery for portable use.

While electronics kits that have you build a functional device are a great way to learn the ropes, we’re always glad to see fresh takes on the classic electronic “playground” concept.

Even More Firmware In Your Firmware

There are many ways to update an embedded system in the field. Images can fly through the air one a time, travel by sneaker or hitch a ride on other passing data. OK, maybe that’s a stretch, but there are certainly a plethora of ways to get those sweet update bytes into a target system. How are those bytes assembled, and what are the tools that do the assembly? This is the problem I needed to solve.

Recall, my system wasn’t a particularly novel one (see the block diagram below). Just a few computers asking each other for an update over some serial busses. I had chosen to bundle the payload firmware images into the binary for the intermediate microcontroller which was to carry out the update process. The additional constraint was that the blending of the three firmware images (one carrier and two payload) needed to happen long after compile time, on a different system with a separate toolchain. There were ultimately two options that fit the bill.

The system thirsty for an update

Continue reading “Even More Firmware In Your Firmware”

Pulse Generator Does The Job With An STM8

When working with hardware, whether a repair or a fresh build, it’s often necessary to test something. Depending on what you’re working with, this can be easy or a total pain if you can’t get the right signal to the right place. To eliminate this frustrating problem, [WilkoL] built a useful pulse generator for use in the lab.

[WilkoL] notes that historically, the job of generating pulses of varying length and frequency would be achieved with a smattering of 555 timers. While this is a perfectly cromulent way to do so, it was desired to take a different approach for the added flexibility modern hardware can offer. The pulse generator is instead built around an STM8 microcontroller; an unusual choice in this era, to be sure. [WilkoL] specified the part for its incredibly low cost, and highly capable timer hardware – perfect for the job.

Combined with an ST7735 TFT LCD screen, and programmed in bare metal for efficiency’s sake, the final project is installed in a project box with controls for frequency and pulse length – no more, no less. Capable of pulse lengths from 250 ns to 90 s, and frequencies from 10 mHz to 2 MHz, it’s a tool that should be comfortable testing everything from servos to mechanical counters.

Of course, if you need to get down to picosecond timescales, an avalanche pulse generator might be more your speed. Video after the break.

Continue reading “Pulse Generator Does The Job With An STM8”

Choosing The Right RTC For Your Project

When it comes to measuring time on microcontrollers, there’s plenty of ways to go about things. For most quick and dirty purposes, such as debounce delays or other wait states, merely counting away a few cycles of the main clock will serve the purpose.  Accurate to the tens of milliseconds, they get the average utility jobs done without too much fuss.

However, many projects are far more exacting in their requirements. When you’re building a clock, or a datalogger, or anything that relies on a stable sense of passing time for more than a few minutes, you’ll want a Real Time Clock. So called due to their nature of dealing with real time, as we humans tend to conceive it, these devices take it upon themselves to provide timekeeping services with a high degree of accuracy. We’ve compiled a guide to common parts and their potential applications so you can get things right the first time, every time.

Continue reading “Choosing The Right RTC For Your Project”

Hacking A Cheap Action Cam Into A Dashcam With A Microcontroller

Repurposing commodity electronics is one of the true forms of hacking, and it’s always the simple little hacks that lead to big ones. [Everett] wanted to use a $20 GoPro clone as a dash cam, so he wired a microcontroller into it to automate some actions and make it practical.

The camera turns on automatically when connected to external power like a car charger, but starting and stopping a recording and power down all had to be done manually. [Everett] wanted to automate these functions, so he opened up the camera and started probing with an oscilloscope. He found the power button, record button, 3.3 V and external 5 V traces conveniently next to each other in the top of the camera.

To automate the required functions, he wired in a PIC10 on a small breakout board, powered by the 3.3 V line. It detects if 5 V is connected to the charging port on start-up via an N-channel FET, then automatically starts a recording. When the 5 V power is switched off with the car, it waits 10 seconds before stopping the recording and switching off the camera. If no external 5 V is not detected on start-up the microcontroller does nothing, which allows the camera to be used as a normal handheld. [Everett] mounted the camera to his rearview mirror with a magnetic bracket made using a combination of a 3D printer and 3D pen.

This is a simple and practical little hack, and the firmware is available on Github. Cheap dashcams are available for similar prices, but you won’t get any hacking satisfaction that way.

The very nature of actions cameras inspire hacking. You can simply add an external battery with the help of a 3D printer, or go all out and build a gimballed helmet cam from scratch