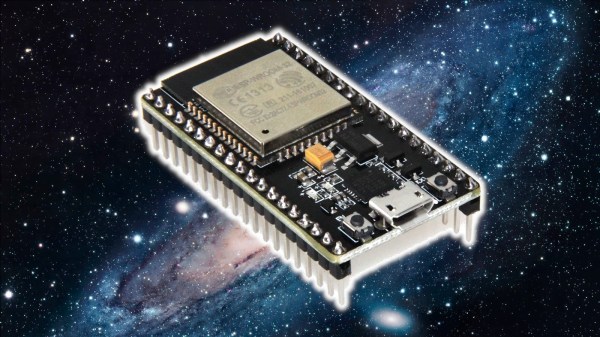
ESP32 Virtual Machine Lets You Change Programs On The Fly

Often, reprogramming a microcontroller involves placing it in reset, flashing the code, and letting it fire back up. It usually involves shutting the chip down entirely. However, [bor0] has built a virtual machine that runs on the ESP32, allowing for dynamic program updates to happen.

The code is inspired by the CHIP-8, a relatively ancient interpreter that had some gaming applications. [bor0] had already created a VM simulating the CHIP-8, and repurposed it here, taking out the gaming-related drawing instructions and replacing them with those that control IO pins. Registers have also been changed to 16 bits for added flexibility and headroom.

It’s probably not something with immediate ground-breaking applications for most people, but it’s a different way of working with and programming the ESP32, and that’s pretty neat.

The ESP32 is a powerful chip, too, as we all know – and it makes a great 8-bit emulator to boot. Sound off in the comments with your thoughts on what would make a killer application for the ESP32 VM!

[Thanks to satancete for the tip!]

Floppy disks

Floppy Interfacing Hack Chat With Adafruit

Join us on Wednesday, February 2 at noon Pacific for the Floppy Interfacing Hack Chat with Adafruit’s Limor “Ladyada” Fried and Phillip Torrone!

When a tiny fleck of plastic-covered silicon can provide enough capacity to store a fair percentage of humanity’s collected knowledge, it may seem like a waste of time to be fooling around with archaic storage technology like floppy disks. With several orders of magnitude less storage capacity than something like even the cheapest SD card or thumb drive, and access speeds that clock in somewhere between cold molasses and horse and buggy, floppy drives really don’t seem like they have any place on the modern hacker’s bench.

join-hack-chatOr do they? Learning the ins and out of interfacing floppy drives with modern microcontrollers is at least an exercise in hardware hacking that can pay dividends in other projects. A floppy drive is, after all, a pretty complex little device, filled with electromechanical goodies that need to be controlled in a microcontroller environment. And teasing data from a stream of magnetic flux changes ends up needing some neat hacks that might just serve you well down the line.

So don’t dismiss the humble floppy drive as a source for hacking possibilities. The folks at Adafruit sure haven’t, as they’ve been working diligently to get native floppy disk support built right into CircuitPython. To walk us through how they got where they are now, Ladyada and PT will drop by the Hack Chat. Be sure to come with your burning questions on flux transitions, MFM decoding, interface timing issues, and other arcana of spinning rust drives.

Our Hack Chats are live community events in the Hackaday.io Hack Chat group messaging. This week we’ll be sitting down on Wednesday, February 2 at 12:00 PM Pacific time. If time zones have you tied up, we have a handy time zone converter.

Continue reading “Floppy Interfacing Hack Chat With Adafruit”

Custom Piano Tickles The Ivories

The core ethos of “hacking” is usually interpreted as modifying something for a use that it wasn’t originally built for. Plenty of builds are modifications or improvements on existing technology, but sometimes that just isn’t enough. Sometimes we have to go all the way down and build something completely from scratch, and [Balthasar]’s recent piano-like musical instrument fits squarely into this category.

This electronic keyboard is completely designed and built from scratch, including the structure of the instrument and the keys themselves. [Balthasar] made each one by hand out of wood and then built an action mechanism for them to register presses. While they don’t detect velocity or pressure, the instrument is capable of defining the waveform and envelope for any note, is able to play multiple notes per key, and is able to change individual octaves. This is thanks to a custom 6×12 matrix connected to a STM32 microcontroller. Part of the reason [Balthasar] chose this microcontroller is that it can do some of the calculations needed to produce music in a single clock cycle, which is an impressive and under-reported feature for the platform.

With everything built and wired together, the keyboard is shockingly versatile. With the custom matrix it is easy to switch individual octaves on the piano to any range programmable, making the 61-key piano capable of sounding like a full 88-key piano. Any sound can be programmed in as well, further increasing its versatility, which is all the more impressive for being built from the ground up. While this build focuses more on the electronics of a keyboard, we have seen other builds which replicate the physical action of a traditional acoustic piano as well.

Continue reading “Custom Piano Tickles The Ivories”

I2C To The Max With ATtiny

The Arduino is a powerful platform for interfacing with the real world, but it isn’t without limits. One of those hard limits, even for the Arduino MEGA, is a finite number of pins that the microcontroller can use to interface with the real world. If you’re looking to extend the platform’s reach in one of your own projects, though, there are a couple of options available. This project from [Bill] shows us one of those options by using the ATtiny85 to offload some of an Arduino’s tasks using I2C.

I2C has been around since the early 80s as a way for microcontrollers to communicate with each other using a minimum of hardware. All that is needed is to connect the I2C pins of the microcontrollers and provide each with power. This project uses an Arduino as the controller and an arbitrary number of smaller ATtiny85 microcontrollers as targets. Communicating with the smaller device allows the Arduino to focus on more processor-intensive tasks while giving the simpler tasks to the ATtiny. It also greatly simplifies wiring for projects that may be distributed across a distance. [Bill] also standardizes the build with a custom development board for the ATtiny that can also double as a shield for the Arduino, allowing him to easily expand and modify his projects without too much extra soldering.

Using I2C might not be the most novel of innovations, but making it easy to use is certainly a valuable tool to add to the toolbox when limited on GPIO or by other physical constraints. To that end, [Bill] also includes code for an example project that simplifies the setup of one of these devices on the software end as well. If you’re looking for some examples for what to do with I2C, take a look at this thermometer that communicates with I2C or this project which uses multiple sensors daisy-chained together.

Continue reading “I2C To The Max With ATtiny”

Game Boy Becomes Super Game Boy With A Pair Of Pis

For the Nintendo aficionados of the 90s, the Super Game Boy was a must-have cartridge for the Super Nintendo which allowed gamers to play Game Boy games on your TV. Not only did it allow four-color dot-matrix gaming on the big screen, but it let you play those favorite Game Boy titles without spending a fortune on AA batteries. While later handhelds like the PSP or even Nintendo Switch are able to output video directly to TVs without issue, the original Game Boy needed processing help from an SNES or, as [Andy West] shows us, it can also get that help from a modern microcontroller.

Testing the design before installing it in the NES case.

The extra processing power in this case comes from a Raspberry Pi Pico which is small enough to easily fit inside of a donor NES case and also powerful enough to handle the VGA directly. For video data input, the Pico is connected to the video pins on the Game Boy’s main board through a level shifter. The main board is also connected to a second Pico which handles the controller input from an NES controller. Some fancy conversion needed to be done at this point because although the controller layouts are very similar, they are handles by the respective consoles completely differently.

With all of the technical work largely out of the way, [Andy] was able to put the finishing touches on the build. These included making sure the power buttons, status LEDs, and reset button all functioned, and restoring the NES case complete with some custom “Game Guy” graphics to match the original design of the Game Boy. We commend the use of original Game Boy hardware in this build as well, which even made it possible for [Andy] and his wife to play a head-to-head game of Dr. Mario through a link cable with another Game Boy. If you’re looking for a simpler way of playing on original hardware without burning a hole in your wallet buying AA batteries, take a look at this Game Boy restoration which uses a Lithium battery instead.

Continue reading “Game Boy Becomes Super Game Boy With A Pair Of Pis”

Single Bit Computer From Vacuum Tubes

Culminating a year-long project, [Usagi Electric] aka [David] has just wrapped up his single-bit vacuum tube computer. It is based on the Motorola MC14500 1-bit industrial controller, but since [David] changed the basic logic unit into an arithmetic-logic unit, he’s dubbing it the UE14500. Built on a wooden panel about 2.5 x 3 rabbit lengths excluding power supply. [David] admits he has cheated a little bit, in that he’s using two silicon diodes instead of a 6AL5 dual diode tube in his universal NOR gate on which the computer is based — but in his defense he notes that plenty of vacuum tube computers of the era used silicon diodes.

The tube he uses in the NOR gates is the 6AU6 miniature pentode, which he selected because of its availability, price, and suitability for low voltage. [David] runs this computer with two power supplies of +24 and -12 VDC, rather than the hundreds of volts typically used in vacuum tube designs. The modules are constructed on single-sided copper-clad PCB panels etched using a milling machine. The video below the break wraps up the 22-part series, where he fixes a few power supply issues and builds a remote front panel for I/O, and gives a demo of the computer in operation. Alas, this only completes one fourth of the project, as there are three more building blocks to build before the whole system is complete — Program Control (magnetic tape), RAM Memory bank, and a serial input/output module. We look forward to seeing the whole system up and running in the future.

We just wrote about the MC14500 a few days ago, and we’ve also covered [David]’s vacuum tube implementation of a 555 timer among other of his vacuum tube projects, several of which are featured on his Hackaday.io page.

Continue reading “Single Bit Computer From Vacuum Tubes”

Modern Features In Classic Radio

As consumer electronics companies chase profits on tighter and tighter margins, it seems like quality is continually harder to find for most average consumer-grade products. Luckily, we don’t have to hunt through product reviews to find well-built merchandise since we have the benefit of survivorship bias to help us identify quality products from the past that have already withstood the test of time. [Tom] has forever been fond of this particular Sony TV/radio combo from the ’70s so he finally found one and set about modernizing it in a few key ways.

Among the modifications to this 1978 Sony FX-300 include the addition of a modern color display, Bluetooth, an upgraded FM radio, and a microphone. At the center of all of this new hardware is a Teensy 4 which [Tom] has found to be quite powerful and has enough capabilities to process the audio that’s being played in order to make visual representations of the sound on the screen. He also implemented a bitcrusher filter and integrated it into the controls on the original hardware. He’s using an optimized version of this library to cram all of that processing ability into such a small chip, and the integration of all this new hardware is so polished that it looks like it could be an original Sony stereo from the modern era.

While some may complain about restomod-type builds like this, we don’t really see any need to be arbitrarily or absolutely faithful to bygone eras even if the original hardware was working properly in the first place. What works is taking the proven technology of the past and augmenting it with modern features to enjoy the best of both worlds. Much like this hi-fi stereo which blends the styles and technology of the 90s with that of the 60s in an equally impressive way.