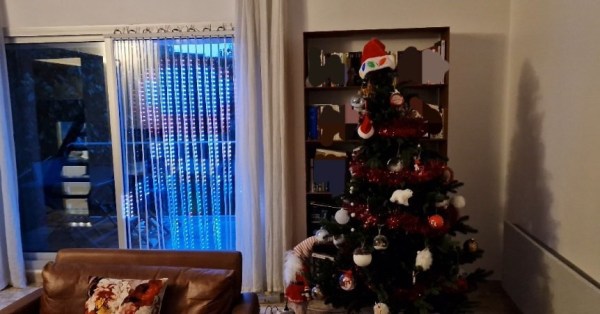
Illuminated smart curtain in front of a window, beside a Christmas tree

Smart LED Curtain Brings Sprites To Your Windows

Mobile interface for LED smart curtain display
A mobile interface is a nice touch

Anybody who has ever seen a video wall (and who hasn’t?) will be familiar with the idea of making large-scale illuminated images from individual coloured lights. But how many of us have gone the extra mile and fitted such a display in our own homes? [vcch] has done just that with his Deluxe Smart Curtain that can be controlled with a phone or laptop.

The display itself is made up of a series of Neopixel strips, hung in vertical lines in front of the window.  There is a wide gap between each strip, lending a ghostly translucent look to the images and allowing the primary purpose of the window to remain intact.

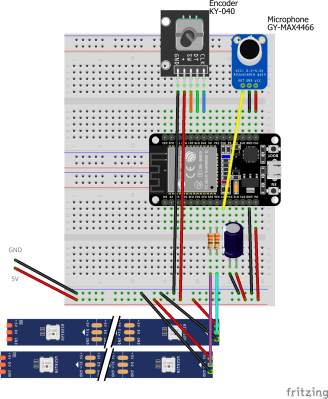
The brains of the system are hosted on a low-cost M5stack atom ESP32 device. The data lines for the LEDs are wired in a zig-zag up and down pattern from left to right, which the driver software maps to the rectangular images. However, the 5V power is applied to the strips in parallel to avoid voltage drops along the chain.

If you’d like to build your own smart curtain, Arduino sketch files and PHP for the mobile interface are included on the project page. Be sure to check out the brief video of what the neighbors will enjoy at night after the break.

If video walls are your kind of thing, then how about this one that uses Ping Pong Balls as diffusers? Continue reading “Smart LED Curtain Brings Sprites To Your Windows”

"The Great Resistor" color code illumination project

The Great Resistor Embiggens The Smallest Value

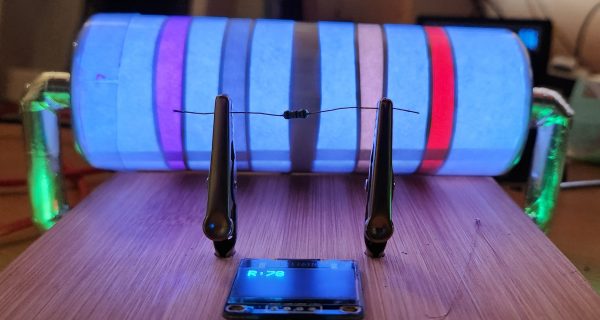
With surface-mount components quickly becoming the norm, even for homebrew hardware, the resistor color-code can sometimes feel a bit old-hat. However, anybody who has ever tried to identify a random through-hole resistor from a pile of assorted values will know that it’s still a handy skill to have up your sleeve. With this in mind, [j] decided to super-size the color-code with “The Great Resistor”.

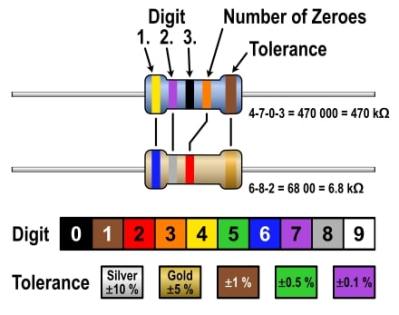
Resistor color code from Wikipedia with white background
How the resistor color-code bands work

At the heart of the project is an Arduino Nano clone and a potential divider that measures the resistance of the test resistor against a known fixed value. Using the 16-bit ADC, the range of measurable values is theoretically 0 Ω to 15 MΩ, but there are some remaining issues with electrical noise that currently limit the practical range to between 100 Ω and 2 MΩ.

[j] is measuring the supply voltage to help counteract the noise, but intends to move to an oversampling/averaging method to improve the results in the next iteration.

The measured value is shown on the OLED display at the front, and in resistor color-code on an enormous symbolic resistor lit by WS2812 RGB LEDs behind.

Inside view of the great resistor showing WS2812 LEDs and baffle plates
Inside The Great Resistor, the LEDs and baffle plates make the magic work

Precision aside, the project looks very impressive and we like the way the giant resistor has been constructed. It would look great at a science show or a demonstration. We’re sure that the noise issues can be ironed out, and we’d encourage any readers with experience in this area to offer [j] some tips in the comments below. There’s a video after the break of The Great Resistor being put through its paces!

If you want to know more about the history of the resistor color code bands, then we have you covered.  Alternatively, how about reading the color code directly with computer vision?

Continue reading “The Great Resistor Embiggens The Smallest Value”

Building A Tessellated NeoPixel Clock

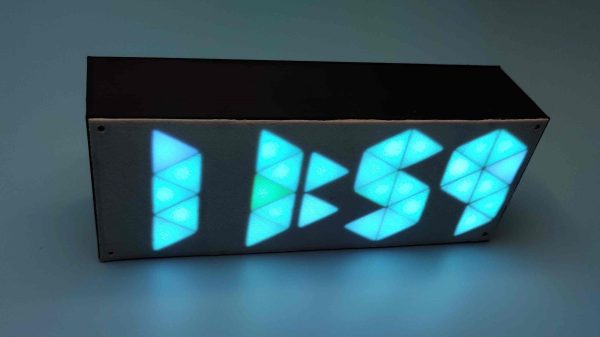
Anyone can buy a clock, but building your own lets you express your creative flair along the way. [Edison Science Corner] did just that with this neat sci-fi looking design.

The build relies on an Arduino Pro Mini to run the show, paired with a DS3231 real-time clock module. The latter part is of great importance, as without it, the Arduino would not keep accurate time. The 3D printed enclosure looks nondescript from the outside. However, inside, it’s got a neat triangular structure which allows the time to be displayed in that attractive tessellated triangular fashion. There’s a black plastic separator between all the segments which stop unattractive bleed-through and really help with the final effect. The individual triangles are each lit by a NeoPixel LED, which are both addressable and capable of lighting up in RGB colors. It makes for an attractive and colorful display.

If you want to try something more traditional yet challenging, consider whipping up your own 7-segment displays. Video after the break.

Continue reading “Building A Tessellated NeoPixel Clock”

laser cut acrylic coaster with rgb leds inside

Your Mug Will Like This Glowy Coaster

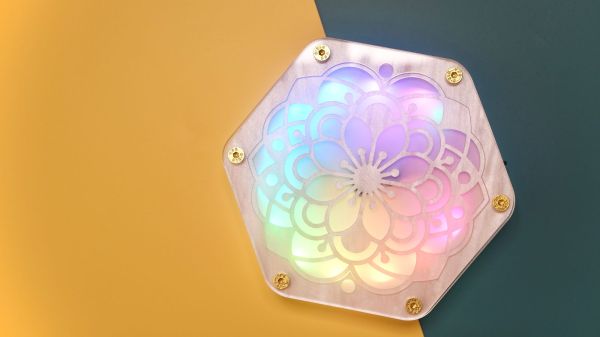
[Charlyn] wanted to highlight their friends beautiful mug collection, so the Glowy Coaster was born.

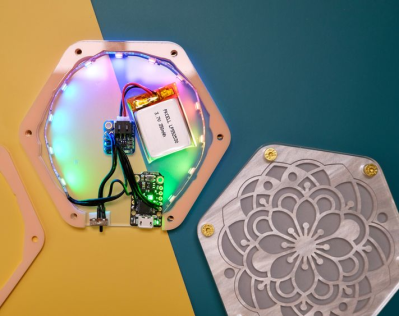
The coaster is made up of six layers of laser cut acrylic. The top and bottom layer are cut out of clear acrylic, providing a flat surface for the coaster. A top pattern layer made of pearl acrylic has a thin piece of vellum put underneath it to provide diffusion for the LED strip sandwiched inside. The middle layers are made of peach acrylic and have their centers hollowed out to provide room for the electronics inside. The top pearl acrylic layer gives the coaster, as [Charlyn] writes, a “subtle touch of elegance”. The coaster itself is screwed together by an M3 screw at each point of the hexagon that feed through to heat-set inserts.

inside of glowy coaster with electronics exposed

The electronics consist of a short NeoPixel strip, cut to include 12 LEDs pointed in towards the center of the coaster. The LEDs are driven by a Trinket M0 microcontroller with a LiPo “backpack” to provide power, attachment points for the exposed power switch and recharging capability to the 110 mAh 3.7 V battery. The code is a slightly modified NeoPixel “rainbow” wheel loop (source available as a gist). The design files are available through Thingiverse.

Creations like these highlight how much care and work goes into a project with minimal beauty, where decisions, like the opacity and thickness of the acrylic or countersinking the M3 screws, can have huge consequences for the overall aesthetic. [Charlyn] has an attention to detail that brings an extra touch of professionalism and polish to the project.

Coasters are a favorite for laser cutting and we’ve covered many different types, including
coaster bots, coaster engravers and even a color changing, drink sensing coasters.

Continue reading “Your Mug Will Like This Glowy Coaster”

The word clock on a desk, with "tien", "over", "half" and "twaalf" lit

An Impeccably Documented Word Clock In Dutch

[Maarten Pennings] shares a word clock project – but not the regular kind. For a start, this clock is a shining demonstration of hobbyist-available 3D printing technologies, with embedded light guides for the letters printed in transparent filament, thanks to a dual-extruder printer. For a word clock, it’s surprisingly small – in fact, it uses an 8×8 addressable LED matrix, with words shown in different colors. If you’re looking to build a novel word clock, you’re all set here – [Maarten] tells all about this project’s story and provides a treasure trove of insights into designing all of its aspects!

The 8×8 limitation was initially set because he wanted to use a low-cost MAX7219 8×8 LED matrix module as a base for the clock. Thankfully, in Dutch, time can be expressed using shorter words — still, it had to be limited to 5-minute intervals. Extra effort had to be spent designing the layout — [Maarten] mentions his friend writing a solver that found a way to fit some words onto the layout diagonally. At some point, he switched from LEDs to Neopixels, and dug deep into addressable LED technology. For instance, he demonstrates Neopixel power measurements and current consumption calculations. This shows that the calculations indeed match the clock’s real consumption when measured by an external meter.

In the best of hacker traditions, all the source files are on Github — if you fancy yourself a Dutch word clock, you can build [Maarten]’s design easily! He provides extensive instructions on building this clock in the README, including a flashing and configuration tutorial, complete wiring diagrams, and a soldering guide. A manufacturing-grade amount of build information that won’t leave you guessing. He’s also added a fair number of animations, put plenty of effort into clock precision verification, and even investigated some Neopixel protocol minutiae. All in all, our hacker went all in on the capabilities while embracing the constraints. This reminds us of the similarly well-documented haptic word clock we covered just a year ago – check that one out, too!

Continue reading “An Impeccably Documented Word Clock In Dutch”

fiber matrix

Big LED Matrix Becomes Tiny LED Matrix Thanks To Fiber Optics

Everyone loves LED matrices, and even if you can’t find what you like commercially, it’s pretty easy to make just what you want. Need it big? No problem; just order a big PCB and some WS2812s. Need something tiny? There are ridiculously small LEDs that will test your SMD skills, as well as your vision.

But what if you want a small matrix that’s actually a big matrix in disguise? For that, you’ll want to follow [elliotmade]’s lead and incorporate fiber optics into your LED matrix. The build starts with a 16×16 matrix of WS2812B addressable LEDs, with fairly tight spacing but still 160 mm on a side. The flexible matrix was sandwiched between a metal backing plate and a plastic bezel with holes directly over each LED. Each hole accepts one end of a generous length of flexible 1.5-mm acrylic light pipe material; the other end plugs into a block of aluminum with a 35 by 7 matrix of similar holes. The small block is supported above the baseplate by standoffs, but it looks like the graceful bundle of fibers is holding up the smaller display.

A Raspberry Pi Pico running a CircutPython program does the job of controlling the LEDs, and as you can see in the video below, the effect is quite lovely. Just enough light leaks out from the fibers to make a fascinating show in the background while the small display does its thing. We’ve seen a few practical uses for such a thing, but we’re OK with this just being pretty. It does give one ideas about adding fiber optics to circuit sculptures, though.

Continue reading “Big LED Matrix Becomes Tiny LED Matrix Thanks To Fiber Optics”

Image showing differences between WS2815 and WS2813 LED strips - the WS2815 strip lighting is more uniform throughout the strip's length.

Teaching You Everything You Might Have Missed About Addressable LEDs

Often, financial motivation results in people writing great educational material for hackers. Such is absolutely the case with this extensive documentation blog post on addressable LEDs by [DeRun]. This article could very be named “Addressable LEDs 101”, and it’s a must-scroll-through for anyone, whether you’re a seasoned hacker, or an artist with hardly any technical background and a desire to put LEDs in your creations.

This blog post is easy to read, painting a complete picture of what you can expect from different addressable LED types, and with apt illustrations to boot. Ever wonder which one of the addressable strips you should get from your retailer of choice, and what are the limitations of any specific type? Or, perhaps, you’d like to know – why is it that a strip with a certain LED controller is suspiciously cheap or expensive? You’re more than welcome to, at least, scroll through and fill into any of your addressable LED knowledge gaps, whether it’s voltage drops, color accuracy differences, data transfer protocol basics or dead LED failsafes.

Addressable LEDs have a special place in our hearts, it’s as if the sun started shining brighter after we’ve discovered them… or, perhaps, it’s all the LEDs we are now able to use. WS2812 is a staple of the addressable LED world, which is why we see them even be targets of both clone manufacturers and patent trolls. However, just like the blog post we highlight today mentions, there’s plenty of other options. Either way do keep coming cover a new addressable LED-related hack, like rewriting their drivers to optimize them, or adding 3.3V compatibility with just a diode.

We thank [Helge] for sharing this with us!