Milspec Teardown: ID-2124 Howitzer Data Display

It’s time once again for another installment in “Milspec Teardown”, where we get to see what Uncle Sam spends all those defense dollars on. Battle hardened pieces of kit are always a fascinating look at what can be accomplished if money is truly no object. When engineers are given a list of requirements and effectively a blank check, you know the results are going to be worth taking a closer look.
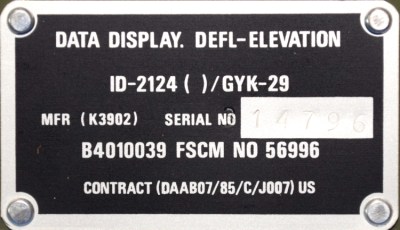
Today, we have quite a treat indeed. Not only is this ID-2124 Howitzer Deflection-Elevation Data Display unit relatively modern (this particular specimen appears to have been pulled from service in June of 1989), but unlike other military devices we’ve looked at in the past, there’s actually a fair bit of information about it available to us lowly civilians. In a first for this ongoing series of themed teardowns, we’ll be able to compare the genuine article with the extensive documentation afforded by the ever fastidious United States Armed Forces.

For example, rather than speculate wildly as to the purpose of said device, we can read the description directly from Field Manual 6-50 “TACTICS, TECHNIQUES, AND PROCEDURES FOR THE FIELD ARTILLERY CANNON BATTERY”:

The gun assembly provides instant identification of required deflection to the gunner or elevation to the assistant gunner. The display window shows quadrant elevation or deflection information. The tenths digit shows on the QE display only when the special instruction of GUNNER’S QUADRANT is received.

From this description we can surmise that the ID-2124 is used to display critical data to be used during the aiming and firing of the weapon. Further, the small size of the device and the use of binding posts seem to indicate that it would be used remotely or temporarily. Perhaps so the crew can put some distance between themselves and the artillery piece they’re controlling.
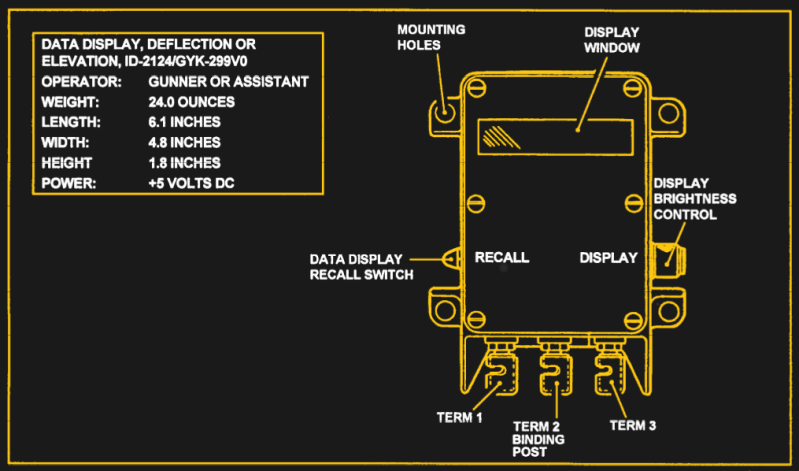
Now that we have an idea of what the ID-2124 is and how it would be used, let’s take a closer look at what’s going on inside that olive drab aluminum enclosure.

Continue reading “Milspec Teardown: ID-2124 Howitzer Data Display”

Getting MIDI Under Control

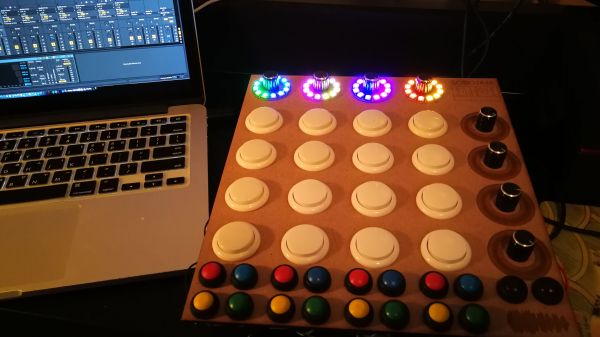
When [Mr. Sobolak] started his DIY Midi Fighter he already had experience with the MIDI protocol, and because it is only natural once you have mastered something to expand on the success and build something more impressive, more useful, and more button-y. He is far from rare in this regard. More buttons mean more than extra mounting holes, for example an Arduino’s I/O will fill up quickly as potentiometers hog precious analog inputs and button arrays take digital ones. Multiplexing came to the rescue, a logic-based way to monitor or control more devices, in contrast to the serial protocols used by an IO expander.

Multiplexing was not in [Mr. Sobolak]’s repertoire, but it was a fitting time to learn and who doesn’t love acquiring a new skill by improving upon a past project? All the buttons were easy enough to mount but keeping the wires tidy was not in the scope of this project, so if you have a weak stomach when it comes to a “bird’s nest” on the underside you may want to look away and think of something neat. Regardless of how well-groomed the wires are, the system works and you can listen to a demo after the break. Perhaps the tangle of copper beneath serves a purpose as it buoys the board up in lieu of an enclosure.

We are looking forward to the exciting new versions where more solutions are exercised, but sometimes, you just have to tackle a problem with the tools you have, like when the code won’t compile with the MIDI and NeoPixel libraries together so he adds an Uno to take care of the LEDs. Is it the most elegant? No. Did it get the job done? Yes, and if you don’t flip over the board, you would not even know.

Continue reading “Getting MIDI Under Control”

Junkbox MIDI

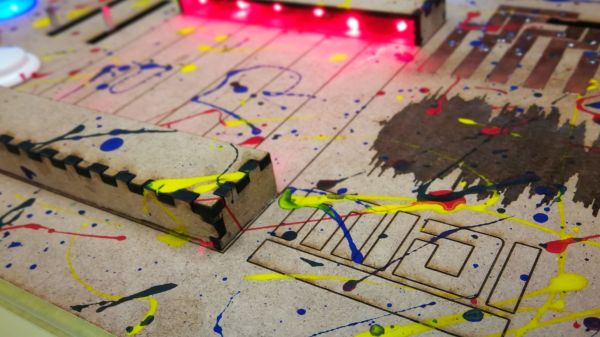
Do you ever peer into the void…of your hardware scrap box? It may be a wonderland of parts with near-infinite potential, and they just need to be assembled and depending on what you hoard, programmed. Access to a laser engraver doesn’t hurt either. The stuff in [Mr. Sobolak]’s bin is cooler than average, at least by Hackaday writer standards. His sound palette project is a wild mixture of interfaces, hardware, channels, and color. There are arcade pushbuttons, slider potentiometers, rotary potentiometers, miniature laser harp, touch piano, and drum pads which earns the title of junk box build extraordinaire.

Under the hood, we find the usual copper tape, wire and solder connecting operators to a Teensy 3.2. In the more esoteric part of the BOM, we find some fancy SoftPots which look like great fun to play. All the code is linked in the Instructable, but there is absolutely no reason to make an exact copy. MIDI is from the 80s and libraries abound for this protocol so the building may be the hardest part of making an interface that fits your character. Some of the techniques in the Instructable may help you, like how to connect a piezo element so it can read something lighter than a wrecking ball or the laser harp roughly the size of your palm.

We are not short of MIDI interfaces if you are thinking of making your own or be truly random.

Continue reading “Junkbox MIDI”

Drone Gives Up Its Wireless Secrets To Zigbee Sniffer

There’s something thrilling about decoding an unknown communications protocol. You start with a few clues, poke at the problem with some simple tools, and eventually work your way up to that first breakthrough that lets you crack the code. It can be frustrating, but when you eventually win, it can be very rewarding.

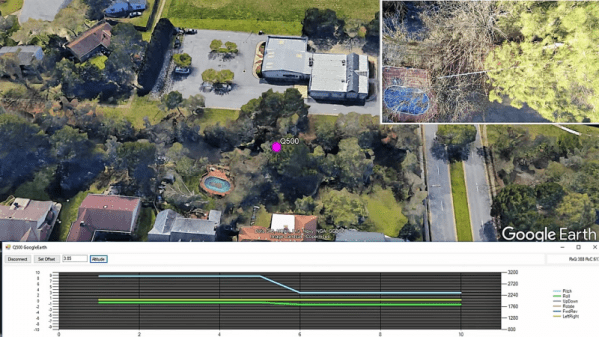
It seems that [Jason] learned this while decoding the wireless conversation between his mass-market quad and its controller. The quad in question, a Yuneec Q500, is one of those mid-range, ready-to-fly drones that’s targeted at those looking to get in the air easily and take some cool pictures. Unsure how the drone and controller were talking, [Jason] popped the covers and found a Zigbee chipset within. With the help of a $14 Zigbee USB dongle and some packet sniffing software from TI, [Jason] was able to see packets flowing, but decoding them was laborious. Luckily, the sniffer app can be set up to stream packets to another device, so [Jason] wrote a program to receive and display packets. He used that to completely characterize each controller input and the data coming back from the drone. It’s a long and strange toolchain, but the upshot is that he’s now able to create KML in real time and track the drone on Google Earth as it flies. The video below shows the build and a few backyard test flights.

Congratulations to [Jason] for breaking the protocol and opening up drones like this for other hackers. If you’re interested in learning more about Zigbee sniffing, you can actually hack a few smarthome gadgets into useful sniffers.

Continue reading “Drone Gives Up Its Wireless Secrets To Zigbee Sniffer”

Spanning The Tree : Dr Radia Perlman & Untangling Networks

As computer networks get bigger, it becomes increasingly hard to keep track of the flow of data over this network. How do you route data, making sure that the data is spread to all parts of the network? You use an algorithm called the spanning tree protocol — just one of the contributions to computer science of a remarkable engineer, Dr. Radia Perlman. But before she created this fundamental Internet protocol, she also worked on LOGO, the first programming language for children, creating a dialect for toddlers.

Continue reading “Spanning The Tree : Dr Radia Perlman & Untangling Networks”

This Thermal Printer Has Serious Game

[Dhole], like the fox, isn’t the first to connect his computer to a Game Boy printer but he has done a remarkable job of documenting the process so well that anyone can follow. The operation is described well enough that it isn’t necessary to scrutinize his code, so don’t be put off if C and Rust are not your first choices. The whole thing is written like a story in three chapters.

The first chapter is about hacking a link cable between two Game Boys. First, he explains the necessity and process of setting the speed of his microcontroller, a NUCLEO-F411RE development board by STMicroelectronics. Once the rate is set, he builds a sniffer by observing the traffic on the cable and listens in on two Game Boys playing Tetris in competition mode. We can’t help but think that some 8-bit cheating would be possible if Tetris thought your opponent instantly had a screen overflowing with tetrominoes. Spying on a couple of Game Boys meant that no undue stress was put on the printer.

Chapter two built on the first chapter by using the protocol to understand how the printer expects to be spoken to. There is plenty of documentation about this already, and it is thoughtfully referenced. It becomes possible to convince a Game Boy that the connected microcontroller is a printer so it will oblige by sending an image. Since there isn’t a reason to wait for printing hardware, the transfer is nearly instantaneous. In the image above, you can see a picture of [Dhole] taken by a Game Boy camera.

The final chapter, now that all the protocols are understood, is also the climax where the computer and microcontroller convince the printer they are a Game Boy that wants to print an image. In the finale, we get another lesson about measuring controller frequency without an oscilloscope. If you are looking for the hack, there it is. There is a handful of success in the form of old receipts with superimposed grayscale images since virgin thermal printer paper by Nintendo costs as much as a used printer.

This story had a happy ending but grab your reading glasses for the smallest Game Boy and here’s someone who wrote their own Game Boy color game.

Voltmeter Speaks MQTT Without Libraries

[Emilio Ficara] [built himself an Internet-connected MQTT multimeter](http://ficara.altervista.org/) (translated from Italian by robots). Or maybe we should say that [Emilio Ficara] undertook a long string of cool hacks that ended up in a WiFi-enabled multimeter, because the destination isn’t nearly as interesting as the voyage.

debugtool-sch

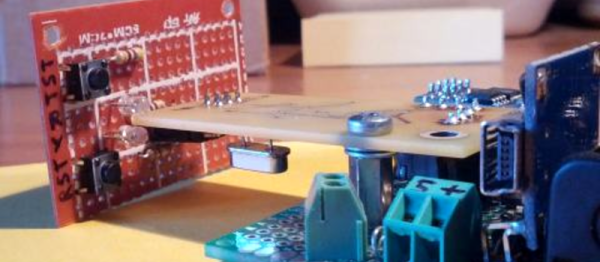
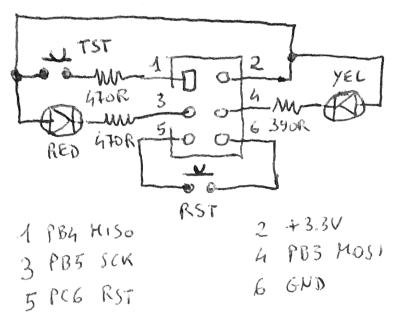
The multimeter, a DT-4000ZC, has a serial output but instead of transferring the data directly, it sends which cells on the LCD screen need to be activated. For testing along the way, [Emilio] used his own USB-serial-to-ESP01 dongle, which sounds like a useful tool to have around if you’re debugging an AT command session. He made a cute AVR SPI-port debugging aid with a reset button and diagnostic LEDs that we’re going to copy right now. Other home-made tools, like a 3.7V Li-ion battery manager and a serial data snooper make this project worth a look.

Continue reading “Voltmeter Speaks MQTT Without Libraries”