Flashing LEDs With MIDI, Note By Note

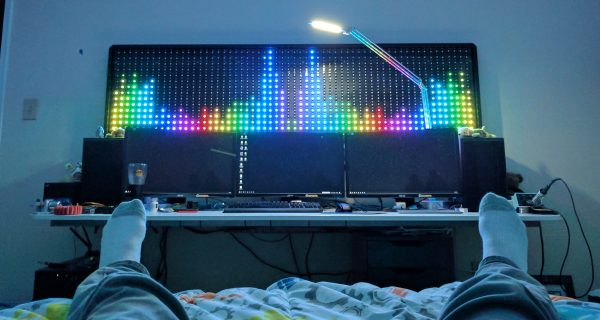
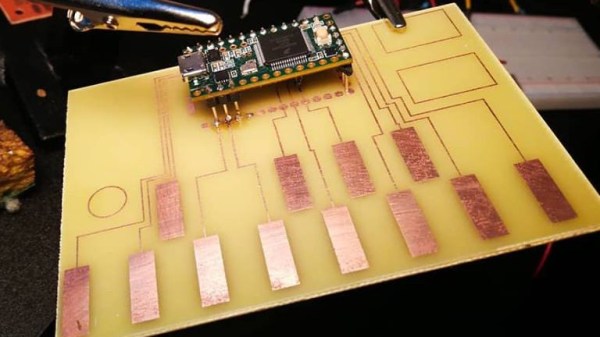
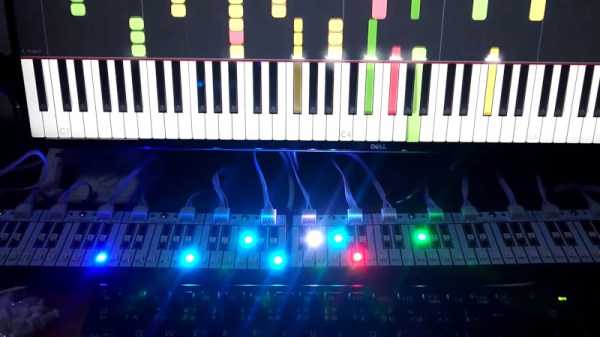
Musical keyboards that light up the correct notes to play have long been touted as a quick and easy way to learn how to play. They’re also fun to look at. [Shootingmaker] has developed a similar concept, with a keyboard lookalike, covered in LEDs (Youtube video, embedded below).

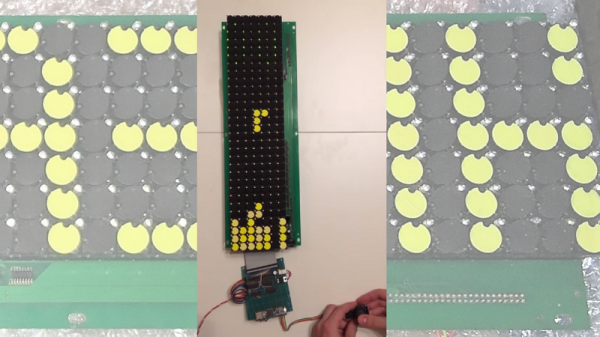
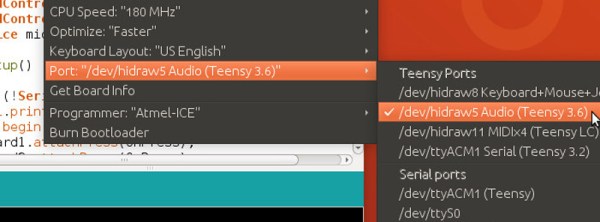
The project consists of a PCB, in which the design of the mask imitates the white and black notes of a piano. This makes it look like a keyboard, but as far as we can tell, it doesn’t actually work as one. All the notes are fitted with APA102 addressable LEDs, under the control of a Teensy 3.2 board, operating in USB-MIDI mode. The Teensy receives MIDI data, and then directs the individual LEDs to flash in different colors based on which MIDI channel fired the note.

It’s a fun way to visualise MIDI data, and we think it would be even more fun combined with a basic synthesis engine to make some noise. We suspect it wouldn’t be too hard to integrate the project into an existing instrument, either. Software is available on Github for those interested in replicating the project. You can use MIDI to control neon lights, too.
Continue reading “Flashing LEDs With MIDI, Note By Note”

LED Music Visualizer Bespeckles Your Bedroom

When it comes to wall-mounted ornamentation, get ready to throw out your throw-rugs and swap them for something that will pop so vividly, you’ll want to get your eyes checked. To get our eyes warmed up and popping, [James Best] has concocted a gargantuan 900-RGB-LED music visualizer to ensure that our bedrooms are bright and blinky on demand.

Like any other graduate from that small liberal-arts school in southern California, [James] started prototyping with some good old-fashioned blue tape. Once he had had his grid-spacing established, he set to work on 2-meter-by-0.5-meter wall mounted display from some plywood and lumber. Following some minor adhesive mishaps, James had his grid tacked down with Gaffers tape, and ready for visuals.

Under the hood, a Teensy is leveraging its DMA capabilities to conduct out a bitstream to 900 LEDs. By using the DMA feature and opting for a Teensy over the go-to Arduino, [James] is  using the spare CPU cycles to cook out some Fourier-Transformed music samples and display their frequency content.

We’ve covered folks proving the concept of driving oodles of WS2812B LEDs over DMA; it’s great seeing these ideas mature into a fully-featured project that lands on the walll. For more on chatting with WS2812B LEDs over DMA, have a look back into our archive.

Continue reading “LED Music Visualizer Bespeckles Your Bedroom”

This Two-Wheeled RC Car Is Rather Quick

Radio control cars have always been fun, it’s true. With that said, it’s hard to deny that true speed was unlocked when lithium polymer batteries and brushless motors came to the fore. [Gear Down For What?] built himself a speedy RC car of his own design, and it’s only got two wheels to boot (Youtube link, embedded below).

The design is of the self-balancing type – if you’re thinking of an angry unmanned Segway with a point to prove, you’re in the ballpark. The brains of the machine come thanks to a Teensy 3.6, which runs the PID loops for balancing and control. An MPU6050 gyroscope & accelerometer provide the necessary sensing to enable the ‘bot to keep itself upright in varied conditions. Performance is impressive, with the car reaching speeds in excess of 40 MPH and managing to handle simple ramps and bumps with ease. It’s all wrapped up in a 3D printed frame which held up surprisingly well to many crashes into tripods and tarmac.

Such builds are not just fun; they’re an excellent way to learn useful control skills that can serve you well in industry and your own projects. You can pick up the finer details of control systems in a university engineering course, or you could give our primer a whirl. When you’ve whipped up your first awesome project, we’d love to hear about it. Video after the break.

Continue reading “This Two-Wheeled RC Car Is Rather Quick”

The Clickiest Game Of Tetris You’ll Ever Play, On A Flip-Dot

Like many other classics it’s easy to come up with ways to ruin Tetris, but hard to think of anything that will make it better. Adding more clickiness is definitely one way to improve the game, and playing Tetris on a flip-dot display certainly manages to achieve that.

The surplus flip-dot display [sinowin] used for this version of Tetris is a bit of an odd bird that needed some reverse engineering to be put to work. The display is a 7 x 30 matrix with small dots, plus a tiny green LED for each dot. Those LEDs turned out to be quite useful for replicating the flashing effect used in the original game when a row of blocks was completed, and the sound of the dots being flipped provides audio feedback. The game runs on a Teensy through a custom driver board and uses a Playstation joystick for control. The video below, in perfectly acceptable vertical format, shows the game in action and really makes us want to build our own, perhaps with a larger and even clickier flip-dot display.

The best thing about Tetris is its simplicity: simple graphics, simple controls, and simple gameplay. It’s so simple it can be played anywhere, from a smartwatch to a business card and even on a transistor tester.

Continue reading “The Clickiest Game Of Tetris You’ll Ever Play, On A Flip-Dot”

Arduino’s Pluggable Discovery Programs With Any Protocol

The first Arduino was serial, and over the decade and a half, this has been the default way to upload code to an Arduino board. In 2008, support for in-circuit programmers was added, and later port detection was added. The latest version of the Arduino IDE adds something new: pluggable discovery. Now any protocol is supported by the Arduino IDE.

This feature is the brainchild of [Paul Stoffregen], creator of the Teensy. If you’ve ever used a Teensy, you’ll remember the Teensyduino application used to upload code to the board. The Teensy uses HID protocol instead of serial for uploading. After working to improve the integration between the Teensy and Arduino IDE, [Paul] stated extending the DiscoveryManager. After some discussion with the Arduino developers, this feature was then added to Arduino 1.8.9, released a month or so ago.

There are some issues with Pluggable Discovery, most importantly that it doesn’t yet exist in the Arduino Command Line Interface (yeah, that exists too). If you’re looking to contribute to Open Source, that would be a nice project to pick up.

With the right JSON, and configuration, it is now theoretically possible to extend the Arduino IDE to any sort of protocol. This means (again, theoretically), it’s possible to update the firmware in your DIY MIDI synth over SysEx message, or a parallel port, maybe. Someone is going to upload to an Arduino board over PCIe, eventually.

DIY Piano: Look, Ma, No Moving Parts

[Michael Sobolak] has a penchant for pianos, concern for capacitive touch, and special sentiment for solid state. This alliterate recipe results in a DIY PCB piano that leaves out the levers and is barren of buttons unless you count the stock RESET button on the Teensy. A real stickler might point out that speakers have moving cones. Beyond these tangential parts, which have motionless options, it is an electronic instrument with no moving parts.

The heart of the project is a Teensy 3.2 which natively supports twelve capacitive touch sensors. The infamous demo board is mounted to a homemade PCB featuring twelve keys but is actually an incomplete octave plus another key one octave above the first. If you look sharp, you already noticed the missing and extra touchpads. PCB traces were made in Illustrator because if you have a familiar tool, you use what you know and you cannot argue that it works. The design was transferred to a copper board using the old magazine page trick that we love and reliable old ferric acid.

We couldn’t help but notice that the posts of the Teensy were soldered to the top of the board, rather than drilling through, IMT-style. Again, the results speak, even if there is room for improvement. Reportedly, there is a second version on the way which includes every expected key.

Continue reading “DIY Piano: Look, Ma, No Moving Parts”

Simple Sensor Provides Detailed Motion Capture For VR Hands

Consider the complexity of the appendages sitting at the end of your arms. The human hands contain over a quarter of the entire complement of bones in the body, use dozens of muscles both in the hand itself and extending up the forearm, and are capable of almost infinite variance in the movements they can create. They are exquisite machines.

And yet when it comes to virtual reality, most simulations treat the hands like inert blobs. That may be partly due to their complexity; doing motion capture from so many joints can be computationally challenging. But this pressure-sensitive hand motion capture rig aims to change that. The product of an undergraduate project by [Leslie], [Hunter], and [Matthew], the idea was to provide an economical and effective way to capture gestures for virtual reality simulators, which generally focus on capturing large motions from the whole body.

The sensor consists of a sandwich of polyurethane foam with strain gauge sensors embedded within. The user slips his or her hand into the foam and rests the fingers on the sensors. A Teensy and twenty lines of code translate finger motions within the sandwich into five axes of joystick movement, which is then sent to Unreal Engine, where finger motions were translated to a 3D-model of a hand to play a VR game of “Rock, Paper, Scissors.”

[Leslie] and her colleagues have a way to go on this; testers complained that the flat hand posture was unnatural, and that the foam heated things up quickly. Maybe something more along the lines of these gesture-capturing gloves would work?