Heated DryBox Banishes Filament Moisture For Under $20

There has been a lot of activity from [Richard Horne] regarding 3D printing filaments lately; most recently he has shared two useful designs for upping one’s filament storage and monitoring game. The first is for a DIY Heated DryBox for 3D printing filament. It keeps filament dry not just by sealing it into a plastic box with some desiccant, but by incorporating a mild and economical heater intended for reptile habitats inside. Desiccant is great, but a gently heated enclosure can do wonders for driving away humidity in the right environment. The DryBox design also incorporates a handy little temperature and humidity sensor to show how well things are working.

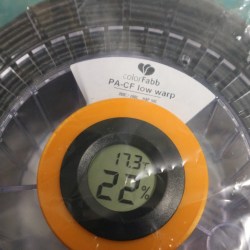
Spool-mounted adapter for temperature and humidity sensor (and desiccant) to monitor storage bag conditions.

The second design is a simple spin-off that we particularly liked: a 3D printed adapter that provides a way to conveniently mount one of the simple temperature and humidity sensors to a filament spool with a desiccant packet. This allows storing a filament spool in a clear plastic bag as usual, but provides a tidy way to monitor the conditions inside the bag at a glance. The designs for everything are on Thingiverse along with the parts for the Heated DryBox itself.

[Richard] kindly shares the magic words to search for on eBay for those seeking the build’s inexpensive key components: “15*28CM Adjustable Temperature Reptile Heating Heater Mat” and “Mini LCD Celsius Digital Thermometer Hygrometer Temperature Humidity Meter Gauge”. There are many vendors selling what are essentially the same parts with minor variations.

Since the DryBox is for dispensing filament as well as storing it, a good spool mounting system is necessary but [Richard] found that the lack of spool standardization made designing a reliable system difficult. He noted that having spool edges roll on bearings is a pretty good solution, but only if one doesn’t intend to use cardboard-sided spools, otherwise it creates troublesome cardboard fluff. In the end, [Richard] went with a fixed stand and 3D printable adapters for the spools themselves. He explains it all in the video, embedded below.

Continue reading “Heated DryBox Banishes Filament Moisture For Under $20”

An Indoor Garden? That’s Arduino-licious

Gardening is a rewarding endeavour, and easily automated for the maker with a green thumb. With simplicity at its focus,  Hackaday.io user [MEGA DAS] has whipped up a automated planter to provide the things plants crave: water, air, and light.

[MEGA DAS] is using a TE215 moisture sensor to keep an eye on how thirsty the plant may be, a DHT11 temperature and humidity sensor to check the airflow around the plant, and a BH1750FVI light sensor for its obvious purpose. To deliver on these needs, a 12V DC water pump and a small reservoir will keep things right as rain, a pair of 12V DC fans mimic a gentle breeze, and a row of white LEDs supplement natural light when required.

The custom board is an Arduino Nano platform, with an ESP01 to enable WiFi capacity and a Bluetooth module to monitor the plant’s status while at home or away. Voltage regulators, MOSFETs, resistors, capacitors, fuses — can’t be too careful — screw header connectors, and a few other assorted parts round out the circuit. The planter is made of laser cut pieces with plenty of space to mount the various components and hide away the rest. You can check out [MEGA DAS]’ tutorial video after the break!

Continue reading “An Indoor Garden? That’s Arduino-licious”

Environmentally Aware Jewelry Gets Attention

We didn’t include a “Most Ornate” category in this year’s Coin Cell Challenge, but if we had, the environmentally reactive jewelry created by [Maxim Krentovskiy] would certainly be the one to beat. Combining traditional jewelry materials with an Arduino-compatible microcontroller, RGB LEDs, and environmental sensors; the pieces are able to glow and change color based on environmental factors. Sort of like a “mood ring” for the microcontroller generation.

[Maxim] originally looked for a turn-key solution for his reactive jewelry project, but found that everything out there wasn’t quite what he was looking for. It was all either too big or too complicated. His list of requirements was relatively short and existing MCU boards were simply designed for more than what he needed.

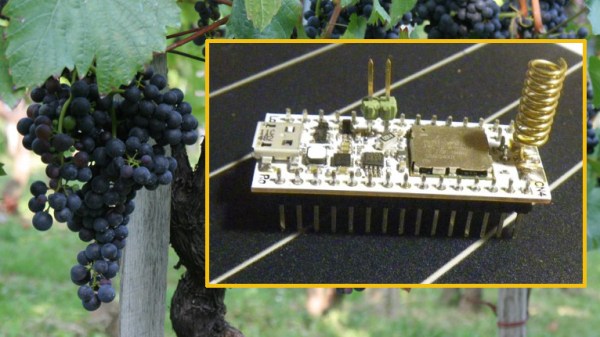
On his 30 x 30 mm PCB [Maxim] has included the bare essentials to get an environmentally aware wearable up and running. Alongside the ATtiny85 MCU is a handful of RGB LEDs (with expansion capability to add more), as well as analog light and temperature sensors. With data from the sensors, the ATtiny85 can come up with different colors and blink frequencies for the LEDs, ranging from a randomized light show to a useful interpretation of the local environment.

It’s not much of a stretch to imagine practical applications for this technology. Consider a bracelet that starts flashing red when the wearer’s body temperature gets too high. Making assistive technology visually appealing is always a challenge, and there’s undoubtedly a market for pieces of jewelry that can communicate a person’s physical condition even when they themselves may be unable to.

Form or function, life saving or complete novelty, there’s still time to enter your own project in the 2017 Coin Cell Challenge.

Digital Kiln

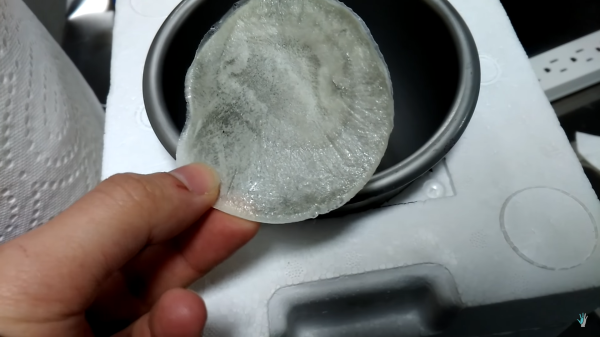
A kiln or foundry is too often seen as a piece of equipment which is only available if a hackspace is lucky enough to have one or individuals are dedicated enough to drop the cash for one of their own. [The Thought Emporium] thought that way until he sourced materials to make his own kiln which can also be seen after the break. It costs half the price of a commercial model not including a failed—and exploded—paint can version.

As described in the video, these furnaces are tools capable of more than just pottery and soft metal baubles. Sure, a clay chess set would be cool but what about carbon fiber, graphene, aerogel, and glass? Some pretty hot science happens at high temperatures.

We get a nice walk-through of each part of the furnace starting with the container, an eleven-gallon metal tub which should set the bar for the level of kiln being built. Some of the hardware arrangements could be tweaked for safety and we insist that any current-carrying screw is safely mounted inside an enclosure which can’t be opened without tools. There’s good advice about grounding the container if metal is used. The explanation of PID loops can be ignored.

What else can you do with a kiln? How about jewelry, heat treating metal, or recycle your beer cans into an engine.

Continue reading “Digital Kiln”

Dumb Box? Make It Really Smart!

[Stephen Harrison]’s Really Smart Box is a great concept, it’s simultaneously a simple idea while at the same time being super clever. The Really Smart Box isn’t really a box; it’s a drop-in platform that can be made any size, intended to turn any dumb storage box into one that helps manage and track levels and usage of any sort of stock or consumable.

It does this by measuring the weight of the stuff piled on top of it, while also monitoring temperature and humidity. The platform communicates this information wirelessly to a back end, allowing decisions to be made about stock levels, usage, and monitoring of storage conditions. It’s clearly best applied to consumables or other stock that comes and goes. The Really Smart Box platform is battery-powered, but spends most of its time asleep to maximize battery life. The prototype uses the SigFox IoT framework for the wireless data, which we have seen before in a wireless swimming pool monitor.

This is still just a prototype and there are bugs to iron out, but it works and [Stephen] intends to set-and-forget the prototype into the Cambridge Makespace with the task of storing and monitoring 3D printer filament. A brief demo video is embedded below.

Continue reading “Dumb Box? Make It Really Smart!”

A Detailed Guide For 3D Printing Enclosures

We’ve all have projects that are done, but not complete. They work, but they’re just a few PCBs wired together precariously on our desks. But fear not! A true maker’s blog has gifted us with a detailed step-by-step guide on how to make a project enclosure.

Having purchased an MP Select Mini 3D Printer, there was little to do but find something practical to print. What better than an enclosure for a recently finished Time/Date/Temperature display Arduino based device?

The enclosure in this guide, while quite nice, isn’t the main attraction here. The real feature is the incredibly detailed instructions for how to design, model and print an enclosure for any project. For the veterans out there, it seems simple. Sketch something on the back of a napkin and take a nap on your keyboard with OpenSCAD open. When you wake, BAM: perfect 3D model. However, for newcomers, the process can seem daunting. With incredibly specific instructions (an example is “Open up a new workspace by clicking CREATE NEW DESIGN,” notice the accurate capitalization!), it should ease the barrier of the first enclosure, turning the inexperienced into the kind-of-experienced.

If you’ve been printing enclosures since the dawn of time or plastic simply isn’t your style, boy, do we have you covered. Why not check out FR4 (aka PCB) enclosures? Or what about laser cut enclosures from eagle files? Maybe two-piece boxes are more your thing.

Building A Better Baby Bottle Boiler

[Sebastian Foerster] hasn’t been at his blog in a while. He and his wife just had twins, so he’s been busy standing waiting for formula or milk to warm up. Being a technical kind of guy, he took a look at the tools currently on the market to do this, analyzed them, and decided instead to do it himself.

[Sebastian] looked to his Nespresso Aeroccino – a milk frother designed to give you hot or cold frothy milk for the top of whatever beverage you decide to put it on top of. It made the milk a bit too hot, 60°C, but once it got to the temperature, it would shut off, so if [Sebastian] could get it to shut off at a lower temperature, he had found the solution!

After taking the Aeroccino apart and going over the circuit, it seemed like a simple design relying on a resistor and NTC (negative temperature coefficient) thermistor connected to an ATTiny44 microcontroller. [Sebastian] didn’t want to have to reprogram the ATTiny, so he looked at the resistor and NTC. The resistor and thermistor create a voltage divider and that voltage is read in by the microcontroller through an analog pin. After looking up some info on the thermistor and replacing the resistor with a potentiometer, [Sebastian] could adjust the shut-off temperature while measuring with a thermometer. When he got the temperature he liked, he reads the value of the potentiometer and then replaces it with a couple of resistors in series.

Now [Sebastian] gets the babies’ bottles ready from fridge to temperature in about 25 seconds. He doesn’t have to worry about keeping an eye on the bottles as they heat up. We’re sure that getting two bottles ready in under a minute is much better on the nerves of new parents than waiting around for ten minutes. For more fun with thermistors, check out our article on resistors controlled by the environment or check out this bluetooth bbq thermometer!