A Minimal ESP8266 Digital Picture Frame

Over the last few years, the price of a good digital picture frame has dropped to the point that we don’t often see DIY versions anymore. As much as we might hate to admit it, it’s hard to justify building something yourself when the economies of scale have made it so you can buy the final product for less than the cost of the parts themselves. But of course, there are always fringe cases where building it might be the only way to get what you need.
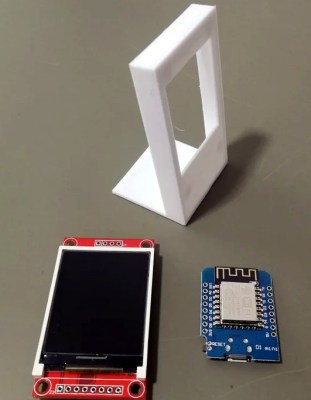
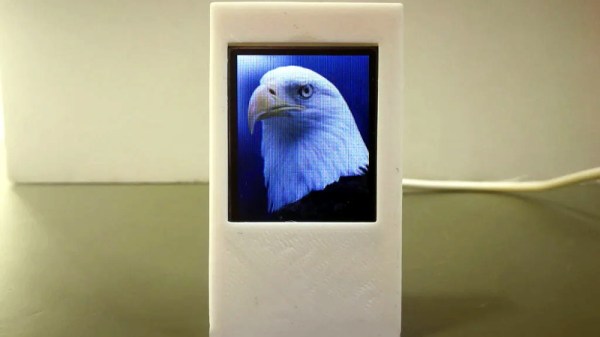
Granted we’re not sure that [Tony Liu] actually needs a 1.8-inch digital picture frame, but we’re sure somebody out there does. The ST7735R display used in this project is a real TFT, so the color and refresh rate is pretty good; but with a resolution of just 128×160, we’d recommend keeping your expectations low in regards to visual fidelity.

What’s really interesting about this project is how low the part count is. All you need is the ST7735R display and the ESP8266 itself (or the development board of your choice, naturally). Even the 3D printed frame is technically optional. The display is driven by SPI, so with the power added in, that’s only eight wires that need to be soldered between the two devices. If you’re looking for an easy way to add a photo slideshow to a small device, say a conference badge, this is about as easy as it gets.

But where are the images coming from? You might think SPIFFS, but in this case [Tony] has converted the images to bitmaps and is loading them into the Arduino Sketch as a header file with PROGMEM. Helpfully, he provides the link for the tool he uses to convert the images into an array the graphics library can understand. This makes adding new images slightly time consuming, but we imagine if you have the need for something like this, it’s probably only showing a pretty specific set of images anyway.

If you’re looking for something bigger, or maybe just an excuse to put that dusty Raspberry Pi to use, you might be interested in one of the more substantial builds we’ve seen over the years.

Continue reading “A Minimal ESP8266 Digital Picture Frame”

This Tiny TFT Pendant Is Digital Jewelry

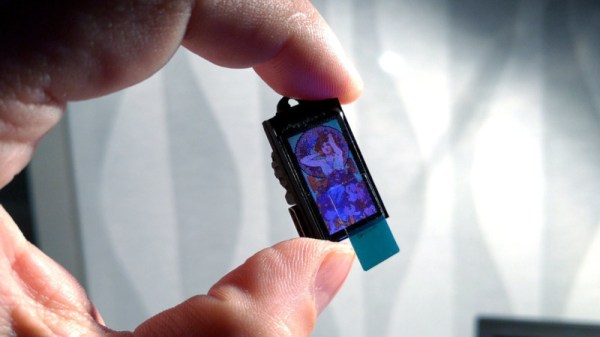
Hackers have a multitude of skills, many are well-versed in the ways of all things that blink and flash. These abilities have often be applied to the field of jewelry and human adornment, and many LEDs have been employed in this work. [Deshipu] has been attempting something a touch different however, by constructing a tiny TFT pendant.

The basic idea is not dissimilar from those USB photo keychains of recent history. A SAMD21 Cortex M0+ serves as the brains of the operation, with the tiny microcontroller being soldered to a custom PCB that makes up the body of the pendant. A ST7735S TFT LCD screen is then attached to act as the display. Charging and delivery of images is done over USB, which can be handled natively by the SAMD21.

Currently, the pendant is capable of displaying 16-color BMPs, with the intention to create a converter for animated GIFs in the pipeline. Potential upgrades also involve creating a larger battery pack to sit behind the wearer’s neck, as currently the device has just 8 mAh to work with.

It’s a nicely designed piece, with the pendant appearing barely bigger than the screen itself. It’s not the first time we’ve seen a hacker take on a pendant, and we’re sure it won’t be the last. If you’ve got the goods, be sure to hit up the tip line. 

ESP8266 Gets Its Game On With Open Source Engine

This is likely not to come as much of a shock to you, but the ESP8266 is pretty popular. At this point, we’re more surprised when a project that hits the tip line doesn’t utilize this incredibly cheap WiFi-enabled microcontroller. If you’re making a gadget that needs to connect to the Internet, there’s a good chance some member of the ESP family is going to be a good choice. But is it a one-trick MCU?

ESP Little Game Engine Logo

Well, judging by software frameworks like the “Little Game Engine” created by [Igor], it looks like the ESP is expanding its reach into offline projects as well. While it might not turn the ESP8266 into a next-gen gaming powerhouse, we’ve got to admit that the demos shown off so far are pretty impressive. When paired with a couple of buttons and a TFT display such as the ILI9341, the ESP could make for a particularly pocket-friendly game system.

The game engine that [Igor] has developed provides the programmer with a virtual screen resolution of 128×128, a background layer, and 32 sprites which offer built-in tricks like collision detection and rotation. All while running at a respectable 20 frames per second. This environment is ideal for the sort of 2D scrolling games that dominated the 8 and 16-bit era of gaming, and as seen in the video after the break, it can even pull off a fairly decent clone of “Flappy Bird”.

In addition, [Igor] created an online emulator and compiler which allows you to develop games using his engine right in your web browser. You can load up a selection of example programs and execute them to see what the engine is capable of, then try your hand at developing your own game before ever having to put the hardware together. Incidentally, the performance of this online development environment is fantastic; with even the fairly complex “Flappy Bird” example code compiling and starting in the emulator nearly instantaneously.

This isn’t the first handheld game we’ve seen powered by the ESP8266, but it would be fair to say this one is a generational leap over its predecessors. Of course, if you really want to start throwing around some pixels, you might want to make the leap to the ESP32; which is the heart of the incredibly awesome (and tiny) PocketSprite.

Continue reading “ESP8266 Gets Its Game On With Open Source Engine”

Spooky Animated Eyes For Your Frightening Needs

Unless you have an incredibly well-stocked parts bin, it’s probably too late to build these spooky animated eyes to scare off the neighborhood kiddies this year. But next year…

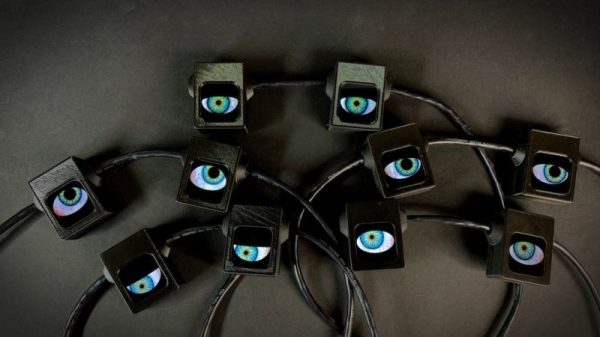
It’s pretty clear that Halloween decorating has gone over the top recently. It may not be as extreme as some Christmas displays, but plenty of folks like to up the scare-factor, and [wermy] seems to number himself among those with the spirit of the season. Like Christmas lights, these eyes are deployed as a string, but rather than just blink lights, they blink creepy eyes from various kinds of creatures. The eyes are displayed on individual backlit TFT-LCD displays housed in 3D-printed enclosures. Two pairs of eyes can be driven by the SPI interface of one ItsyBitsy M0 Express; driving more displays works, but the frame rate drops to an unacceptable level if you stretch it too far. Strung together on scraps of black ethernet cable, the peepers can live in the shrubs next to the front door or lining the walk, and with surprisingly modest power needs, you’ll get a full night of frights from a USB battery bank.

We like the look of these, and maybe we’ll do something about it next year. If you’re still in the mood to scare and don’t have the time for animated eyes this year, try these simple Arduino blinky eyes for a quick hit.

Continue reading “Spooky Animated Eyes For Your Frightening Needs”

This Nearly NIMO Clock Fakes It And Makes It

Pity the aficionado of rare vintage displays. While Nixies and VFD tubes get all the attention and benefit from a thriving market to satisfy demand, the rarer displays from the mid-20th century period are getting harder and harder to find. One copy of an especially rare display is hard enough to find. Six copies for a clock? That’s a tall order.

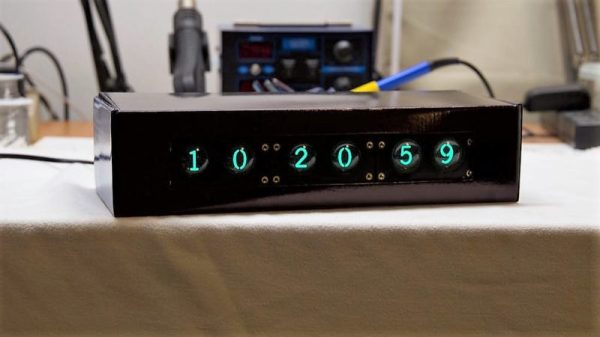
That doesn’t mean you can’t fudge it, though, which is how this faux-NIMO clock came to be. [Paul Bricmont] was inspired by [Fran Blanche]’s NIMO tube primer, wherein the rare, single-digit CRT display was put through its paces. We’ve got to admit, it’s an easy display to fall in love with, thanks to its eerie blue phosphor glow, high voltage supply, and general quirkiness. [Paul] was unable to lay hands on a single tube, though, so he faked it with six tiny TFT displays and some plastic lenses. The lenses mimic the curved front glass of the original NIMO, while the TFT displays provide the stencil-style images of each numeral. The phosphor glow comes from replacing the stock white TFT backlight with a Neopixel array that can produce just the right shade of blue-green. 3D-printed modules hold two digits each, and the usual Arduino components run the show. The effect is quite convincing, although we bet some software tweaks could add things like faux burn-in and perhaps soften the edges of the digits to really sell it.

What other rare displays could be replicated this way? Given the variety of displays that were tried in the pre-LED era, it may be a rich vein to mine.

Pocket-Sized Workstation Sports Pi Zero, Pop-Up Screen

Many of us could use a general-purpose portable workstation, something small enough to pocket but still be ready for a quick troubleshooting session. Terminal apps on a smartphone will usually do the job fine, but they lack the panache of this pocketable pop-top Raspberry Pi workstation.

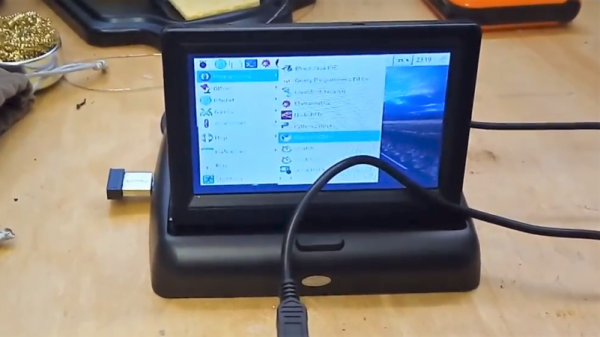
It doesn’t appear that [Michael Horne] has a specific mission in mind for his tiny Linux machine, but that’s OK — we respect art for art’s sake. The star of the show is the case itself, a unit intended for dashboard use with a mobile DVD player or backup camera. The screen is a 4.3″ TFT with a relatively low-resolution, so [Michael] wasn’t expecting too much from it. And he faced some challenges, like dealing with the different voltage needs for the display and the Raspberry Pi Zero W he intended to stuff into the base. Luckily, the display regulates the 12-volt supply internally to 3.3-volts, so he just tapped into the 3.3-volt pin on the Pi and powered everything from a USB charger. The display also has some smarts built in, blanking until composite video is applied, which caused a bit of confusion at first. A few case mods to bring connectors out, a wireless keyboard, and he had a nice little machine for whatever.

No interest in a GUI machine? Need a text-only serial terminal? We’ve seen that before too. And here’s one with a nice slide-out keyboard built in.

Continue reading “Pocket-Sized Workstation Sports Pi Zero, Pop-Up Screen”

Tracking Planes With An ESP8266

While there are apps that will display plane locations, [squix] wanted to build a dedicated device for plane spotting. The ESP8266 PlaneSpotter Color is a standalone device that displays a live map with plane data on a color TFT screen. This device expands on his PlaneSpotter project, adding a color display and mapping functions.

First up, the device needs to know where planes are. The ADS-B data that is transmitted from planes contains useful data including altitude, velocity, position, and an identifier unique to the aircraft. While commercial services exist for getting this data, the PlaneSpotter uses ADS-B Exchange. You can set up a Raspberry Pi to record this data, and provide it to ADS-B Exchange.

With the plane data being received from the ADS-B Exchange API, it’s time to draw to the screen. The JPEGDecoder fork for ESP8266 is used for drawing images, which are fetched from the MapQuest API as JPEGs.

Finally, geolocation is needed to determine where in the world the PlaneSpotter is. Rather than adding a GPS module, [squix] went with a cheap solution: WiFi geolocation. This uses identifying information and signal strengths from nearby WiFi access points to determine location. This project uses a public API by [Alexander Mylnikov], which returns a JSON object with longitude and latitude.

This project demonstrates what the ESP8266 is capable of, and brings together some neat techniques. If you’re looking to geolocate or display maps on an ESP8266, the code is available on Github.

Continue reading “Tracking Planes With An ESP8266”