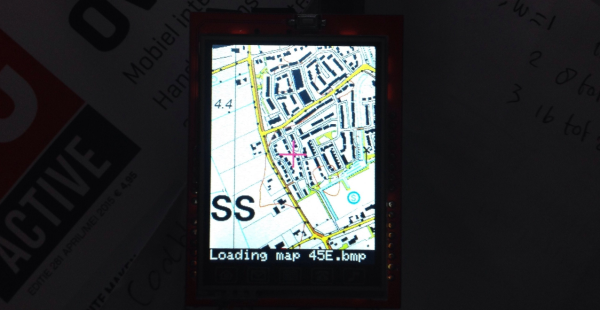
While there are apps that will display plane locations, [squix] wanted to build a dedicated device for plane spotting. The ESP8266 PlaneSpotter Color is a standalone device that displays a live map with plane data on a color TFT screen. This device expands on his PlaneSpotter project, adding a color display and mapping functions.
First up, the device needs to know where planes are. The ADS-B data that is transmitted from planes contains useful data including altitude, velocity, position, and an identifier unique to the aircraft. While commercial services exist for getting this data, the PlaneSpotter uses ADS-B Exchange. You can set up a Raspberry Pi to record this data, and provide it to ADS-B Exchange.
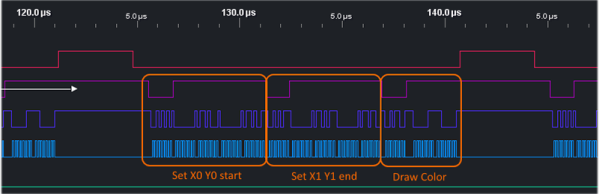
With the plane data being received from the ADS-B Exchange API, it’s time to draw to the screen. The JPEGDecoder fork for ESP8266 is used for drawing images, which are fetched from the MapQuest API as JPEGs.
Finally, geolocation is needed to determine where in the world the PlaneSpotter is. Rather than adding a GPS module, [squix] went with a cheap solution: WiFi geolocation. This uses identifying information and signal strengths from nearby WiFi access points to determine location. This project uses a public API by [Alexander Mylnikov], which returns a JSON object with longitude and latitude.
This project demonstrates what the ESP8266 is capable of, and brings together some neat techniques. If you’re looking to geolocate or display maps on an ESP8266, the code is available on Github.


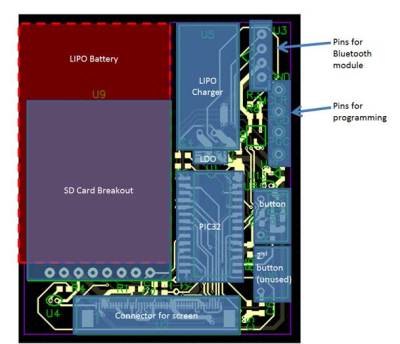 and meant one shot at getting his custom PCB right.