Turntable Spins Color And Sound Together

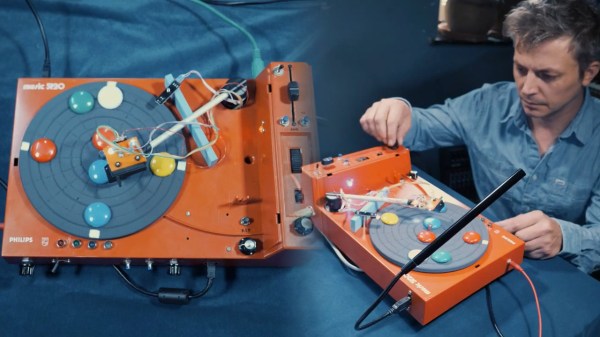
If you can’t grow your own synesthesia, buying electronics to do it for you is fine. Such is the case with the CHROMATIC by [Xavier Gazon], an artist who turns all kinds of electronics into circuit-bent musical art pieces. His project turns an old Philips Music 5120 turntable into a colorful MIDI sequencer, inspired by older 20th century instruments such as the Optophonic Piano and the Luminaphone.

The CHROMATIC uses colored pucks placed on a converted turntable to perform a looping sequence of chords in a given musical scale, generating MIDI data as output. Where its inspirations used primitive optics as their medium, this project employs a Teensy microcontroller and two modern optical sensors to do the work. One of these is a simple infrared sensor which tracks a white spot on the edge of the turntable, generating a MIDI clock signal to keep everything quantized and in sync. The other is a color sensor mounted on the tone arm, which can tell what color it sees and the height of the arm from the turntable.

While the instrument is still in beta testing phase details on how notes are generated aren’t yet given, though the general idea is that they are dictated by the color the tone arm sees and its position above the platter. Moving the tone arm changes which pucks it tracks, and the speed of the turntable can also be adjusted, changing how the melody sounds.​

The CHROMATIC is a very interesting project, but it’s not the first optical-based turntable hack we’ve seen here. We’ve also seen a much weirder use for a color sensor, too. Check out the video of this one in action after the break.

Continue reading “Turntable Spins Color And Sound Together”

Printed It: Hand Cranked Photography Turntable

Even a relatively low-end desktop 3D printer will have no problems running off custom enclosures or parts for your latest project, and for many, that’s more than worth the cost of admission. But if you’re willing to put in the time and effort to become proficient with necessary CAD tools, even a basic 3D printer is capable of producing complex gadgets and mechanisms which would be extremely time consuming or difficult to produce with traditional manufacturing techniques.

Printable bearing cross-section

Once you find yourself at this stage of your 3D printing career, there’s something of a fork in the road. The most common path is to design parts which are printed and then assembled with glue or standard fasteners. This is certainly the easiest way forward, and lets you use printed parts in a way that’s very familiar. It can also be advantageous if you’re looking to meld your own printed parts with existing hardware.

The other option is to fully embrace the unique capabilities of 3D printing. Forget about nuts and bolts, and instead design assemblies which snap-fit together. Start using more organic shapes and curves. Understand that objects are no longer limited to simple solids, and can have their own complex internal geometries. Does a hinge really need to be two separate pieces linked with a pin, or could you achieve the desired action by capturing one printed part inside of another?

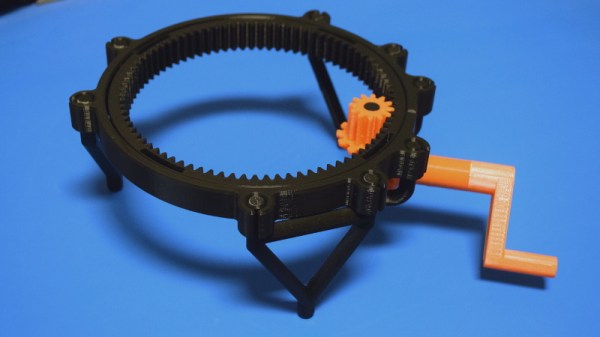
If you’re willing to take this path less traveled, you may one day find yourself creating designs such as this fully 3D printed turntable by Brian Brocken. Intended for photographing or 3D scanning small objects without breaking the bank, the design doesn’t use ball bearings, screws, or even glue. Every single component is printed and fits together with either friction or integrated locking features. This is a functional device that can be printed and put to use anywhere, at any time. You could print one of these on the International Space Station and not have to wait on an order from McMaster-Carr to finish it.

With such a clever design, I couldn’t help but take a closer look at how it works, how it prints, and perhaps even some ways it could be adapted or refined going forward.

Continue reading “Printed It: Hand Cranked Photography Turntable”

A Scratch Instrument For Ants

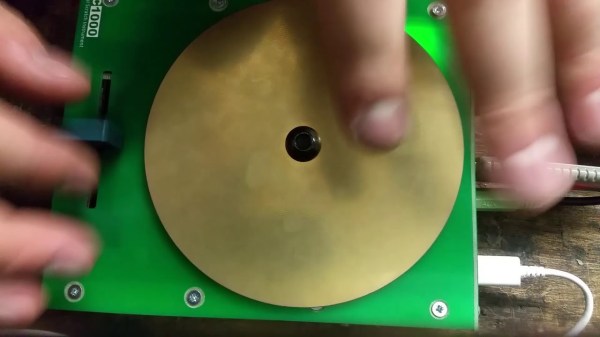
If you think that this scratch instrument looks as though it should be at least… three times larger in order to be useful, you’d be wrong. This mighty pocket-sized instrument can really get the club hopping despite its diminuitive size. Despite that, the quality of the build as well as its use of off-the-shelf components for almost every part means that if you need a small, portable turntable there’s finally one you can build on your own.

[rasteri] built the SC1000 digital scratch instrument as a member of the portabilist scene, focusing on downsizing the equipment needed for a proper DJ setup. This instrument uses as Olimex A13-SOM-256 system-on-module, an ARM microprocessor, and can use a USB stick in order to load beats to the system. The scratch wheel itself uses a magnetic rotary encoder to sense position, and the slider is miniaturized as well.

If you want to learn to scratch good and learn to do other things good too, there’s a demo below showing a demonstration of the instrument, as well as a how-to video on the project page. All of the build files and software are open-source, so it won’t be too difficult to get one for yourself as long as you have some experience printing PCBs. If you need the rest of the equipment for a DJ booth, of course that’s also something you can build.

Continue reading “A Scratch Instrument For Ants”

Automated Turntable For 3D Scanning

Those just starting out in 3D printing often believe that their next major purchase after the printer will be a 3D scanner. If you’re going to get something that can print a three dimensional model, why not get something that can create said models from real-world objects? But the reality is that only a small percentage ever follow through with buying the scanner; primarily because they are notoriously expensive, but also because the scanned models often require a lot of cleanup work to be usable anyway.

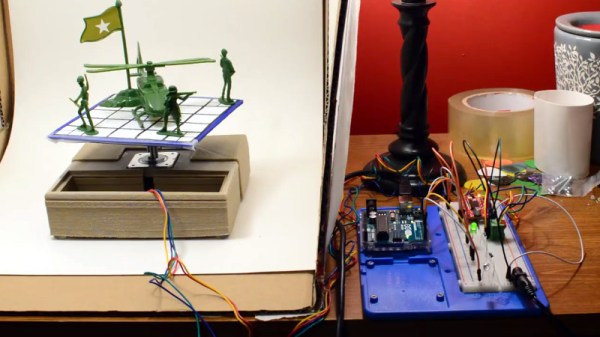
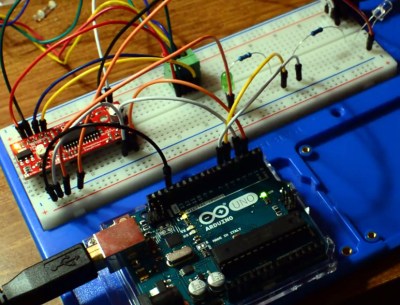
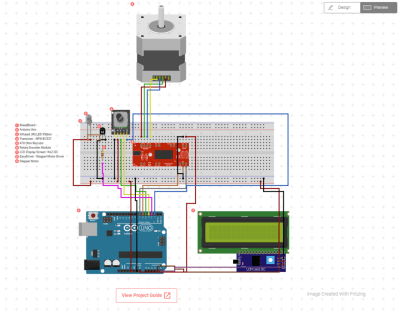
While this project by [Travis Antoniello] won’t make it any easier to utilize scanned 3D models, it definitely makes them cheaper to acquire. So at least that’s half the battle. Consisting primarily of a stepper motor, an Arduino, and a EasyDriver controller, this is a project you might be able to assemble from the parts bin. Assuming you’ve got a pretty decent camera in there, anyway…

The general idea is to place a platform on the stepper motor, and have the Arduino rotate it 10 degrees at a time in front of a camera on a tripod. The camera is triggered by an IR LED on one of the Arduino’s digital pins, so that it takes a picture each time the platform rotates. There are configurable values to give the object time to settle down after rotation, and a delay to give the camera time to take the picture and get ready for the next one.

Once all the pictures have been taken, they are loaded into special software to perform what’s known as photogrammetry. By compiling all of the images together, the software is able to generate a fairly accurate 3D image. It might not have the resolution to make a 1:1 copy of a broken part, but it can help shave some modeling time when working with complex objects.

We’ve previously covered the use of photogrammetry to design 3D printed accessories, as well as a slightly different take on an automated turntable a few years ago. The process is still not too common, but the barriers to giving it a try on your own are at least getting lower.

Continue reading “Automated Turntable For 3D Scanning”

Making A Motorized Turntable Portable

[Robin Reiter] needed a better way to show off his work. He previously converted an electric TV stand into a full 360-degree display turntable, but it relied on an external power supply to get it spinning. It was time to give it an upgrade.

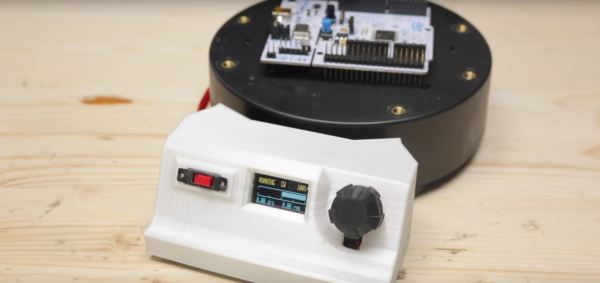
Putting his spacial organization skills to work, [Reiter] has crammed a mini OLED display, rotary encoder, a LiPo 18650 battery and charging circuit, a pair of buck converters, a power switch, and an Arduino pro mini into the small control console. To further maximize space, [Reiter] stripped out the pin headers and wired the components together directly. It attaches to the turntable in question with magnets, so it can be removed out of frame, or for displaying larger objects!

When first powered on, the turntable holds in pause mode giving [Reiter] time to adjust the speed and direction. He also took the time to add an optical rotary encoder disk to the turntable and give the gearing a much needed cleaning. Check out the project video after the break!

Continue reading “Making A Motorized Turntable Portable”

This DIY Turntable Just Got Freaky Fresh

Photography turntables are made for both the precise and lazy. Whether you are concerned about the precision of consistent angles during a photo shoot or you simply do not want to stand there rotating a plate after every picture — yes, it does get old — a lazy susan style automatic photography turntable is the ticket. This automatic 360° design made over at circuito.io satisfies both of these needs in an understated package

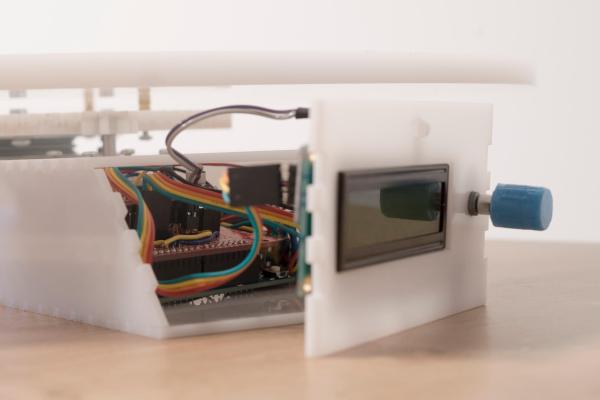
The parts required to make this DIY weekend project are about as minimal as they get. An Arduino Uno controls it all with a rotary encoder for input and a character LCD to display settings. The turntable moves using a stepper motor and an EasyDriver. It even takes care of controlling the camera using an IR LED.

The biggest obstruction most likely to arise is creating the actual laser cut casing itself. The circuito team avoided this difficulty by using Pololu‘s online custom laser cutting service for the 4 necessary laser cut parts. After all of the components have been brought together, all that is left to do is Avengers assemble. They provide step by step instructions for this process in such a straightforward way that you could probably put this sucker together blindfolded.

We have seen some other inspired photography turntables on Hackaday before. [NotionSunday] created a true turntable hack based off of the eject mechanism of an old DVD-ROM drive. With the whole thing spinning on the head assembly of a VCR, this is the epitome of letting nothing go to waste. We also displayed another very similar Arduino Uno controlled turntable created 2 years ago by [Tiffany Tseng]. There is even a non-electronic version out there of a DIY 360° photography turntable that only uses a lazy susan and tape measure. All of these photography turntable hacks do the job wonderfully, but there was something that we liked about the clean feel of this one. All of the necessary code for this project has been provided over at GitHub. What is your favorite photography turntable?

Motorized Turntable Created From TV Stand

[Robin Reiter] had a powered TV stand that only rotates around 20°, because who really needs their TV to rotate fully? He wanted to turn it into a motorized turntable for shooting videos, but first he had to hack it.

After opening it up [Robin] discovered that there was a surprising amount of electronics in the base. In addition to a DC motor, there was a potentiometer attached to a gear to give feedback, but it was set up for partial rotation so it had to be yanked out.

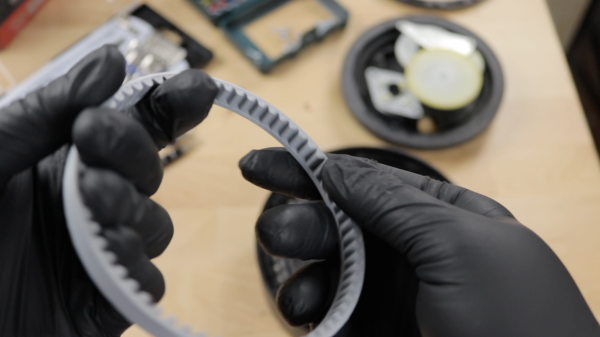
There was also a plastic gear with teeth around just part of the interior. [Robin] took a picture of the gear and dropped it into Fusion360, using the photo as a reference image while he re-created the gear. The new piece had teeth all around the periphery. After printing it out he glued it into the old gearbox, and now he had turned his TV stand into a motorized turntable.

If you’re looking for more along these lines, check out our posts on making parametric models in Fusion360 and turning a turntable into a waveform generator. Continue reading “Motorized Turntable Created From TV Stand”