Generate Positivity With Machine Learning

Gesture recognition and machine learning are getting a lot of air time these days, as people understand them more and begin to develop methods to implement them on many different platforms. Of course this allows easier access to people who can make use of the new tools beyond strictly academic or business environments. For example, rollerblading down the streets of Atlanta with a gesture-recognizing, streaming TV that [nate.damen] wears over his head.

He’s known as [atltvhead] and the TV he wears has a functional LED screen on the front. The whole setup reminds us a little of Deep Thought. The screen can display various animations which are controlled through Twitch chat as he streams his journeys around town. He wanted to add a little more interaction to the animations though and simplify his user interface, so he set up a gesture-sensing sleeve which can augment the animations based on how he’s moving his arm. He uses an Arduino in the arm sensor as well as a Raspberry Pi in the backpack to tie it all together, and he goes deep in the weeds explaining how to use Tensorflow to recognize the gestures. The video linked below shows a lot of his training runs for the machine learning system he used as well.

[nate.damen] didn’t stop at the cheerful TV head either. He also wears a backpack that displays uplifting messages to people as he passes them by on his rollerblades, not wanting to leave out those who don’t get to see him coming. We think this is a great uplifting project, and the amount of work that went into getting the gesture recognition machine learning algorithm right is impressive on its own. If you’re new to Tensorflow, though, we have featured some projects that can do reliable object recognition using little more than a Raspberry Pi and a camera.

Continue reading “Generate Positivity With Machine Learning”

A Homebrew Radio, As All The Best Homebrew Radios Should Be

It started with an old TV sound chip, and some curiosity. The TDA1701 that [Philip Bragg] found in a box of junk is a complete FM IF strip and audio power amplifier from the golden age of analogue PAL televisions, and while it was designed for the 5.5 MHz or 6 MHz FM subcarrier of European broadcast TV, he found it worked rather well at the more usual 10.7 MHz of a radio receiver. There followed a long thread detailing the genesis bit-by-bit of a decent quality VHF radio receiver, built dead-bug-style on a piece of PCB material.

The TDA1701 was soon joined by a couple of stages of IF amplification with a ceramic filter, and then by several iterations of a JFET mixer. A varicap tuned MOSFET RF amplifier followed, and then a local oscillator. Finally it became a fully-functional FM radio, with probably far better performance than most commercial radios. He admits tuning is a little impractical though, with what appears to be a cermet preset potentiometer covering the entire band.

We suspect this project isn’t finished, and we hope he posts the schematic. But it doesn’t really matter if he doesn’t, because the value here isn’t in the design. Instead it lies in the joy of creating an ad-hoc radio just for the fun of it, and that’s something we completely understand.

We’ve covered a lot of radios in our time, and while it might be the first to feature a TV sound chip, it’s not the first built on bare PCB.

Adding RGB To A CRT

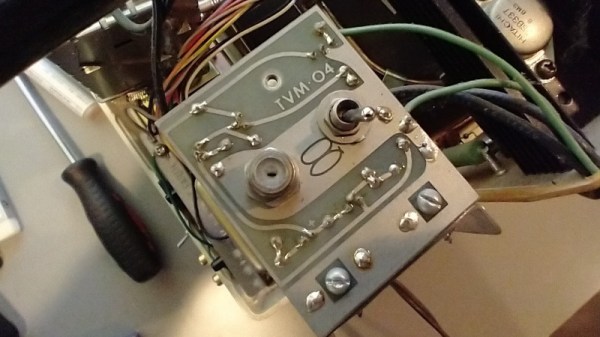
There was a time when all TVs came with only an antenna socket on their backs, and bringing any form of video input to them meant dicing with live-chassis power supplies. Then sets with switch-mode supplies made delving into a CRT TV much safer, and we could bodge in composite video and even RGB sockets by tapping into their circuitry. For Europeans the arrival of the SCART socket gave us ready-made connectivity, but in the rest of the world there was still a need to break out the soldering iron for an RGB input. [Jacques Gagnon] is in Canada, and has treated us to a bit of old-school TV input hacking as he put an RGB socket on his JVC CRT set.

Earlier hacks had inventive incursions into discrete analogue circuitry, but on later sets such as this one the trick was to take advantage of the on-screen-display features. The signal processing chip would usually have an RGB input with a blanking input to turn of the picture during the OSD chip’s output. These could be readily hijacked to provide an RGB input, and this is the course taken here. We see a VGA socket on the rear panel going to a resistor network on a piece of protoboard stuck in a vacant space on the PCB, from which a set of lines then go to the signal processing chip. The result is a CRT gaming monitor for retro consoles, of the highest quality.

For those of us who cut our teeth on CRT TVs it’s always good to see a bit of TV hacking. It’s a mod we’ve seen before, too.

See The Damage 250-Pound Combat Robots Get

Combat robots have been a thing for a while, but we don’t normally get a close look at the end results of the sort of damage they can both take and deal out. [Raymond Ma] spent time helping out with season four of BattleBots and wrote about the experience, as well as showed several pictures of the kind of damage 250-pound robots can inflict upon each other. We’ve embedded a few of them here, but we encourage you to read [Raymond]’s writeup and see the rest for yourself.

The filming for a season of BattleBots is done in a relatively short amount of time, which means the pacing and repair work tends to be more fast and furious than slow and thoughtful. [Raymond] says that it isn’t uncommon for bots, near the end of filming, to be held together with last-minute welds, wrong-sized parts, and sets of firmly-crossed fingers. This isn’t because the bots themselves are poorly designed or made; it’s because they can get absolutely wrecked by the forces at play.

Continue reading “See The Damage 250-Pound Combat Robots Get”

Raspberry Pi Serves Up 24 Hour Simpsons Channel

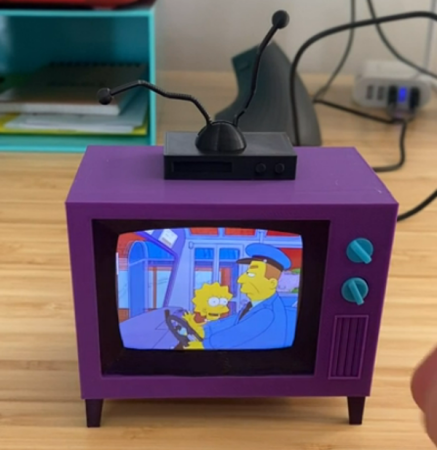
Commercial-free video on demand was every couch potato’s dream for decades, and now we’ve got it. But nostalgia has a funny way of making some folks miss the old days, even if we know it’s technically be a step backwards. Wanting to recreate the TV watching experience circa 1998, [probnot] has come up with a way to run his very own television channel.

With the Raspberry Pi and a digital modulator, he’s got the only house on the block that’s wired to show The Simpsons all day. He has absolutely no control over which episode plays next, he can’t pause it, and its in presented in standard definition (a nightmare for anyone who grew up in the Netflix era) but a familiar viewing experience for the rest of us.

Where we’re going, we don’t need HDMI.

The key to this project is the Channel Plus Model 3025 modulator. It takes the feed from the antenna and mixes in two composite video sources on user-defined channels. All [probnot] had to do was find a channel that wouldn’t interfere with any of the over-the-air stations. The modulator has been spliced into the house’s coax wiring, so any TV connected to the wall can get in on the action. There’s no special setup required: when he wants to watch The Simpsons he just tunes the nearest TV to the appropriate channel.

Providing the video for the modulator is a Raspberry Pi, specifically, the original model that featured composite video output. While the first generation Pi is a bit long in the tooth these days, playing standard definition video is certainly within its capabilities. With a USB flash drive filled with a few hundred episodes and a bit of scripting it’s able to deliver a never-ending stream direct from Springfield. There’s still that second channel available on the modulator as well, which we’re thinking could be perfect for Seinfeld or maybe The X-Files.

Interestingly, this isn’t the first time we’ve seen a Raspberry Pi used to provide a never-ending stream of The Simpsons. But compared to previous attempts which had to be directly connected to the TV, we like the idea of using the modulator and creating a more authentic experience.

Continue reading “Raspberry Pi Serves Up 24 Hour Simpsons Channel”

It’s A TV-Scope-Guitar Amplifier!

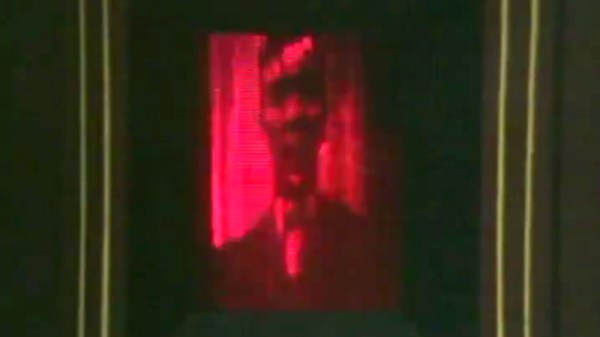
Guitar amplifiers are a frequent project, and despite being little more than a simple audio amplifier on paper, they conceal a surprising quantity of variables in search of a particular sound. We’ve seen a lot of them, but never one quite like [Nate Croson]’s CRT TV guitar amplifier. The LM386 doesn’t just drive the speaker, he’s also using it to turn the TV into a crude oscilloscope to form a visualisation of the sound.

The video showing this feat is below the break, and it puts us in a quandary due to being short on technical information. He’s driving the horizontal coils with the TV’s 50 Hz sawtooth field timebase, and the vertical ones with the audio from the LM386. We aren’t sure whether he’s rotated the yoke or whether the connections have been swapped, but the result is certainly impressive.

So given that there’s not quite as much technical detail as we’d like, why has this project captured our interest? Because it serves as a reminder that a CRT TV is a bit more than a useless anachronism, it’s a complex analogue device with significant and unique hacking potential. The older ones in particular provide endless possibilities for modification and circuit bending, and make for a fascinating analogue playground at a very agreeable price. It’s worth pointing out however that some of the voltages involved can make them a hazardous prospect for the unwary hacker. If you’re interested though, take a look at our dive into an older model.

Continue reading “It’s A TV-Scope-Guitar Amplifier!”

Designing Sci-Fi Hack Chat

Join us on Wednesday, October 9 at noon Pacific for the Designing Sci-Fi Hack Chat with Seth Molson!

We all know the feeling of watching a movie set in a galaxy far, far away and seeing something that makes us say, “That’s not realistic at all!” The irony of watching human actors dressed up as alien creatures prancing across a fantasy landscape and expecting realism is lost on us as we willingly suspend disbelief in order to get into the story; seeing something in that artificial world that looks cheesy or goofy can shock you out of that state and ruin the compact between filmmaker and audience.

Perhaps nowhere do things get riskier for filmmakers than the design of the user interfaces of sci-fi and fantasy sets. Be they the control panels of spacecraft, consoles for futuristic computers, or even simply the screens of phones that are yet to be, sci-fi UI design can make or break a movie. The job of designing a sci-fi set used to be as simple as wiring up strings of blinkenlights; now, the job falls to a dedicated artist called a Playback Designer who can create something that looks fresh and new but still plausible to audiences used to interacting with technology that earlier generations couldn’t have dreamed of.

Seth Molson​ is one such artist, and you’ve probably seen some of his work on shows such as TimelessStargate Universe, and recently Netflix’s reboot of Lost in Space. When tasked to deliver control panels for spacecraft and systems that exist only in a writer’s mind, Seth sits down with graphics and animation software to make it happen.

Join us as we take a look behind the scenes with Seth and find out exactly what it’s like to be a Playback Designer. Find out what Seth’s toolchain looks like, how he interacts with the rest of the production design crew to come up with a consistent and believable look and feel for interfaces, and what it’s like to design futures that only exist — for now — in someone’s imagination.

join-hack-chatOur Hack Chats are live community events in the Hackaday.io Hack Chat group messaging. This week we’ll be sitting down on Wednesday, October 9 at 12:00 PM Pacific time. If time zones have got you down, we have a handy time zone converter.

Click that speech bubble to the right, and you’ll be taken directly to the Hack Chat group on Hackaday.io. You don’t have to wait until Wednesday; join whenever you want and you can see what the community is talking about.