Watch This LEGO Pantograph Carve Chocolate Messages

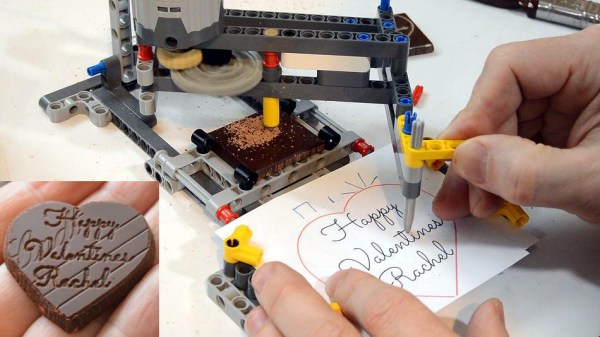
[Matthias Wandel] is best known for his deeply interesting woodworking projects, so you might be forgiven for not expecting this lovely chocolate-engraving pantograph made from LEGO. With it, he carves a delightful valentine’s message into a square of chocolate, but doesn’t stop there. He goes the extra mile to cut the chocolate carefully into a heart, and a quick hit with a heat gun takes the rough edges off for a crisp and polished end result.

The cutting end is a small blade stuck inside a LEGO piece, but that’s the only non-LEGO part in the whole assembly. A key to getting a good carve was to cool the chocolate before engraving, and you can see the whole process in the video embedded below.

Continue reading “Watch This LEGO Pantograph Carve Chocolate Messages”

Freeform Wire Frame Tulip Blooms To The Touch

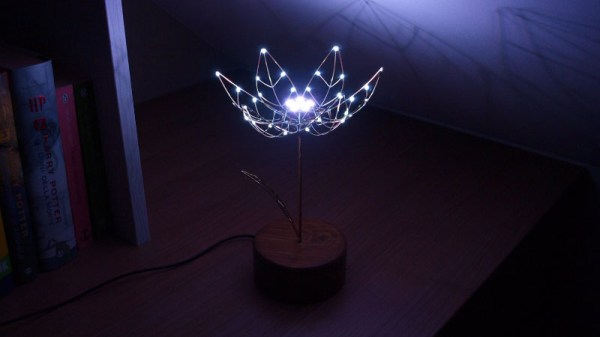
Holidays are always good for setting a deadline for finishing fun projects, and every Valentine’s Day we see projects delivering special one-of-a-kind gifts. Why buy a perishable bulk-grown biological commodity shipped with a large carbon footprint when we can build something special of our own? [Jiří Praus] certainly seemed to think so, his wife will receive a circuit sculpture tulip that blooms when she touches it.

via @jipraus

This project drew from [Jiří]’s experience with aesthetic LED projects. His Arduino-powered snowflake, with LEDs mounted on a custom PCB, is a product available on Tindie. For our recent circuit sculpture contest, his entry is a wire frame variant on his snowflake. This tulip has 7 Adafruit NeoPixel in the center and 30 white SMD LEDs in the petals, which look great. But with the addition of mechanical articulation, this project has raised the bar for all that follow.

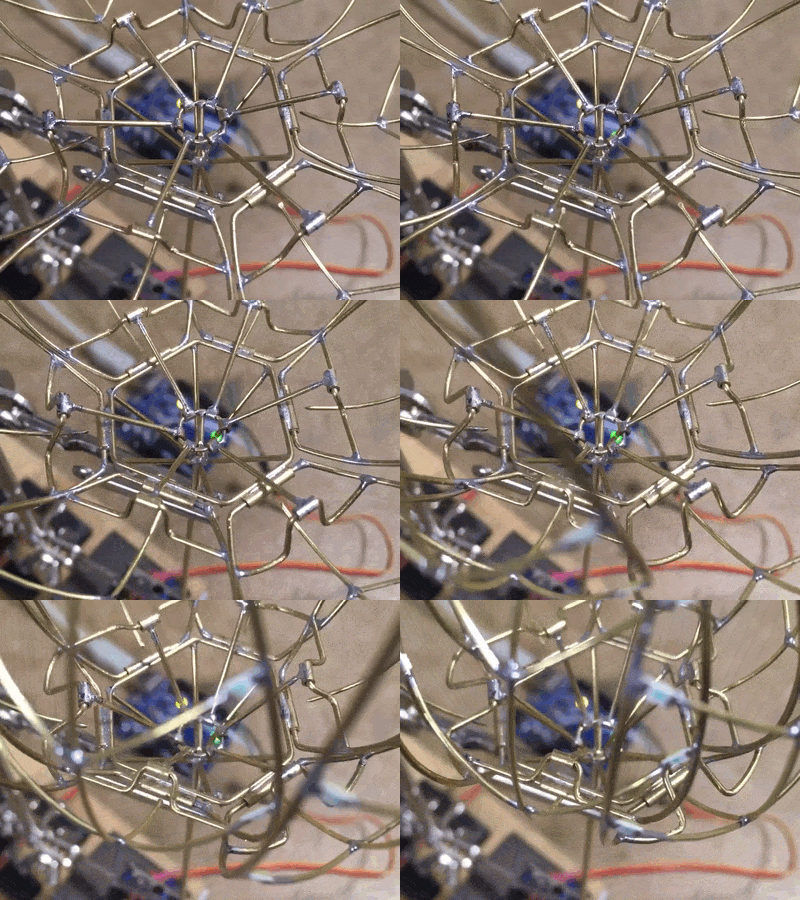
We hope [Jiří] will add more details for this project to his Hackaday.io profile. In the meantime, look over his recent Tweets for more details on how this mechanical tulip works. We could see pictures and short videos of details like the wire-and-tube mechanism that allowed all the petals to be actuated by a single servo, and the components that are tidily packaged inside that wooden base.

Need more digital expressions of love? We have no shortage of hearts. Animated LED hearts, illuminated acrylic hearts, and talking hearts. We’re a little short on flower projects, but we do have X-ray of a rose among others to accompany [Jiří]’s tulip.

Continue reading “Freeform Wire Frame Tulip Blooms To The Touch”

Valentine’s Heart With Awesome Animations

January has drawn to a close, and for many of you that means: “Oh no! Less than two weeks’ time until Valentine’s day.” But for us here at Hackaday, it means heart-themed blinky projects. Hooray!

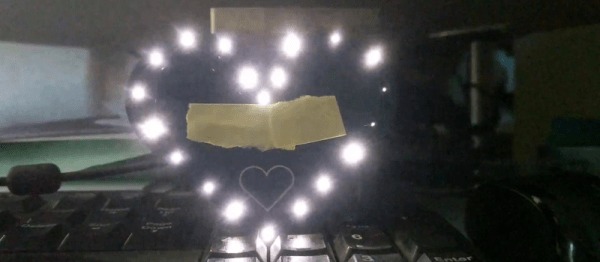
[Dmitry Grinberg] has weighed in with his version of the classic heart-shaped LED ring. It’s hard to beat the BOM on this one: just a microcontroller, five resistors, and twenty LEDs. The rest is code, and optionally putting the name of your beloved into the copper layer. Everything is there for you to download.

Continue reading “Valentine’s Heart With Awesome Animations”

Valentine Heart

Animated LED Valentine Heart

With only a week left until Valentine’s day, [Henry] needed to think on his feet. He wanted to build something for his girlfriend but with limited time, he needed to work with what he had available. After scrounging up some parts and a bit of CAD work, he ended up with a nice animated LED Valentine heart.

[Henry] had a bunch of WS2812 LEDs left over from an older project. These surface mount LED’s are very cool. They come in a small form factor and include red, green, and blue LEDs all in a single package. On top of that, they have a built-in control circuit which makes each LED individually addressable. It’s similar to the LED strips we’ve seen in the past, only now the control circuit is built right into the LED.

Starting with the LEDs, [Henry] decided to build a large animated heart. Being a stickler for details, he worked out the perfect LED placement by beginning his design with three concentric heart shapes. The hearts were plotted in Excel and were then scaled until he ended up with something he liked. This final design showed where to place each LED.

The next step was to design the PCB in Altium Designer. [Henry’s] design is two-sided with large copper planes on either side. He opted to make good use of the extra copper surface by etching a custom design into the back with his girlfriend’s name. He included a space for the ATMega48 chip which would be running the animations. Finally, he sent the design off to a fab house and managed to get it back 48 hours later.

After soldering all of the components in place, [Henry] programmed up a few animations for the LEDs. He also built a custom frame to house the PCB. The frame includes a white screen that diffuses and softens the light from the LEDs. The final product looks great and is sure to win any geek’s heart. Continue reading “Animated LED Valentine Heart”

Valentine’s PCBs To Make Your Heart Melt

valentines

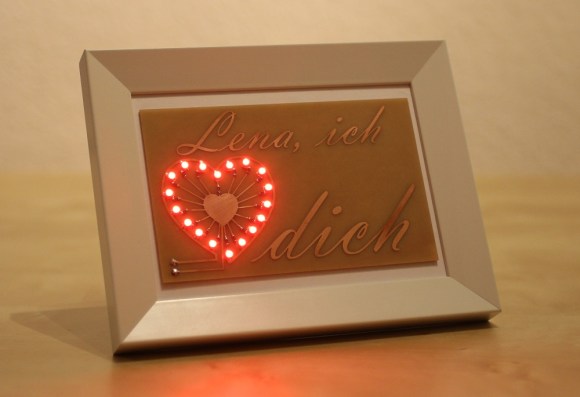
Have you ever sat in bed, staring at a bottle of Iron III Chloride, and thought “I should do something with that…”? [Tobias] has. He wanted to use his tinkering skills to make his girlfriend happy, so he decided to make this beautiful etched PCB that professes his love to her.

The cool thing about this project is that [Tobias] has never etched a PCB, or even worked with SMD parts before! After designing the PCB layout on his computer, he printed it out on an inkjet transparency film and applied it to his PCB. After 14 minutes of exposure he then put the board into development fluid for about 60 seconds — it was starting to look good already! He then pulled out his trusty bottle of Iron III Chloride and began the etching process.

Once the board was etched, he soldered 18 red PLCC-2 LEDs in place, each with its own 330Ohm resistor. Not content with a simple on/off switch, [Tobias] decided to program a Trinket with a voltage regulator and mosfet to have it pulse on and off, similar to a beating heart! The finished project looks great, and we’re sure his girlfriend will love it.

Another bonus to doing something geeky like this for your loved ones means it will increase their acceptance of tools laying about, and half-finished projects that aren’t quite as pretty!

Speech Synthesizing Valentine From 1991

Internals

Back in 1991, a young [Backwoods Engineer] and his new wife went to a Valentines day get together. One of the conditions of the shindig was having the guys make – not buy – a Valentines day card. Go big or go home, he though, and after a few days he had a talking Valentines day card that would become one of his wife’s most treasured possessions.

The early 90s were a different time; in case you haven’t yet been made to feel very old yet today, 1991 is closer to 1970 than 2013 is to 1991. Likewise, the circuitry inside this heartfelt talking token of appreciation bears more resemblance to something from a 1970s electronics magazine than an Arduino project of today.

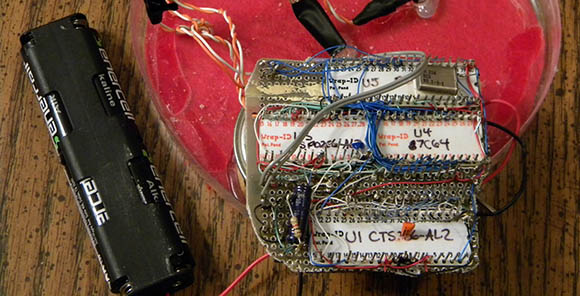
The project is powered by an old Intel MCS-48 microcontroller attached to one of the old speech synthesis chips Radio Shack used to sell. These are, in turn, connected to a programmable logic chip and a masked ROM that translates English words into phonemes for the speech synthesizer.

The entire device is constructed on a hacked up piece of perf board and a few wire wrap sockets; sturdy construction, even if the battery compartment has been replaced a few times.

As for what the talking valentine says? “”OK!  Hello, I am a Talking Valentine Card.  “Love Is A Many-Splendored Thing” and in this case also needs batteries!” You can check that out after the break.

Continue reading “Speech Synthesizing Valentine From 1991”

A Lot Of Love Went Into This Glowing Valentine

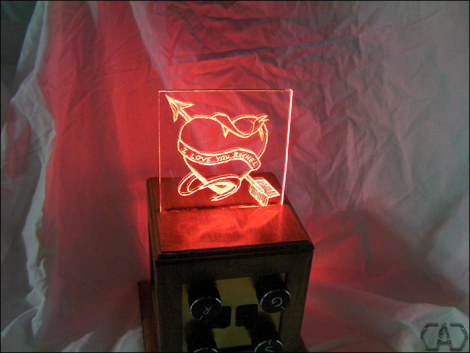
[Will] didn’t pick up a card, rose, and bottle of wine for Valentine’s Day like most guys. Nope, he planned way ahead and built this color-selectable glowing Valentine. When we first saw it, we figured he threw some LEDs together with a microcontroller and edge-lit a piece of acrylic. While that is technically what happened, there was a lot more design and craftsmanship at play here than you might think.

First off, the controller board is a beautifully designed two-sided PCB which he etched rather than throwing a mess of wires and hot glue into an enclosure. Speaking of enclosures, he grabbed a wooden picture box from the big box store and used a piece of brass plate stock to serve as the control panel. The enclosure was finished with tinted polyurethane after having a slit added to the top for the acrylic. The message itself was milled using an engraving bit and a Dremel tool. This was done by hand and we think achieves a finished look that is comparable to the CNC milled ornaments we’ve seen in the past.

Get a good look at the device and a demonstration of its features in the clip after the jump.

Continue reading “A Lot Of Love Went Into This Glowing Valentine”