Tiny Tapeout 3

Tiny Tapeout 3: Get Your Own Chip Design To A Fab

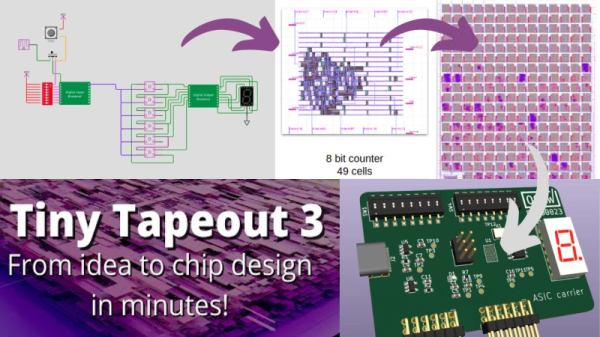
Custom semiconductor chips are generally big projects made by big companies with big budgets. Thanks to Tiny Tapeout, students, hobbyists, or anyone else can quickly get their designs onto an actual fabricated chip. [Matt Venn] has announced the opening of a third round of the Tiny Tapeout project for March 2023.

In 2022, Tiny Tapeout 1 piloted fabrication of user designs onto custom chips referred to as application-specific integrated circuits or ASICs. Following success of the pilot round, Tiny Tapeout 2 became the first paid version delivering guaranteed silicon. For Tiny Tapeout 2, there were 165 submissions. Most submissions were designed using a hardware description language such as Verilog or Amaranth, but ASICs can also be designed in the visual schematic capture tool Wokwi.

Each submitted design must fit within 150 by 170 microns. That footprint can accommodate around one thousand standard cells, which is certainly enough to explore a digital system of real interest.  Examples from Tiny Tapeout 2 include digital neurons, FPGAs, and RISC-V processor cores.

Once the 250 designs are submitted, they’ll be combined into a large grid along with a controller. The controller will receive input signals and pump the inputs via a scan chain through the entire grid to each design. The results from each design continue through the scan chain to be output from the grid. Since all 250 designs will be combined on to one chip, each designer will receive everybody else’s design along with their own. This shared process opens a huge opportunity for experimentation.

To get started on your own ASIC design right away, visit Tiny Tapeout. Also check out the talk [Matt] gave at Supercon 2022: Bringing Chip Design to the Masses along with his Zero to ASIC videos. And we’re not saying anything official, but he’ll probably be giving a workshop at Hackaday Berlin.

Continue reading “Tiny Tapeout 3: Get Your Own Chip Design To A Fab” →
An Open Hardware Eurorack Compatible Audio FPGA Front End

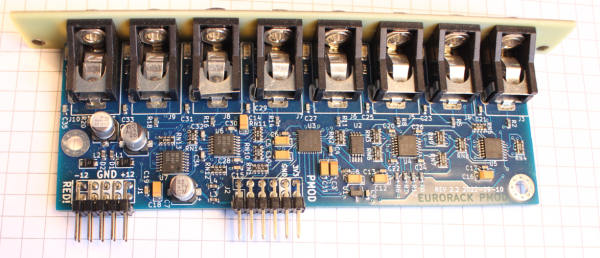
[Sebastian Holzapfel] has designed an audio frontend (eurorack-pmod) for FPGA-based audio applications, which is designed to fit into a standard Eurorack enclosure. The project, released under CERN Open-Hardware License V2, is designed in KiCAD using the AK4619VN four-channel audio codec by Asahi Kasei microdevices. (And guess what folks, there’s plenty of those in stock!) Continue reading “An Open Hardware Eurorack Compatible Audio FPGA Front End” →

Create Your RTL Simulations With KiCAD

[Bob Alexander] is in the process of designing a homebrew discrete TTL CPU, and wanted a way to enter schematics for digital simulations via a Verilog RTL flow. Since KiCAD is pretty good at handling hierarchical schematics, why not use that? [Bob] created a KiCAD plugin, KiCadVerilog allowing one to instantiate and wire up the circuits under consideration, and then throw the resulting Verilog file at your logic simulator of choice.

KiCadVerilog doesn’t do all the hard work though, as it only provides the structure and the wiring of the circuit. The actual guts of each TTL instance needs to be provided, and a reference to it is manually added to the schematic object fields. That’s a one-time deal, as you can re-use the component library once generated. Since TTL logic has been around for a little while, locating a suitable Verilog library for this is easy. Here’s ice-chips-verilog by [TimRudy] on GitHub for starters. It’s intended as a collection for Icestudio (which is also worth a look). Still, the Verilog code for many TTL series devices is presented ready for the taking, complete with individual test benches in case you need them.

Check out the project GitHub page for the module source code, and some more documentation about the design process.

We’ve seen many RTL hacks over the years, here’s an interesting way to generate a PCB layout with discrete logic, direct from the RTL.

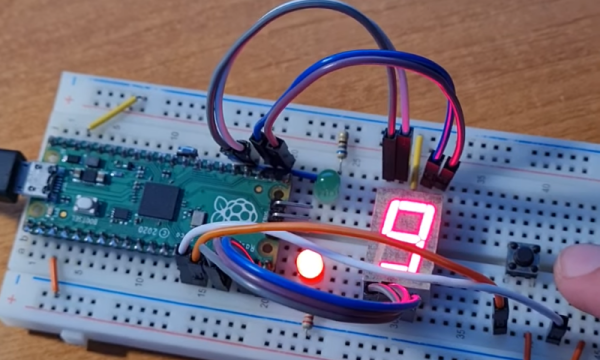
a Pi Pico on a breadboard, running a 7-segment counter gateware, with a 7-segment digit and a pushbutton next to the Pico

Want To Play With FPGAs? Use Your Pico!

Ever want to play with an FPGA, but don’t have the hardware? Now, if you have one of those ever-abundant Pi Picos, you can start playing with Verilog without getting an FPGA board. The FakePGA project by [tvlad1234], based on the Verilator toolkit, provides you with a way to compile Verilog into C++ for the RP2040. FakePGA even integrates RP2040 GPIOs so that they work as digital pins for the simulated GPIOs, making it a significant step up from computer-aided FPGA code simulation

[tvlad1234] provides instructions for setting this up with Linux – Windows, though untested, could theoretically run this through WSL. Maximum clock speed is 5KHz – not much, but way better than not having any hardware to test with. Everything you’d want is in the GitHub repo – setup instructions, Verilog code requirements, and a few configuration caveats to keep in mind.

We cover a lot of projects where FPGAs are used to emulate hardware of various kinds, from ISA cards to an entire Game Boy.  CPU emulation on FPGAs is basically the norm — it’s just something easy to do with the kind of power that an FPGA provides. Having emulation in the opposite direction is unusual,  though, we’ve seen FPGAs being emulated with FPGAs, so perhaps it was inevitable after all. Of course, if you have neither a Pico nor an FPGA, there’s always browser based emulators.

Continue reading “Want To Play With FPGAs? Use Your Pico!” →

Ztachip Accelerates Tensorflow And Image Workloads

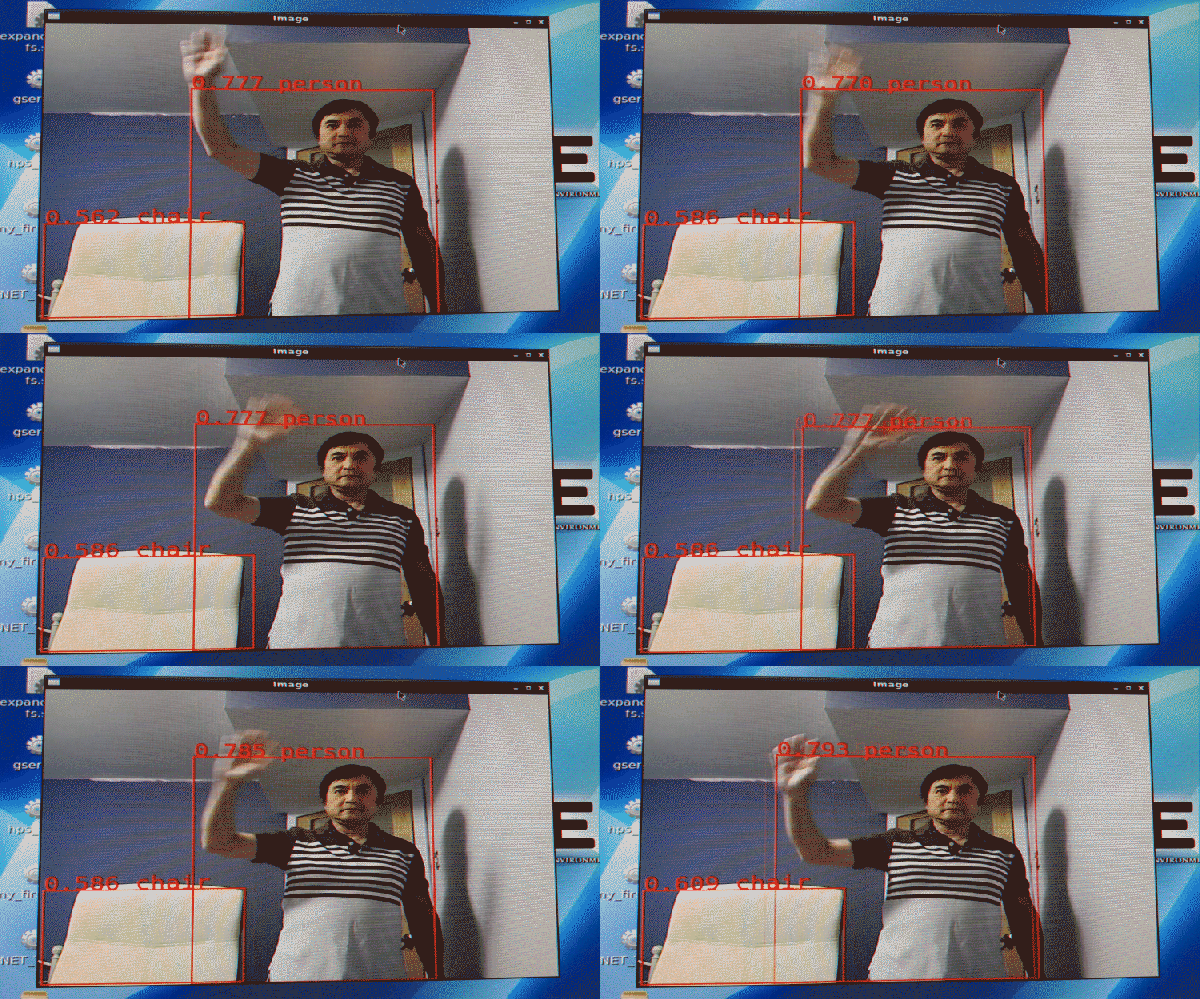
[Vuong Nguyen] clearly knows his way around artificial intelligence accelerator hardware, creating ztachip: an open source implementation of an accelerator platform for AI and traditional image processing workloads. Ztachip (pronounced “zeta-chip”) contains an array of custom processors, and is not tied to one particular architecture. Ztachip implements a new tensor programming paradigm that [Vuong] has created, which can accelerate TensorFlow tasks, but is not limited to that. In fact it can process TensorFlow in parallel with non-AI tasks, as the video below shows.

A RISC-V core, based on the VexRiscV design, is used as the host processor handling the distribution of the application. VexRiscV itself is quite interesting. Written in SpinalHDL (a Scala variant), it’s super configurable, producing a Verilog core, ready to drop into the design.

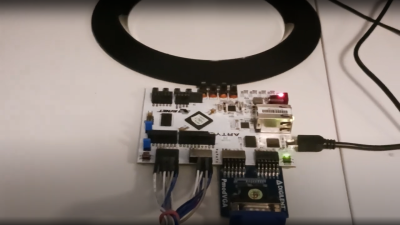
A Digilent Arty-A7, Arducam and a VGA PMOD is all you need

From a hardware design perspective the RISC-V core hooks up to an AXI crossbar, with all the AXI-lite busses muxed as is usual for the AMBA AXI ecosystem. The Ztachip core as well as a DDR3 controller are also connected, together with a camera interface and VGA video.

Other than providing an FPGA-specific DDR3 controller and AXI crossbar IP, the rest of the design is generic RTL. This is good news. The demo below deploys onto an Artix-7 based Digilent (Arty-A7) with a VGA PMOD module, but little else needed. Pre-build Xilinx IP is provided, but targeting a different FPGA shouldn’t be a huge task for the experienced FPGA ninja.

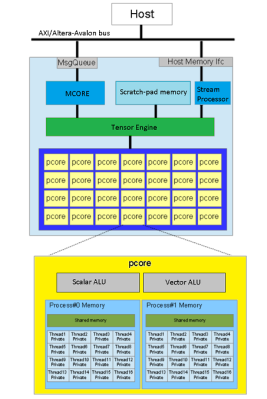
Ztachip top level architecture

The magic happens in the Ztachip core, which is mostly an array of Pcores. Each Pcore has both vector and scalar processing capability, making it super flexible. The Tensor Engine (internally this is the ‘dataplane processor’) is in charge here, sending instructions from the RISC-V core into the Pcore array together with image data, as well as streaming video data out. That camera is only a 0.3 MP Arducam, and the video is VGA resolution, but give it a bigger FPGA and those limits could be raised.

This domain-specific approach uses a highly modified C-like language (with a custom compiler) to describe the application that is to be distributed across the accelerator array. We couldn’t find any documentation on this, but there are a few example algorithms.

The demo video shows a real-time mix of four algorithms running in parallel; one object classification (Google’s Tensorflow mobilenet-ssd, a pre-trained AI model) canny edge detection, a Harris corner detection, and Optical flow which gives it a predator-like motion vision.

[Vuong] reckons, efficiency wise it is 5.5x more computationally efficient than a Jetson Nano and 37x more than Google’s TPU edge. These are bold claims, to say the least, but who are we to argue with a clearly incredibly talented engineer?

We cover many AI-related topics, like this AI assisted tap-typing gadget, for starters. And not wanting to forget about the original AI hardware, the good old-fashioned neuron, we got that covered as well!

Continue reading “Ztachip Accelerates Tensorflow And Image Workloads” →

Remoticon 2021 // Rob Weinstein Builds An HP-35 From The Patent Up

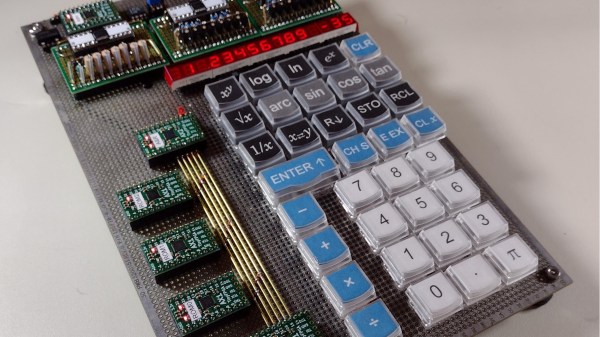
Fifty years ago, Hewlett-Packard introduced the first handheld scientific calculator, the HP-35. It was quite the engineering feat, since equivalent machines of the day were bulky desktop affairs, if not rack-mounted. [Rob Weinstein] has long been a fan of HP calculators, and used an HP-41C for many years until it wore out. Since then he gradually developed a curiosity about these old calculators and what made them tick. The more he read, the more engrossed he became. [Rob] eventually decided to embark on a three year long reverse-engineer journey that culminated a recreation of the original design on a protoboard that operates exactly like the original from 1972 (although not quite pocket-sized). In this presentation he walks us through the history of the calculator design and his efforts in understanding and eventually replicating it using modern FPGAs.

The HP patent ( US Patent 4,001,569 ) contains an extremely detailed explanation of the calculator in nearly every aspect. There are many novel concepts in the design, and [Rob] delves into two of them in his presentation. Early LED devices were a drain on batteries, and HP engineers came up with a clever solution. In a complex orchestra of multiplexed switches, they steered current through inductors and LED segments, storing energy temporarily and eliminating the need for inefficient dropping resistors. But even more complicated is the serial processor architecture of the calculator. The first microprocessors were not available when HP started this design, so the entire processor was done at the gate level. Everything operates on 56-bit registers which are constantly circulating around in circular shift registers. [Rob] has really done his homework here, carefully studying each section of the design in great depth, drawing upon old documents and books when available, and making his own material when not. For example, in the course of figuring everything out, [Rob] prepared 338 pages of timing charts in addition to those in the patent. Continue reading “Remoticon 2021 // Rob Weinstein Builds An HP-35 From The Patent Up” →

Turn Timing Diagrams Into ASCII Art, For Friendlier Pasting

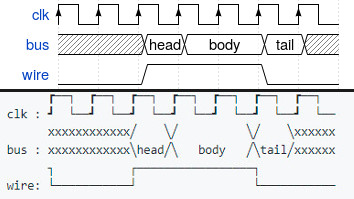
We all use text-based fields at one time or another, and being limited to ASCII only can end up being a limitation. That’s what led [Luke Wren] to create asciiwave, a fantastic tool that turns WaveDrom timing diagrams into ASCII art. Unlike images, ASCII timing diagrams are suitable for pasting into comment fields, change logs, or anywhere else that accepts text only. [Update: As the author kindly shared in the comments below, this tool’s original niche is pasting into HDL (e.g. Verilog) source code comments, where it has a special kind of usefulness.]

WaveDrom itself is a nifty JavaScript tool that we have covered before. It accepts timing diagrams expressed as JSON data, and renders nicely-readable digital timing diagrams as images directly inside one’s browser.

As cool and useful as that is, images can’t be pasted into text fields. That’s where asciiwave comes in. It reads the exact same format that WaveDrom uses, but generates an ASCII-art timing diagram instead. So if you’ve found WaveDrom useful, but wish you could generate ASCII versions, here’s your solution.