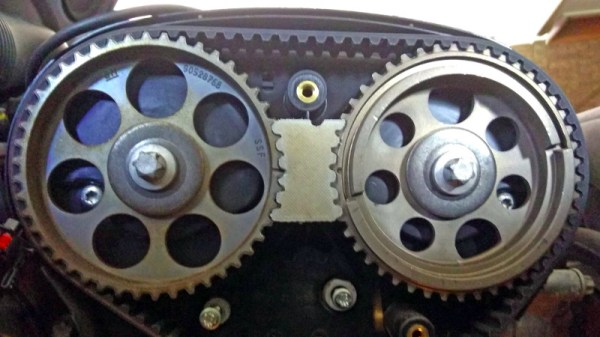
The modern overhead-cam internal combustion engine is a mechanical masterpiece of hundreds of parts in perfect synchronisation. In many cases it depends for that synchronisation upon a flexible toothed belt, and those of you who have replaced one of these belts will know the exacting requirements for keeping the various pulleys in perfect alignment during the process.
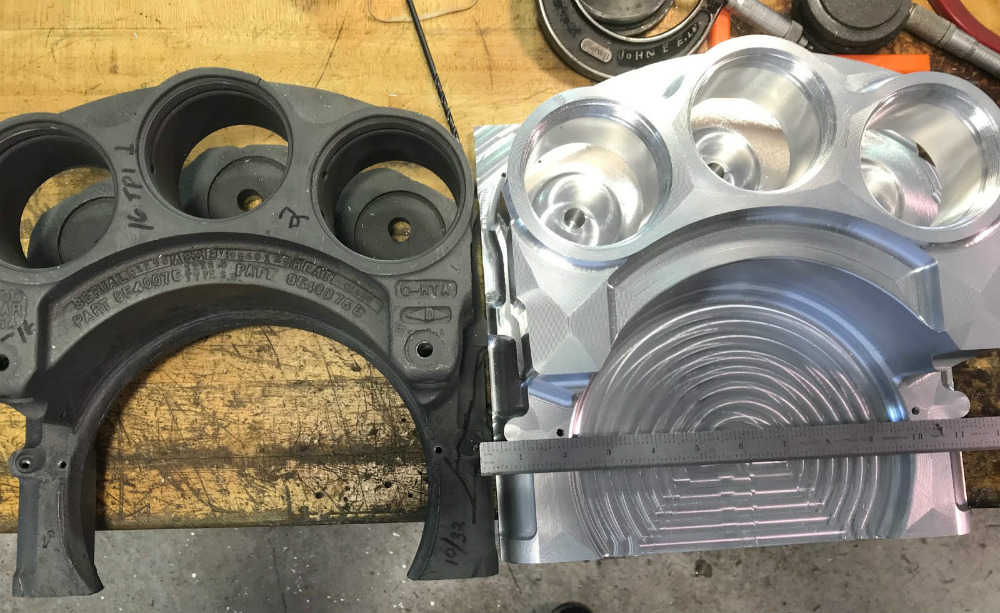
[Greolt] had this problem with a dual overhead-cam engine, particularly that the shafts would spring out of alignment on removal of the belt. The solution was one of those beautifully simple hacks that use high-tech methods to make something that is not high-tech in itself but which solves a problem perfectly. He produced a CNC-machined block of HDPE to sit between the two toothed pulleys that was machined exactly to their profiles and which once inserted kept them securely and exactly in alignment.
It’s likely that the same job could easily be done with a 3D printer, and indeed we’ve seen it done with a small piece of soft wood and a hammer. But there is something very elegant indeed about this particular incarnation that we like, it may not be the most complex of the hacks you’ll see here but we’re sure you’ll agree if you’ve ever changed a cambelt, it’s a pretty useful one.
Towards the end of the Second World War, as the United States considered their options for a possible invasion of Japan, there was demand for a new fighter that could escort long range bombers on missions which could see them travel more than 3,200 kilometers (2,000 miles) without refueling. In response, North American Aviation created the F-82, which essentially took two of their immensely successful P-51 fighters and combined them on the same wing. The resulting plane, of which only 272 were built, ultimately set the world record for longest nonstop flight of a propeller-driven fighter at 8,129 km (5,051 mi) and ended up being the last piston engine fighter ordered by the United States Air Force.
The project provides a fascinating look at what it takes to not only return a 70+ year old ultra-rare aircraft to fully functional status, but do it in a responsible and historically accurate way. With only four other intact F-82’s in the world, replacement parts are obviously an exceptional rarity. The original parts used to rebuild this particular aircraft were sourced from literally all over the planet, piece by piece, in a process that started before [Tom] even purchased the plane itself.
In a way, the search for parts was aided by the unusual nature of the F-82, which has the outward appearance of being two standard P-51 fighters, but in fact utilizes a vast number of modified components. [Tom] would keep an eye out for parts being sold on the open market which their owners mysteriously discovered wouldn’t fit on a standard P-51. In some cases these “defective” P-51 parts ended up being intended for the Twin Mustang project, and would get added to the collection of parts that would eventually go into the XP-82 restoration.
For the parts that [Tom] couldn’t find, modern manufacturing techniques were sometimes called in. The twin layout of the aircraft meant the team occasionally had one component but was missing its counterpart. In these cases, the original component could be carefully measured and then recreated with either a CNC mill or 3D printed to be used as a die for pressing the parts out of metal. In this way the team was able to reap the benefits of modern production methods while still maintaining historical accuracy; important on an aircraft where even the colors of the wires used in the original electrical system have been researched and faithfully recreated.
We’ve seen plenty of restorations here at Hackaday, but they tend to be of the vintage computer and occasionally Power Wheels variety. It’s interesting to see that the same sort of techniques we apply to our small scale projects are used by the pros to preserve pieces of history for future generations.
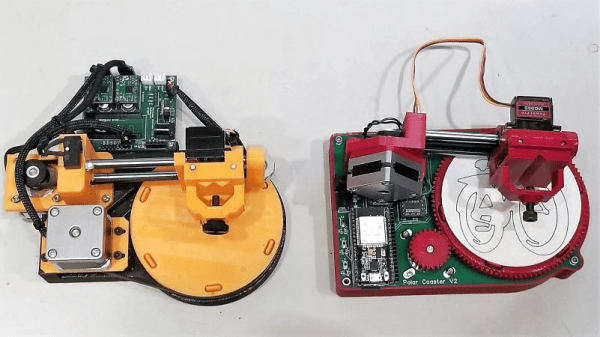
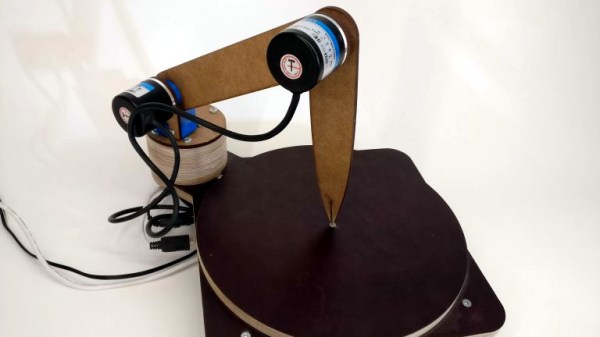
If you’re anything like us, your success with the opposite sex at the bar wasn’t much to brag about. But imagine if you had only had this compact CNC polar plotter and could have whipped up a few custom coasters for your intended’s drink. Yeah, that definitely would have helped.
Or not, but at least it would have been fun to play with. This is actually an improved version of [bdring]’s original “Polar Coaster”. Version 2 is really just a more compact and robust version of the original. The new one has a custom controller for the steppers and pen-lift servo, and everything is mounted neatly to the main PCB. Where the original used a timing belt to drive the platter, the new one uses 3D-printed helical gears, and the steppers have been replaced by slimmer motors. It even has an SD card and smartphone UI, and the coasters look pretty good.
There’s no video of the new one, but you can see its predecessor in action below and imagine the possibilities. Snap a picture and have a line art rendition of someone plotted while you’re waiting for drinks? Just remember not to take any laser engraved wooden nickels.
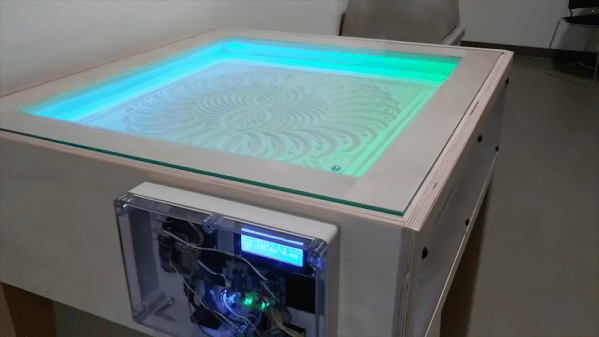
The purpose of a Zen garden, those stylized landscapes created by painstakingly placing rocks and raking gravel into perfect patterns, is the doing of the thing. Making sure every line is perfectly formed is no mean feat, and the concentration required to master it is the point of the whole thing. But who has time for that? Why not just build a robot to create the perfect Zen garden in miniature?
That was what [Tim Callinan] and his classmates did for a semester project, and the “ZenXY” sand plotter was the result. There isn’t a build log for the device per se, although the video below makes it plain how they went about this. The sand table itself is a plywood box whose bottom is layered with fine white sand and contains a single steel ball. Below the table is an X-Y gantry carrying a powerful magnet. A gShield riding on top of an Uno turns G code into slow, stately movement of the ball through the sand. The patterns are remarkably intricate, and while it might not be the same as mastering the body control needed to rake gravel with precision, watching the ball push the sand around is pretty Zen all by itself
Digitizing an object usually means firing up a CAD program and keeping the calipers handy, or using a 3D scanner to create a point cloud representing an object’s surfaces. [Dzl] took an entirely different approach with his DIY manual 3D digitizer, a laser-cut and 3D printed assembly that uses rotary encoders to create a turntable with an articulated “probe arm” attached.
Each joint of the arm is also an encoder, and by reading the encoder values and applying a bit of trigonometry, the relative position of the arm’s tip can be known at all times. Manually moving the tip of the arm from point to point on an object therefore creates measurements of that object. [Dzl] successfully created a prototype to test the idea, and the project files are available on GitHub.
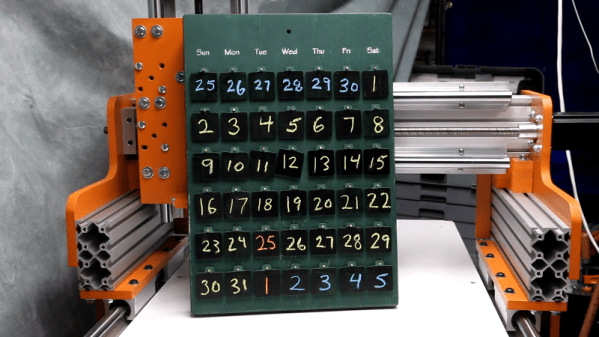
The calendar is made primarily from wood. This is an excellent choice for test machining projects, as it is softer and less likely to cause tool or machine damage when compared to steel or aluminum. The calendar base was first milled out using end mills, while a 30-degree V-bit was used to engrave the days of the week. Brass brazing rod was then used to create hangers for the calendar tags.
Thanks to the clever use of chalkboard paint and removable tags, the calendar can be reconfigured to work for any given year and month combination — just in case you wish to have an advent calendar year round. Overall, it’s a good low-intensity machining project that would also be a fun craft project for kids.
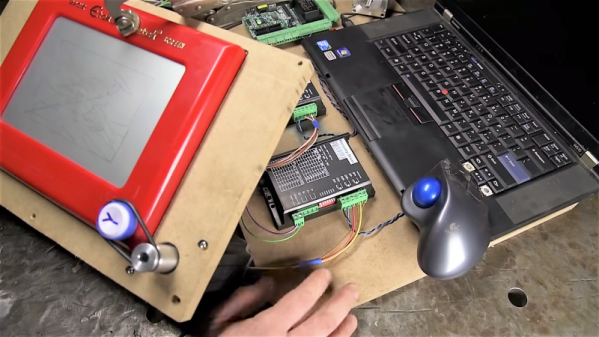
Despite appearances, [This Old Tony]’s latest series has little to do with CNC-ifying an Etch A Sketch. Although he certainly achieves that, more or less, automating the classic toy is just the hook for a thorough lesson in CNC machine building starting with the basics.
Fair warning: we said basics, and we mean it. [Old Tony]’s intended audience is those who haven’t made the leap into a CNC build yet and need the big picture. Part one concentrates on the hardware involved – the steppers, drivers, and controller. He starts with one of those all-in-one eBay packages, although he did upgrade the motion controller to a Mach4 compatible board; still, the lessons should apply to most hardware.
By the end of part one, the Etch A Sketch is connected to two of the steppers and everything is wired up and ready to go for part two, the first part of which is all about inputs and outputs. Again, this is basic stuff, like how relays work and why you might need to use them. But that’s the kind of stuff that can baffle beginners and turn them off to the hobby, so kudos to [Old Tony] for the overview. The bulk of the second part is about configuring Mach4 Hobby, with a ton of detail and some great tips and tricks for getting a machine ready to break some end mills.
For someone looking to get into a CNC build, [Old Tony]’s hard-won CNC experience really fills in the gaps left by other tutorials. And it looks like a third part, dealing with making all this into something more than an automated Etch A Sketch, is in the works. We’re looking forward to that.