Open-Source Thermostat Won’t Anger Your Landlord

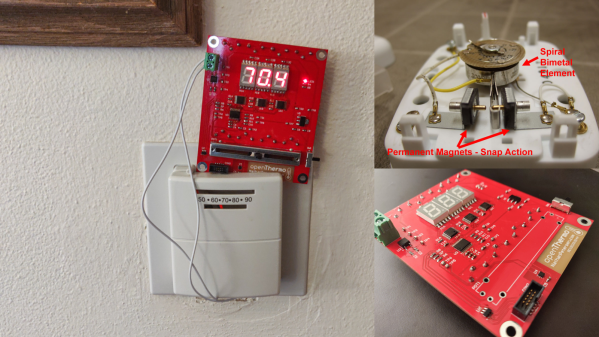
[Nathan Petersen] built a Hackable Open-Source Thermostat to smooth out temperature fluctuations caused by the large hysteresis of the bimetallic strip thermostat in his apartment. While it may be tempting to adjust the “anticipator” to take care of the problem or even replace the bimetallic thermostat with an electronic version, building your own thermostat from scratch is a good way to add to your project portfolio while making your way through college. Plus, he got to hone his hardware and software design chops.

The hardware is designed around the STM32, using a cheap, minimal variant since the device just needs to sense temperature and control the furnace in on-off mode. The TMP117 high-accuracy, low-power, temperature sensor was selected for temperature measurement since accuracy was an essential feature of the project. Dry-contact output for the furnace is via a normally-open solid state relay (opto-isolator). For the user interface, instead of going the easy-route and using an I2C/SPI OLED or LCD display, [Nathan] used three 7-segment LED displays, each driven by an 8-channel constant current driver. The advantage is that the display can be viewed from across the room, and it’s brightness adjusted via PWM. Temperature set-point adjustment is via a simple slide potentiometer, whose analog voltage is read by the micro-controller ADC. To remind about battery replacement, a second ADC channel on the micro-controller monitors the battery voltage via a voltage divider. The PCB components are mostly surface mount, but the packages selected are easy enough to hand solder.

[Nathan]’s Github repo provides the hardware and firmware source files. The board is designed in Altium, but folks using KiCad can use either the awesome Altium2KiCad converter or the online service for conversion. (The results, with some minor errors that can be easily fixed, are quite usable.) Serendipitously, his PCB layout worked like a charm the first time around, without requiring any rework or bodge wires.

The firmware is a few hundred lines of custom bare-metal C code, consisting of drivers to interface with the hardware peripherals, a UI section to handle the user interface, and the control section with the algorithm for running the furnace. [Nathan] walks us through his code, digging into some control theory and filtering basics. After making a few code tweaks and running the thermostat for some time, [Nathan] concludes that it is able to achieve +0.1°F / -0.5°F temperature regulation with furnace cycles lasting about 10-15 minutes (i.e. 4-6 cycles per hour). Obviously, his well insulated apartment and a decent furnace are also major contributing factors. Moving on, for the next version, [Nathan] wants to add data collection capabilities by adding some memory and SD card storage, and use an RTC to allow seasonal adjustments or time-based set-points.

This is his first attempt at a “functional’ useful project, but he does love to build the occasional toy, such as this POV Top.

The Spin Cycle: Washing Machine Motor Converts 10-Speed To E-Bike

The “Spin Cycle” is an amazing electric bicycle built using a motor salvaged from a washing machine; when the puns are this perfect you have to roll with them. [jimminecraftguy’s] creation is one of the most hacked-together yet functional electric vehicle we’ve seen in a long time.

The drive train of this bicycle starts with a brushless DC motor from a washing machine. It has been slightly modified to run on 48 volts, and is installed inside the triangle of the bike’s frame. It has a chain driving the bike’s crank, retaining the original chain and gearing setup (unlike many electric bike hacks that utilize hub motors). The crank has also been specially modified to include a freewheel, a necessary feature so that the motor can operate without spinning the pedals. Everything except the motor has been custom fabricated including the mounts and the electronics.

[jimminecraftguy] reports speeds of 110 kph which is a little crazy for a 20-year-old aluminum frame bike, and we’d guess it’s not street legal in many jurisdictions, but we can’t really find much fault with this build in general based on the amount of innovation required to get this working at all. A few more improvements for the build are in the works, including improved batteries and a cover for the sides to keep the local law enforcement from getting too suspicious. We can’t wait to see the final version. Continue reading “The Spin Cycle: Washing Machine Motor Converts 10-Speed To E-Bike”

How CERN Made High Quality Electronics In The 1970s

We’re suckers for some retro electronics here at Hackaday, so we were fascinated when Daniel Valuch wrote to us with some pictures of his findings in his CERN lab’s archive. He works on Linear Accelerator 3, which has had an extended downtime after many decades of continuous operation, for major upgrades and overhauls. Part of the upgrade involves the removal of electronic assemblies dating back as far as the 1970s, and he’s shared his fascination with them as he trawls through dusty filing cabinets in the lab basement.

What it reveals is a world before the CAD and microcontrollers we know, instead here are circuits using the electronic building blocks of logic gates, discretes, and op-amps. PCBs are laid out not with the KiCad that CERN are famous in our community for today, but on acetate, with transfers and tape. A ground plane is even hand-carved from a red sheet. Oddly though it isn’t a world without CNC, because in the pouch with a design from 1974 is a roll of punched paper tape. If you have ever pondered the “Numerical” in “Computer Numerical Control”, here are the numbers in physical form.

For those of us who were trained in this type of electronic design, the convenience of a PCB CAD package and a professionally-made PCB at the click of a mouse is nothing short of miraculous. But seeing personally laid boards of this quality reminds us that seeing the hand of the designer in them is something few engineers today (with the possible exception of Boldport) manage to recreate.

Books You Should Read: The Boy Who Harnessed The Wind

For many of us, our passion for electronics and science originated with curiosity about some device, a computer, radio, or even a car. The subject of this book has just such an origin. However, how many of us made this discovery and pursued this path during times of hunger or outright famine?

That’s the remarkable story of William Kamkwamba that’s told in the book, The Boy Who Harnessed the Wind. Remarkable because it culminates with his building a windmill (more correctly called a wind turbine) that powered lights in his family’s house all by the young age of fifteen. As you’ll see, it’s also the story of an unyielding thirst for knowledge in the face of famine and doubt by others.

Continue reading “Books You Should Read: The Boy Who Harnessed The Wind”

Debugging Electronics: To Know Why It Didn’t Work, First Find What It Is Actually Doing

Congratulations, you have just finished assembling your electronics project. After checking for obvious problems you apply power and… it didn’t do what you wanted. They almost never work on the first try, and thus we step into the world of electronics debugging with Daniel Samarin as our guide at Hackaday Superconference 2019. The newly published talk video embedded below.

Beginners venturing just beyond blinking LEDs and premade kits would benefit the most from information here, but there are tidbits useful for more experienced veterans as well. The emphasis is on understanding what is actually happening inside the circuit, which explains the title of the talk: Debugging Electronics: You Can’t Handle the Ground Truth! So we can compare observed behavior against designed intent. Without an accurate understanding, any attempted fix is doomed to failure.

To be come really good at this, you need to embrace the tools that are often found on a well stocked electronics bench. Daniel dives into the tricks of the trade that transcend printf and blinking LED to form a plan to approach any debugging task.

Continue reading “Debugging Electronics: To Know Why It Didn’t Work, First Find What It Is Actually Doing”

Automagic Tool Makes KiCAD Schematic Symbols From PDFs

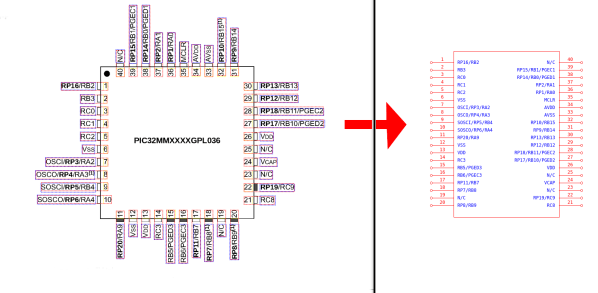
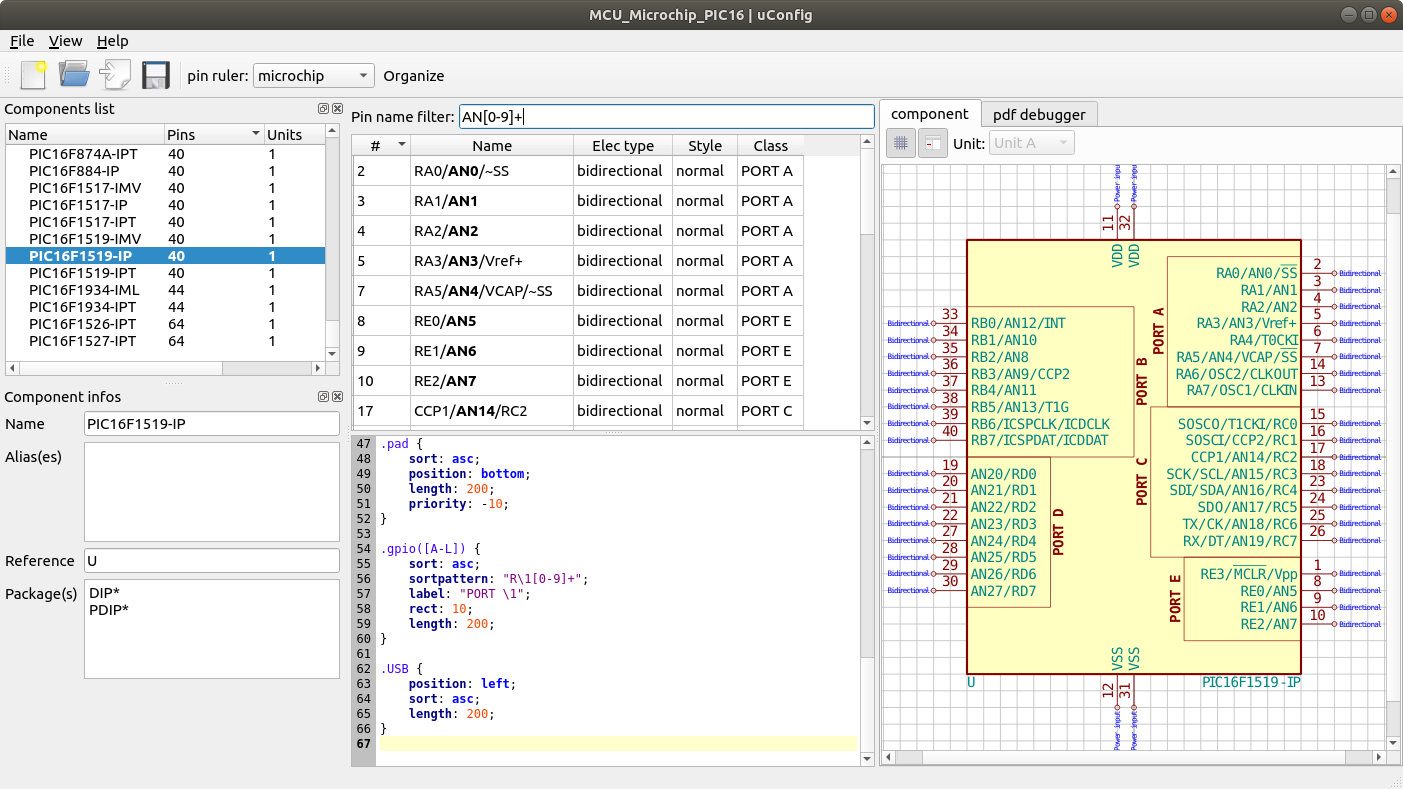
Last time we talked about a KiCAD tool it was to describe a way to make the zen-like task of manual assembly more convenient. But what about that most onerous of EE CAD tasks, part creation? Home makers probably don’t have access to expensive part library subscriptions or teams of people to create parts for them, so they are left to the tedium of creating them by hand. What if the dream tool existed that could read the darn PDF by itself and make a part? It turns out [Sébastien] made that tool and it’s called uConfig.

uConfig has a pretty simple premise. It scrapes manufacturer datasheets in PDF form, finds what it thinks are diagrams of parts with pin names, functions, etc, and emits the result as parts in a KiCAD library. To aid in the final conversion [Sébastien] added rules engine which consume his custom KiCAD Style Sheets which specify how to categorize pins. In the simple case the engine can string match or use regex to let you specify things like “all pins named VDD[A-C] should be power pins”. But it can also be used to move everything it thinks belongs to “GPIOB” and stick them on the bottom of the created symbol. We could imagine features like that would be of particular use breaking out gigantic parts like a 400 ball BeagleBone on a chip.

Thanks for the tip [arturo182]!

Bunnie Weighs In On Tariffs

[Bunnie] has penned his thoughts on the new 25% tariffs coming to many goods shipped from China to the US. Living and working both in the US and China, [Bunnie] has a unique view of manufacturing and trade between the two countries. The creator of Novena and Chumby, he’s also written the definitive guide on Shenzen electronics.

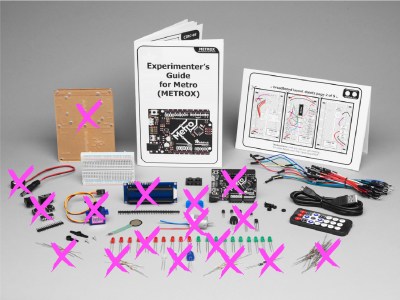
All the marked items are included in the new tariffs

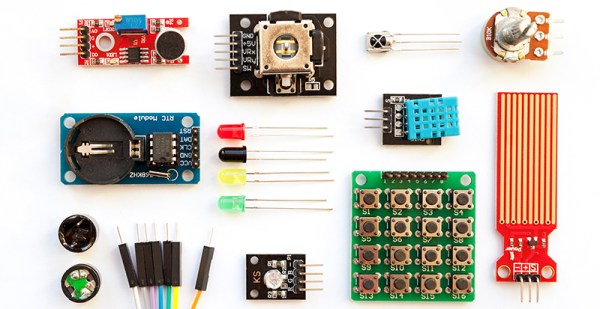
The new US tariffs come into effect on July 6th. We covered the issue last week, but Bunnie has gone in-depth and really illustrates how these taxes will have a terrible impact on the maker community. Components like LEDs, resistors, capacitors, and PCBs will be taxed at the new higher rate. On the flip side, Tariffs on many finished consumer goods such as cell phone will remain unchanged.

As [Bunnie] illustrates, this hurts small companies buying components. Startups buying subassemblies from China will be hit as well. Educators buying parts kits for their classes also face the tax hike. Who won’t be impacted? Companies building finished goods. If the last screw of your device is installed in China, there is no tax. If it is installed in the USA, then you’ll pay 25% more on your Bill of Materials (BOM). This incentivizes moving assembly offshore.

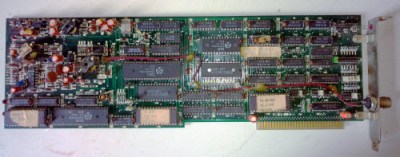
What will be the end result of all these changes? [Bunnie] takes a note from Brazil’s history with a look at a PC ISA network card. With DIP chips and all through-hole discrete components, it looks like a typical 80’s design. As it turns out the card was made in 1992. Brazil had similar protectionist tariffs on high-tech goods back in the 1980’s. As a result, they lagged behind the rest of the world in technology. [Bunnie] hopes these new tariffs don’t cause the same thing to happen to America.

[Thanks to [Robert] and [Christian] for sending this in]