Displays We Love Hacking: SPI And I2C

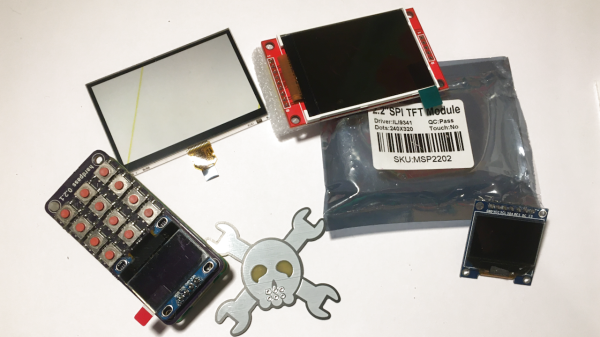
I’ve talked about HD44780 displays before – they’ve been a mainstay of microcontroller projects for literal decades. In the modern hobbyist world, there’s an elephant in the room – the sheer variety of I2C and SPI displays you can buy. They’re all so different, some are LCD and some are OLED, some have a touchscreen layer and some don’t, some come on breakouts and some are a bare panel. No matter which one you pick, there are things you deserve to know.

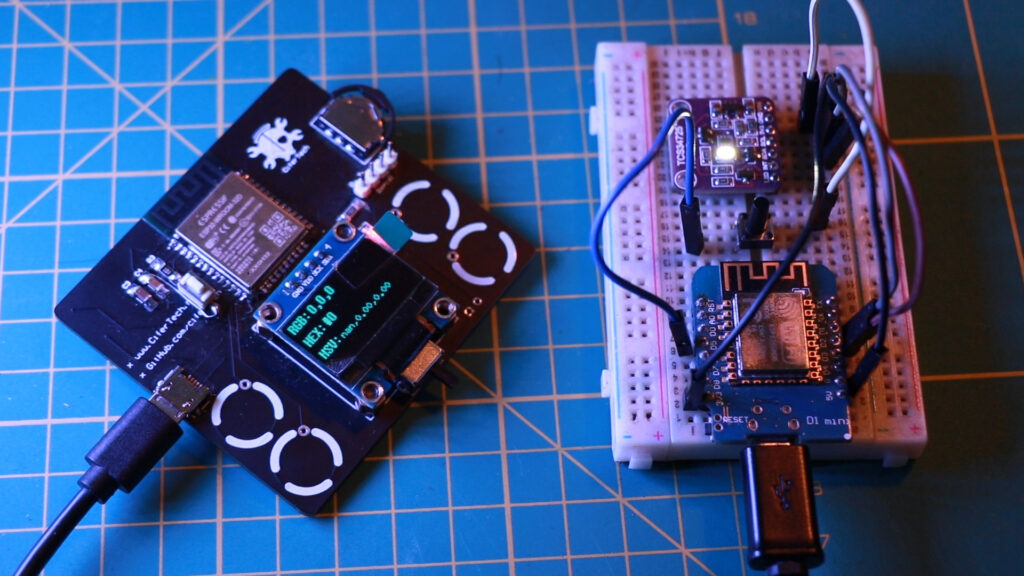
These displays are exceptionally microcontroller-friendly, they require hardly any GPIOs, or none extra if you already use I2C. They’re also unbelievably cheap, and so tiny that you can comfortably add one even if you’re hurting for space. Sure, they require more RAM and a more sophisticated software library than HD44780, but with modern microcontrollers, this is no problem at all. As a result, you will see them in almost every project under the sun.

What do you need for those? What are the requirements to operate one? What kind of tricks can you use with them? Let’s go through the main aspects.

Continue reading “Displays We Love Hacking: SPI And I2C”

ColorReplica Is A Rainbow At Your Fingertips

Have you ever wanted to match paint to the color of a pillow, or make a website where the primary color matches your favorite shade of electrolytic capacitor? Then ColorReplica is the project for you.

At the heart of this build are two ESP32s, one of which controls the color picker, and the other lights up the 18 WS2812 LEDs and displays information on the OLED screen.

ColorReplica has two modes, ColorPicker and ColorCube. In ColorPicker mode, you just choose what color you want, adjust the brightness level, and choose between static and dynamic modes for the LEDs. [CiferTech] used the ESP32 touch pins extended to pads on the PCB to control different menu variables, which is a nice touch.

In ColorCube mode, there’s a secondary circuit with a color sensor an another ESP32. Once detected, it transmits the color data to the main device at the push of a button. The RGB LEDs turn that color, and shows the RGB, HEX, and HSV values on the OLED screen. If you’d like to make one of these yourself, everything is available on GitHub.

Want something a big more tangible? Check out this color picker that types HEX codes for you.

Continue reading “ColorReplica Is A Rainbow At Your Fingertips”

Hackaday Prize 2023: AC Measurements Made Easy

When working on simple DC systems, a small low-cost multimeter from the hardware store will get the job done well enough. Often they have the capability for measuring AC, but this is where cheap meters can get tripped up. Unless the waveform is a perfect sinusoid at a specific frequency, their simple algorithms won’t be able to give accurate readings like a high-quality meter will. [hesam.moshiri] took this as a design challenge, though, and built an AC multimeter to take into account some of the edge cases that come up when working with AC circuits, especially when dealing with inductive loads.

The small meter, an upgrade from a previous Arduino version that is now based on the ESP32, is capable of assessing root mean square (RMS) voltage, RMS current, active power, power factor, and energy consumption after first being calibrated using the included push buttons. Readings are given via a small OLED screen and have an accuracy rate of 0.5% or better. The board also includes modern design considerations such as galvanic isolation between the measurement side of the meter and the user interface side, each with its own isolated power supply.  The schematics and bill-of-materials are also available for anyone looking to recreate or build on this design.

With the project built on an easily-accessible platform like the ESP32, it would be possible to use this as a base to measure other types of signals as well. Square and triangle waves, as well as signals with a large amount of harmonics or with varying frequencies, all need different measurement techniques in order to get accurate readings. Take a look at this classic multimeter to see what that entails.

Continue reading “Hackaday Prize 2023: AC Measurements Made Easy”

a–d, Crystal structures of the 1CzTrz-F (a,b) and 3CzTrz-F (c,d) compounds, determined by XRD. a,c, Diagrams of the two dimers of both crystallographic unit cells to show the molecular packing. b,d, Spatial arrangement of the acceptor–donor contacts in the 3D crystal structure. The triazine acceptor and the carbazole donor units are coloured orange and blue, respectively. The green features in d indicate co-crystallized chloroform molecules. (Credit: Oskar Sachnik et al., 2023)

Eliminating Charge-Carrier Trapping In Organic Semiconductors

For organic semiconductors like the very common organic light-emitting diode (OLED), the issue of degradation due to contaminants that act as charge traps is a major problem. During the development of OLEDs, this was very pronounced in the difference between the different colors and the bandgap which they operated in. Due to blue OLEDs especially being sensitive to these charge traps, it still is the OLED type that degrades the quickest as contaminants like oxygen affect it the strongest. Recent research published in Nature Materials from researchers at the Max Planck Institute for Polymer Research by Oskar Sachnik and colleagues (press release) may however have found a way to shield the electron-carrying parts of organic semiconductors from such contaminants.

Current density (J)–voltage (V) characteristics of electron- and hole-only devices of 3CzTrz and TPBi. (Credit: Oskar Sachnik et al., 2023)

In current organic semiconductors TPBi is used for electron transport, whereas for this research triazine  (Trz, as electron acceptor) and carbozole (Cz, as donor) were used and compared with the properties of leading-edge TPBi. While a few other formulations in the study did not show remarkable results, one compound (3CzTrz) was found using X-ray diffraction (XRD) to have a structure as shown on the right in the heading image, with the carbozole (in blue) forming essentially channels along which electrons can move, while shielded from contaminants by the triazine.

Using this research it might be possible to create organic semiconductors in the future which are free of charge-traps, and both efficiency and longevity of this type of semiconductor (including OLEDs and perovskites) can be improved immensely.


OLED Display Lets Vintage PC Engage Turbo Mode In Style

Back in the 486 days, it was common to see a “Turbo” button on the front panel of many PCs, which was used to toggle between the CPU’s maximum speed and a slower clock rate that was sometimes necessary for compatibility with older software. Usually an LED would light up to show you were running at this higher speed, or if your machine was very fancy, it might even have a numerical display that would show the current CPU frequency.

[Joshua Woehlke] wanted to add a similar display to his 486, but figured that with modern technology, he could do something a bit more interesting. Especially when he realized that the spot on his case where the two-digit LED display would have originally been mounted was the perfect size to hold a common 0.96″ SSD1306 OLED. From there it was just a matter of wiring it up to an Arduino and writing some code to display different graphics depending on the computer’s current CPU speed.

Just like the frequency indicators of yore, the Arduino doesn’t actually measure the CPU’s frequency, it’s simply reading the state of the Turbo LED on the front panel. When the LED is off the Arduino shows an image of a i8088 CPU on the screen to indicate the computer is running in compatibility mode, and when the LED is on, the screen shows the Cyrix Cx486 DX2 logo. When the button hasn’t been pressed in awhile, the display defaults to a star field screensaver.

Regular readers may recall we recently covered a similar project that used an Arduino to add a little flair to an era appropriate seven-segment LED display. We’d say there’s still a good deal of romanticism about computers having a big “TURBO” button you can smash whenever you feel the need for speed.

Open Source OLED Nametag Is Full Of Features

Ever wanted a sweet OLED nametag with fancy features like daylight readability, automatic brightness adjustment, GIF animation support, all-day runtime, easy web interface, and more? [TobleMiner]’s OLED Nametag is the project you want to keep an eye on in that case.

It’s still an early prototype, but the feature list looks great and works with a variety of OLED modules that are easily available. The enclosure can be 3D printed, and while there is very little spare room inside the housing, [TobleMiner] has clearly made the most of all available space. Some PCB fab houses offer component placement these days, and the board is designed with exactly that in mind.

We’ve seen a batteryless E-paper display make a serviceable nametag in the past, and while those offer high contrast and wide viewing angles, they lack the sort of features this project is bursting at the seams with. Affordable access to good components and the ability to have high-quality PCBs made on demand has really raised the bar in terms of what a hacker project can work with in recent years, and we love to see it expressed in projects like this one.

These Fake Nixie Tubes Have A Bootup Screen

[IMSAI Guy] bought a fake Nixie clock, and luckily for all of us has filmed a very close look and demonstration. Using OLED displays as the fake Nixie elements might seem like cheating to some, the effect is really very well done.

Clock digits with bootup screens is something we didn’t know we liked until we saw it.

When it comes to Nixie elements, it’s hard to say which gets more attention and project time from hardware folks: original Nixie tube technology, or fake Nixie elements. Either way, their appeal is certainly undeniable.

Original Nixie tubes have shown up in modern remakes of alarm clocks, and modern semiconductors make satisfying a Nixie tube’s power requirements much easier with clever and compact Nixie drivers costing under $3 USD. This is also a good time to remind people that Nixie tubes don’t have to be digits. This audio spectrum visualizer, for example, uses IN-13 tubes which serve as elements of a bar graph.

Authentic Nixie elements require high voltages and are labor-intensive to manufacture to say the least, and as far as fake Nixie elements go, this one looks pretty good once it lights up. You can see it in action in the video, embedded below.

Continue reading “These Fake Nixie Tubes Have A Bootup Screen”