Hello, Holograms

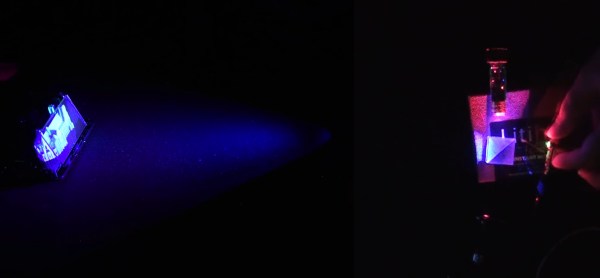
Holograms are tricky to describe because science-fiction gives the name to any three-dimensional image. The science-fact versions are not as flashy, but they are still darn cool. Legitimate holograms are images stored on a photographic medium, and they retain a picture of the subject from certain angles. In other words, when [Justin Atkin] makes a hologram of a model building, (video, embedded below) you can see the east side of the belfry, but when you reorient, you see the west side, or the roof if you point down. Holography is different from stereoscopy, which shows you a 3D image using two cameras. With a stereoscopic image, you cannot tilt it and see a new part of the subject, so there is a niche for each method.

There are a couple of different methods for making a hologram at home. First, you probably want a DIY hologram kit since it will come with the exposure plate and a known-good light source. Far be it for us to tell you you can’t buy plates and a laser pointer to take the path less traveled. Next, you need something that will not move, so we’re afraid you cannot immortalize your rambunctious kitty. The last necessity is a stable platform since you will perform a long-exposure shot, and even breathing on the setup can ruin the image. Different colors come from the coherent light source, so getting the “Rainbow Holograms” advertised in the video is a matter of mixing lights. Since you can buy red, green, and blue laser pointers for a pittance, you can do color remixes to your content.

Another type of hologram appears on things like trading cards as those wildly off-color (chromatic, not distasteful) images of super-heroes or abstract shapes. They’re a different variety, which can be printed en-masse, unlike the one-off [Justin] shows us how to make.

If you’re yearning for volumetric displays, we are happy to point you to this beauty capable of showing a jaw-dropping 3D model or this full-color blocky duck.

Continue reading “Hello, Holograms”

A Soap Film Photography How-To

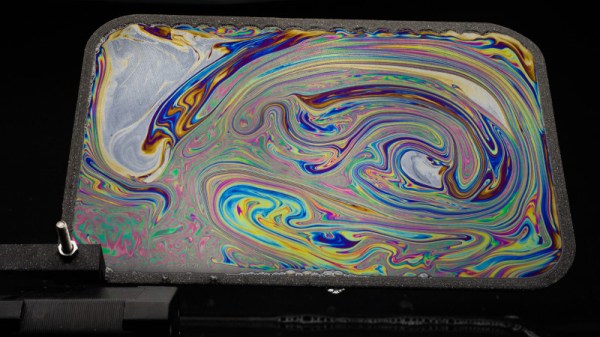
Blowing bubbles is a pastime enjoyed by young and old alike. The pleasant motion and swirling colors of the bubbles can be remarkably relaxing. With the right tools and techniques, it’s possible to take striking photos of these soap film phenomena, and that’s exactly what [Eric] and [Travis] did.

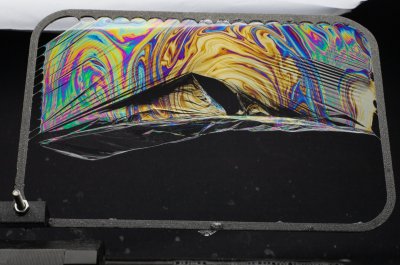
Adding sugar to the soap solution increases the resilience of the film significantly. With enough added, the film no longer pops, but instead breaks and fails in interesting ways.

After beginning with a robotic arm and a computer fan blowing bubbles, the project moved towards a simple stepper motor setup. A thin frame is lowered into a solution of soapy water, then brought back up by the stepper motor. The resulting soap film is held in front of a black background and carefully lit with a softbox light.

Lens selection is critical for this sort of work – in this case, a TS-E 50mm Macro f/2.8 lens was the order of the day. [Eric] shares other tips for taking great shots, such as adding sugar to the solution to make the soap film last longer, and using a modified speaker to help “paint” the surface of the films.

The resulting images are beautiful examples of the art, showing vibrant colors from the interference patterns created by the light. [Eric] has done a great job of clearly documenting the development process and the final results, making it possible for others to recreate the project elsewhere.

We’ve seen other soapy projects before, like this automatic bubble blowing machine. Video after the break.

Continue reading “A Soap Film Photography How-To”

10,000-Year-Old Camera Lens Takes Striking Pictures

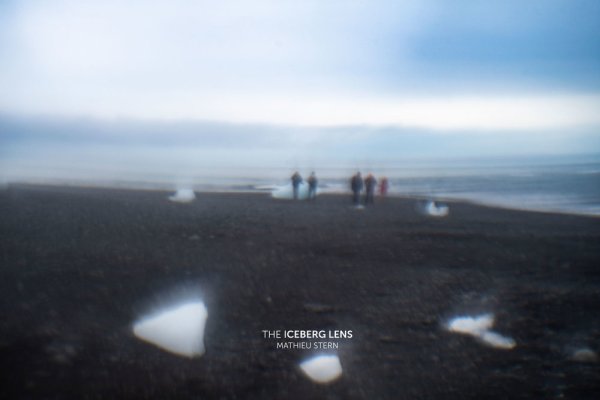
The first photograph was taken sometime in the early 1800s, and through almost two centuries of development we’ve advanced through black-and-white, the video camera, and even high-speed cameras that can take thousands of frames per second. [Mathieu Stern] took a step back from all of the technological progress of the past two hundred years, though, and found a lens for his camera hidden in the glacial ice of Iceland.

Ice in this part of the world has been purified over the course of 10,000 years, and [Mathieu] realized that with this purity the ice could be formed into a workable camera lens. The first step was to get something that could actually form the ice into the proper shape, and for that he used a modified ice ball maker that was shaped to make a lens rather than a sphere. Next, he needed an enclosure to hold the lens and attach it to his camera, which he made using a 3D printer.

For this build, the hardest part probably wasn’t making the actual equipment, but rather getting to the right place in Iceland and actually making the lenses. At room temperature the lenses could be made in around five minutes, but in Iceland it took almost 45 minutes and the first four attempts broke. The fifth one was a charm though, so after over five hours on the beach he was finally able to make some striking images with the 10,000-year-old ice lens which melted after only a minute of use. If that seems like too much work, though, you can always outfit your camera with no lens at all.

Thanks to [baldpower] for the tip!

Continue reading “10,000-Year-Old Camera Lens Takes Striking Pictures”

Smile For The Raspberry Pi Powered Photo Booth

[Roo] was tasked with finding a better way to take corporate employee photos. The standard method was for a human resources employee to use a point and shoot camera to take a photo of the new recruits. The problem with this method is many people feel awkward trying to force a smile in front of other people. Plus, if the photo turns out poorly many people won’t ask to have it retaken so as not to feel vain or inconvenience the photographer. [Roo’s] Raspberry Pi powered photo booth solves this problem in a novel way.

The new system has the employee use their own mobile phone to connect to a website running on the Pi. When the employee tells the Pi to snap a photo, the system uses the Raspberry Pi camera module to capture an image. [Roo] actually 3D printed a custom adapter allowing him to replace the standard camera lens if desired. The photo can be displayed on an LCD screen so the user can re-take the photo if they wish.

The system is built into a custom case made from both 3D printed and laser cut parts. The front plate is a frosted white color. [Roo] placed bright white lights behind the front panel in order to act as a flash. The frosted plastic diffuses the light just enough to provide a soft white light for each photo taken. Once the photo is selected, it can then be uploaded to the company database for use with emails, badges, or whatever else.

[Roo] also mentions that the system can easily be changed to send photos via Twitter or other web applications. With that in mind, this system could be a great addition to any hackerspace or event. The code for an older version of the project can be found on the project’s github page.

Continue reading “Smile For The Raspberry Pi Powered Photo Booth”

Pictures That Defeat Key Locks

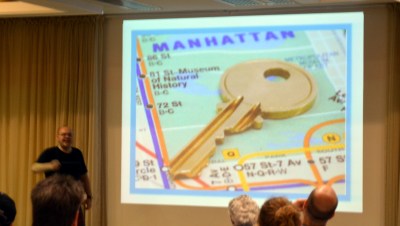
We’re at LayerOne this weekend and one of the talks we were excited about didn’t disappoint. [Jos Weyers] presented Showing Keys in Public — What Could Possibly Go Wrong? The premise is that pictures of keys, in most cases, are as good as the keys themselves. And that pictures of keys keep getting published.

[Jos] spoke a bit about new services that offer things like 3D scanning and storage of your key for printing when you get locked out, or apps that ask you to take a picture of your key and they’ll mail you a duplicate. Obviously this isn’t the best of ideas; you’re giving away your passwords. And finding a locksmith is easier than findind a 3D printer. But it’s the media gaffs with important keys that intrigues us.

We’ve already seen the proof of concept for taking covert images to perfectly duplicate a key. But these examples are not so covert. One example is a police officer carrying around handcuff keys on a belt clip. Pose for a picture and that key design is now available to all. But news stories about compromised keys are the biggest offenders.

subway-keysA master key for the NYC Subway was compromised and available for sale. The news coverage not only shows a picture at the top of the story of a man holding up the key straight on, but this image of it on a subway map which can be used to determine scale. This key, which is still published openly on the news story linked above, opens 468 doors to the subway system and these are more than just the ones that get you onto the platform for free. We were unable to determine if these locks have been changed, but the sheer number of them has us thinking that it’s unlikely.
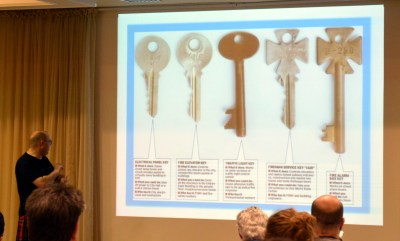
firemans-keysWorse, was the availability of fire-department master keys which open lock boxes outside of every building. (Correction: these are fire department keys but not the actual lock-box keys) A locksmith used to cut the original keys went out of business and sold off all their stock. These keys were being sold for $150, which is bad enough. But the news coverage showed each key on a white background, straight on, with annotations of where each type of key will work.

Other examples include video news stories about credit card skimmers installed in gas pumps — that coverage showed the key used to open the pump housing. There was also an example of speed camera control cabinet keys being shown by a reporter.

key-photo-duplication-layerone[Jos’] example of doing the right thing is to use a “prop” key for news stories. Here he is posing with a key after the talk. Unfortunately this is my own house key, but I’m the one taking pictures and I have blurred the teeth for my own security. However, I was shocked during image editing at the quality of the outline in the image — taken at 6000×4000 with no intent to make something that would serve as a source for a copy. It still came out remarkably clear.
Some locks are stronger than others, but they’re all meaningless if we’re giving away the keys.

Light Stage

Incredibly Simple Stage For Product Photos

If you’ve ever tried to take nice photos of small objects in your home, you might have found that it can be more difficult than it seems. One way to really boost the quality of your photos is to get proper lighting with a good background. The problem is setting up a stage for photos can be expensive and time-consuming. [Spafouxx] shows that you don’t need to sink a lot of money or energy into a setup to get some high quality photos.

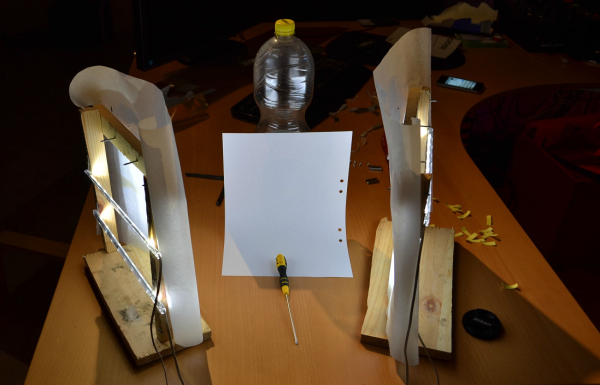
His lighting setup is very simple. Two wooden frames are built from scraps of wood. The frames stand upright and have two LED strips mounted horizontally. The LEDs face inwards toward the object of the photos. The light is diffused using ordinary parchment paper that you might use when baking.

The frames are angled to face the backdrop. In this case, the backdrop is made of a piece of A4 printer paper propped up against a plastic drink bottle. The paper is curved in such a way to prevent shadows. For being so simple, the example photo shows how clean the images look in the end.

Wildlife Camera

Remote Controlled Wildlife Camera With Raspberry Pi

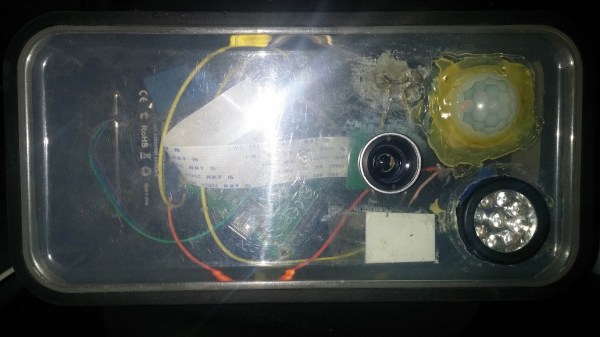
If you are interested in local wildlife, you may want to consider this wildlife camera project (Google cache). [Arnis] has been using his to film foxes and mice. The core components of this build are a Raspberry Pi and an infrared camera module specifically made for the Pi. The system runs on a 20,000 mAh battery, which [Arnis] claims results in around 18 hours of battery life.

[Arnis] appears to be using a passive infrared (PIR) sensor to detect motion. These sensors work by detecting sudden changes in the amount of ambient infrared radiation. Mammals are good sources of infrared radiation, so the sensor would work well to detect animals in the vicinity. The Pi is also hooked up to a secondary circuit consisting of a relay, a battery, and an infrared light. When it’s dark outside, [Arnis] can enable “night mode” which will turn on the infrared light. This provides some level of night vision for recording the furry critters in low light conditions.

[Arnis] is also using a Bluetooth dongle with the Pi in order to communicate with an Android phone. Using a custom Android app, he is able to connect back to the Pi and start the camera recording script. He can also use the app to sync the time on the Pi or download an updated image from the camera to ensure it is pointed in the right direction. Be sure to check out the demo video below.

If you like these wildlife cameras, you might want to check out some older projects that serve a similar purpose. Continue reading “Remote Controlled Wildlife Camera With Raspberry Pi”