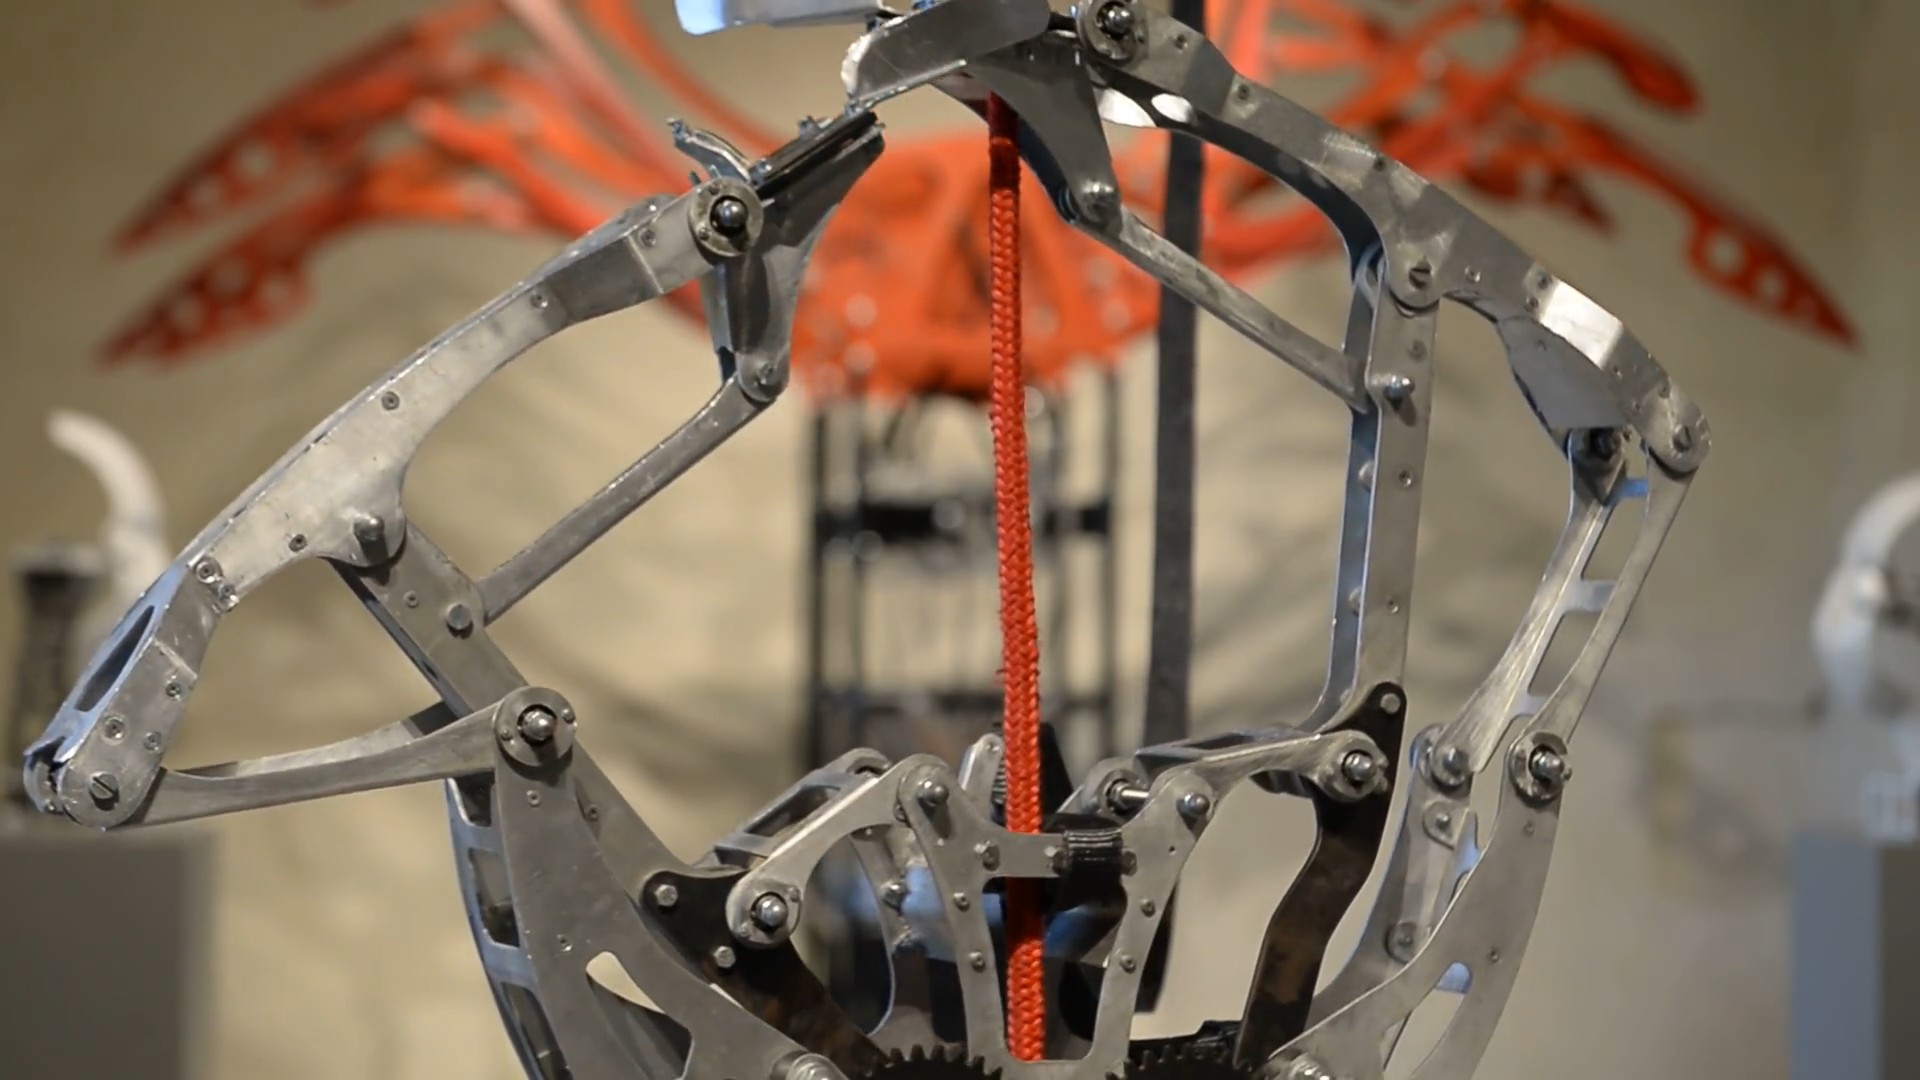
Latvian artist [Krists Pudzens] just put on a show in Sweden and sent us the video of his amazing kinetic sculpture. (Embedded below.) We found an arty-theory writeup of another exhibition of his to share, but we had so many technical questions that we had to write him back asking for details. And boy, did he answer.
In the video, a couple of animatronic faces watch you as crab-like rope-climber bots inch upwards and red wings flap in the background. There’s a lot of brilliant mechanisms here, and aside from whatever it all means, we just like to watch machines go.
The details! Most of the pieces are plasma-cut steel or hand-cut-and-filed aluminum, and almost all of the motors are windshield wiper motors from old Russian KAMAZ and LADA cars. In another installation, the red wings (“Red Queens’ Race”) were installed in a public square and used to track the crowd, flapping faster as people moved more quickly by.
The robotic faces also use OpenCV to track you, and stare you down. One mask is vacuum-formed plastic, and the other is a copy in polyester resin and gelcoat. Here is a video of them on their own, and another of the development.
The twin rope-climbers, “Unbalanced Force”, just climb upwards at different paces. We were more than a little curious about what happens to the rope-climbers when they reach the top. [Krists] says the gallery staff grabs ladders and goes to fetch them. When he exhibited them in Poland on 20m ropes, they actually had to hire professional climbers. Life imitates art.
Measuring length is a pain, and it’s all the fault of Imperial measurements. Certain industries have standardized around either Imperial or metric, which means that working on projects across multiple industries generally leads to at least one conversion. For everyone outside the last bastion of Imperial units, here’s a primer on how we do it in crazy-land.
Definitions
The basic unit of length measurement in Imperial units is the inch. twelve inches make up one foot, three feet make up one yard, and 5,280 feet (or 1,760 yards) make up a mile. Easy to remember, right?
Ironically, an inch is defined in metric as 25.4 millimeters. You can do the rest of the math for exact lengths, but in general, three feet is just shy of a meter, and a mile is about a kilometer and a half. Generally in Imperial you’ll see lots of mixed units, like a person’s height is 6’2″ (that’s shorthand for six feet, two inches.) But it’s not consistent, it’s English; the only consistency is that it’s always breaking its own rules. You wouldn’t say three yards, two feet, and six inches; you’d say 11 1/2 feet. If it was three yards, one foot, and six inches, though, you’d say 3 1/2 yards. There’s no good rule for this other than try to use nice fractions as often as you can.
Users of Imperial units love fractions, especially when it comes to parts of an inch or mile. You’ll frequently find drill bits in fractions of an inch, which can be extremely frustrating when you are trying to do math in your head and figure out if a 17/64″ bit is bigger than a 1/4″ bit (hint, yes, it’s 1/64″ bigger).
A socket wrench set in Imperial fractions on the left and metric on the right. Metric is so much easier.
If it wasn’t hard enough already, there came the thousandth of an inch. As the machine age was getting better and better, and parts were getting smaller and more precise, there came a need for more accurate measurements than 1/64 inch. Development of appropriate tools for measuring such fine resolution was critical as well. You can call a 1/8″ bit a .125″ bit, and that means 125 thousandths of an inch. People didn’t like to wrap their mouths around that whole word, though, so it was reduced to “thou.” Others used the latin root for thousand, “mil.” To summarize, a mil is the equivalent of a thou, which is one thousandth of an inch. It should not be confused with a millimeter. It takes about 40 mils to make 1 millimeter. Also, the plural of mil is mils, and the plural of thou is thou.
Tools
Outside calipers for measuring the outer dimensionBy Glenn McKechnie (Own work) [GFDL, CC-BY-SA-3.0 or CC BY-SA 2.5-2.0-1.0], via Wikimedia CommonsMeasuring length is done with a variety of tools, from GPS for long distances, to tape measures for feet/meters, and rulers for inches/centimeters. When it comes to very small measurements, the caliper is the tool of choice. This is the kind of tool that should be in everyone’s toolbox. Initially it started with the inside caliper and outside caliper, which were separate tools used to measure lengths. The Vernier caliper combined the two, added a depth meter and a couple other handy features, and gave machinists an all-around useful tool for measuring. Just like the slide rule, though, as soon as digital options became available, they took over. The digital caliper can usually switch modes between decimal inches, fractional inches, and metric.
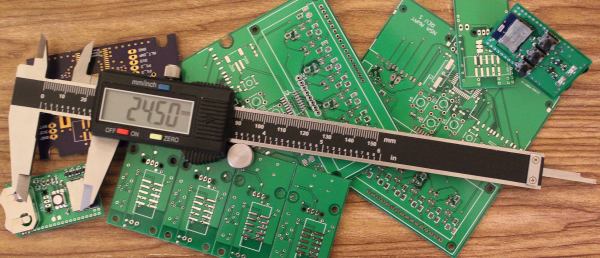
Every industry has picked a different convention. Plastic sheets are usually measured in mils for thin stuff and millimeters or fractions of an inch for anything greater than 1/32″. Circuit boards combine units in every way imaginable, sometimes combining mils for trace width and metric for board dimensions, with the thickness of the copper expressed in ounces. (That’s not even a unit of length! It represents the amount of copper in one square foot of area and 1 oz is equivalent to 1.4mil.) Most of the time products designed outside of the U.S. are in metric units, while U.S. products are designed in either. When combining different industries, though, the difference in standards gets really annoying. For example, order 1/8″ plexiglass, and you may get 3mm plexiglass instead. Sure the difference is only .175mm (7 thou), but that difference can cause big problems for pieces that are press fit or when making finger joints on boxes, so it’s important that when sourcing components, you not only verify the unit, but if it’s a normal unit for that industry and it’s not just being rounded.
Often you can tell with what primary unit a product is designed with only a few measurements of a caliper. Find a dimension and see if it’s a nice round number in metric. If it’s not, switch it to imperial, and watch how quickly it snaps to a nice number.
Moving forward
Use metric if you can. The vast majority of the world does it. When you are sending designs overseas for production they will convert to metric (though they are used to working in both). It does take time to get used to it (especially when you are dealing with thou/mils), but your temporary discomfort will turn to relief when your design doesn’t crash into the Mars (or more realistically when you don’t have to pull out the Dremel and blade to get your parts to fit together).
Most of North America has been locked in a record-setting heat wave for the last two weeks, and cheap window AC units are flying out of the local big-box stores. Not all of these discount units undergo rigorous QC before sailing across the Pacific, though, and a few wonky thermostats are sure to get through. But with a little sweat-equity you can fix it with this Arduino thermostat and temperature display.
We’ll stipulate that an Arduino may be overkill for this application and that microcontrollers don’t belong in every project. But if it’s what you’ve got on hand, and you’re sick of waking up in a pool of sweat, then it’s a perfectly acceptable solution. It looks like [Engineering Nonsense] got lucky and had a unit with a low-current power switch, allowing him to use a small relay to control the AC. The control algorithm is simple enough – accept a setpoint from an encoder, read the temperature sensor, and turn the AC on or off accordingly. Setpoint and current temperature are displayed on an OLED screen. One improvement we’d suggest is adding a three-minute delay between power cycles like the faceplate of the AC states.
This project bears some resemblance to this Arduino-controlled AC, but it seems more hackish to us. And that’s a good thing – hackers have to keep cool somehow.
In the previous article in this series on making a personal electronic project into a saleable kit, we looked at the broader picture of the kit market for a new entrant, the importance of gauging whether or not your proposed kit has a viable niche and ensuring that it has a good combination of buildability, instructions, and quality. In this article we will look at specifying and pricing the hardware side of a kit, illustrating in detail with an example project. The project we’ve chosen is a simple NE555 LED flasher which we haven’t built and have no intention of assembling into a kit for real, however it provides a handy reference project without the circuit itself having any special considerations which might distract from the job at hand.
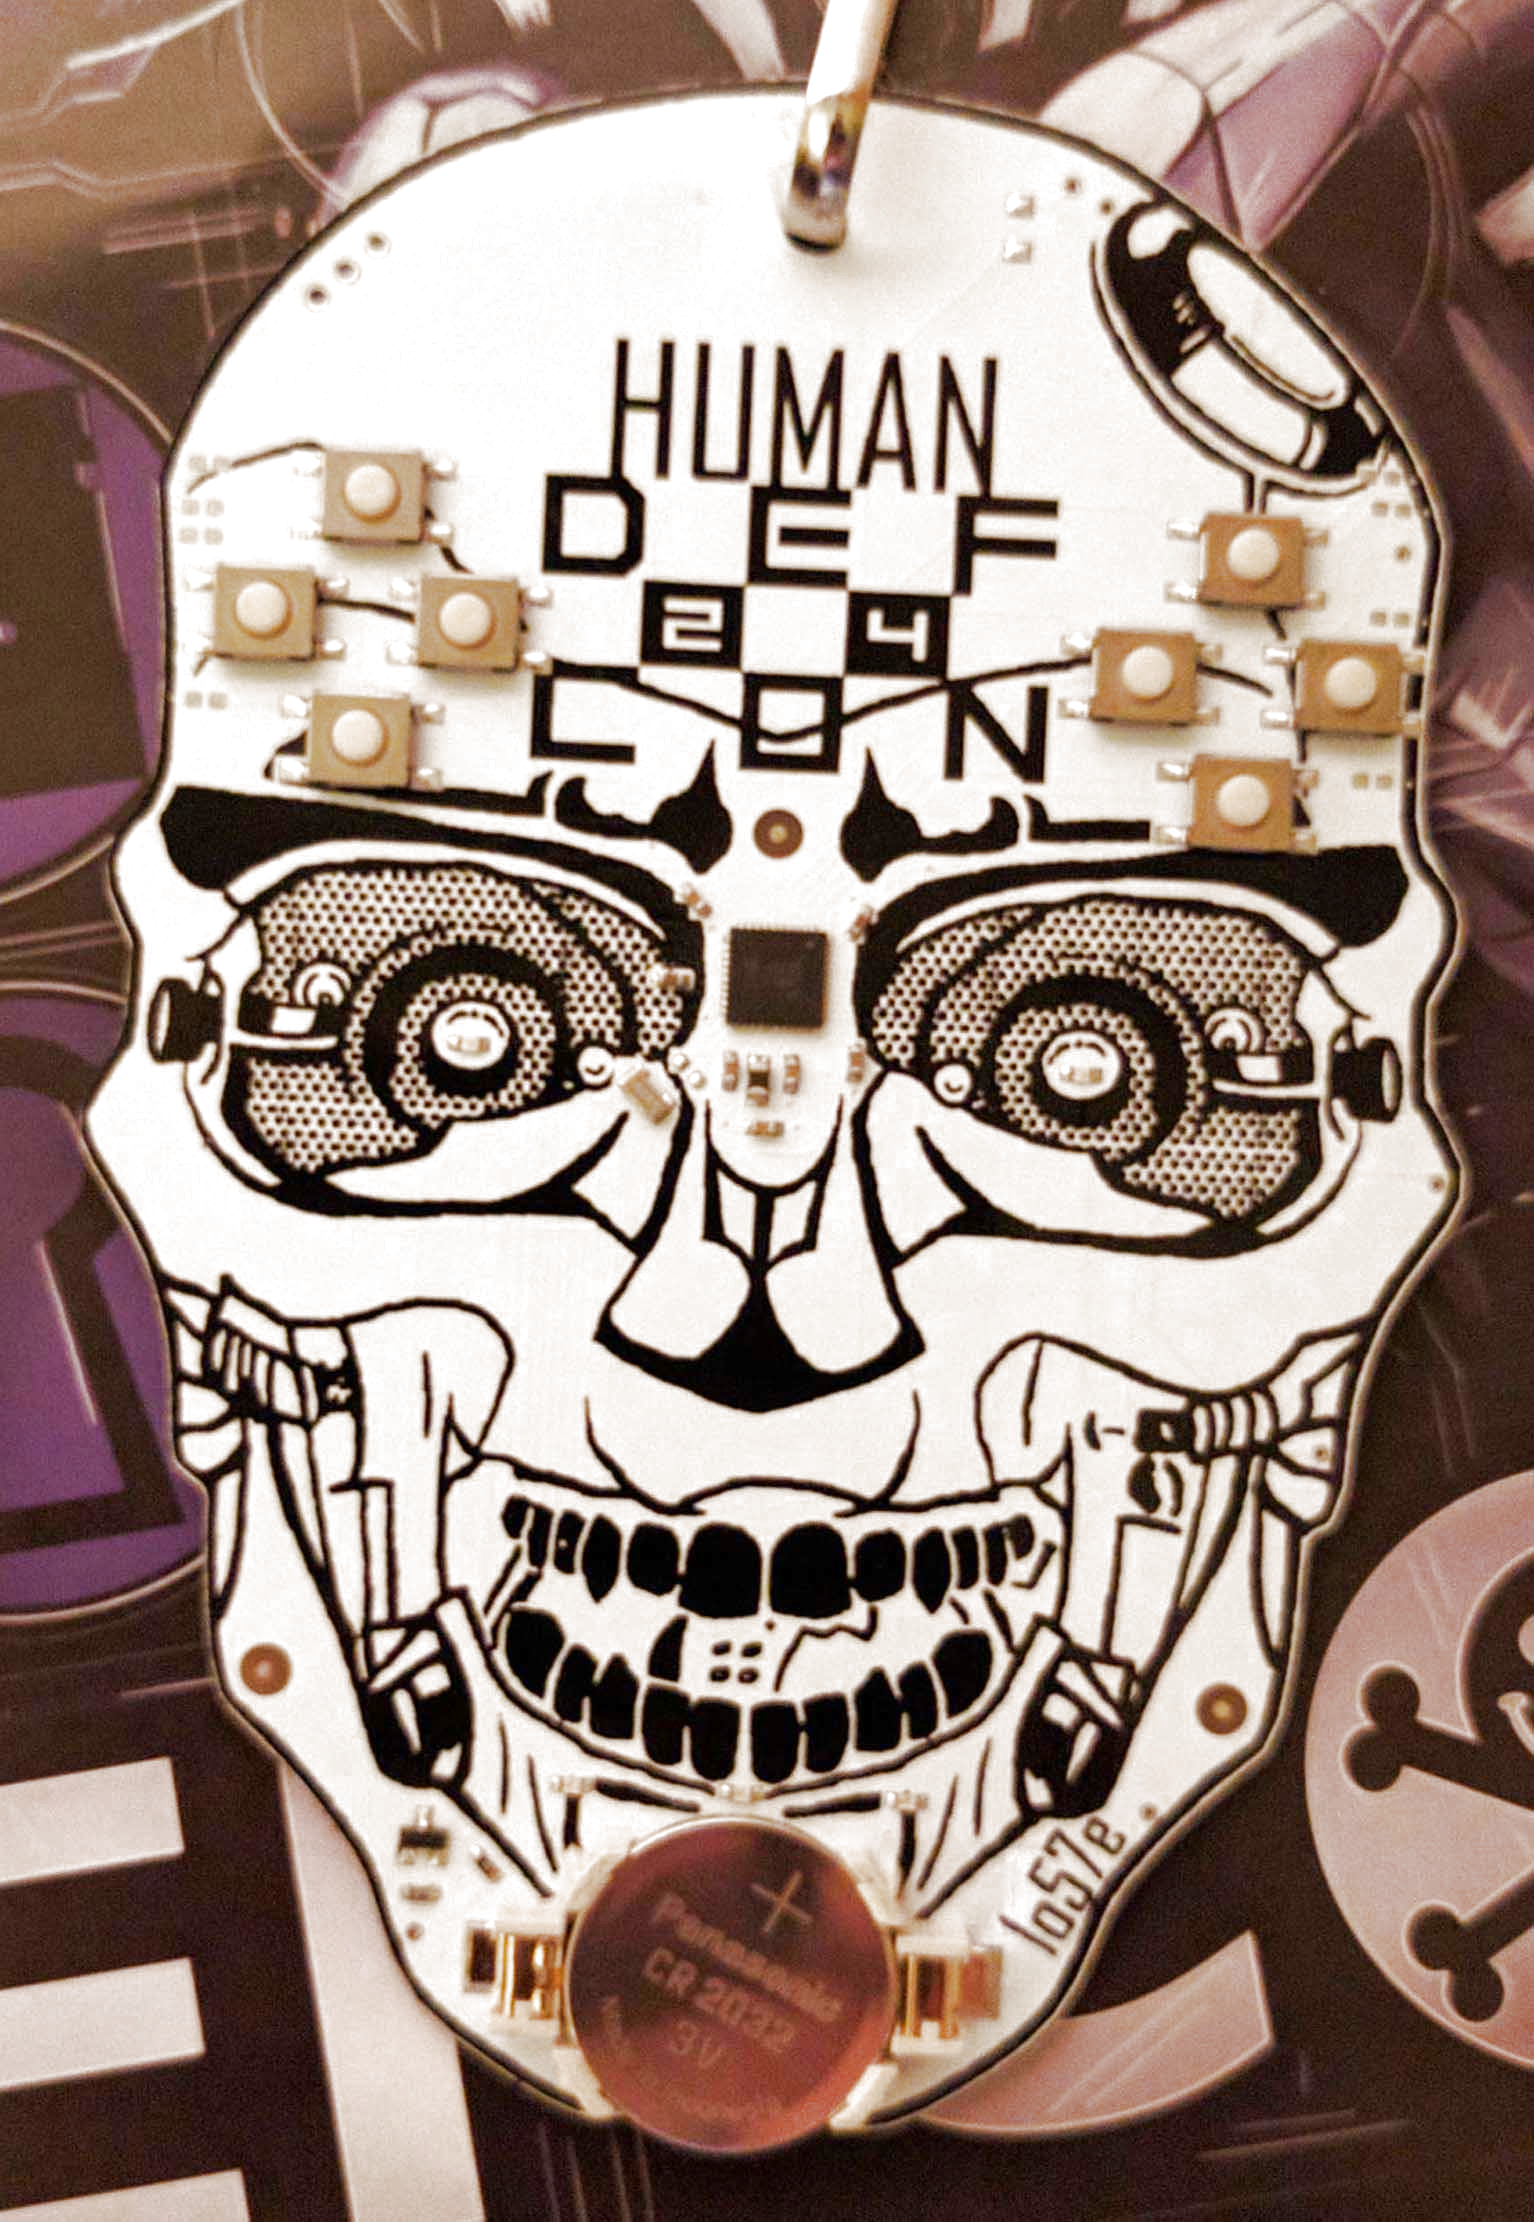
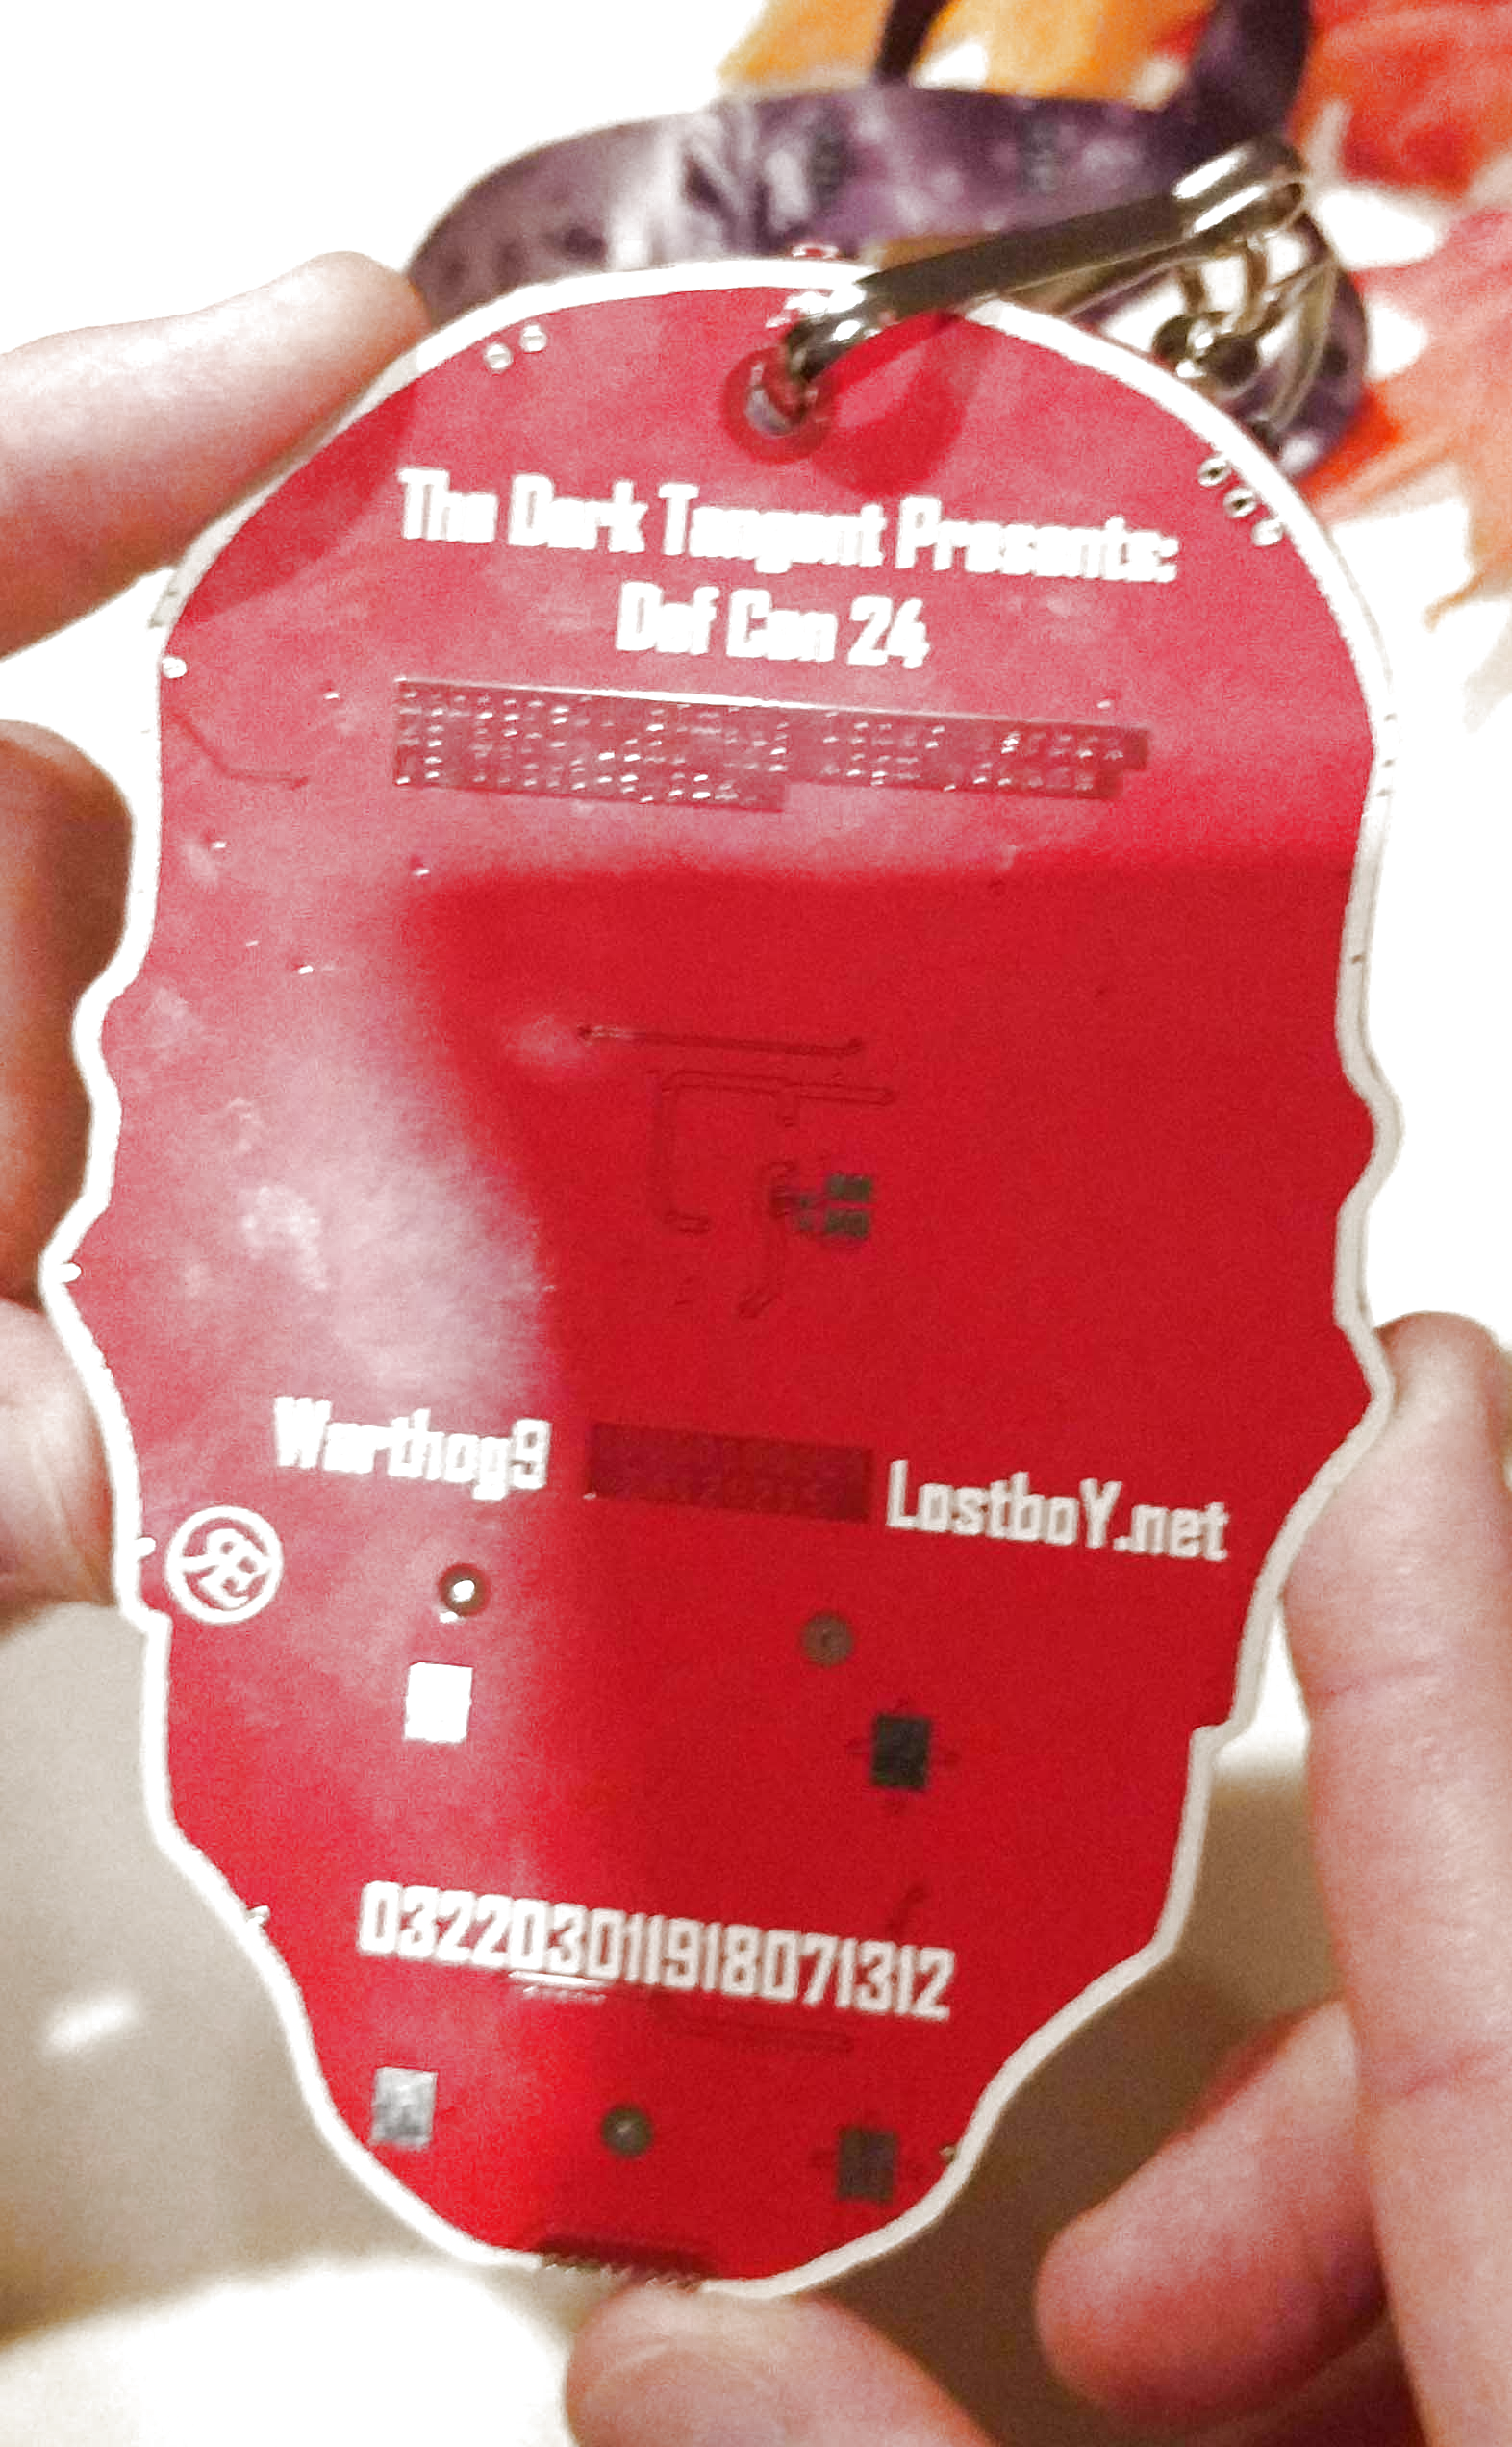
This year’s DEF CON badge is electronic, and there was much celebrating. This year’s DEF CON badge has an x86 processor, and there was much confusion.
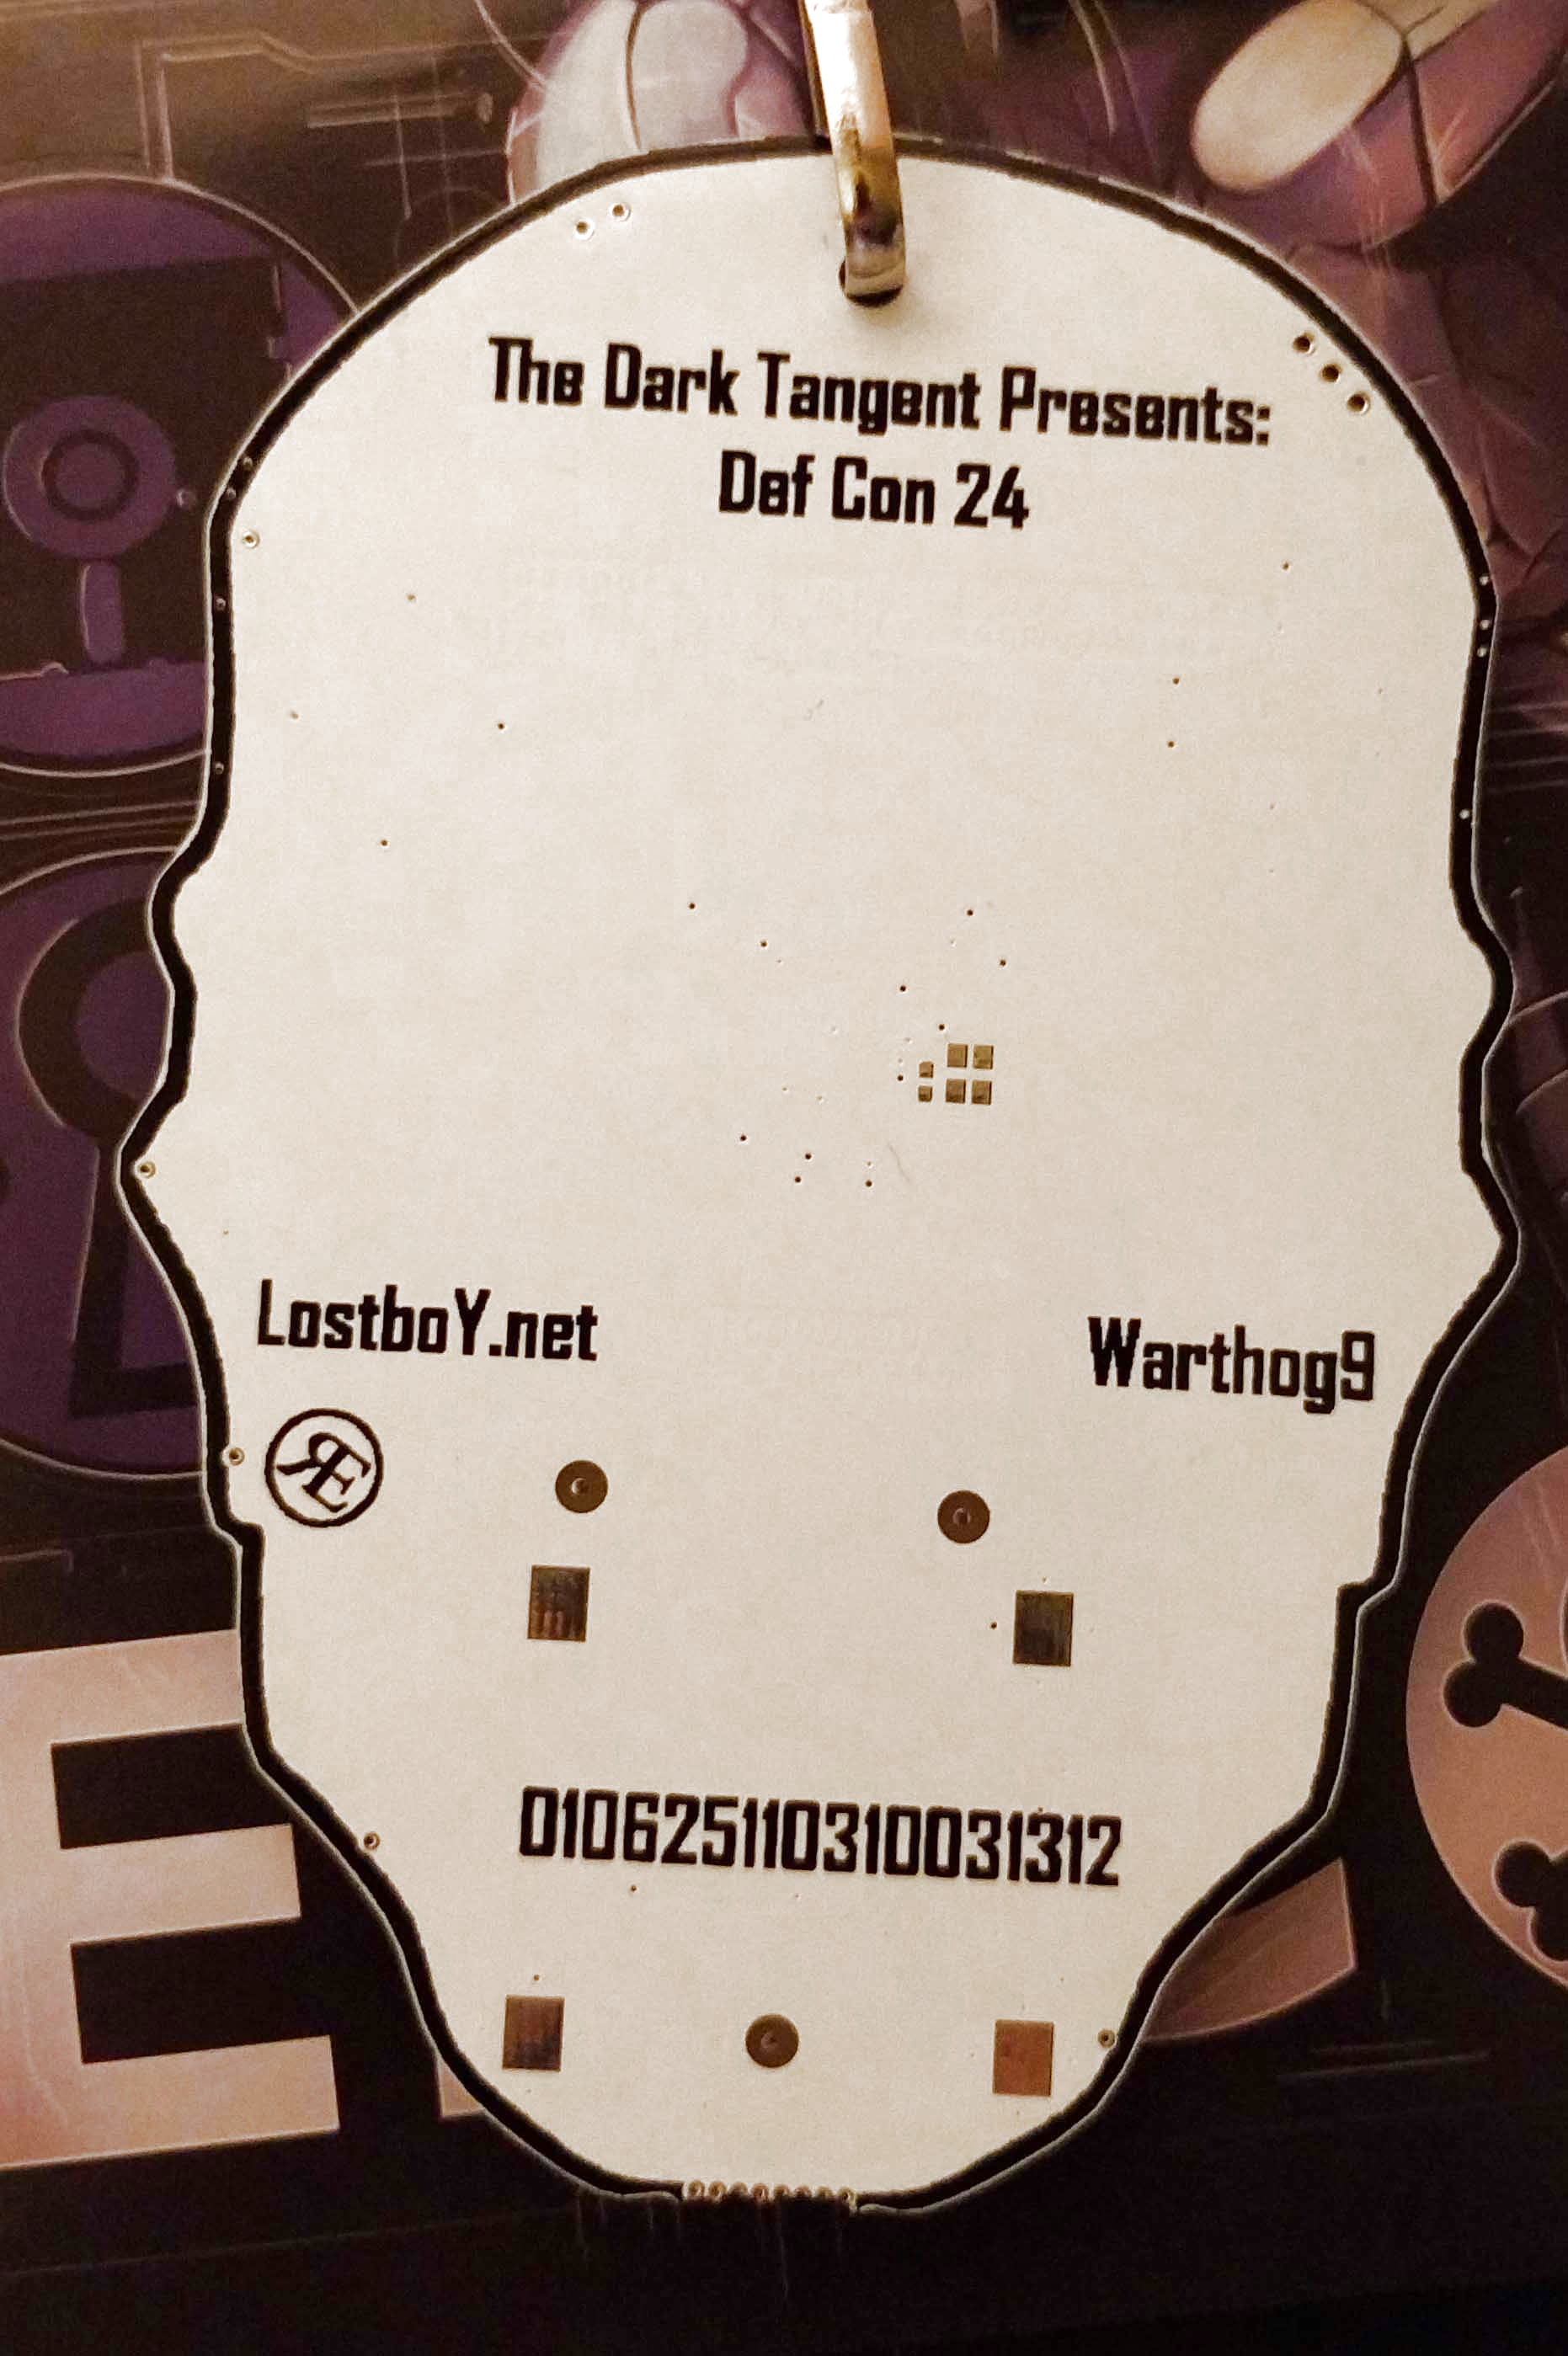
These vias are connected to something.
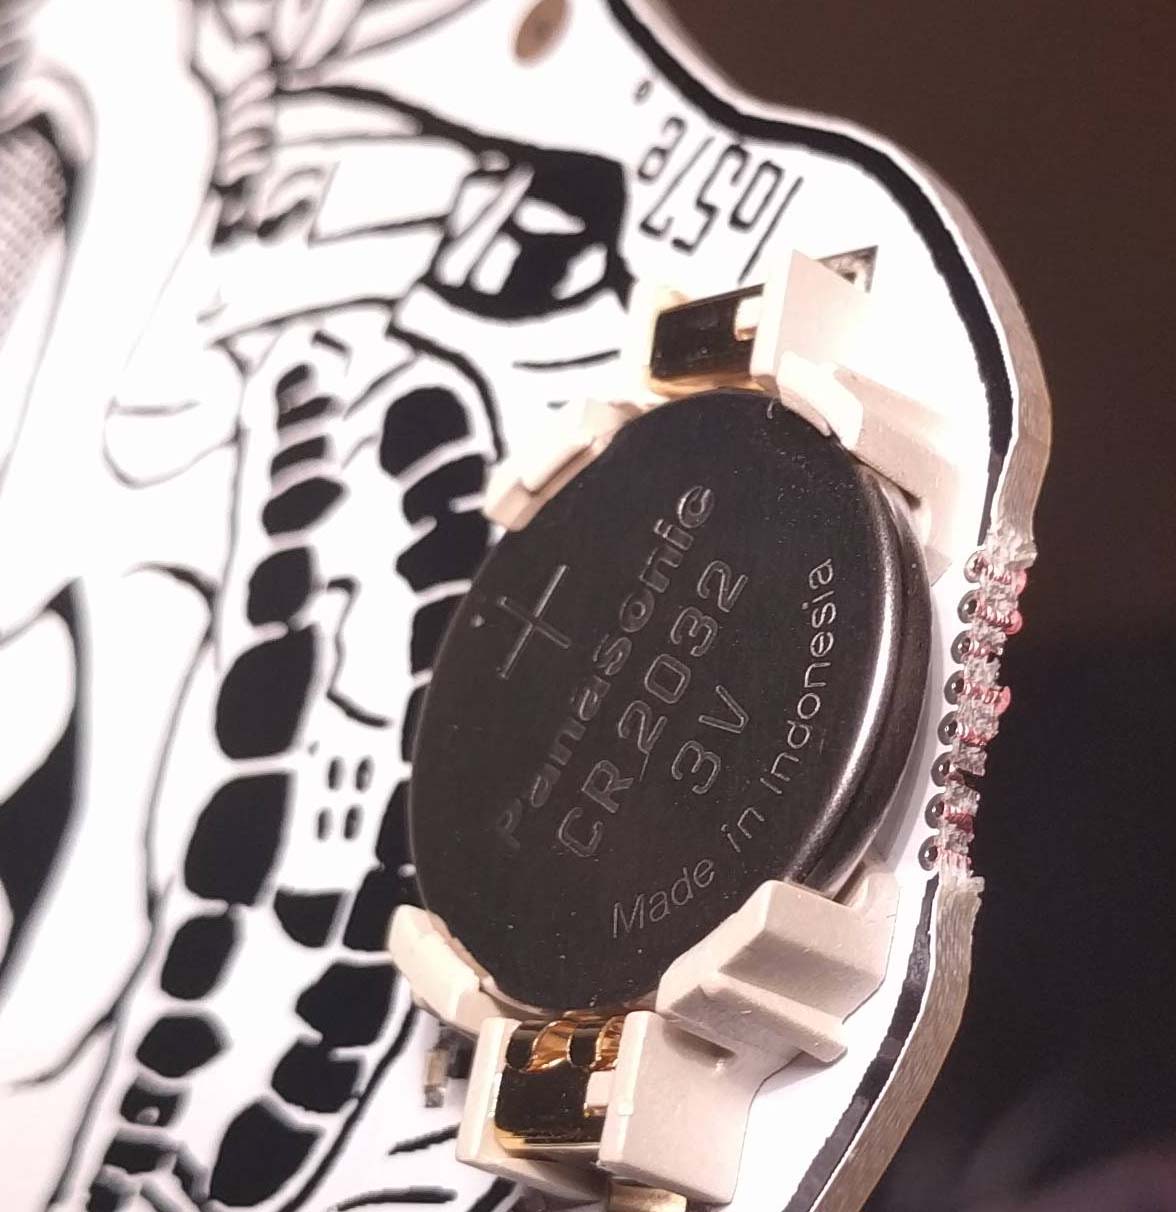
The badge this year, and every year, except badges for 18, 17, 16, 15, and 14, designed by [Joe Grand], and badges from pre-history designed by [Dark Tangent] and [Ping], was designed by [1057], and is built around an x86 processor. Specifically, this badge features an Intel Quark D2000 microcontroller, a microcontroller running at 32MHz, with 32kB of Flash and 8kB of RAM. Yes, an x86 badge, but I think an AT motherboard badge would better fulfill that requirement.
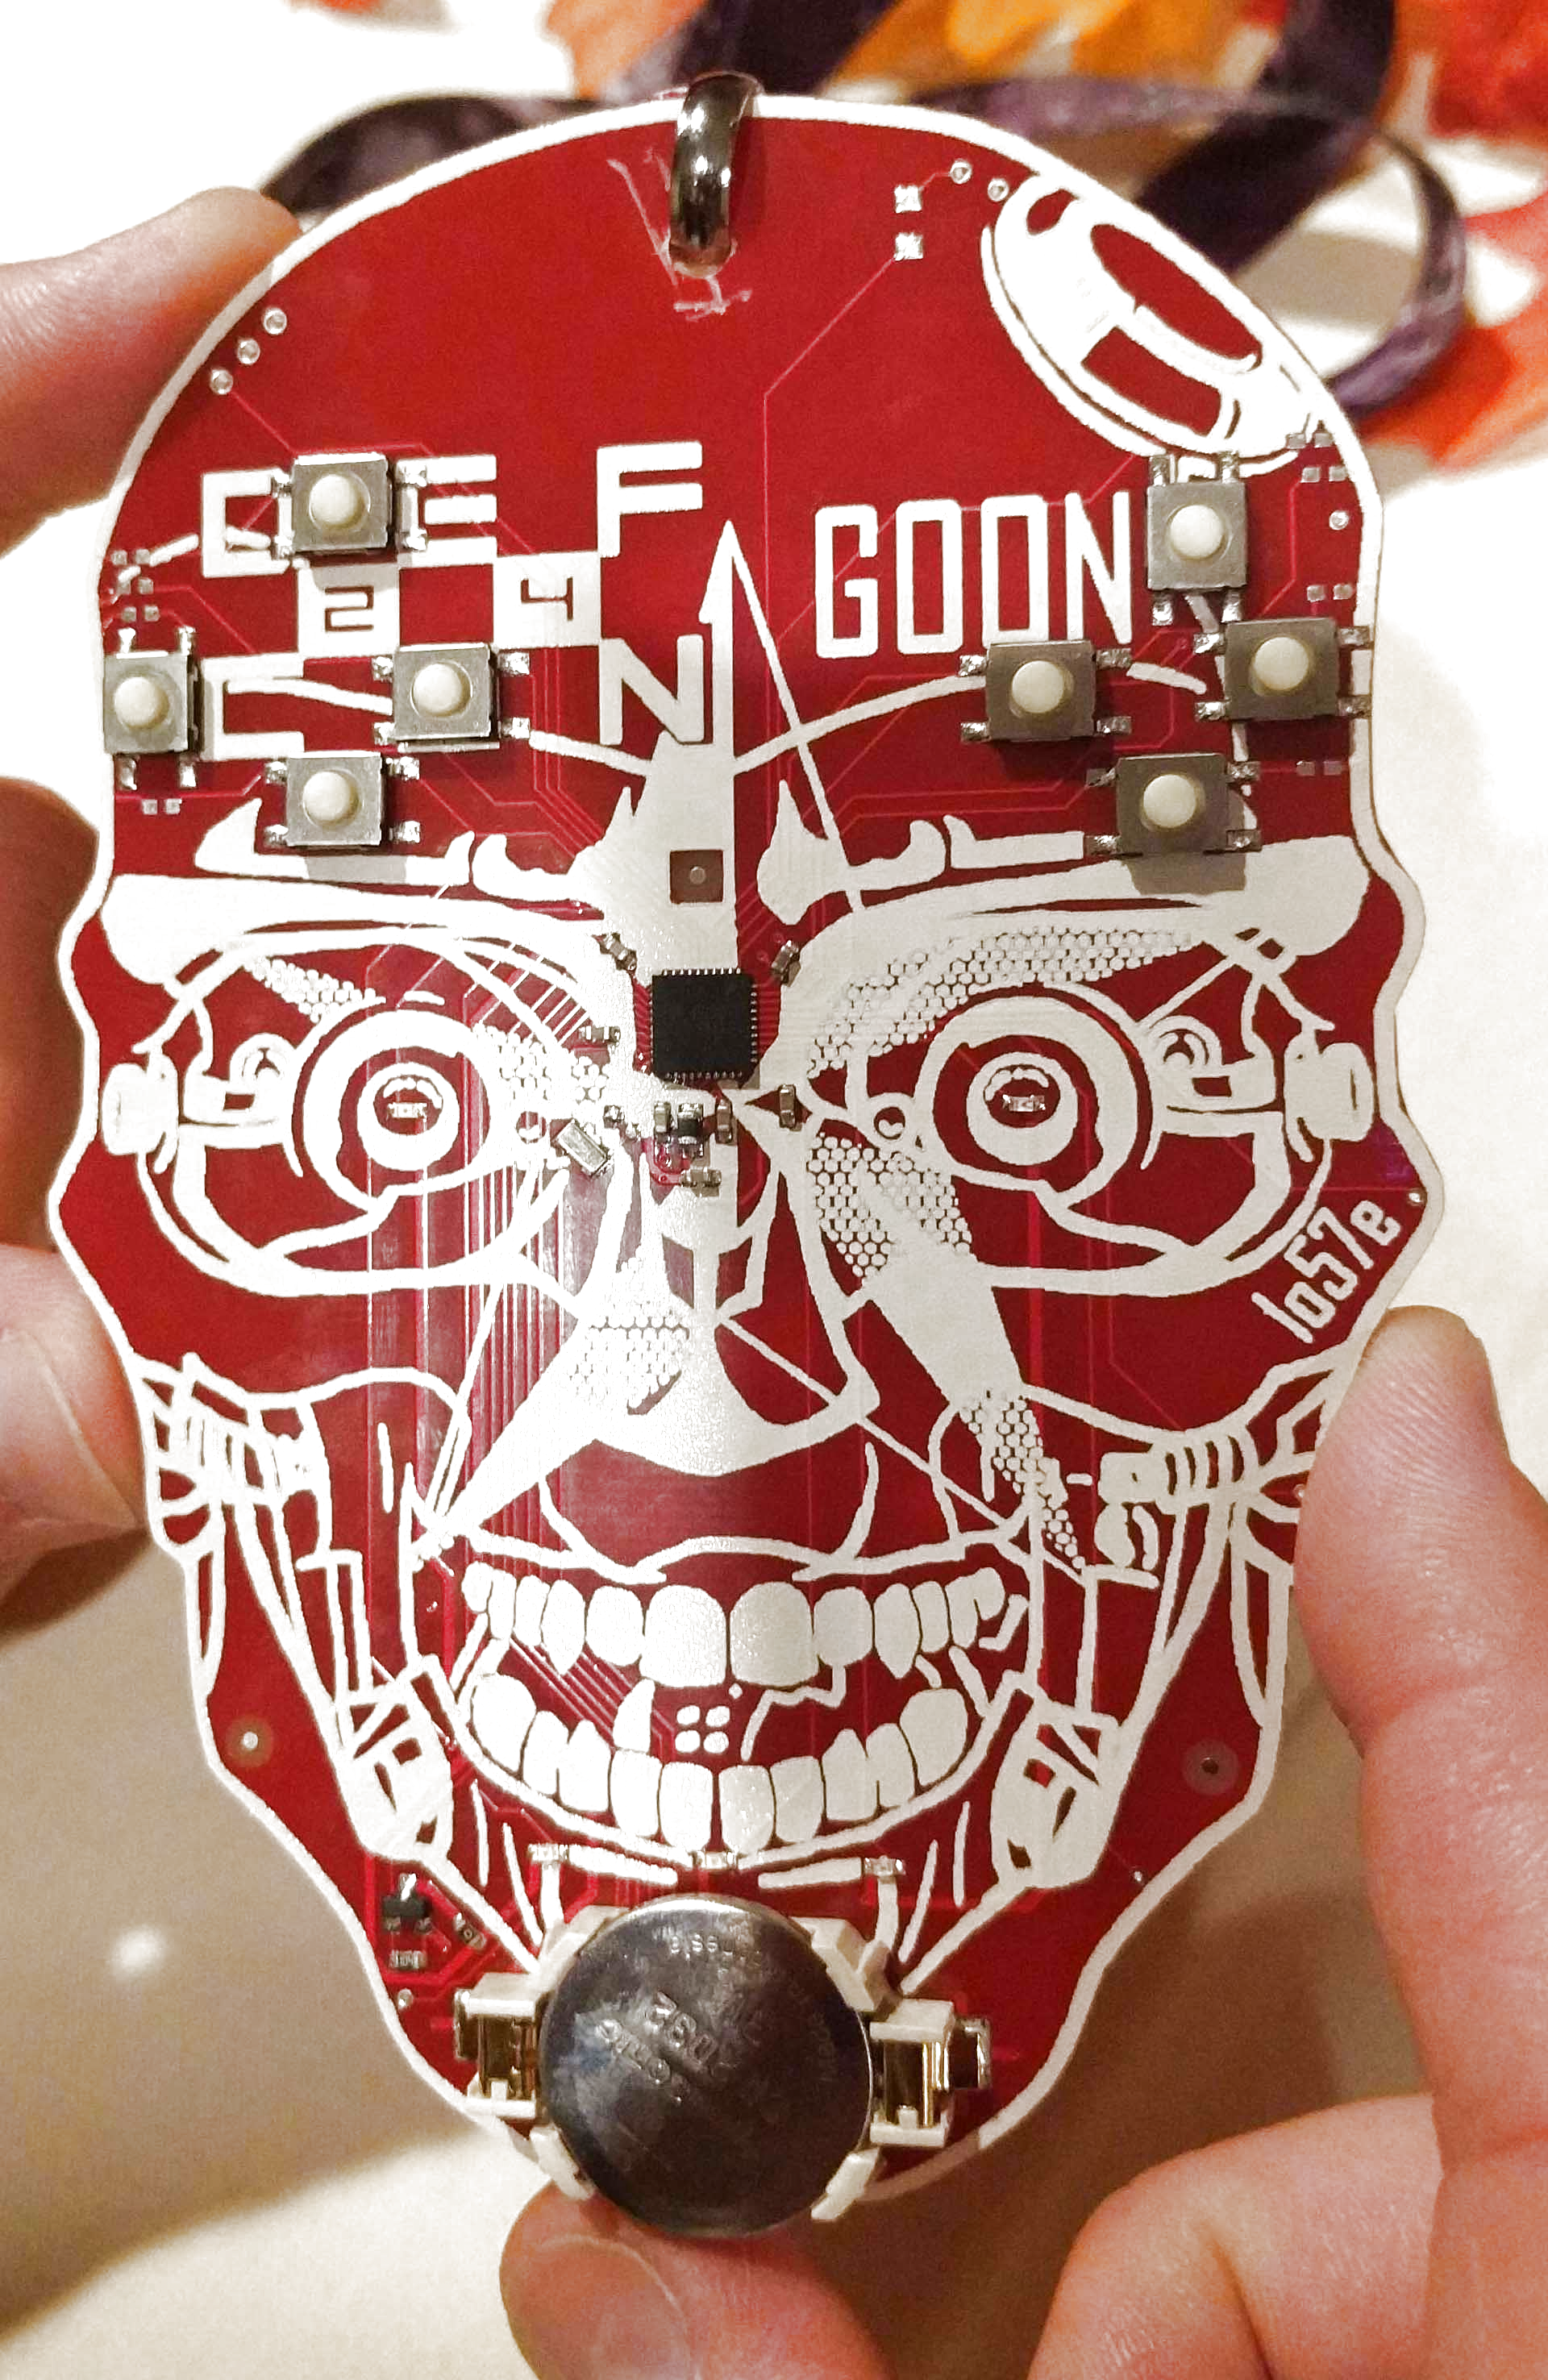
As far as buttons, sensors, peripherals, and LEDs go, this badge is exceptionally minimal. There are eight buttons, laid out as two directional pads, five LEDs, and a battery. There’s not much here, but with a close inspection of the ‘chin’ area of the badge, you can see how this badge was programmed.
As with any [1057] joint, this badge features puzzles galore. One of these puzzles is exceptionally hard to photograph as it is in the bottom copper layer. It reads, “nonpareil bimil: Icnwc lsrbcx kc htr-yudnv ifz xdgm yduxnw yc iisto-cypzk”. Another bottom copper text reads, “10000100001 ΣA120215”. Get crackin’.
A gallery of the Human and Goon badges follows, click through for the best resolution we have.
This post has been updated to correct the record of who designed badges for previous cons.
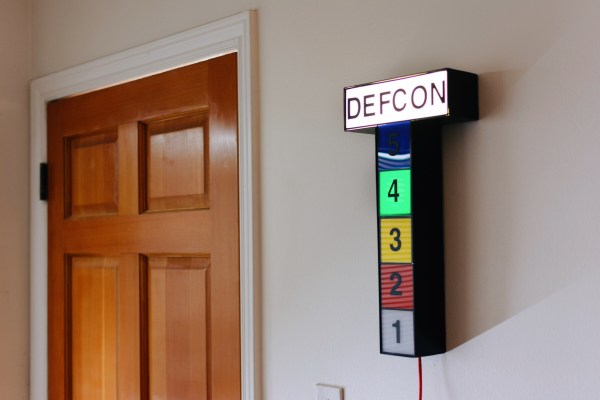
Redditor [mulishadan] — a fan of the movie WarGames — has created a singular thermostat in the form of a Defcon alert meter.
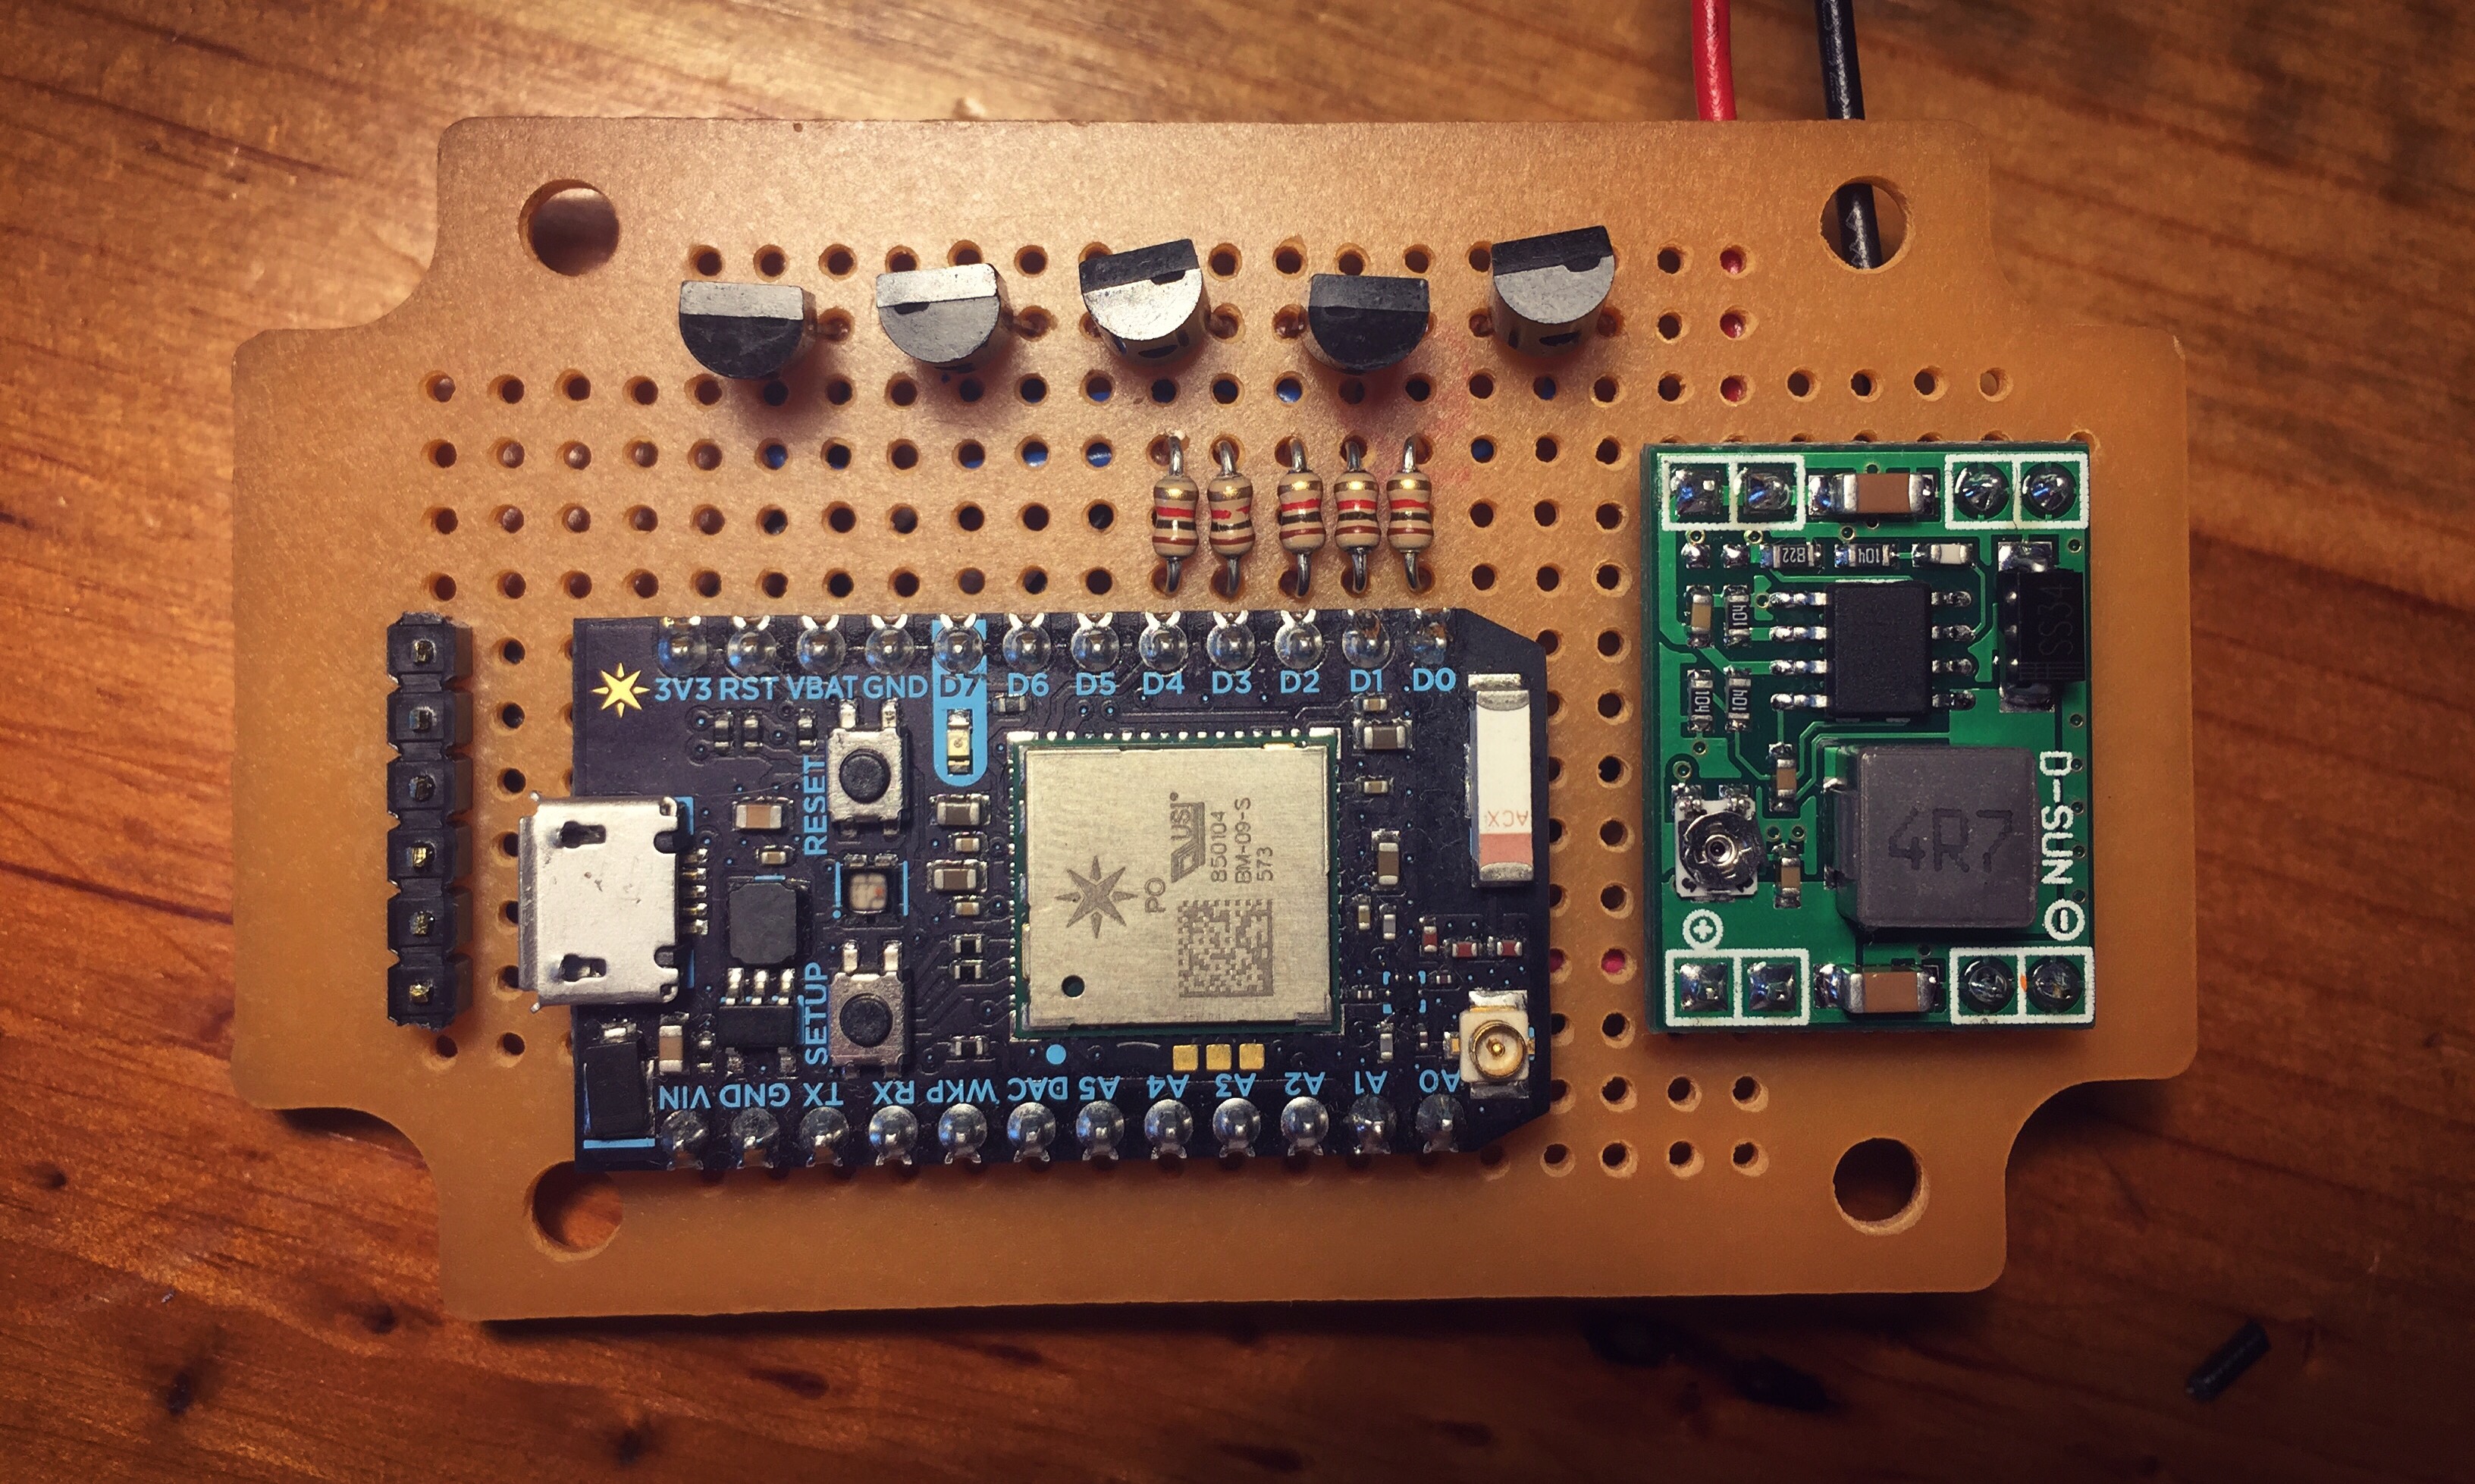
Looking to learn some new skills while building, [mulishadan] tried their hand at MIG welding the 16g cold-rolled plate steel into the distinctive shape. A second attempt produced the desired result, adding a 1/4-inch foam core and painting the exterior. Individual LEDs were used at first for lighting, but were replaced with flexible LED strips which provided a more even glow behind the coloured acrylic. A Particle Photon board queries the Weather Underground API via Wi-Fi in five-minute intervals.
Each escalation in the Defcon alert signals an increase of 10 F, starting at Defcon 5 for 69 F and below, up to Defcon 1 for 100+ F. The final build looks like a true-to-life prop with some useful functionality that can be adapted to many different purposes — proof that a relatively simple project can still produce fantastic results for entry-level makers. So why not try making this thermostat scarf as well?
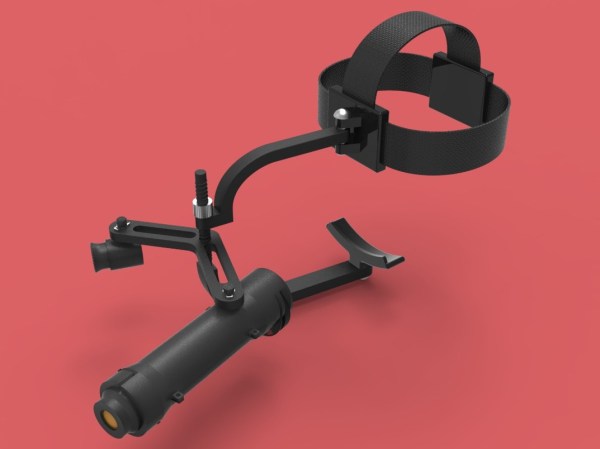
Slit lamps are prohibitively expensive in the third world areas of India where they are most needed. An invention that’s been around for over a hundred years, the slit lamp is a simple-in-concept way to see and diagnose a large array of ocular issues.
Since they are relatively old by technological standards, the principles behind them have become more and more understood as time has gone on. While a nice lab version with a corneal microscope is certainly better, innovations in manufacturing have brought the theoretical minimum cost of the device way down, or at least that’s what [Kewal Chand Swami] hopes.
His design aims for portability and cost reduction. It must be able to travel to remote locations and it must be significantly cheaper than the lab versions. It uses off-the-shelf lenses in a 3D printed housing with a simple LED torch, the kind you can buy for a dollar at the check-out stand.
The assembly slides onto the user’s head and is held there with straps. The doctor can adjust where the slit the lamp shines and also look through a microscope to diagnose the issue. Hopefully devices like this will see similar community support to the prosthetic projects we’ve covered.


![Outside calipers for measuring the outer dimensionBy Glenn McKechnie (Own work) [GFDL, CC-BY-SA-3.0 or CC BY-SA 2.5-2.0-1.0], via Wikimedia Commons](https://hackaday.com/wp-content/uploads/2016/07/outsidecalipers.jpg?w=400)