Word Clock Five Minutes At A Time

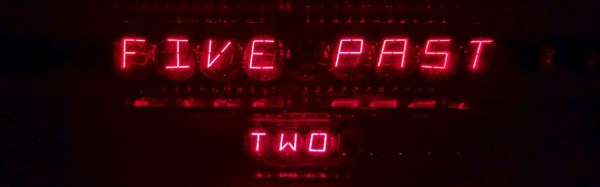
As this clock’s creator admits, it took far more than five minutes to put together, but it does display the time in five minute increments.

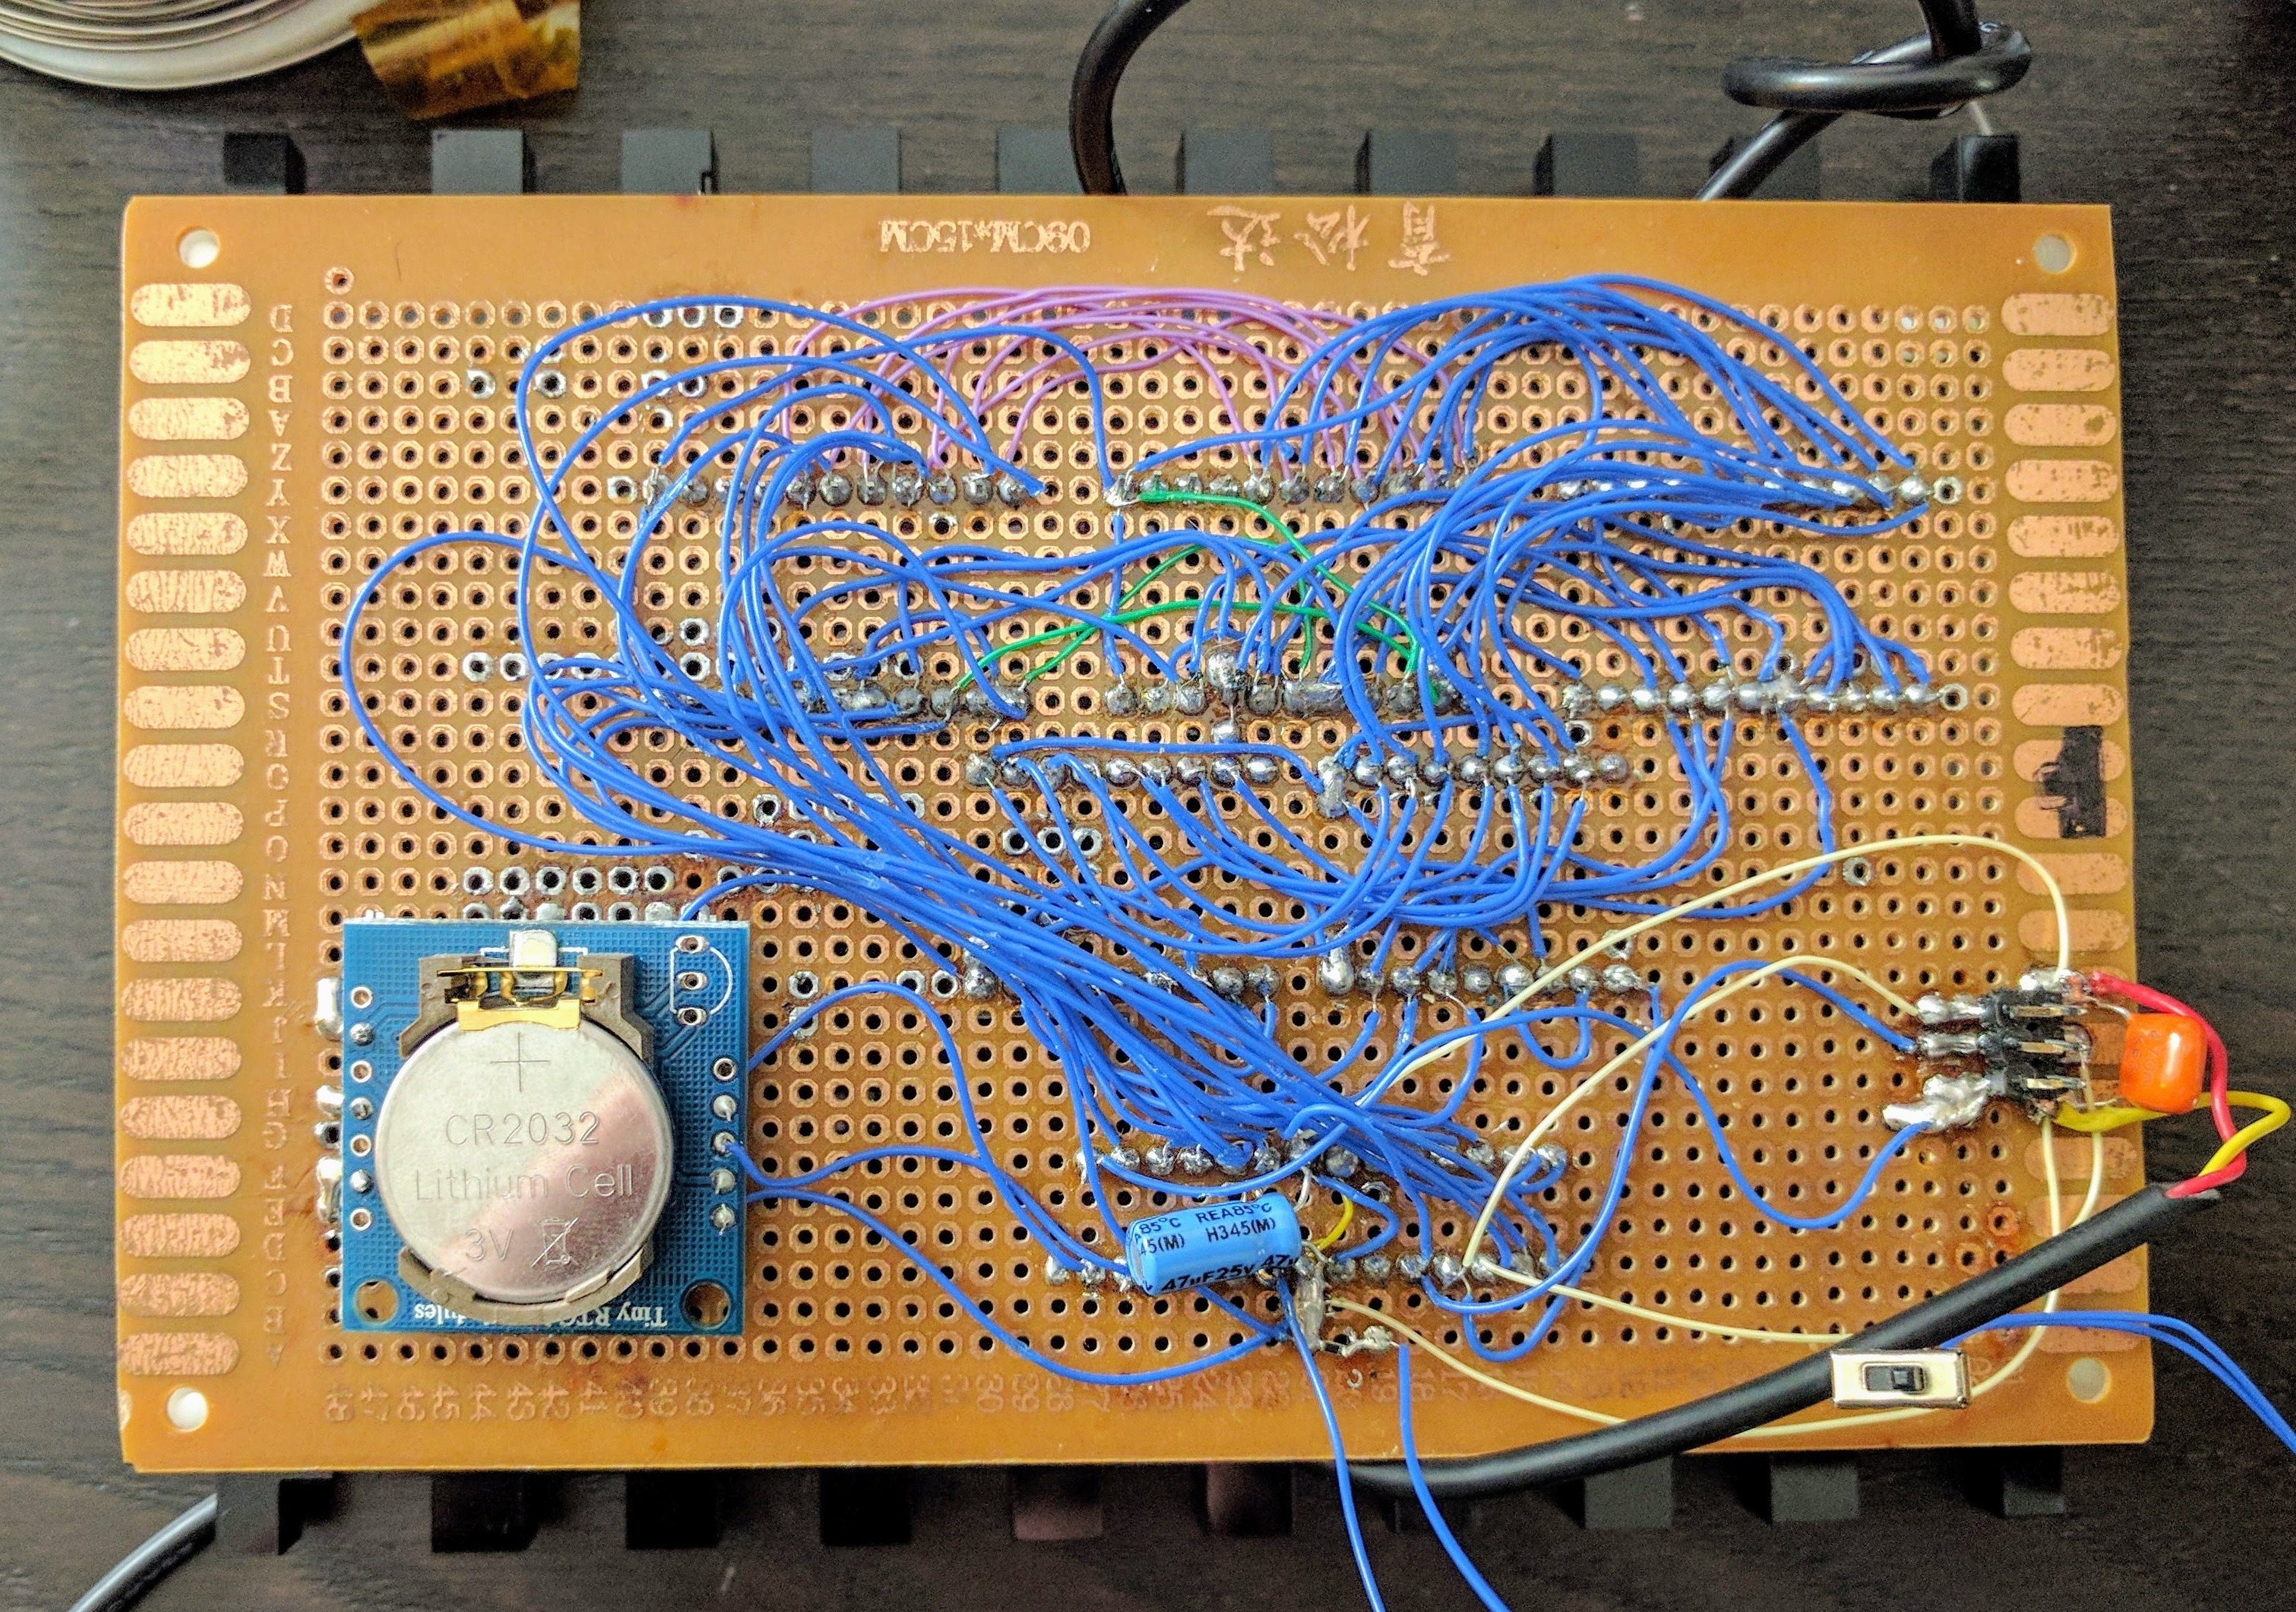
After acquiring five 4-character, 16 segment display modules that were too good to pass up, they were promptly deposited in the parts pile until [JF] was cajoled into building something by a friend. Given that each display’s pins were in parallel, there was a lot of soldering to connect these displays to the clock’s ATMega328P brain. On the back of the clock’s perfboard skeleton, a DS1307 real-time clock and coin cell keep things ticking along smoothly. The case is laser cut out of acrylic with an added red filter to up the contrast of the display, presenting a crisp, crimson glow.

Troubleshooting — as well as procrastination — proved to be the major stumbling block here. Each of the displays required extensive troubleshooting because — like Christmas lights of yore — one bad connection would cause all the other displays to fail. Furthermore, there isn’t any easy way to change the time, so the clock needs to be reprogrammed once in a while

We love word clocks because there are so many ways to configure them and for the oddities. That isn’t to say radial clocks are any less creative.

Continue reading “Word Clock Five Minutes At A Time”

3D Prints That Fold Themselves

3D printing technologies have come a long way, not only in terms of machine construction and affordability but also in the availability of the diverse range of different printing materials at our disposal. The common consumer might already be familiar with the usual PLA, ABS but there are other more exotic offerings such as PVA based dissolvable filaments and even carbon fiber and wood infused materials. Researchers at MIT allude to yet another possibility in a paper titled “3D-Printed Self-Folding Electronics” also dubbed the “Peel and Go” material.

The crux of the publication is the ability to print structures that are ultimately intended to be intricately folded, in a more convenient planar arrangement. As the material is taken off the build platform it immediately starts to morph into the intended shape. The key to this behavior is the use of a special polymer as a filler for joint-like structures, made out of more traditional but flexible filament. This special polymer, rather atypically, expands after printing serving almost like a muscle to contort the printed joint.

Existing filaments that can achieve similar results, albeit after some manual post-processing such as immersion in water or exposure to heat are not ideal for electronic circuits. The researchers focus on this new materials potential use in manufacturing electronic circuits and sensors for the ever miniaturizing consumer electronics.

If you want to experiment printing extremely intricate structures, check out how [_primoz_] brilliant technique revolutionized how the 3D printing community prints thin fibers, bristles, and lion sculptures.

Continue reading “3D Prints That Fold Themselves”

Take A Time-Lapse Or Bake A Cake With This Kitchen Timer Panning Rig

Seems like the first thing the new GoPro owner wants to do is a time-lapse sequence. And with good reason – time-lapses are cool. But they can be a bit bland without a little camera motion, like that provided by a dirt-cheap all-mechanical panning rig.

Let’s hope [JackmanWorks]’ time-lapse shots are under an hour, since he based his build on a simple wind-up kitchen timer, the likes of which can be had for a buck or two at just about any store. The timer’s guts were liberated from the case and a simple wooden disc base with a 1/4″-20 threaded insert for a tripod screw was added. The knob, wisely left intact so the amount of time left in the shot is evident, has a matching bolt for the camera’s tripod socket. Set up the shot, wind up the timer, and let it rip at 1/60 of an RPM. Some sample time-lapse shots are in the video below.

Turning this into a super-simple powered slider for dollying during a time-lapse wouldn’t be too tough — if you’ve already got a nice pantograph slide rig built.

Continue reading “Take A Time-Lapse Or Bake A Cake With This Kitchen Timer Panning Rig”

Cheap And Easy Motion Tracking

[Koppany Horvarth] set out to create a dirt-cheap optical tracking rig for VR that uses only two cameras and a certain amount of math to do its thing. He knew he could do theoretically, and wouldn’t cost a lot of money, but still required a lot of work and slightly absurd amount of math.

While playing around with a webcam that he’d set up to run an object-tracking Python script and discovered that his setup tended to display a translucent object with a LED inside of it as pure, washed-out white. This gave [Koppany] the idea that he could use such a light as part of his object tracking project. He 3D-printed 50mm hollow spheres out of transparent PLA, illuminated via a LED and powered by a 5V power supply hacked from an old USB cable. After dealing with some lens flares, he sanded down the PLA a little to diffuse the light and it worked like a charm.

To learn more check out his GitHub code repository. You can also take inspiration in some of the other motion tracking posts we’ve published in the past, like motion tracking on the cheap with a PIC and this OpenCV Airsoft turret.

A Lightsaber, With Rave Mode

How often after being exposed to Star Wars did you dream of having your own working lightsaber? These days — well, we don’t quite have the technology to build crystal-based weapons, but tailor-made lightsabers like redditor [interweber]’s are very much real.

Piggybacking off the Korbanth Graflex 2.0 kit — a sort of bare-bones lightsaber ready to personalize — [interweber] is using a Teensy 3.5 to handle things under the hilt. Instead of taking the easy route and cramming everything into said handle, a 3D printed a cradle for the electronics and speaker keep things secure. The blade is made up of two meters of APA102 LEDs.

As well as all the sound effects appropriate to ‘an elegant weapon for a more civilized age’, a cluster of buttons handle the various functions; , playing and cycling through music(more on that in a second), changing the color of the lightsaber — Jedi today, Sith tomorrow — enabling a flickering effect that mimics Kylo Ren’s lightsaber, color cycling, and a…. rave mode?

Continue reading “A Lightsaber, With Rave Mode”

Table-Top Self Driving With The Pi Zero

Self-driving technologies are a hot button topic right now, as major companies scramble to be the first to market with more capable autonomous vehicles. There’s a high barrier to entry at the top of the game, but that doesn’t mean you can’t tinker at home. [Richard Crowder] has been building a self-driving car at home with the Raspberry Pi Zero.

The self-driving model is trained by first learning from the human driver.

[Richard]’s project is based on the EOgma Neo machine learning library. Using a type of machine learning known as Sparse Predictive Hierarchies, or SPH, the algorithm is first trained with user input. [Richard] trained the model by driving it around a small track. The algorithm takes into account the steering and throttle inputs from the human driver and also monitors the feed from the Raspberry Pi camera. After training the model for a few laps, the car is then ready to drive itself.

Fundamentally, this is working on a much simpler level than a full-sized self-driving car. As the video indicates, the steering angle is predicted based on the grayscale pixel data from the camera feed. The track is very simple and the contrast of the walls to the driving surface makes it easier for the machine learning algorithm to figure out where it should be going. Watching the video feed reminds us of simple line-following robots of years past; this project achieves a similar effect in a completely different way. As it stands, it’s a great learning project on how to work with machine learning systems.

[Richard]’s write-up includes instructions on how to replicate the build, which is great if you’re just starting out with machine learning projects. What’s impressive is that this build achieves what it does with only the horsepower of the minute Raspberry Pi Zero, and putting it all in a package of just 102 grams. We’ve seen similar builds before that rely on much more horsepower – in processing and propulsion.

A Battery-Tab Welder With Real Control Issues

Spot welding should easier than it looks. After all, it’s just a lot of current in a short time through a small space. But it’s the control that can make the difference between consistently high-quality welds and poor performance, or maybe even a fire.

Control is where [WeAreTheWatt]’s next-level battery tab spot welder shines. The fact that there’s not a microwave oven transformer to be seen is a benefit to anyone sheepish about the usual mains-powered spot welders we usually see, even those designed with safety in mind. [WeAreTheWatt] chose to power his spot welder from a high-capacity RC battery pack, but we’d bet just about any high-current source would do. The controller itself is a very sturdy looking PCB with wide traces and nicely machined brass buss bars backing up an array of MOSFETs. A microcontroller performs quite a few functions; aside from timing the pulse, it can control the energy delivered, read the resistance of the 8AWG leads for calibration purposes, and even detect bad welds. The welder normally runs off a foot switch, but it can also detect when the leads are shorted and automatically apply a pulse — perfect for high-volume production. See it in action below.

There may be bigger welders, and ones with a little more fit and finish, but this one looks like a nicely engineered solution.

Continue reading “A Battery-Tab Welder With Real Control Issues”