Wake Up! The Cat Came Back!

In order to get the most out of the batteries connected to your microcontroller, you’ll probably need to put it to sleep, the deeper the better. [Rgrokett] was curious about the nighttime habits of his cat, and came up with a nice little hack to get more battery life out of the ESP8266 that he was using.

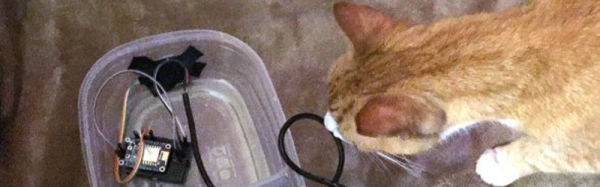
[rgrokett]’s cat enters and leaves through a cat-door. He figured a PIR sensor would let him know when there was movement around the door. He could then tell if the cat was around. Leaving the PIR sensor and the ESP8266 microcontroller (an Adafruit Huzzah) on all the time drained the batteries pretty quickly, so [rgrokett] decided to try putting the Huzzah to sleep.

The trick in this build is that the PIR sensor is used to reset the Huzzah when it triggers. The Huzzah requires the reset switch to go from high to low, but the PIR trigger goes from low to high, so a transistor is used to invert the PIR sensor’s trigger signal. When the Huzzah wakes up, it connects to the WiFi network and sends [rgrokett] an email via IFTTT ([rgrokett]’s description goes over the steps to set up a secure connection to IFTTT.)

It’s a pretty simple hack, but it increases [rgrokett] system’s battery life from a couple of days to more than a month (he’s still waiting to see how long they’ll last) and all that was needed was the microcontroller, the sensor and a couple of parts. We have a couple of older hacks about putting the ESP modules into deep sleep, such as this one, and check out this tutorial on PIR sensors.

Portable RetroPie Suitcase For Multiplayer On The Go!

Portable gaming — and gaming in general —  has come a long way since the days of the original Game Boy. With a mind towards portable multiplayer games, Redditor [dagcon] has assembled a RetroPie inside a suitcase — screen and all!

This portable console has almost everything you could need. Four controllers are nestled beside two speakers. Much of the power cabling is separated and contained by  foam inserts. The screen fits snugly into the lid with a sheet of rubber foam to protect it during transport.

Tucked behind the monitor rests the brains of this suitcase console: a Raspberry Pi and the associated boards. [Dagcon] resorted to using a dedicated sound card for the speakers, diverting the output from the HDMI port. An LCD screen controller was also necessary as the screen had been re-purposed from its previous life as a laptop screen. [Dagcon] offers some tips on how to go about accomplishing this yourself and a helpful Instructables link.

Continue reading “Portable RetroPie Suitcase For Multiplayer On The Go!”

Simple Marble Machine Captivates The Eyes

Marble machines are the kind of useless mechanisms that everybody loves. Their sole purpose is to route marbles through different paths for your viewing pleasure. They can be extremely complicated contraptions, and sometimes that is the precisely the point. However, even a simple mechanism can be delightful to watch. [Denha] just uploaded his latest creation, using a spring as elevator and a simple zig-zag path.

The construction is relatively simple, a spring with the appropriate pitch for the steel balls size is used as an elevator. The spring is driven by a small electric motor via a couple of gears, and a wooden zig-zag path for the marbles lies next to the spring. The marbles go up with the spring and return in the wooden path in an endless journey.

We believe that a serious hacker should build a marble machine at least once in their life. We have posted several of them, from simple ones to other more complicated designs that require careful craftsmanship. [Denha]’s Youtube channel is full of good ideas to inspire your first project. In any case, watching a marble machine at work is quite a nice, relaxing experience.

Continue reading “Simple Marble Machine Captivates The Eyes”

An Eggcelent Eggspriment

After multiple iterations [Keef] has nailed down the fabrication process for an unusual component. Using only a heater water bath, some silicone and easily available reagents, [Keef] demonstrate how he manufactures a gastronomic enigma: the long egg.

The similarities between [Keef’s] process and the typical hacker iteration cycle are eggceptional. He starts out with a goal and iterates, modifying his methods until he gets the perfect long egg. Sound familiar? Cooking can be as much of a science as it is an art.

In his quest, [Keef] utilizes sausage casing, plastic bags, sticky tape, “lots of sweat and almost some tears” to hold eggs for cooking via an Anova Precision Cooker immersion circulator. However, [Keef] notes, the Anova is normally used for sous vide cooking so you might not have one sitting around. In that case, you can use a regular pan on a stovetop along with a digital thermometer, but you’ll have to be quite vigilant to keep the temperature steady.

But wait. Why would one want a long egg in the first place? I’ll leave this explanation to [Keef]. “Well, the main use is in a Gala Pie (a long pork pie baked in a loaf tin and often cut into slices for picnics). Or you could just slice the egg and lay it out on a platter and amaze your friends with how every slice is exactly the same size.”

Go check out [Keef’s] two videos. He has two, one that chronicles the eggciting initial attempts, and another that describes his final method. With [Keef’s] help, the number of long eggs outside of Denmark may substantially increase. But, if you’d rather have some pizza, we won’t be offended.

One Micro Bit Accomplishes Its Goal

Like the Raspberry Pi, the BBC Micro Bit had a goal of being foremost an educational device. Such an inexpensive computer works well with the current trend of cutting public school budgets wherever possible while still being able to get kids interested in coding and computers in general. While both computers have been co-opted by hackers for all kinds of projects (the Pi especially), [David]’s latest build keeps at least his grandkids interested in computers by using the Micro Bit to add some cool features to an old toy.

The toy in question is an old Scalextric slot car racetrack – another well-known product of the UK. But what fun is a race if you can’t keep track of laps or lap times? With the BBC Mirco Bit and some hardware, the new-and-improved racetrack can do all of these things. It also implements a drag race-style light system to start the race and can tell if a car false starts. It may be a little difficult to intuit all of the information that the Micro Bit is displaying on its LED array, but it shouldn’t take too much practice.

The project page goes into great detail on how the project was constructed. Be sure to check out the video below for some exciting races! The build is certain to entertain [David]’s grandkids for some time, as well as help them get involved with programming and building anything that they can imagine. Maybe they’ll even get around to building a robot or two.

Thanks to [Mark] for sending in this tip!

Continue reading “One Micro Bit Accomplishes Its Goal”

See The Weather At A Glance With This WiFi Wall Mounted Display

Whether you’re lodged in an apartment with a poor view of the sky like [Becky Stern] or are looking for an at-a-glance report of the current weather, you might consider this minimalist weather display instead of checking your computer or your phone every time you’re headed out the door.

The first order of business was to set up her Feather Huzzah ESP8266 module. [Becky] started with a blink test to ensure it was working properly. Once that was out of the way, she moved on to installing a few libraries. Temperature data fetched by an IFTTT feed is displayed on a seven-segment display, while additional feeds separately retrieve information for each basic weather type: sunny, overcast, rain, snow.

All it took to create the sleek display effect was a few pieces of cardboard inside a shadow box frame, a sheet of paper as a diffuser, and twelve Neopixel RGB LEDs hidden inside. Trimming and securing everything in place as well as notching out the back of the frame for the power cable finished the assembly. Check out the build video after the break.

Continue reading “See The Weather At A Glance With This WiFi Wall Mounted Display”

From 1950s Multimeter To Internet Connected Clock

We’ve seen many clocks here over the years. Some of them are conventional, some esoteric. So it’s not often that we see something novel in the world of timekeeping.

lael-450-analizzatore-hacked
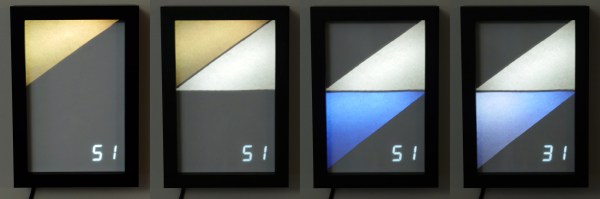
Strictly speaking, [Giulio Pons]’s clock project isn’t new at all. He’s taken a broken multimeter from the 1950s, and with the help of an Arduino Nano and an ESP8266 module, converted it into a clock that indicates the time on the multimeter’s moving-coil meter. He’s wired the multimeter’s front panel controls to the Arduino to operate the thing, and given it a speaker to play alarm sounds. A PIR motion detector activates the clock. In the hours of darkness, a photoresistor brings up a light. Time setting is automatic via the internet. [Giulio] previously experimented with an RTC module but found the network connection made changing time settings easier.

It’s by no means the perfect timepiece. For instance, [Giulio] found that driving the meter from a PWM pin gave different readings depending on the PSU load from other parts such as the light. But the clock does work, and has breathed new life into what might otherwise have remained a piece of junk.

Those of you with long memories might remember a similar project from a few years ago that used unmodified multimeters to display time as voltage. And of course, there are always frequency counter clocks.