Repairs You Can Print: A Little Love For The Glove Box

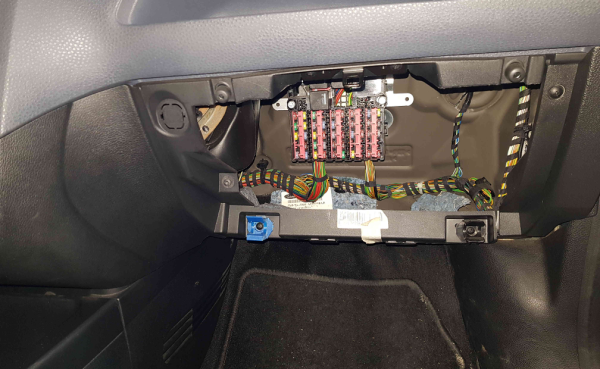
A few years ago, [Brieuc]’s car blew a fuse. He went to replace it, which unfortunately means removing the entire glove box. In his haste to get his baby back on the road, he accidentally broke one of the clips that holds the glove box on the dashboard.
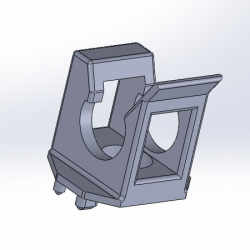
[Brieuc] tried to just glue the thing back together, but it didn’t hold because the part has to flex a little bit for people who need to get into the fuse box. No one seems to offer a replacement for this small but vital hunk of plastic, though he did find someone offering total glove box replacements at highway robbery prices. Since there was still one good clip, he used it to design and print a strong ABS replacement.

This is a great example of the one-off utility of 3D printers. [Brieuc] didn’t need an exact copy, and since he was replacing an injection-molded part with additive manufacturing, he had the freedom to start with a bare-bones design, make adjustments as needed, and iterate until he got it right. It didn’t take long. The layer orientation of the first print made the legs too weak, but that’s a simple fix. The second version has lasted for three years and counting.

We get it. You don’t have the same car as [Brieuc], so this particular fix doesn’t sway you. But someday in the future when your zipper breaks or your dishwasher detergent cup won’t latch, 3D printing will be there to help.

3D Printering: Printing Sticks For A PLA Hot Glue Gun

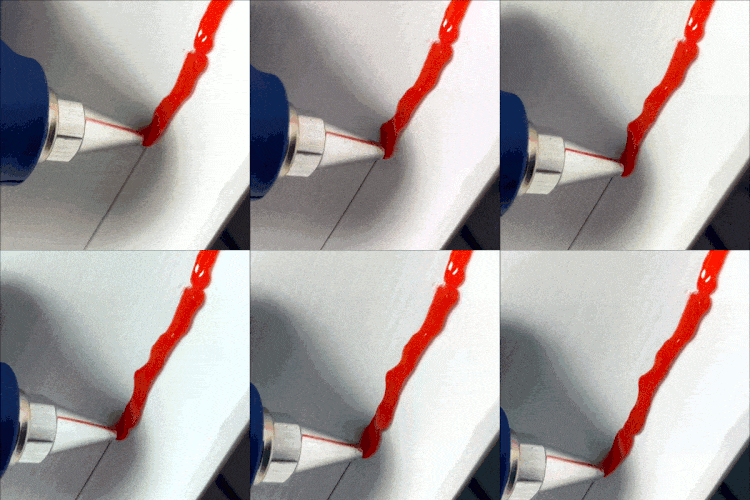
When is a hot glue stick not a hot glue stick? When it’s PLA, of course! A glue gun that dispenses molten PLA instead of hot glue turned out to be a handy tool for joining 3D-printed objects together, once I had figured out how to print my own “glue” sticks out of PLA. The result is a bit like a plus-sized 3D-printing pen, but much simpler and capable of much heavier extrusion. But it wasn’t quite as simple as shoving scrap PLA into a hot glue gun and mashing the trigger; a few glitches needed to be ironed out.

Why Use a Glue Gun for PLA?

Some solutions come from no more than looking at two dissimilar things while in the right mindset, and realizing they can be mashed together. In this case I had recently segmented a large, hollow, 3D model into smaller 3D-printer-sized pieces and printed them all out, but found myself with a problem. I now had a large number of curved, thin-walled pieces that needed to be connected flush with one another. These were essentially butt joints on all sides — the weakest kind of joint — offering very little surface for gluing. On top of it all, the curved surfaces meant clamping was impractical, and any movement of the pieces while gluing would result in other pieces not lining up.

An advantage was that only the outside of my hollow model was a presentation surface; the inside could be ugly. A hot glue gun is worth considering for a job like this. The idea would be to hold two pieces with the presentation sides lined up properly with each other, then anchor the seams together by applying melted glue on the inside (non-presentation) side of the joint. Let the hot glue cool and harden, and repeat. It’s a workable process, but I felt that hot glue just wasn’t the right thing to use in this case. Hot glue can be slow to cool completely, and will always have a bit of flexibility to it. I wanted to work fast, and I wanted the joints to be hard and stiff. What I really wanted was melted PLA instead of glue, but I had no way to do it. Friction welding the 3D-printed pieces was a possibility but I doubted how maneuverable my rotary tool would be in awkward orientations. I was considering ordering a 3D-printing pen to use as a small PLA spot welder when I laid eyes on my cheap desktop glue gun.

Continue reading “3D Printering: Printing Sticks For A PLA Hot Glue Gun”

Making Smoke That Really Performs

Smoke is a useful thing, whether you want to hide from enemy combatants or just make a big scene at a local sporting match. Smoke devices have lots of applications, many of which will likely cause a nuisance to somebody, somewhere. With that said, they can also be really cool, and [Tech Ingredients] is here to tell you how to make them.

Far from a simple tutorial, the video guide is loaded with detail. It begins with an explanation of the basic chemistry involved, using potassium nitrate and sugar. This is the basis of rocket candy, a popular method for making solid rocket motors at home. However, it’s then explained how the formula is altered to suit a smoke-making, rather than a thrust-making device. The trick is the addition of paraffin to moderate the reaction.

The tips don’t stop there. The guide explains how to use a coffee grinder to make the coarse ingredients finer, which increases the surface area and allows the powder constituents to blend with the wax more easily. Enclosures are also discussed, with a cardboard tube and bentonite clay favored for its heat resistance and stability.

Overall, it’s an excellent guide which takes the time to explain the rationale behind each step in the process. It’s great to see the underlying concepts explained with the practical execution, giving a strong understanding of not just how to do it, but why. Video after the break.

Continue reading “Making Smoke That Really Performs”

Black Holes And The Elusive Mystery That Lies Within An Equation

“If I have seen further than others, it is by standing upon the shoulders of giants.” This famous quote by Isaac Newton points to an axiom that lies at the heart of The Sciences — knowledge precedes knowledge.

What we know today is entirely based upon what we learned in the past. This general pattern is echoed throughout recorded history by the revelation of one scientific mystery leading to other mysteries… other more compounding questions. In the vast majority of cases these mysteries and other questions are sprung from the source of an experiment with an unexpected outcome sparking the question: “why the hell did it do that?” This leads to more experiments which creates even more questions and next thing you know we go from moving around on horse-drawn carriages to landing drones on Mars in a few generations.

The observant of you will have noticed that I preceded a statement above with “the vast majority of cases.” Apart from particle physics, almost all scientific discovery throughout recorded history has been made via experiment and observation. There are a few, however, that have been discovered hidden within the confines of an equation, only later to be confirmed with observation. One such discovery is the Black Hole, and how it was stumbled upon on a dusty chalkboard in the early 1900s will be the focal point of today’s article.

Continue reading “Black Holes And The Elusive Mystery That Lies Within An Equation”

Making Software Defined Radio Portable

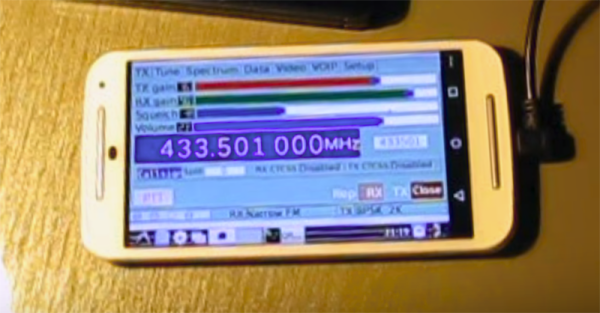
While most smartphones can receive at least some radio, transmitting radio signals is an entirely different matter. But, if you have an Android phone and a few antennas (and a ham radio license) it turns out that it is possible to get a respectable software-defined radio on your handset.

[Adrian] set this up to be fully portable as well, so he is running both the transceiver and the Android phone from a rechargeable battery bank. The transceiver is also an interesting miniaturized version of the LimeSDR, the Lime SDR Mini, a crowdfunded Open Source radio platform intended for applications where space is at a premium. It operates on the 10 MHz to 3.5 GHz bands, has two channels, and has a decent price tag too at under $100.

For someone looking for an SDR project or who needs something very portable and self-contained, this could be a great option. The code, firmware, and board layout files are all also open source, which is always a great feature. If you’re new to SDR though, there’s a classic project that will get you off the ground for even less effort.

Continue reading “Making Software Defined Radio Portable”

Repairing A Wounded Mantis

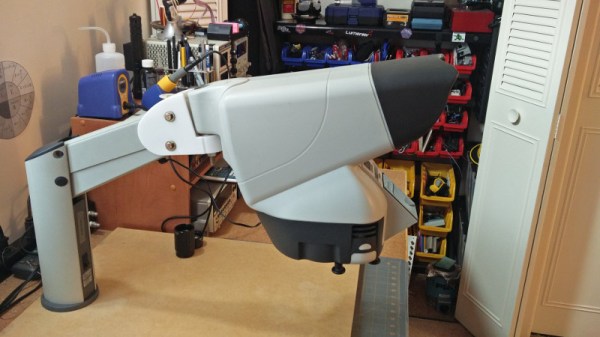
While it’s true that we didn’t specifically say making Hackaday staff exceedingly jealous of your good fortune would deduct points from your entry into our ongoing “Repairs You Can Print Contest”, we feel like [Sam Perry] really should have known better. During a recent dumpster dive he found an older, slightly damaged, but still ridiculously awesome Mantis stereo inspection microscope. Seriously, who’s throwing stuff like this away?

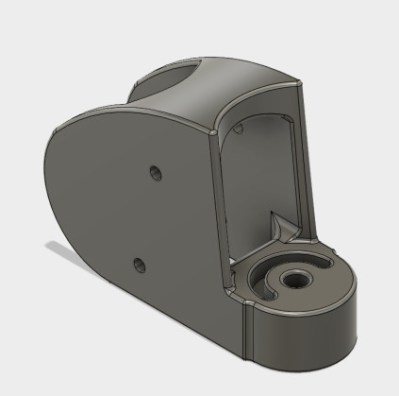
Rendered replacement mount in Fusion 360

Apparently, the microscope itself worked fine, and beyond some scratches and dings that accumulated over the years, the only serious issue was a completely shattered mount. Luckily he still had the pieces and could get a pretty good idea of what it was supposed to look like. After what we imagine was not an insignificant amount of time in Fusion 360, he was able to model and then print a replacement.

The replacement part was printed on a Tronxy P802M in PLA. Even at 0.3mm layer height, it still took over 10 hours to print such a large and complex component. A few standard nuts and bolts later, and he had a drop-in replacement for the original mount.

Whether it’s due to how big and heavy the Mantis is, or a slight miscalculation in his model, [Sam] does mention that the scope doesn’t sit perfectly level; he estimates it’s off by about 5 degrees.

We’re somewhat suspicious that mentioning an error of only 5 degrees is a stealth-brag on the same level as telling everyone you found a Mantis in the trash. But if [Sam] gives us the GPS coordinates of the dumpster in which people are throwing away high-end lab equipment, all will be forgiven.

There’s still plenty of time to get your entry into the “Repairs You Can Print” contest! The top twenty projects will receive $100 in Tindie store credit, and the top entries in the Student and Organization categories will each receive a Prusa i3 MK3 with the Quad Material upgrade kit: arguably one of the best 3D printers currently on the market. If you were considering going back to school, or finally leaving your basement and joining a hackerspace, now would definitely be the time.

A Game That Does More With Less

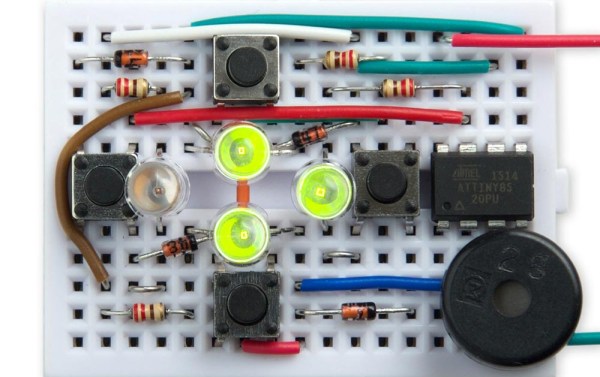
[David Johnson-Davies] created a minimal Secret Maze Game using a single ATTiny85 and a few common components. This simple game uses four buttons, four LEDs, and a small speaker. The player moves in the four cardinal directions using buttons, and the LEDs show walls and corridors. If an LED is lit, it means the path in that direction is blocked by a wall, and attempting to move in that direction will make a beep. When the player reaches the exit, a short victory tune chirps from the speaker.

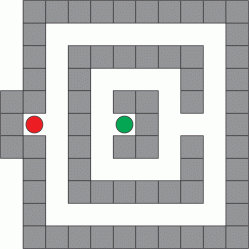
Sample maze. A 16×16 matrix is allocated for maze designs.

Since the ATTiny85 has only five I/O lines, [David] had to get a bit clever to read four buttons, display output on four LEDs, and drive a little speaker. The solution was to dedicate one pin to the speaker and the other four to charlieplexing, which is a method of driving more LEDs than you have pins. It takes advantage of the fact that most microcontroller pins can easily switch state between output high, output low, or low-impedance high-impedance input.

As for the buttons, [David] charlieplexed them as well. Instead of putting an LED in a charlieplexed “cell”, the cell contains a diode and an SPST switch in series with the diode. To read the state of the switch, one I/O line is first driven low and the other I/O line is made an input with a pullup. A closed switch reads low on the input, and an open switch reads high. With charlieplexing, four pins is sufficient for up to twelve LEDs (or buttons) in any combination, which is more than enough for the Secret Maze.

Charlieplexing is also what’s behind this 110 LED micro-marquee display, or this elegant 7-segment display concept that takes advantage of modern PCB manufacturing options.