LED Strips Are So Hot Right Now

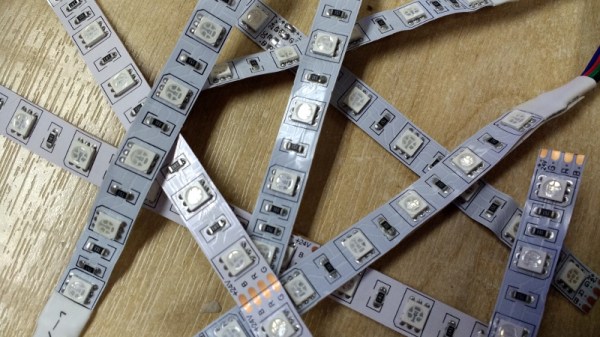
Sometimes there will appear a figure that flies in the face of reason, and challenges everything you think you know about a subject. Just such a moment came from [Chris Taylor] at Milton Keynes Makerspace when he characterised a set of LED strips, and the figure in question was that he found an LED strip creates the same amount of heat as its equivalent incandescent bulb.

We can hear your coffee hitting the monitor and your reaching for the keyboard to place a suitably pithy comment, because yes, that’s a pretty unbelievable statement. But it’s no less true, albeit that the key to it lies in its details. If you have a 100 W incandescent bulb, 88% of the energy is radiated as light and infra-red, leaving 12 W heating the bulb itself. To get the same light output from an LED meanwhile we’d only need 17 W, of which 11.9 W would be left to heat the LED. Which means that an LED strip can get as hot as an incandescent bulb with equivalent light output, and he’s run some tests to prove it.

If you’ve worked with LEDs, you’ll know that they get hot. But to learn that they have the potential to get as hot as their incandescent equivalents is something of a eye-opener, and should demonstrate the need for adequate thermal mitigation. It’s easy to take them for granted, and we’ve taken a look before at some of their safety pitfalls.

Disclosure: [Jenny List] is a member of MK Makerspace.

A DIY Nine Channel Digital Scope

Have you ever found yourself in the need of a nine channel scope, when all you had was an FPGA evaluation board? Do not despair, [Miguel Angel] has you covered. While trying to make sense of the inner workings of a RAM controller core, he realized that he needed to capture a lot of signals in parallel and whipped up this 9-channel digital oscilloscope.

The scope is remote-controlled via a JavaScript application, and over Ethernet. Graphical output is provided as a VGA signal at full HD, so it is easy to see what is going on. Downloading sampled data to the controlling computer for analysis is in the works. [Miguel] runs his implementation on an Arty A7 development board which is currently available for around a hundred dollars, but the design is transferable to other platforms. The code and some documentation is available on GitHub and there is a demo video after the break.

Continue reading “A DIY Nine Channel Digital Scope”

Want A Leak-Proof Camper? Better Fire Up The 3D Printer Now.

Ah, the great outdoors.  Rejuvenating air rife with mosquitoes and other nasties, and spending some time hanging out in the woods sleeping in a 3D printed camper. Wait– what was that last one again?

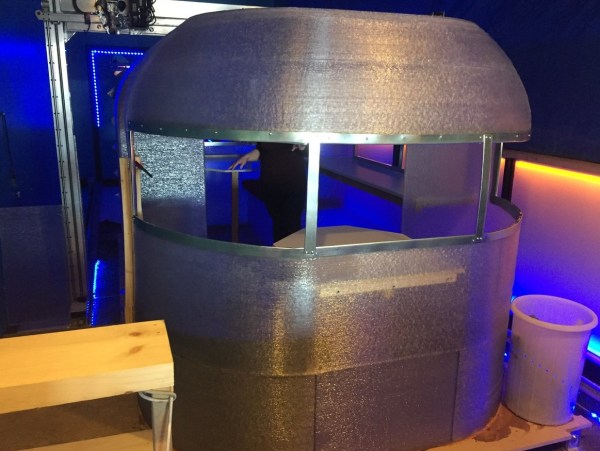
Yep, it’s exactly what it sounds like. A Canadian team headed by [Randy Janes] of Wave of the Future 3D, printed a camper at [Create Cafe] in Saskatoon, Saskatchewan, using high-flow nozzles on one of the largest 3D printers in North America. These layers are 10.3mm thick!!

This trailer is one single printed piece, taking 230 hours — nine and a half days — of straight printing with only a few hangups. Weighing 600lbs and at 13 feet long by six feet wide — approximately 507 cubic feet, this beats the previous record holder for largest single piece indoor print in size by three times over.

Continue reading “Want A Leak-Proof Camper? Better Fire Up The 3D Printer Now.”

Converting Power Supplies For Antique Computers

Just because something is “never used” doesn’t mean it’s good. [Inkoo Vintage Computing] learned that lesson while trying to repair an Amiga 500 and finding parts online that were claimed to be “new” in that they were old stock that had never been used. The problem was that in the last 30 years the capacitors had dried out, rendering these parts essentially worthless. The solution, though, was to adapt a modern PSU for use on the old equipment.

The first hurdle to getting this machine running again was finding the connector for the power supply. The parts seemed to have vanished, with some people making their own from scratch. But after considering the problem for a minute longer they realized that another Commodore machine used the same parts, and were able to source a proper cable.

Many more parts had to be sourced to get the power supply operational, but these were not as hard to come across. After some dedicated work with the soldering iron, the power supply was put to use running the old Amiga. Asture readers will know that [Inkoo Vintage Computing] aren’t strangers to the Amiga. They recently were featured with a nondestructive memory module hack that suffered from the same parts sourcing issues that this modification had, but also came out wonderfully in the end.

Arduino Clock Jots Down The Time, In UV

We’re big fans of the impractical around here at Hackaday. Sure there’s a certain appeal to coming up with the most efficient method to accomplish your goal, the method that does exactly what it needs to do without any superfluous elements. But it’s just not as much fun. If at least one person doesn’t ask “But why?”, then you probably left something on the table, design wise.

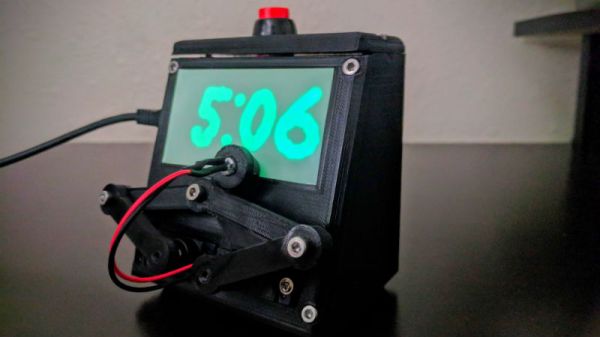
So when we saw this delightfully complex clock designed by [Tucker Shannon], we instantly fell in love. Powered by an Arduino, the clock uses an articulated arm with a UV LED to write out the current time on a piece of glow-in-the-dark material. The time doesn’t stay up for long depending on the lighting in the room, but at least it only takes a second or two to write out once you press the button.

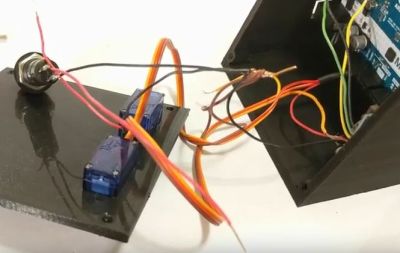
Things are pretty straightforward inside the 3D printed case. There’s an Arduino coupled with an RTC module to keep the time, which is connected to the two standard hobby servos mounted in the front panel. A UV LED and simple push button round out the rest of the Bill of Materials. The source code is provided, so you won’t have to figure out the kinematics involved in getting the two servos to play nicely together if you want to try this one at home.

We’ve seen many clocks powered by Arduinos over the years, occasionally they even have hands. But few can boast their own robotic arm.

Continue reading “Arduino Clock Jots Down The Time, In UV”

Carrots In Space

For this year’s Hackaday Prize, [will.stevens] is growing his own produce and now looks for a way to shield his endeavors from the perils of the British winter. To achieve this, he decided to grow vegetables in sealed containers. Inspired by prior art and backed up by research, his approach is a wild mix of applied laziness on one hand and reckless over-engineering on the other. The sealed containers in this project are PET bottles, chosen for their availability and the produce are carrots, mainly because they can be harvested through the bottle’s mouth. Carrots also feature a high energy density and can provide fibers for plant-based construction materials so [will] deems them ideal space colonist food.

The project is currently in its fourth attempt and somewhere along the road from carrot seeds, dirt and some water in a soda bottle to the current state, the setup sprouted artificial lighting and a CO2 sensor. Fully aware that sealed greenhouses are a proven concept, [will.stevens] provides links to literature one should read before attempting something like this, alongside regular updates on his progress.

With a sensor and LEDs already in place, it is just a matter of time until a raspi will be added. Or we might see the demise of the soil in favor of a hydroponic setup.

Mechanisms: Cable Ties

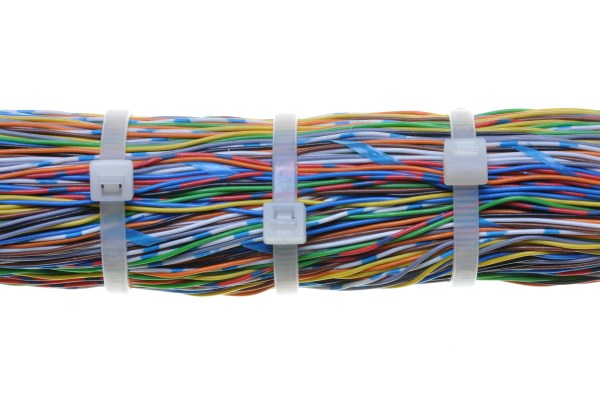
Zip ties, Ty-Raps, cable ties; call them what you will, but it’s hard to imagine doing without these ubiquitous and useful devices. Along with duct tape and hot glue, they’re part of the triumvirate of fasteners used to solve nasty problems quickly and cheaply. They’re next up on the list of mechanisms we find fascinating, and as it turns out, there’s more to these devices than meets the eye.

Continue reading “Mechanisms: Cable Ties”