Print Your Way To Keyboard Stability

Keyboard key stabilizers, or stabs as they’re known in enthusiast circles, do exactly what you’d expect — they stabilize longer keys like the Shifts and the space bar so that they don’t have to be struck dead-center to actuate evenly. Stabs work by flanking the key switch with two non-functional switch actuators linked with a thick wire bar. Some people love stabs and insist on stabilizing every key that’s bigger than 1u, while other people thinkĀ  stabs are more trouble than they’re worth for various reasons, like rattling.

[Riskable 3D Printing] has been working on a parametric, printable stabilizer system for Cherry MX caps that uses small disk magnets to keep the wire in place. As you can see in the video (embedded after the break), the result is a crisp clacker that doesn’t rattle. The magnets stabilize the wire, so it snaps back quite nicely.

Although the print is an easy one, [Riskable] says the design process wasn’t as cut and dried as it seems. The center points of the stabilizer stems aren’t supposed to be in the center of cutouts, even though it looks that way to the naked eye. After that, the pain point has shifted to the wire, and getting it as straight as possible before making the necessary bends. [Riskable] is going to make a straightener to help out, and we suggest something like this one.

Clacker hacking is quite the rabbit hole, especially when combined with 3D printing. We recently saw a completely 3D-printed macro pad, springs and all.

Continue reading “Print Your Way To Keyboard Stability”

Russell Kirsch: Pixel Pioneer And The Father Of Digital Imaging

It’s true what they say — you never know what you can do until you try. Russell Kirsch, who developed the first digital image scanner and subsequently invented the pixel, was a firm believer in this axiom. And if Russell had never tried to get a picture of his three-month-old son into a computer back in 1957, you might be reading Hackaday in print right now. Russell’s work laid the foundation for the algorithms and storage methods that make digital imaging what it is today.

Russell reads SEAC’s last printout. Image via TechSpot

Russell A. Kirsch was born June 20, 1929 in New York City, the son of Russian and Hungarian immigrants. He got quite an education, beginning at Bronx High School of Science. Then he earned a bachelor’s of Electrical Engineering at NYU, a Master of Science from Harvard, and attended American University and MIT.

In 1951, Russell went to work for the National Bureau of Standards, now known as the National Institutes of Science and Technology (NIST). He spent nearly 50 years at NIST, and started out by working with one of the first programmable computers in America known as SEAC (Standards Eastern Automatic Computer). This room-sized computer built in 1950 was developed as an interim solution for the Census Bureau to do research (PDF).

Standards Eastern Automatic Computer (SEAC) was the first programmable computer in the United States. Credit: NIST via Wikimedia

Like the other computers of its time, SEAC spoke the language of punch cards, mercury memory, and wire storage. Russell Kirsch and his team were tasked with finding a way to feed pictorial data into the machine without any prior processing. Since the computer was supposed to be temporary, its use wasn’t as tightly controlled as other computers. Although it ran 24/7 and got plenty of use, SEAC was more accessible than other computers, which allowed time for bleeding edge experimentation. NIST ended up keeping SEAC around for the next thirteen years, until 1963.

The Original Pixel Pusher

This photo of Russell’s son Walden is the first digitized image. Public Domain via Wikimedia

The term ‘pixel’ is a shortened portmanteau of picture element. Technically speaking, pixels are the unit of length for digital imaging. Pixels are building blocks for anything that can be displayed on a computer screen, so they’re kind of the first addressable blinkenlights.

In 1957, Russell brought in a picture of his son Walden, which would become the first digital image (PDF). He mounted the photo on a rotating drum scanner that had a motor on one end and a strobing disk on the other. The drum was coupled to a photo-multiplier vacuum tube that spun around on a lead screw. Photo-multipliers are used to detect very low levels of light.

As the drum slowly rotated, a photo-multiplier moved back and forth, scanning the image through a square viewing hole in the wall of a box. The tube digitized the picture by transmitting ones and zeros to SEAC that described what it saw through the square viewing hole — 1 for white, and 0 for black. The digital image of Walden is 76 x 76 pixels, which was the maximum allowed by SEAC.

Variable-Shaped Pixels

If Russell Kirsch had any regrets, it is that he designed pixels to be square. Ten years ago at the age of 81, he started working on a variable-shaped pixels with the hope of improving the future of digital imaging. He wrote a LISP program to explore the idea, and simulated triangular and rectangular pixels using a 6×6 array of square pixels for each.

Alternative pixel geometries. Image via Cloudseed Films

In in the video below, Russell discusses the idea and proves that variable pixels make a better image with more information than square pixels do, and with significantly fewer pixels overall. It takes some finagling, as pixel pairs of triangles and rectangles must be carefully chosen, rotated, and mixed together to best represent the image, but the image quality is definitely worth the effort. Following that is a video of Russell discussing SEAC’s hardware.

Russell retired from NIST in 2001 and moved to Portland, Oregon. As of 2012, he could be found in the occasional coffeehouse, discussing technology with anyone he could engage. Unfortunately, Russell developed Alzheimer’s and died from complications on August 11, 2020. He was 91 years old.

Continue reading “Russell Kirsch: Pixel Pioneer And The Father Of Digital Imaging”

Encouragement Machine Battles Your Inner Bully

We would be preaching to the choir if we told you that fear is the action killer when it comes to the challenge of new projects in uncharted territory. Everyone who reads Hackaday knows that it takes mettle to forge through the self-doubt as we push ourselves to new engineering heights.

[JBV Creative] hears the voice, too: the one that says you can’t build that thing, it’s too difficult/useless. He knows that both creativity and anti-creativity stem from the same source — the powerful human mind that dreams up these projects in the first place.

The Encouragement Machine combines the two in a piece that engineers art from garbage, aka negative thoughts. It works by first acknowledging the most basal of discouraging thoughts — an important step of the process — and then it simply trims away the negativity.

This machine uses a stepper motor to feed receipt paper underneath a custom stamp that says YOU CAN’T DO IT. Then it passes the paper through a pair of servo-driven scissors that snip off the apostrophe-t.

Ironically or not, [JBV Creative] ran into a few issues with this build, but managed to muster up enough moxie to work through the problems without encouraging slips of paper. We have to wonder how much more smoothly the next project will go given all the positivity he now has on-demand.

[JBV] doesn’t delve into the electronics much, but it looks like an Arduino and a motor driver to us. We totally dig the design — it looks like an electrical substation or rocket launch pad that happens to have a Ferris wheel. Step right up and check out the build video after the break.

Generic encouragement is great all-purpose attitude adjuster, but what if you want more specific sentiments? Here’s an affirmation mirror that will help you believe whatever you program into the scrolling display.

Continue reading “Encouragement Machine Battles Your Inner Bully”

Inputs Of Interest: The Infogrip BAT Chording Keyboard

I guess it shouldn’t surprise me that by researching weird and interesting keyboards, I would uncover more weird and interesting keyboards. This is the BAT personal keyboard by Infogrip, and it’s something I came across while researching the DataHand keyboard and mentally filed away as something cool to look into.

When I came across a used BAT for a reasonable price, I snagged it, even though it didn’t come with any of the manuals or software, not even a cord. Like I said, reasonable price. I looked these keyboards up and found out that you can buy them new for a lot more than what I paid.

My gently used BAT in all its angular glory.
The lowercase letter chords use either the middle thumb key or no thumb key. Image via Infogrip

So what is this thing? It’s a chording keyboard that’s meant to be used a standard PC input device by anyone who either can’t use a regular keyboard or has a need for speed. Years of research went into the BAT’s chording scheme, which was developed in conjunction with NASA’s Stennis Space Center.

Instead of stretching your fingers all over a regular keyboard, poking keys one at a time to spell out words, you press combinations of keys simultaneously, like playing chords on a piano.

You’re meant to use your thumb for the red, grey, and blue keys, and lay the other four on the rest of the keys. All of the alphabet keys are chorded with or without the gray thumb key, and all the number, symbol, and modifier keys are accessed through the red and blue layers.

Why would you want one of these? Well, given enough time to learn the chords, you can do anything a standard 104+ keyboard can do with only seven keys. You would never need to look down, not even for those weird seldom-used keys, and the only finger that ever travels is your thumb. All of this reduced hand/finger/wrist travel is going to be easier on the body.

The BAT lets you CAD like a madlad. Via Bill Buxton

The BAT is also part programmable macro pad, and from what I can gather, the main selling point was that you could quickly input shortcuts in CAD programs and the like, because you could keep one hand on the mouse.

The BAT came in both left- and right-handed versions that can be used either alone or together. Imagine how fast you could type if you chorded everything and split the typing duties between both hands! The only trouble is learning all those different finger combinations, although they say it doesn’t take that long.

So why is it called the BAT? Legend has it that it’s because company started out in Baton Rouge, Louisiana, but also because a pair of BATs sitting next to each other resembles a bat (PDF).

Continue reading “Inputs Of Interest: The Infogrip BAT Chording Keyboard”

Mercurial Light Box Has A Secret Switch

Hit up the lighting aisle of any big box hardware store these days and you’ll probably find a variety of Edison bulbs — modern bulbs meant to evoke the bare, complicated tungsten filament bulbs from the early days of electric candlelight. Edison bulbs use filament LEDs, which resemble skinny candles with wicks at both ends and give off a nice light, especially when diffused by acrylic.

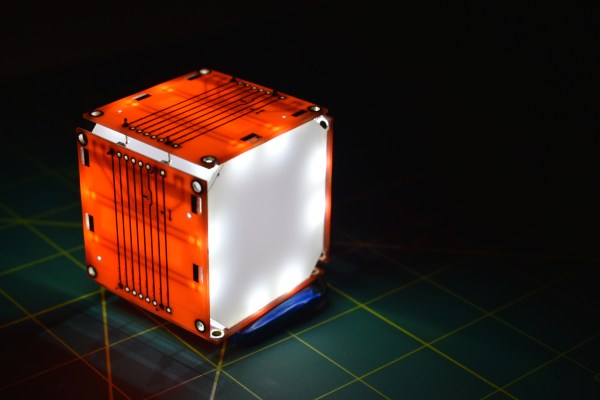
This simple light box uses two filament LEDs that float inside on an internal circuit sculpture. [lonesoulsurfer] likes to use old cell phone batteries and USB charging boards in his builds, and that’s exactly what’s inside this box.

Our favorite part of the build elevates this simple light box into a curiosity for those not in the know. It’s controlled with a mercury tilt switch, so all you’d have to do in a power outage is locate the box and turn it upside down, provided it has a charge.

We love elemental switch design around here, like this light box that switches on with salt water.

Modified Bricks Can House Energy, Too

What if building an emergency battery were as easy as painting conductive plastic onto bricks, stacking them, and charging them up? Researchers at Washington University in St. Louis have done just that — they’ve created supercapacitors by modifying regular old red bricks from various big-box hardware stores.

The bricks are coated in poly(3,4-ethylenedioxythiophene) polystyrene sulfonate (PEDOT:PSS), a conductive polymer that soaks readily into the bricks’ porous surface. When the coated brick is connected to a power source such as a solar panel, the polymer soaks up ions like a sponge. PEDOT:PSS reacts with the iron oxide in the bricks, the rust that gives them their reddish-orange color. Check out the demonstration after the break — it’s a time lapse that shows three PEDOT-coated bricks powering a white LED for ten minutes.

We envision a future where a brick house could double as a battery backup when the power goes out. The researchers thought of that too, or at least had their eye on the outdoors. They waterproofed the PEDOT-coated bricks in epoxy and found they retain 90% of their capacitance and are still efficient after 10,000 charge-discharge cycles. Since this doesn’t take any special kind of brick, it seems to us that any sufficiently porous material would work as long as iron oxide is also present for the reaction. What do you think?

If you can get your hands on the stuff, PEDOT:PSS has all kinds of uses from paper-thin conductors to homebrew organic LEDs.

Continue reading “Modified Bricks Can House Energy, Too”

E-Ink Moon Phase Viewer Keeps Interest From Waning

It’s a shame that so many cool things happen in the night sky, but we can’t see them because of clouds or light pollution. If you missed seeing the comet NEOWISE or this summer’s Perseid meteor showers, there’s not a lot to be done but look at other people’s pictures. But if it’s the Moon and its phases you keep missing out on, that information can be acquired and visualized fairly easily.

This project includes a bunch of firsts for [Jacob Tarr], like designing a custom PCB and utilizing a three-color E-ink screen to show the Moon in its current phase along with the date and time.

[Jacob]’s moon phase viewer runs on an ItsyBitsy M4 Express, which holds data pulled from NASA ahead of time to save battery. Every morning, the board dishes out the daily info on a schedule kept by a real-time clock module.

We particularly like the minimalist case design, especially the little shelf that holds the lithium-ion cell. This is just the beginning, and [Jacob] plans to add more detail for anyone who wants one for themselves.

If you want something more Moon-shaped, here’s a printed version that gets brighter in time with the real thing. Or you could just make a giant light-up full moon like Hackaday super alumnus [Caleb Kraft].