RC Strandbeest Is A Head Above The Rest

Prolific maker [Jeremy Cook] recently put the finishing touches (at least, for now) on his impressive ClearCrawler remote controlled Strandbeest, which includes among other things a surprisingly expressive “head” complete with LED matrix eyes. For anyone in the audience who was only mildly terrified of these multi-legged robotic beasties before, you may want to avert your eyes from the video after the break.

The clever locomotive design of [Theo Jansen] known as Strandbeest is a legged walker. What makes it special is that the legs themselves are not independent, but work together for a gliding action more akin to wheeled bots. [Jeremy’s] work with ClearCrawler has taken this to another level of precision and mechanization.

Before installation of the electronics, the ClearCrawler had to be tethered to a bench power supply, and could only move forward and backward. Once the locomotion was working as expected, [Jeremy] was ready to install some brains into the beast.

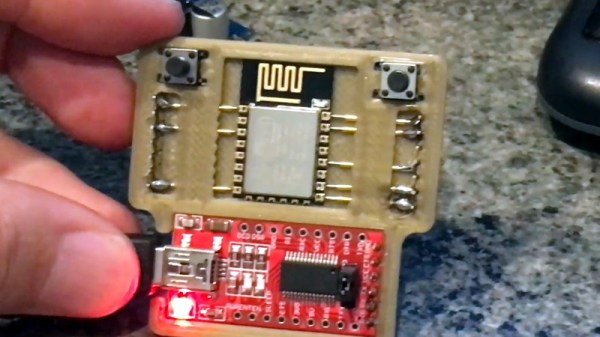
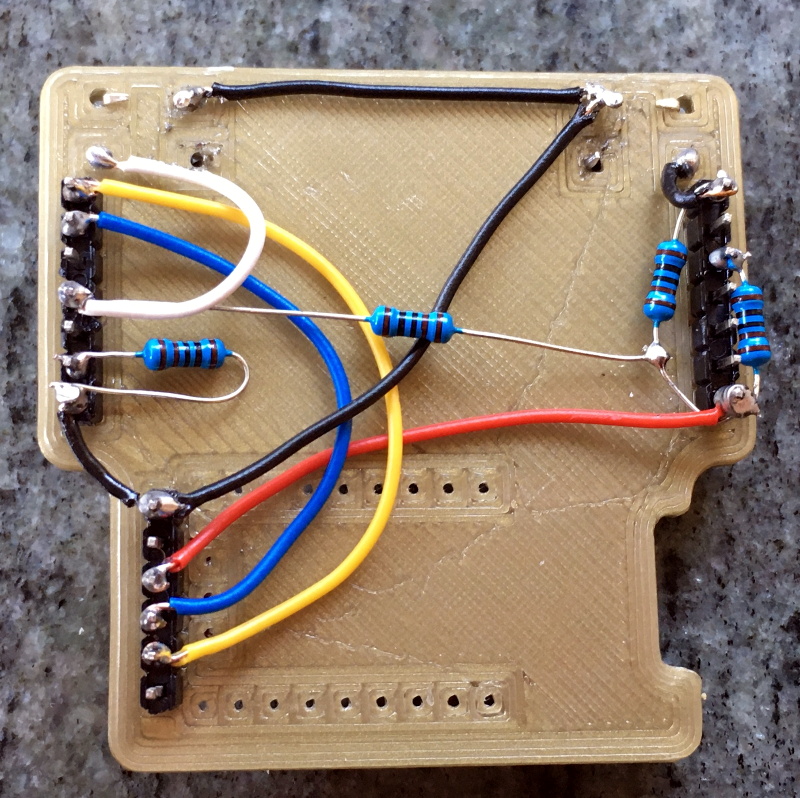
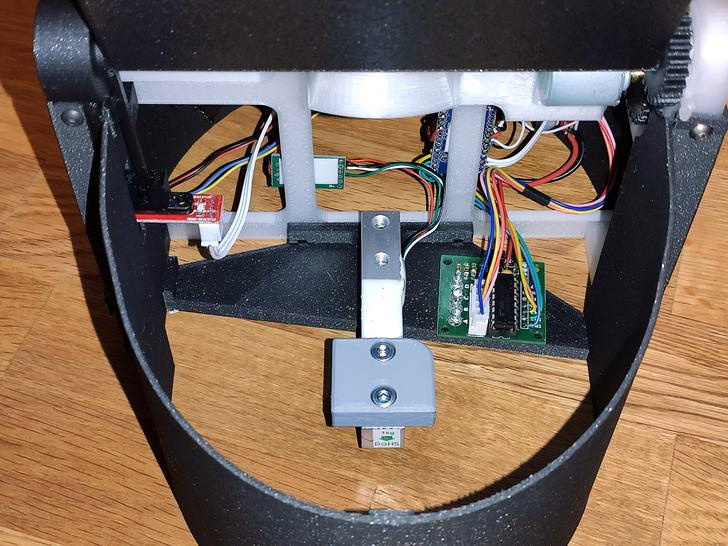
The robot is controlled by a dual motor driver and an Arduino Nano socketed in an I/O expansion board. Communication between the Nano onboard the walker and the hand-held remote control is provided by of a pair of nRF24L01 modules. The controller itself is a simple affair, comprised of a joystick shield plugged into an Arduino Uno.

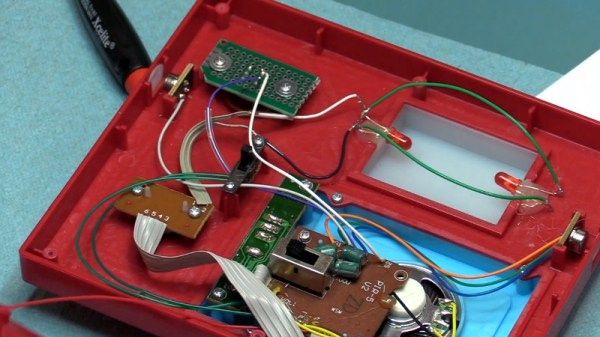
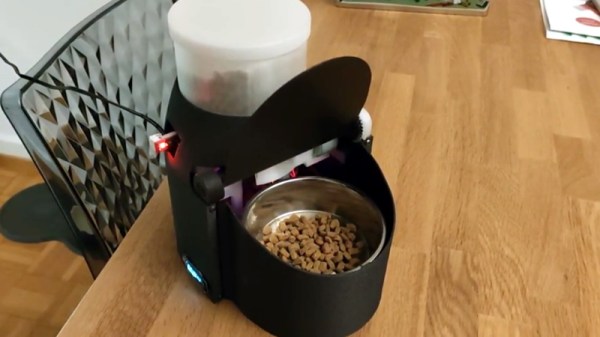
The robot’s head is made up of a chunk of clear polycarbonate tube with a 3D printed internal frame to hold the dual 8×8 LED matrices that serve as its animated eyes. This arrangement is mounted on a servo pan and tilt mount, which is controlled by an analog stick on the controller. While the head doesn’t currently serve any practical function, it does give [Jeremy] a chance to emote a bit with his creation; a popular trick when he shows the ClearCrawler off.

A few years ago we covered this robot’s predecessor, the considerably larger ClearWalker. While that machine was surely a beauty to behold, this smaller and more agile iteration of the concept is quite a bit more practical.

Continue reading “RC Strandbeest Is A Head Above The Rest”

From Fail To Wail: Guitar Picks Made From 3D Printed Waste

Between failed prints and iterative designs that need a few attempts before you nail them down, a certain amount of wasted material is essentially unavoidable when 3D printing. The good news is that PLA is a bioplastic and can be broken down via industrial composting, but even still, any method that allows you to reuse this material at home is worth taking a look at.

In a recent video, [Noah Zeck] details one potential use for your scrap plastic by turning his failed 3D prints into guitar picks. The idea here could really be applied to anything you can make out of thin plastic sheeting, but the fact that you can easily and cheaply produce picks with a commercially available punch makes this application particularly appealing.

The first step in this process is about as low-tech as it gets: wrap your scrap printed parts in rags, and beat them with a sledge hammer. This breaks them up into smaller and more manageable pieces, which is important for the next step. If the parts are small enough and you’ve got a decently powerful blender you don’t mind devoting to plastic recycling, we imagine that would make short work of this step as well.

Once suitably pulverized, [Noah] puts the plastic on a piece of glass and gets it warmed up with a heat gun. PLA has a fairly low glass transition temperature, so it shouldn’t take much time to soften. Then he puts a second piece of glass on top and squeezes them together to get a thin, flat sheet of plastic. Once cooled, he punches his guitar picks out of the sheet, with bonus points if the colors swirled around into interesting patterns. If you’re not musically inclined, we’ve seen a very similar method used to produce colorful floor tiles.

Continue reading “From Fail To Wail: Guitar Picks Made From 3D Printed Waste”

Simple Pogo Programmer For ESP8266 Modules

ESP8266 development boards like the Wemos D1 Mini and NodeMCU are an excellent way to get a one-off project up and rolling quickly, but their size and relative complexity mean they aren’t necessarily a good choice for even short-run production hardware. On the other hand, programming the bare ESP modules can be something of a pain. But thanks to [Greg Frost], flashing those tiny little boards just got a lot easier.

His 3D printed design uses pogo pins to securely connect to the board’s castellated edges, which also holds it in place during the programming process. On the back side there’s just a few jumper wires and a couple of resistors, which ultimately lead to the FT232R FTDI board that actually connects the chip to the computer so you can program it.

We’d like to see a back panel that encloses the wiring, and perhaps an alternate version that deletes the space for the FTDI board in favor of a row of header pins. Both easy enough modifications to the basic design should [Greg] or anyone else feel so inclined. But even as it is, this is a great little programmer that can be sourced and assembled easily and cheaply.

This isn’t the first 3D printed ESP8266 programmer we’ve seen, and there are some improvised versions which are even cheaper to put together, but this design has a certain professional look that we think will be right at home on your bench.

Swapping The ROMs In Mini Arcade Cabinets

You’ve probably seen a few of these miniature arcade games online or in big box retailers: for $20 USD or so you get scaled-down version of a classic arcade cabinet, perfect for a desk toy or to throw up on a shelf as part of your gaming collection. Like any good Hackaday reader, you were probably curious about what makes them tick. Thanks to [wrongbaud], we don’t have to wonder anymore.

Over the course of several blog posts, [wrongbaud] walks readers through the hardware and software used in a few of these miniature games. For example, the Rampage cabinet is using a so-called “NES on a Chip” along with a SPI flash chip to hold the ROM, while Mortal Kombat is using a Genesis emulation solution and parallel flash. It wouldn’t be interesting if they didn’t throw you a few curves now and again, right?

But these are more than simple teardowns. Once [wrongbaud] gives an overview of the hardware, the next step is reading the respective flash storage and trying to make sense of the dumped data. These sort of games generally reuse the hardware among a number of titles, so by isolating where the game ROM is and replacing it, they can be made to play other games without hardware modification. Here, this capability is demonstrated by replacing the ROM data for Rampage with Yoshi’s Cookie. Naturally it’s one of those things that’s easier said than done, but it’s an interesting proof of concept.

The Mortal Kombat cabinet is a newer addition to the collection, so [wrongbaud] hasn’t progressed quite as far with that one. The parallel flash chip has been dumped with the help of an ESP32 and a MCP23017 I/O expander, and some Genesis ROM headers are identifiable in the data, but there’s still some sifting to be done before the firmware structure can be fully understood.

Even if you’re not in the market for a diminutive arcade experience, the information that [wrongbaud] has collected here is really phenomenal. From understanding protocols such as I2C and SPI to navigating firmware dumps with a hex editor, these posts are an invaluable resource for anyone looking to get started with reverse engineering.

Tuning Up The ThinkGeek Star Trek Intercom Panel

On Star Trek, all Kirk and friends had to do was snap the button on the always conveniently located intercom panel, start talking, and the intended recipient would immediately respond no matter where they were in the ship. How did it work? Who knows. In spite of, or perhaps even because of, the lightly-explained nature of the technology, the cherry-red wall intercoms still hold a certain charm for fans of the groundbreaking show.

A viewer sent [Fran Blanche] a scaled down replica of the intercom from ThinkGeek, and while it certainly looks fairly close to the original prop, it has a couple of annoying design elements. When triggered by the side-mounted motion sensors, the panel will play either the iconic swoosh of the automatic doors or the “Red Alert” sound effect. It’s a cute idea for a kid’s bedroom maybe, but not exactly ideal for somebody who regularly records YouTube videos.

Peak 23rd century technology

So the first order of business was to cut the motion sensors out of the circuit and replace them with a push button. [Fran] draws up a quick diagram to explain how these sensors work, and shows that they can easily be bypassed with a momentary switch since they normally bring the line high when triggered. She then converted the indicator light on the right side of the panel into a button to enable the alert sound effect, which is more accurate to how it worked in the show anyway.

The other issue, and perhaps the most egregious to Star Trek fans, is that the “Red Alert” indicator on the top of the panel didn’t actually flash like it did in the show. To design and build this panel and not put a few LEDs behind that piece of frosted plastic seems a bit like producing a Matchbox car and forgetting to make the wheels spin. With a couple of red LEDs and a bit of new wiring, the oversight was quickly rectified.

While it might not be perfect, at least ThinkGeek actually produced a functional product this time. It could have ended up like one of their April Fool’s “products” that never get put into production, forcing a desperate Trekkie to begrudgingly build his own version.

Continue reading “Tuning Up The ThinkGeek Star Trek Intercom Panel”

Automated Cat Feeder Leaves Little To Chance

We often like to say that if something is worth doing, then it’s worth overdoing. This automatic cat feeder built by [krizzli] is a perfect example of the principle. It packs in far more sensors and functions than its simple and sleek outward appearance might suggest, to the point that we think this build might just set the standard for future projects.

The defining feature of the project is a load cell located under the bowl, which allows the device to accurately measure out how much feed is being dispensed by weight. This allows the feeder to do things such as detect jams or send an alert once it runs out of food, as well as easily adjust how much is dispensed according to the animal’s dietary needs. To prevent any curious paws from getting into the machine while it’s doling out the food, the lid will automatically open and close during the filling process, complete with optical sensors to confirm that it moved as expected.

All of the major components of the feeder were printed out on a Prusa i3 MK3S, and [krizzli] says that the feed hopper can be scaled vertically if necessary. Though at the current size, it’s already packing around a week’s worth of food. Of course, this does depend on the particular feline you’re dealing with.

In terms of electronics, the feeder’s primary control comes from an ESP8266 (specifically, the Wemos D1 Mini), though [krizzli] also has a Arduino Pro Mini onboard so there’s a few more GPIO pins to play with. The food is dispensed with a NEMA 17, and a 28-BYJ48 stepper is in charge of moving the lid. A small OLED on the side of the feeder gives some basic information like the time until the next feeding and the dispensed weight, but there’s also a simple API that lets you talk to the device over the network. Being online also means the feeder can pull the time from NTP, so kitty’s mealtime will always be on the dot.

Over the years we’ve seen an incredible array of automatic cat feeders, some of which featuring the sort of in-depth metrics possible when you’ve got on onboard scale. But we can’t help but be impressed with how normal this build looks. If nothing else, of all the feeders we’ve seen, this one is probably the most likely to get cloned and sold commercially. They say it’s the most sincere form of flattery.

Start Your Day With The Mountain That Rises

Like many of us, [Zach Archer] enjoys the comfort of his darkened room so much that he has trouble getting up and facing the day. To make things a little easier for himself, he decided to put together a custom alarm clock that would fill his mornings with the glorious glow of LEDs; and since he finds the mountains an inspirational sight he decided to wrap the whole thing up in a 3D printed enclosure that resembles snow capped peaks.

But even Bob Ross himself couldn’t have imagined a snowy mountain range that featured an integrated e-ink screen. The big 4.2″ panel is connected to a custom designed PCB by [romkey], which was graciously donated for this project. An ESP32 runs the show, providing a convenient web interface to control not only the clock, but various aspects of the mountain’s internal LEDs such as fade in time and total duration.

[Zach] says he originally printed the mountains in PLA, but the heat generated by the LEDs eventually started to cause things to warp. Switching over to translucent PETG not only solved the heat problem, but made for a very effective LED diffuser. Rather than complex animation patterns, he’s found that smoothly transitioning between different shades of blue and green seems to work best for him in the mornings.

This isn’t the first time we’ve seen somebody use LEDs to get them out of bed in the morning, but we do appreciate the aesthetic that [Zach] has achieved here between the design of the mountains and the impressive artwork on the e-ink display. Then again, we’re also quite partial to this version that looks like a warp core, so our tastes do run the gamut.