Raspberry Pi Offers Soulless Work Oversight

If you’re like us, you spend more time than you care to admit staring at a computer screen. Whether it’s trying to find the right words for a blog post or troubleshooting some code, the end result is the same: an otherwise normally functioning human being is reduced to a slack-jawed zombie. Wouldn’t it be nice to be able to quantify just how much of your life is being wasted basking in the flickering glow of your monitor? Surely that wouldn’t be a crushingly depressing piece of information to have at the end of the week.

With the magic of modern technology, you need wonder no longer. Prolific hacker [dekuNukem] has created the aptly named “facepunch”, which allows you to “punch in” with nothing more than your face. Just sit down in front of your Raspberry Pi’s camera, and the numbers start ticking away. It’s like the little clock in the front of a taxi: except at the end you don’t have to pay anyone, you just have to come to terms with what your life has become. So that’s cool.

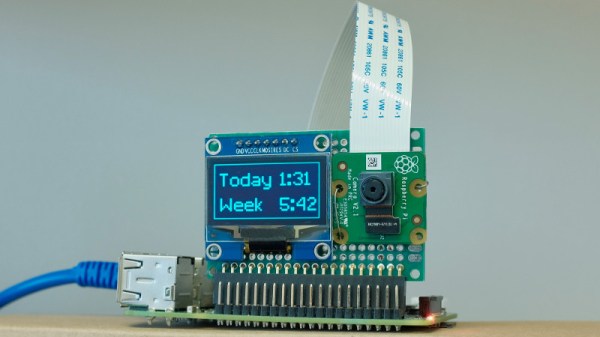
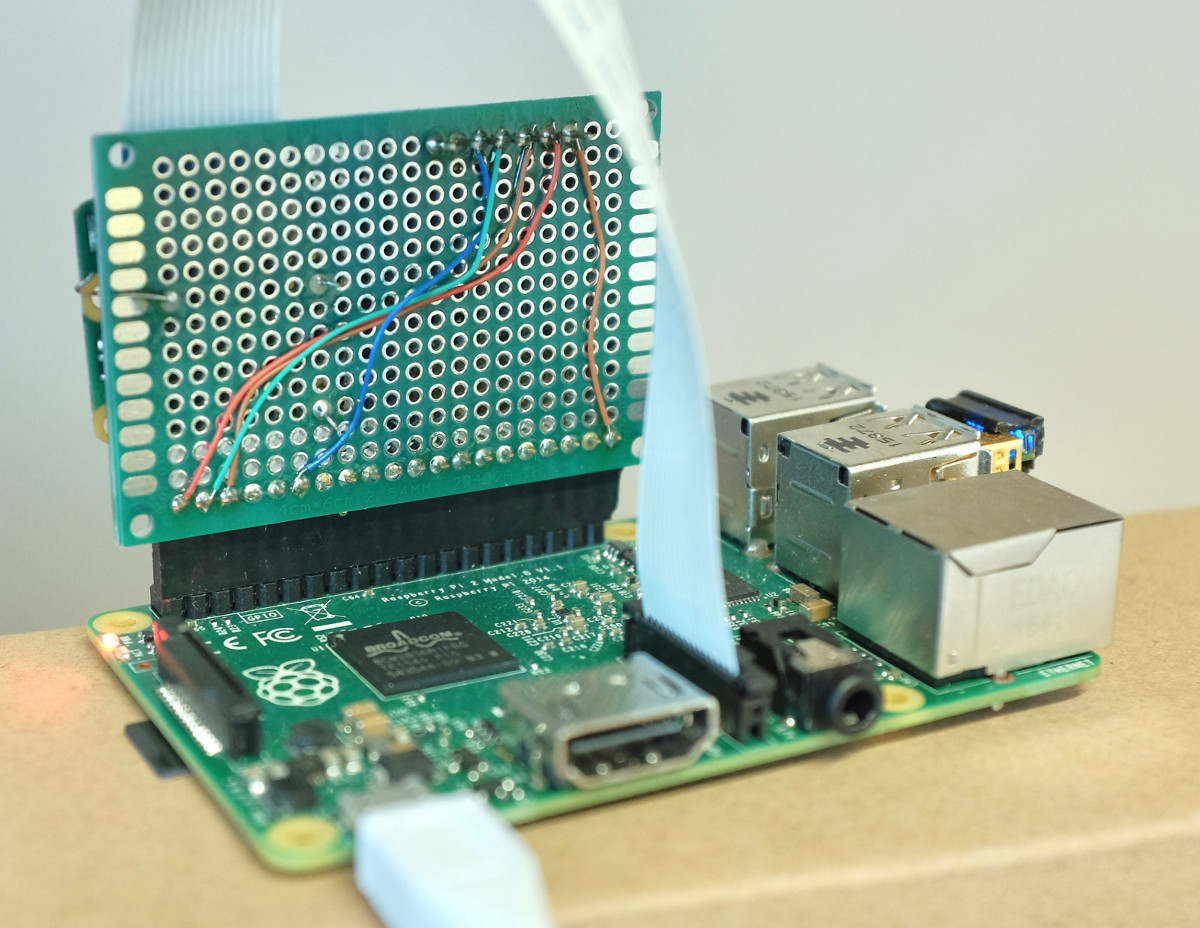
It doesn’t take much hardware to play along at home. All you need is a Raspberry Pi and the official camera accessory. Though for the full effect you should add one of the displays supported by the Luma.OLED driver so you can see the minutes and hours ticking away in real-time.

To get the facial recognition going, all you need to do is take a well-lit picture of your face and save it as a 400×400 JPEG. The Python 3 script will take care of the rest: checking the frames from the camera every few seconds to see if your beautiful mug is in the frame, and incrementing the counters accordingly.

Even if you’re not in the market for an Orwellian electronic supervisor, this project is a great example to get you started in the world of facial recognition. With a little luck, you’ll be weaponizing it in no time.

3D Printing A Better Quadcopter Frame

Before you smash the “Post Comment” button with the fury of Zeus himself, we’re going to go ahead and say it: if you want to build a decent quadcopter, buy a commercial frame. They are usually one of the cheaper parts of the build, they’re very light for how strong they are, and replacement parts are easily available. While you could argue the cost of PLA/ABS filament is low enough now that printing it would be cheaper than buying, you aren’t going to be able to make a better quadcopter frame on a 3D printer than what’s available on the commercial market.

The frame features a surprisingly low part count.

Having said that, [Paweł Spychalski] has recently shown off his 3D printed FPV racing quadcopter frame with some surprising results. The frame ended up being surprisingly stiff, and while the weight is a bit high, it’s actually lighter than he expected. If you’re looking to build a quad with the absolute minimum of expense his design might be something to look into.

Of course, [Paweł] is hardly the first person to think about printing a quad frame. But he did give his design some extra consideration to try and overcome some of the shortcomings he noticed in existing 3D printed designs. For one, rather than have four separate arms that mount to a central chassis, his design has arms that go all the way across with a thick support that goes between the motors. The central chassis is also reassuringly thick, adding to the overall stiffness of the frame.

The key here is that [Paweł] printed all the parts with 2 mm thick walls. While that naturally equates to longer print times and greater overall weight, it’s probably more than worth it to make sure the frame doesn’t snap in half the first time it touches the ground.

Beyond the printed parts, all you need to assemble this frame are about a dozen M3 nuts and bolts. Overall, between the hardware and the plastic you’re looking at a total cost of under $5 USD. In the video below [Paweł] puts the frame through its paces doing some acrobatic maneuvers, and it looks like 5 bucks well spent to us.

If you want to go all-in on 3D printed quadcopter parts, you can pair this frame with some printed propellers. Perhaps even a printed camera gimbal while you’re at it. Continue reading “3D Printing A Better Quadcopter Frame”

They’re Putting Soy In Your Wires, Man

I’ve got a friend who tells me at every opportunity that soy is the downfall of humanity. Whatever ails us as a society, it’s the soy beans that did it. They increase violent tendencies, they make us fat and lazy, they run farmers out of business, and so on. He laments at how hard it is to find food that doesn’t include soy in some capacity, and for a while was resigned to eating nothing but chicken hot dogs and bags of frozen peas; anything else had unacceptable levels of the “Devil’s Bean”. Overall he’s a really great guy, kind of person who could fix anything with a roll of duct tape and a trip to the scrap pile, but you might think twice if he invites you over for dinner.

A column of soy soldiers stand at the ready.

So when he recently told me about all the trouble people are having with soy-based electrical wiring, I thought it was just the latest conspiracy theory to join his usual stories. I told him it didn’t make any sense, there’s no way somebody managed to develop a reliable soy-derived conductor. “No, no,” he says, “not the conductor. They are making the insulation out of soy, and animals are chewing through it.”

Now that’s a bit different. I was already well aware of the growing popularity of bioplastics: the PLA used in desktop 3D printers is one such example, generally derived from corn. It certainly wasn’t unreasonable to think somebody had tried to make “green” electrical wiring by using a bioplastic insulation. While I wasn’t about to sit down to a hot bag of peas for dinner, I had to admit that maybe in this case his claims deserved a look.

Continue reading “They’re Putting Soy In Your Wires, Man”

Aluminum No Match For 3D Printed Press Brake Dies

If you’re looking for a get-rich-quick scheme, you can scratch “Doing small-scale manufacturing of ultralight aircraft” off your list right now. Turns out there’s no money in it. At least, not enough money that you can outsource production of all the parts. Not even enough to setup a huge shop full of customized machining tools when you realize you have to make the stuff yourself. No, this sounds like one of those “labors of love” we always hear so much about.

So how does one do in-house manufacturing of aircraft with a bare minimum of tools? Well, since you’re reading this on Hackaday you can probably guess that you’ve got to come up with something a bit unorthodox. When [Brian Carpenter] of Rainbow Aviation needed a very specific die to bend a component for their aircraft, he decided to try designing and 3D printing one himself.

Printing a die on the Zortrax M200

He reasoned that since he had made quick and dirty dies out of wood in the past, that a 3D printed one should work for at least a few bends before falling apart. He even planned to use JB Weld to fill in the parts of the printed die which he assumed would start cracking and breaking off after he put it through a few cycles. But even after bending hundreds of parts, wear on the dies appears to be nearly non-existent. As an added bonus, the printed plastic dies don’t mar the aluminum pieces they are bending like the steel dies do.

So what’s the secret to printing a die that can bend hundreds of pieces of aluminum on a 20 ton brake without wearing down? As it turns out…not a whole lot. [Brian] attributes the success of this experiment to designing the die with sufficiently accurate tolerances and having so high of an infill that it may as well be solid plastic.

In fact, the 3D printed die worked out so well that they’ve now expanded the idea to a cheap Harbor Freight brake. Before this tool was going more or less unused as it didn’t have features they needed for the production of their parts, namely a radius die or backstop. But by 3D printing these components [Brian] was able to put the tool back to work.

We’ve previously covered the art and science of bending sheet metal, as well as a homebuilt brake that let’s you do it on a budget even Rainbow Aviation would scoff at. So what are you waiting for? Go build an airplane.

Thanks to [Oahupilot] for the tip.

Continue reading “Aluminum No Match For 3D Printed Press Brake Dies”

DIY Bookshelf Is More Than Meets The Eye

It might surprise you, Dear Reader, that not every project featured on Hackaday needs to pulsate with LEDs, or update the world about its goings-on over Twitter. They don’t even, contrary to what you may have heard, need to have an Arduino inside. No, sometimes you can pull off a pretty neat hack with nothing more than some wood, a couple of tools, and a unique idea which repurposes something that would otherwise be in a landfill.

Such is the case with the latest project from [Keith Decent], which uses plywood and the spines of old books to create a secret compartment “bookshelf”. The concept is probably best described as a roll-top desk on its side, and while the action does appear a little stiff, it scores extra points for how easy it looks to replicate.

Using a router, [Keith] cuts a channel into the top and bottom sheets of plywood, which the “books” will eventually ride in. This channel goes around the entire perimeter of the shelf, and it’s important to make it as straight as possible so nothing binds up. To make sure things move through as smoothly as possible, some sandpaper is used to clean-up the inside edges.

The next step is to rip some books apart and salvage their spines. Used books can be purchased for next to nothing at flea markets, so even if you don’t have a home library filled with vintage tomes to eviscerate, it should be easy enough to get your hands on some if you want to build your own version. For sanity’s sake it would seem that books with the same size spines are ideal, so keep an eye out for old sets of encyclopedias and the like.

When the spines are removed from the books, they get glued to individual wooden slats. These slats then have holes drilled in the top and bottom, and standard wood screws driven in to act as “rollers”. Real rollers would undoubtedly make for smoother action, but you can’t beat his method if you’re trying to get it done cheaply and quickly.

The slats are then glued onto a piece of fabric, creating what is referred to as a tambour. The fabric backing links all the slats together and makes it so that pushing and pulling one slat will move them all together as one. The book spine tambour is then inserted in the routed channel, and the back panel of the shelf can be installed to lock it all together.

At this point the project is essentially done, but [Keith] does take it the extra mile by sealing all the book spines and doing some finish work on the shelf to make it look more like a real vintage piece of furniture instead of some scrap plywood screwed together.

If this exercise in woodworking has gotten you interested in the wonderful world of dead trees, you’re in luck. We’ve covered several woodworking projects from the hacker perspective, so you won’t be completely lost.

Continue reading “DIY Bookshelf Is More Than Meets The Eye”

Bartop Arcade Cabinet Build Skips The Kit

An arcade cabinet is one of those things that every gamer wants at home, but few ever get. Getting a real arcade cabinet is usually expensive, and building one yourself is no small feat. There are kits you can get now which help the process along, generally taking the form of pre-cut cabinet parts, but with them comes the quiet shame of kit-building. What if your friends found out you used a kit instead of designing it yourself? The drama is almost too much to think about.

That’s how [Bogdan Berg] felt about it, at least. Not content with just getting a pre-cut cabinet kit from eBay, he decided to design and build his own bartop arcade machine in just one week: fast enough for him to fit the whole thing into his Christmas vacation. We don’t know what Christmas was like for his friends and family this year with him toiling away on this beautiful build the whole time, but we can confidently say his Christmas was awesome.

He designed the cabinet in Fusion 360, working around the limitation that the laser cutter he had access to had a work area of 24 inches by 18 inches. Some interesting design choices were made here, including going with a tab and slot construction method. While [Bogdan] admits that this aesthetic isn’t always popular, he liked how sturdy it makes the final product.

He was originally going to use plywood for the cabinet, but owing to the fact that he couldn’t find any pieces that weren’t warped locally, he switched over to MDF. Using MDF did mean he had to seal all the cut pieces with shellac before painting, but in the end he’s happy with the final lacquer paint job; even if it did take more work and materials than he anticipated.

The hardware is pretty much the standard for DIY arcades these days: a 17 inch LCD monitor he had laying around is used for the display, a two player joystick and button kit from Amazon provides the user interface, and emulation is provided by a Raspberry Pi 3 running RetroPie. A recessed door in the rear allows him to get into the machine will still maintaining a finished look on the backside.

While the size of them may vary wildly, DIY arcade cabinets are always a popular project. Whether shamelessly emblazoned with our logo or playing host to glorious LED lighting, it seems like the design of these cabinets provide as much entertainment as the games they play.

Continue reading “Bartop Arcade Cabinet Build Skips The Kit”

Vintage Logan Lathe Gets 3D Printed Gears

In December 2016, [Bruno M.] was lucky enough to score a 70+ year old Logan 825 lathe for free from Craigslist. But as you might expect for a piece of machinery older than 95% of the people reading this page, it wasn’t in the best of condition. He’s made plenty of progress so far, and recently started tackling some broken gears in the machine’s transmission. There’s only one problem: the broken gears have a retail price of about $80 USD each. Ouch.

On his blog, [Bruno] documents his attempts at replacing these expensive gears with 3D printed versions, which so far looks very promising. He notes that usually 3D printed gears wouldn’t survive in this sort of application, but the gears in question are actually in a relatively low-stress portion of the transmission. He does mention that he’s still considering repairing the broken gears by filling the gaps left by the missing teeth and filing new ones in, but the 3D printed gears should at least buy him some time.

As it turns out, there’s a plugin available for Fusion 360 that helpfully does all the work of creating gears for you. You just need to enter in basic details like the number of teeth, diametral pitch, pressure angle, thickness, etc. He loaded up the generated STL in Cura, and ran off a test gear on his delta printer.

Of course, it didn’t work. Desktop 3D printing is still a finicky endeavour, and [Bruno] found with a pair of digital calipers that the printed gear was about 10% larger than the desired dimensions. It would have been interesting to find out if the issue was something in the printer (such as over-extrusion) or in the Fusion 360 plugin. In any event, a quick tweak to the slicer scale factor was all it took to get a workable gear printed on the third try.

This isn’t the first time we’ve seen 3D printed gears stand in for more suitable replacement parts, nor the first time we’ve seen them in situations that would appear beyond their capability. As 3D printer hardware and software improves, it seems fewer and fewer of the old caveats apply.

Continue reading “Vintage Logan Lathe Gets 3D Printed Gears”