Pushing As Many Pixels As Possible To A CRT: Interlaced 4K

Some people love CRTs to a degree that the uninitiated may find obsessive. We all have our thing, and for [Found Tech], it’s absolutely pointing particle accelerators at his face to play video games. He likes modern games, with modern resolutions– none of this 1080p nonsense. Today’s gamers demand 4K! Can a CRT keep up? The answer is a resounding “No, but actually, yes!”

[Found Tech] has an IBM P275 monitor, which is one of the last generation of CRTs.  Officially, the resolution maxes out at 1920 dots by 1440 lines. While one might (inaccurately) call that UHD output “2K”, you certainly cannot claim it is 4K. So, what’s the secret? Interlacing. Yes, interlacing, like old analog TV signals.

Apparently, in spite of what the manual says, getting the screen to absorb the 2880×2160 interlaced signal wasn’t the hard part, but generating it was. NVIDIA and AMD graphics cards are absolutely unable to create an interlaced signal, but Intel integrated GPUs are– if you get the right combo of chip and old driver. Sadly, the video doesn’t list exactly what he used. Of course an iGPU isn’t going to give you a very good gaming experience at this high resolution, so [Found Tech] has his games do their rendering on the discrete card before piping that over to the iGPU for display on the CRT.

Technically, you still can’t call the 2880×2160 picture “4K”, as that trademark refers to 2160p at 16:9, and this is both interlaced and 4:3. Still, close enough. In spite of the artifacting that turned us all against interlaced signals back in the day, this apparently has [Found Tech]’s eyes fooled– he says it’s as good as 2160p on his OLED, plus the extra magic that comes with glowing phosphors.

It certainly looks great in a recording, but the monitor in the recording isn’t displayed at a high enough resolution to say for sure if it’s 4K. Still, if you’re into CRT gaming, maybe give this high-res interlacing a try. If you still don’t get what’s so great about CRTs, check here, and remember it could be worse– at least we’re not going on about Plasma TVs. Continue reading “Pushing As Many Pixels As Possible To A CRT: Interlaced 4K”

Building An X86 Gaming PC Without Intel, NVIDIA Or AMD Parts

This is an interesting challenge from the “why not?” files — [GPUSpecs] over on YouTube built a gaming PC without using a single component from NVIDIA, Intel, or AMD. That immediately makes us think of the high-power ARM workstations or perhaps even perhaps the new “AI workstations” coming available with RISC V architecture, but the challenge here was specifically “gaming PC,” not workstation. A gaming PC, without a GPU by one of those three? To make it even more interesting, the x86 CPU isn’t Intel or AMD either.

If you’re of a certain vintage, you may remember Cyrix. Cyrix reverse-engineered the x86 ISA and made their own compatible chips in the 90s, before being bought out by National Semiconductor, and then VIA Technologies. VIA partnered with the Government of Shanghai to found Zhaoxin, and it is from Zhaoxin that the KaiXian KX 7000 CPU hails — an x86-64 device, that isn’t Intel or AMD. We’ve actually covered the company before. This particular chip benchmarks like an old i5, so not spectacular, but usable. 

Continue reading “Building An X86 Gaming PC Without Intel, NVIDIA Or AMD Parts”

Wipeout Clone Runs Native On ESP32-S3

Psygnosis’s 1995 game Wipeout is remembered for two things: being one of the greatest games of all time, and taking advantage of the then-new PlayStation’s capacity for 3D graphics. The ESP32-S3 might not be your first choice to replace Sony’s iconic console, but [Michael Biggins] a.k.a. [PhonicUK] is working on doing just that, with his own clone of Wipeout on the Expressif MCU. 

It’s actually not that crazy when you think about it. The PlayStation had a 32-bit RISC processor, and the ESP32-S3 is a 32-bit RISC processor. The PlayStation’s was only good for about 30 Million Instructions Per Second (MIPS) but it had a graphics co-processor to help out with the polygons — the ESP32-S3 has two cores that can help each other, which combine to about 300 MIPS. In terms of RAM, the board in use has 8 MB of PSRAM, while the faster 512 kB on the chip is used, in effect, as video ram.

The demo is very impressive, especially considering he’s fit in three computer players. He’s also got it blasting out 60 frames per second, which is probably double what the original Wipeout ran on the PS1. Part of that is the two cores in action: he’s got them working together on the interlaced video output, one sending while the other finishes the second half of the frame. Each half of the video gets dedicated space in the internal memory. Using a 480×320 pixel display doesn’t hurt for speed, either. Sure, it’s paltry by modern standards, but the original Wipeout got by with even fewer pixels — and it didn’t run on a microcontroller. Granted it’s a beefy micro, but we really love how [Michael] is pushing its limits here.

Right now there’s just the Reddit thread and the demo video below. [Michael] is considering sharing the source code for his underlying 3D engine under an open license. We do hope he shares the code, as there are surely tricks in there some of us here could learn from. If it’s all old hat to you, perhaps you’d rather spend a weekend learning raytracing.

Continue reading Wipeout Clone Runs Native On ESP32-S3″

Mist, Mirrors, Laser : Multi-view 3D Projection

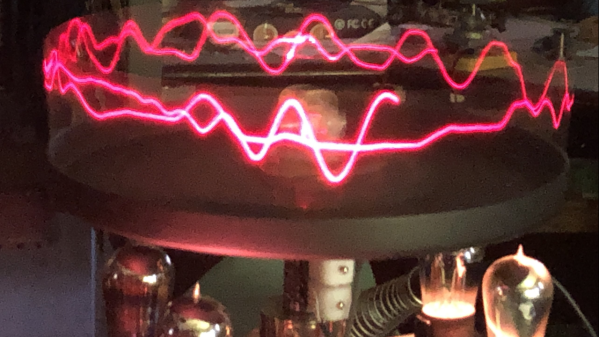
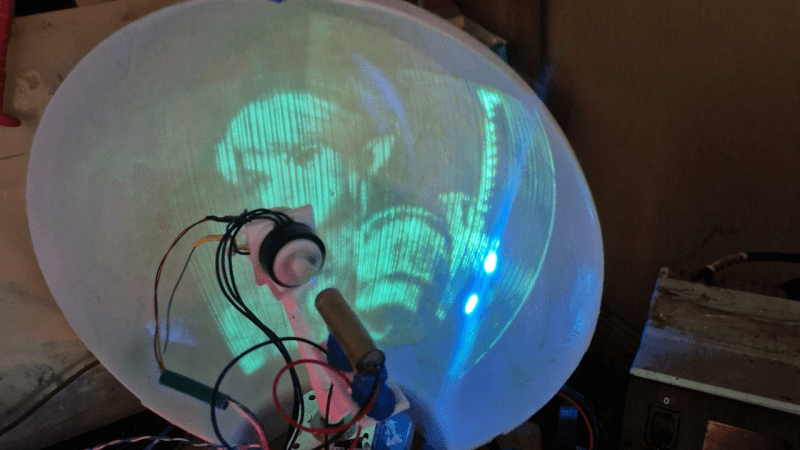
“Lights, camera, action!” might have been the call when recording back in the day, but for an awesome three-dimensional viewing experience, you might try yelling “Mist, Mirrors, Laser!” and following in the footsteps of [Ancient]’s latest adventure in voxel displays, which is also embedded below.

He starts with a naive demonstration: take a laser projector and toss an image into a flat cloud of mist. That demonstrates that yes, the mist does resolve an image, and that the viewing angle is very poor– that is, brightness drops off sharply when you’re out of line from the projector. In this case, that’s a good thing! It means more angles can be projected into that mist for a three-dimensional, hologram effect.

Continue reading “Mist, Mirrors, Laser : Multi-view 3D Projection”

Slicer Settings For “Indestructible” Battle-Bot Worthy PLA Parts

If you follow [Maker’s Muse] on YouTube, you know he’s as passionate about robot fights these days as he is about the tools he uses to make the robots. Luckily for us, he’s still got fame as a 3D printing YouTuber, as this has given him the platform to share his trade secrets for strong, robot-combat-worthy prints.

He fights robots in a ‘plastic ant-weight’ division, which restricts not only the weight of the robot but also the materials used. Not only must they be primarily plastic, but only certain plastics are allowed: PLA is in, but engineering filaments, Nylon, and TPU are out. Since necessity is the mother of invention, this has led to strong evolutionary pressure to figure out how to print the most impact-resilient PLA parts for armor and spinners.

He’s using the latest OrcaSlicer and shares the profile as a pay-what-you-want 3MF file. It’s all about solidity: a solid part with solidly fused walls and solidly linked layers. It makes sense: if you’re going to be hammering on or with these parts, you don’t want any internal voids that could either collapse or pull open.

The infill density is obviously 100%, and you’ll want a concentric pattern — this makes it look like you’re just printing walls, but it allows you to use another trick. To make sure those walls don’t all align, creating a potential weakness, OrcaSlicer’s “alternate extra wall” will put one extra wall every second layer. The extra wall causes the infill pattern to stagger and lock together.

Also helping lock it together, he’s playing with extrusion widths, with the suggested rule-of-thumb being the line width on the walls be one-half that of the internal fill — and as wide as possible. In his case, with a 0.4 mm nozzle, that means 0.4 mm wide walls and 0.8 mm for the infill. OrcaSlicer 2.3.2 also lets you play with specific flow ratios, allowing you to overextrude only the internals for strength, without overextruding on the walls and potentially ruining dimensional accuracy. He also irons all top surfaces, but admits that that’s mostly about aesthetics. The iron may make those layers a little bit stronger, though, so why not?

Would brick layers make these parts even stronger? That’s very likely; [Maker’s Muse] mentions them in the video but does not use them because they’re not implemented in-slicer, and he wants something accessible to all. On the other hand, this post-processing script seems accessible enough for our crowd.

This video/profile is exclusively about fully-solid parts. When you want strong parts that aren’t fully solid, it looks like the answer is walls.

, Continue reading “Slicer Settings For “Indestructible” Battle-Bot Worthy PLA Parts”

You Wouldn’t Download A Combustion Engine

Although 3D printing it a great tool for making all sorts of things, the nature of the plastics used in most desktop FDM printers means it isn’t the first tool most would think of to build an internal combustion engine. [Alexander] is evidently not most people, as he’s on his third generation 3D printed engine.

There are 3D printed pumps to distribute coolant water and oil, plus some clever engineering in the head to make sure they don’t mix — a problem with a previous iteration. As you probably guessed, the engine isn’t fully printed. Assembling it requires add-on hardware for things like bearings, belts, and filters.

But it’s still impressive just how much of this beast is actually made of plastic. Not even fancy engineering plastic, either — there are a few CF-Nylon parts, but most of it is apparently good old ASA and ABS.

If you’re looking for “cheats”, the plastic engine block does get a stainless steel sleeve, and the head is CNC’d aluminum, but we hesitate to call anything that gets a homemade engine running a “cheat”. It’s hard enough using all the ‘right’ materials. Just like another 3D printed engine we featured, the carb is also an off-the-shelf component.

Still, it’s the dancing bear all over again: it’s not how well it runs that impresses, but the fact that it runs at all. We’ve also seen hackers use 3D printing to make steam engines, hot-air Stirling engines, and electric motors— all with varying amounts of non-printed parts.

Continue reading “You Wouldn’t Download A Combustion Engine”

Time Frog Color Is A Game Boy Color On Your Wrist

Handheld consoles are great for gaming on the go, but who wants to hold onto things all the time? Would it not be easier to strap the game to your wrist? Well, not in its current form factor, but [LeggoMyFroggo], aka [
Chris Hackmann] has you covered, because he turned the Gameboy Color into a (relatively smart) watch.

Why “relatively” smart? Well, we say that because he’s using the original Game Boy Color CPU, a Sharp SOC based on the Z80 that is far less powerful than modern smartwatch platforms. That SOC is helped out by an RP2040 that translates the chip’s parallel RGB output into something a modern watch-sized display can comprehend via its PIOs. [Chris] refers to it as a “poor man’s FPGA” which isn’t a bad way of thinking about it in this context. Yes, he could have just stuck an emulator on that chip, but what’s the fun in that?

The controls are squeezed into the sides of the watch — the four face buttons on one side, and a tiny D-pad on the other — but that’s easy enough because this thing is 15 mm thick. Since [LeggoMyFroggo] is a purist, he insists on loading the games via cartridge, which does not help thin it out. Game Boy carts are not not watch-friendly, so the cartridges are custom PCBs that plug into an M.2 slot, but with the original (or at least compatible) ROM.

If it wasn’t for the cartridge slot, maybe a battery would have fit. But it doesn’t, which leads to our favorite part of the hack: the battery is in the watch strap. This is both kind of crazy, but also brilliant. The band is cast in silicone, so he’s able to embed a flexi-PCB inside. As for the watch body, that’s CNC’d out of 6061 aluminum before being anodized to a very Nintendo-esque purple.

[Chris] evidently has a soft spot for the Game Boy Color — we featured his FrogBoy re-imagining of the handheld a few years back. The project is just up on YouTube as of this writing, but the watch will join the FrogBoy on [Chris]’s GitHub so we can all get in on the fun once he’s finished the documentation.

Continue reading “Time Frog Color Is A Game Boy Color On Your Wrist”