Play Tetris On A Transistor Tester, Because Why Not?

[Robson] had been using the same multimeter since he was 15. It wasn’t a typical multimeter, either. He had programmed it to also play the Google Chrome jumping dinosaur game, and also used it as a badge at various conferences. But with all that abuse, the ribbon cable broke and he set about on other projects. Like this transistor tester that was just asking to have Tetris programmed onto its tiny screen.

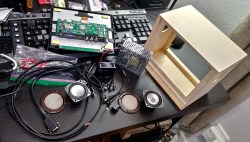
The transistor tester is a GM328A made for various transistor testing applications, but is also an LCR meter. [Robson]’s old meter didn’t even test for capacitance but he was able to get many years of use out of that one, so this device should serve him even better. Once it was delivered he set about adding more features, namely Tetris. It’s based on an ATmega chip, which quite easy to work with (it’s the same chip as you’ll find in the Arduino Uno but [Robson’s] gone the Makefile route instead of spinning up that IDE). Not only did he add more features, but he also found a mistake in the frequency counter circuitry that he fixed on his own through the course of the project.

If you’ve always thought that the lack of games on your multimeter was a total deal breaker, this project is worth a read. Even if you just have a random device lying around that happens to be based on an ATmega chip of some sort, this is a good primer of getting that device to do other things as well. This situation is a fairly common one to be in, too.

Continue reading “Play Tetris On A Transistor Tester, Because Why Not?”

Low Power Weather Station Blows The Competition Away

Building a weather station isn’t too tall of an order for anyone getting into an electronics project. There are plenty of plans online, and you can even put your station on Weather Underground if it meets certain standards. These usually have access to a reliable source of power, though, and like any electronics project can get challenging quickly once it needs to work reliably in a remote location. The weather station from [Tegwyn☠Twmffat] has met this challenge though, and has been working reliably for three years now.

Getting that sort of reliability from any circuit that has to be powered by an unreliable source (solar, wind, etc.) and a battery is quite a challenge. Not only do you need to sort out the power management and make sure that you can get enough sun in the winter for your application, but you’ll need to do some extreme low power modifications to your circuitry as well. This weather station accomplishes all of that, helped by using LoRa for communication, and also comes complete with a separate hardware watchdog timer that can reboot the weather station if it loses power or hangs up for some reason.

If you’ve been looking for a weather station to build, this is a great place to start. [Tegwyn☠Twmffat] also goes through the assembly of the weather station, complete with a guy-wire-supported platform to mount it on. There are other weather stations out there too, if you need even more ideas about saving power in remote areas.

New Part Day: Lynxmotion Smart Servos

Anyone who shops for robotics kits would have come across a few designed by Lynxmotion. They’ve been helping people build robots since 1995, from robot arm kits to hexapod chassis and everything in between. We would expect these people know their motors, so when they launched their own line of servo motors called Lynxmotion Smart Servos (LSS), it is worth spending a bit of time to look over what they offer.

While these new devices have a PWM mode compatible with classic remote control servos, unleashing their full power requires bidirectional communication over a serial bus. We’ve previously given an overview of three serial bus servos already on the market for comparison. A quick look at the $68-$100 price tags listed on Lynxmotion’s parent company RobotShop made it clear they do not intend to compete on price, so what interesting features do these new kids on the block have?

Digging into product documentation found some great details. Acceleration and deceleration rates are adjustable, which can help with smoother robot movement. There’s also an adjustable level of “stiffness” that adds some “give” (compliance) so a robot won’t have to be as stiff as… well, a robot!

Mechanically, the most interesting internal component is the magnetic position sensor. They are far more precise than potentiometers, but more importantly, they allow positioning anywhere within full 360 degrees. Many other serial bus servos are constrained to positions within an arc less than 360 degrees leaving a blind spot.

An interesting quirk of the LSS offerings is that the serial communication protocol uses human-readable text characters, so sending a number 255 means transmitting a three byte string ‘2’, ‘5’, and ‘5’ instead of single byte 0xFF. This would make debugging our custom robot code far easier, at the cost of reduced bandwidth efficiency and loss of checksum for detecting communication errors. It’s a trade-off that some robot builders would be happy to make, but others might not.

Externally, these servos have bountiful mounting options including some we didn’t know to ask for. Historically Lynxmotion kits have used a wide variety of servo mounting brackets, so they are motivated to make mechanical integration easy. The most novel offering is the ability to bolt external gears to the servo body. A set of 1:3 gears allow for gearing the servo up or down, or you can use a set of 1:1 gears for a compact gripper.

As you’d expect of servos in this price range, they all have metal gears, but they also have the ability to power the motor directly from a battery pack (a 3 cell lithium polymer is recommended). There are additional features, like an RGB LED for visual feedback, which we didn’t cover here so dig into the documentation for more. We look forward to seeing how these interesting little actuators perform in future robotics projects.

Hackaday Podcast 017: Are Cheap Microcontrollers Worth It? Android On Your Bike. Plus Food Printers And Coffee Bots

Join Editors Mike Szczys and Elliot Williams as they recount a week of fascinating hacks. We take a good look at the PMS150C, a microcontroller that literally costs pennies but can only be flashed once. SNES emulators have a new trick up their sleeves to make low-def a lot less low, and you retro enthusiasts will either hate or love the NES zapper chandelier. Elliot’s enamored by a bike computer running Android core, and both Mike and Elliot delve into the food hacking scene, be it meat, chocolate, coffee, or of course frosting!

Take a look at the links below if you want to follow along, and as always, tell us what you think about this episode in the comments!

Take a look at the links below if you want to follow along, and as always, tell us what you think about this episode in the comments!

Direct download (60 MB or so.)

Continue reading “Hackaday Podcast 017: Are Cheap Microcontrollers Worth It? Android On Your Bike. Plus Food Printers And Coffee Bots”

The Cloak Of Invisibility Against Image Recognition

Adversarial attacks are not something new to the world of Deep Networks used for image recognition. However, as the research with Deep Learning grows, more flaws are uncovered. The team at the University of KU Leuven in Belgium have demonstrated how, by simple using a colored photo held near the torso of a man can render him invisible to image recognition systems based on convolutional neural networks.

Convolutional Neural Networks or CNNs are a class of Deep learning networks that reduces the number of computations to be performed by creating hierarchical patterns from simpler and smaller networks. They are becoming the norm for image recognition applications and are being used in the field. In this new paper, the addition of color patches is seen to confuse the image detector YoLo(v2) by adding noise that disrupts the calculations of the CNN. The patch is not random and can be identified using the process defined in the publication.

This attack can be implemented by printing the disruptive pattern on a t-shirt making them invisible to surveillance system detection. You can read the paper[PDF] that outlines the generation of the adversarial patch. Image recognition camouflage that works on Google’s Inception has been documented in the past and we hope to see more such hacks in the future. Its a new world out there where you hacking is colorful as ever.

Continue reading “The Cloak Of Invisibility Against Image Recognition”

Get To Know The Physics Behind Soldering And The Packaging Of ICs

Often it feels as if soldering is deemed to be more of an art form than something that’s underpinned by the cold, hard reality of physics and chemistry. From organic chemistry with rosin, to the material properties of fragile gold bond wires and silicon dies inside IC packages and the effects of thermal stress on the different parts of an IC package, it’s a complicated topic that deserves a lot more attention than it usually gets.

A casual inquiry around one’s friends, acquaintances, colleagues and perfect strangers on the internet usually reveals the same pattern: people have picked up a soldering iron at some point, and either figured out what seemed to work through trial and error, or learned from someone else who has learned what seemed to work through trial and error. Can we say something scientific about soldering?

Continue reading “Get To Know The Physics Behind Soldering And The Packaging Of ICs”

Custom Monitor For Pi-Powered Commodore 64

Classic games never seem to have gone out of style and with the emulation powers of the Raspberry Pi, there seems to be no end of projects folks have been coming up with. [Chris Mills] project is a great looking monitor to get his Commodore 64 fix by combining the retro looks of a home-made 64-style monitor with the Raspberry Pi.

[Chris] is only interested in Commodore 64 emulation, at least with this project, and wanted something that would fit on a desk without taking up too much room. An eight inch LCD security monitor fit the bill perfectly. [Chris] ended up building a wooden enclosure for the monitor to give it that Commodore look. The monitor, power supply and cable connections fit inside along with speakers; each of these having their inputs on the back. A fan vents in the back as well and the Pi sits outside running the Combian 64 emulation software.

[Chris] has put up some galleries of build pics. The logo from the old Commodore logo is a nice touch. Read over the Hackaday site and you could build your own Commodore 64, or use the Commodore 64 itself to house the Raspberry Pi if you wanted.