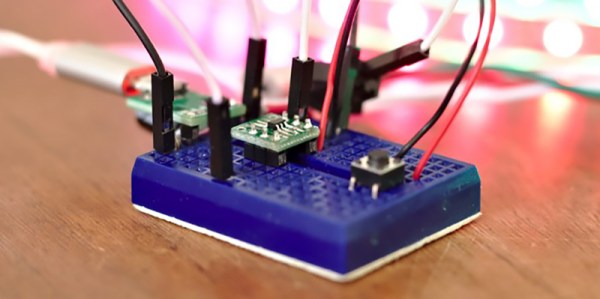
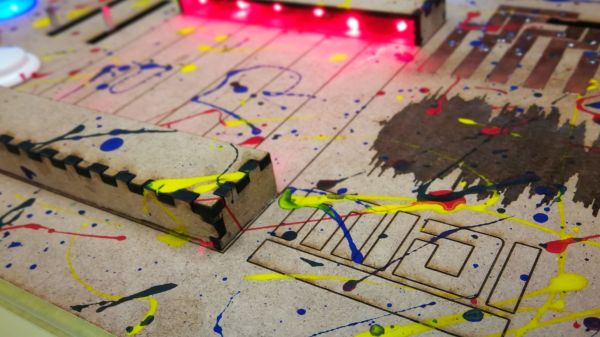
A Dynamometer For Measuring Motor Power

If you have ever ventured into the world of motor vehicles you may be familiar with a dynamometer, possibly as a machine to which your vehicle is taken for that all-important printout that gives you bragging rights (or not) when it comes to its ability to lay down rubber. A dynamometer is essentially a variable load for a rotating shaft, something that converts the kinetic energy from the shaft into heat while measuring the power being transferred.

Most of us will never have the chance to peer inside our local dyno, so a term project from a group of Cornell students might be something of interest. They’ve built a dynamometer for characterising small electric motors, and since their work is part of their degree courses, their documentation of it goes into great detail.

Their dynamometer takes the form of a shaft driving a stainless steel disc brake upon which sit a pair of calibers mounted on a fixed shaft that forms a torsion bar. The whole is mounted in a sturdy stainless steel chassis, and is studded with sensors, a brace of strain gauges and a slotted disc rotation sensor. It’s not the largest of dynamometers, but you can learn about these devices from their work just as they have.

This is a project sent to us by [Bruce Land], one of many from his students that have found their way to these pages. His lectures on microcontrollers are very much worth a look.

3D Printing The Final Frontier

While down here there’s room for debate about the suitability of 3D printing for anything more serious than rapid prototyping, few would say the same once you’ve slipped the surly bonds of Earth. With 3D printing, astronauts would have the ability to produce objects and tools on-demand from a supply of inert raw building materials. Instead of trying to pack every conceivable spare part for a mission to Mars, replacements (assuming a little forward thinking on the part of the spacecraft designers) can be made to order out of the stock of raw plastic or metal kept on-board. The implications of such technology for deep space travel or off-world settlement simply cannot be overstated.

In the more immediate future, 3D printing can be used to rapidly develop and deploy unmanned spacecraft. Tiny satellites (referred to as CubeSats) could be printed, assembled, and deployed by astronauts already in orbit. Innovations such as these could allow science missions to be planned and executed in months instead of years, and at a vastly reduced cost.

Continue reading “3D Printing The Final Frontier”

Small Jet Engine Model From Students Who Think Big

We love to highlight great engineering student projects at Hackaday. We also love environment-sensing microcontrollers, 3D printing, and jet engines. The X-Plorer 1 by JetX Engineering checks all the boxes.

This engineering student exercise took its members through the development process of a jet engine. Starting from a set of requirements to meet, they designed their engine and analyzed it in software before embarking on physical model assembly. An engine monitoring system was developed in parallel and integrated into the model. These embedded sensors gave performance feedback, and armed with data the team iterated though ideas to improve their design. It’s a shame the X-Plorer 1 model had to stop short of actual combustion. The realities of 3D printed plastic meant airflow for the model came from external compressed air and not from burning fuel.

Also worth noting are the people behind this project. JetX Engineering describe themselves as an University of Glasgow student club for jet engine enthusiasts, but they act less like a casual gathering of friends and more like an aerospace engineering firm. The ability of this group to organize and execute on this project, including finding sponsors to fund it, are skills difficult to teach in a classroom and even more difficult to test with an exam.

After X-Plorer 1, the group has launched two new project teams X-Plorer 2 and Kronos. They are also working to expand to other universities with the ambition of launching competitions between student teams. That would be exciting and we wish them success.

Continue reading “Small Jet Engine Model From Students Who Think Big”

Machined Lightsaber Pen For A More Civilized Age

In an increasingly paperless society, writing implements are becoming an obsolete technology for many of us. Certainly not the kind of thing the average person would think to spend more than a couple bucks on, to say nothing of machining one out of a solid piece of aluminum bar stock. But clearly [Bob] is not most people. He recently dropped us a line about a video he uploaded to his aptly-named YouTube channel “Making Stuff”, where he goes through the steps required to turn raw materials into a writing instrument worthy of a Jedi.

Starting with a piece of aluminum chucked up in the lathe, [Bob] cuts out the iconic ribbed profile of Luke’s saber and fills in the gaps with nothing more exotic than a black Sharpie. He then moves on to the more complex shape of the emitter, and then flips the handle over in the lathe and hollows it out so a brass tube can be inserted.

Turning down the acrylic “blade”

Somewhat surprisingly, it seems more effort ends up being put into the acrylic “blade” than the aluminum handle itself. A chunk of acrylic is drilled and tapped so that it can be mounted in the chuck, and then turned down into a long cylinder. A tip is then cut in the end, the length of the blade is hollowed out, and finally it gets polished up to a nice shine.

The build is completed by inserting a standard ink pen cartridge down the center of the now completed saber. Surely the pen aficionados will lament that he didn’t attempt to build his own ink cartridge as well, but we think he gets a pass considering the rest of it was made from scratch.

If even a glorious writing instrument such as this isn’t enough to get you to re-learn how to write your name, fear not. Whether you’re making music or capturing flags, we’ve played home to numerous other saber projects; eye-safe or otherwise.

Continue reading “Machined Lightsaber Pen For A More Civilized Age”

The Miracle Of Injection Molding: How Does It Work?

Pretty much any household item nowadays has an involved, extremely well-thought-out manufacturing method to it, whether it’s a sheet of paper, an electrical outlet, a can of tuna, or even the house itself. Some of the stories of how these objects came to be are compelling, though, as one of the recent videos from [This Old Tony] shows as he takes a deep dive into a $5 ball valve, and uses it to talk about all of the cool things you can do with injection molding.

Injection molding is the process of casting molten plastic into more useful pieces of plastic. In this case it’s a plumbing valve which might seem simple on the surface, but turns out to be much more involved. These ball valves are extremely reliable but have a very small price tag, meaning that a lot of engineering must have gone into their design. What is unearthed in the video is that injection molding allows parts to be cast into the molds of other parts, and the means by which those parts don’t all melt together, and how seals can be created within the part itself. All of this happens with a minimal number of parts and zero interaction from a human, or from any robot that isn’t the injection mold itself.

The video goes into exceptional detail on these valves specifically but also expounds on various techniques in injection molding. Similar to the recognition the seemingly modest aluminum can deserves, the injection molded ball valve deserves a similar amount of respect. While [This Old Tony] usually focuses on metalworking, he often tackles other interesting topics like this and this video is definitely worth checking out.

Continue reading “The Miracle Of Injection Molding: How Does It Work?”

DIY Cable Chain Looks Great, Stays Cheap

If you’ve built a 3D printer, CNC, laser cutter, or basically any piece of electrical equipment that moves around, then you’ve run into the problem of securing the bundle of wires that such machines always require. The easy way out is to zip tie them all up into a tight harness or put them in commercially available wraps or sleeves, but these don’t really impart any mechanical strength on the wires. With repetitive motion it’s not unheard of to break a conductor or two, causing intermittent failures and generally leading to a painful diagnostic session trying to isolate the broken wire.

An alternative are what are generally referred to as “cable chains”. These are rigid enclosures for your wiring that not only keep things tidy, but give the wires the mechanical support necessary to prevent fatigue. Unfortunately, they are often many times more expensive than a simple wire wrap or pack of zip ties. But [Brad Parcels] has written into our tip line to share with us a sort of hybrid approach to wire management that has many of the same advantages as a traditional cable chain, but at a greatly reduced cost.

The key to the design is using the metallic tape from a cheap tape measure to give the bundle of wires some mechanical strength. As anyone who’s ever played around with a tape measure knows, if you bend the tape over into a U shape it will hold the bend even if you extend and retract it. Thanks to this principle, [Brad] realized that all he need to do was add some wire sleeves and he would have a cheap and effective way to keep his wiring neat and sag-free.

[Brad] punches holes in the tape to secure it to his 3D printed mounting arms, but really any method of securing the tape to the frame of your machine will work just as well. He then slides a cable sleeve over the tape itself to protect from any possibility of the edge of the tape nicking a wire, and then finally a larger wire sleeve over the entire assembly.

After running the wires between the two sleeves, heatshrink can be used on the ends to neatly close everything up. Just make sure you remember all your wires before you seal it, [Brad] learned that one the hard way. But overall, he reports this DIY cable chain arrangement has been working wonderfully in his machine, providing smooth and silent movement for only a few bucks.

Cable management for projects that move is one of those things that doesn’t always get the attention it deserves. Not only can it keep your project looking professional, but it just might save you some time down the road by preventing failures.

Hackaday Links Column Banner

Hackaday Links: December 17, 2017

Where do you go if you want crazy old electronic crap? If you’re thinking a ham swap meet is the best place, think again. [Fran] got the opportunity to clean out the storage closet for the physics department at the University of Pennsylvania. Oh, man is there some cool stuff here. This room was filled to the brim with old databooks and development boards, and a sample kit for the unobtanium Nimo tube.

The Gigatron is a Hackaday Prize entry to build a multi-Megahertz computer with a color display out of TTL logic. Now, all this work is finally paying off. [Marcel] has turned the Gigatron into a kit. Save for the memories, this computer is pretty much entirely 74-series logic implemented on a gigantic board. Someone is writing a chess program for it. It’s huge, awesome, and the kits should cost under $200.

What’s cooler than BattleBots, and also isn’t Junkyard Wars? BattleBots, but in drone form. Drone Clash was originally announced in March, but now they’re moving it up to February to coincide with the TUS Expo. What could be better than flaming piles of lithium?

The Atari Lynx went down in history as the first portable console with a color LCD. There was a problem with the Lynx; the display was absolutely terrible. [RetroManCave] found someone selling an LCD upgrade kit for the Lynx, and the results are extremely impressive. The colors aren’t washed out, and since the backlight isn’t a fluorescent light bulb (yes, really), this Lynx should get a bit more run time for each set of batteries.

Like dead tree carcasses? You need to butcher some dead tree carcasses. The best way to do this is on a proper workbench, and [Paul Sellers] is working on a video series on how to make a workbench. He’s up to episode 3, where the legs are mortised. This is all done with hand tools, and the videos are far more interesting than you would think.

If you need some very small, very blinky wearables, here’s an option. This build is literally three parts — an LED matrix, an ATtiny2313, and a coin cell battery. Seems like this could be an entry for the Coin Cell Challenge we have going on right now.