Scooter Hauls Kids With A Little Heavy Metal

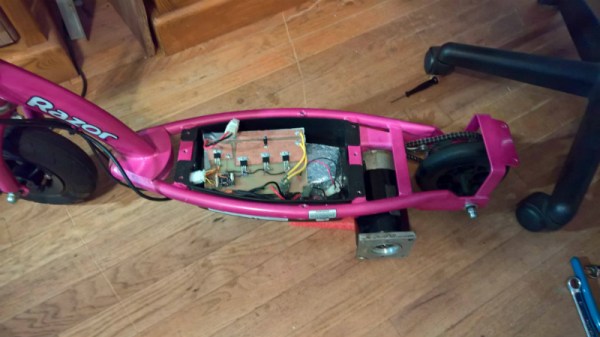
Where there’s a will, there’s a way. Similarly, where there’s a paying customer and a well stocked metalworking shop, there will also be a way. That’s about all the backstory you need to understand this latest creation from [Richard Day] of 42Fab. A customer asked him to build something that didn’t exist, and in a few hours he not only fabricated it from scratch but documented the whole thing for our viewing pleasure.

The object in question is a mount that would allow the customer to pull a “Burley Bee” kid trailer behind their electric scooter. The trailer is only meant for a bicycle, but the expected stresses of getting pulled around by a scooter seemed similar enough that [Richard] figured it should work. Especially since the ride height of the scooter lined up almost perfectly with the trailer’s tongue. The trick is, he wanted to avoid making permanent changes to either the scooter or the trailer.

On the scooter side, [Richard] came up with a clamp arrangement that would squeeze onto the frame. This gave him plenty of strength, without having to put any holes in the scooter. To create the clamp he took two pieces of 1/4″ x 2″ steel flat bar and welded 5/16″ nuts to them. By drilling the threads out of outer nuts they act as bushings, so cranking down on the bolts draws the two pieces together. To simplify the alignment, he welded the nuts to the bars while the bolts were threaded in, so he knew everything would be in place.

For the trailer side, he took another piece of flat steel and turned it into a “U” shape by cutting almost all the way through the back of it and then folding it over in his vice. A bead of metal was then laid in the cut with the welder to strengthen it back up. [Richard] used this opportunity to demonstrate the difference between pushing and pulling the torch while welding, which is an interesting tip to file away. A hole drilled through the two sides and a little grinding, and it’s ready to mount.

Between the two fabricated components is some flat stock welded at an eyed up angle. As [Richard] says in the video, the nice thing about these one-off projects is that you can basically design on the fly. Plus you can always use a hammer to make some final adjustments.

While his isn’t the first bike trailer hack we’ve seen here at Hackaday, it would be fair to say it’s something of a rarity around these parts. Usually we get word of somewhat larger bits of kit getting dragged around.

Continue reading “Scooter Hauls Kids With A Little Heavy Metal”

Moving 3D Printed Prosthetic Arms With A Pulse

One of the best uses of 3D printers we’ve seen are custom prosthetics. Even today, custom-built prosthetics cost an arm and a leg, but there’s no reason why they should. Right now, we can scan someone’s arm or leg, import that scan into a 3D-modeling program, and design a custom-fit orthotic that can be spit out on a 3D printer. Now, we’re seeing some interesting methods of turning those 3D-printed parts into the beginnings of a cybernetic design. This is a custom printed robotic hand controlled by a pulse sensor. It’s in its early stages right now, but so far the results are promising and this is a great entry to The Hackaday Prize

This project draws upon a few of the team’s other endeavours. The first is a 3D-printed mini linear actuator, a project that made it into the finals of the Hackaday Prize in the Robotics Module challenge. This tiny linear actuator is actually powered by a tiny hobby servo rigged up for continuous rotation. Add in some 3D printed gears and a well-designed frame, and you have something that’s just as good as fantastically expensive linear actuators as a bargain basement price. This pulse sensor arm also makes use of the team’s TNS 1i, a 3D printed robotic hand that makes use of those tiny little linear actuators.

Of course, if you’re going to build a prosthetic robotic arm, you have to have some sort of brain-machine interface. Previously, the team was using Myoware muscle sensors to control the opening and closing of the fingers. This changed, however, when [Giovanni] was trying to get his Samsung gear S3 to detect his pulse. Apparently, moving your wrist when trying to get a smartwatch to listen in on your heartbeat is an acceptable substitute for a muscle sensor.

FOSSCON 2018: Where Open Source And LEGO Collide

It probably won’t come as a surprise to anyone reading this, but hackers and makers absolutely love LEGO. We think you’d be hard pressed to find a Hackaday reader, young or old, that hasn’t spent some quality time with the little plastic bricks from Billund, Denmark. So it follows that there’s a considerable community of individuals who leverage their better than average technical prowess to utilize LEGO in new and unique ways. But the activities and history of these LEGO hackers is not exactly common knowledge to those who aren’t heavily vested in the hobby.

During the recent FOSSCON 2018 in Philadelphia, Daniel Pikora gave attendees a comprehensive look at the intersection of open source development and the world’s most popular brand of construction toys. A software developer with a penchant for open source code by trade, he’s also an avid member of what’s known as the Adult Fan of LEGO (AFOL) community who’s exhibited his creations at shows across the United States and Canada. Such a unique perspective, with a foot in both the FOSS and LEGO camps, makes Daniel an ideal tour guide for this particular microcosm of toys and tech.

In a whirlwind presentation that took attendees through 49 slides in about as many minutes, Daniel covered LEGO’s beginnings in the 1930s to the rise of 3D printed custom bricks, and everything in between. Some of the engineering-centric product lines, such as Technic and Mindstorms, were already fairly well known to the types of folk who spent a beautiful Saturday in Philadelphia at an open source conference. But Daniel’s deep-dive into the long history of open source LEGO projects brought to light the work of so many dedicated developers that everyone walked away with a newfound respect for the amount of work the AFOL community has put into elevating LEGO from a child’s toy to a legitimate tool. Join me below for a look at the particulars of that deep dive.

Continue reading “FOSSCON 2018: Where Open Source And LEGO Collide”

We’re Hiring: Come Join Us!

You wake up in the morning, and check Hackaday over breakfast. Then it’s off to work or school, where you’ve already had to explain the Jolly Wrencher to your shoulder-surfing colleagues. And then to a hackspace or back to your home lab, stopping by the skull-and-cross-wrenches while commuting, naturally. You don’t bleed red, but rather #F3BF10. It’s time we talked.

The Hackaday writing crew goes to great lengths to cover all that is interesting to engineers and enthusiasts. We find ourselves stretched a bit thin and it’s time to ask for help. Want to lend a hand while making some extra dough to plow back into your projects? We’re looking for contributors to write a few blog posts per week and keep the Hackaday flame burning.

Contributors are hired as private contractors and paid for each article. You should have the technical expertise to understand the projects you write about, and a passion for the wide range of topics we feature. You’ll have access to the Hackaday Tips Line, and we count on your judgement to help us find the juicy nuggets that you’d want to share with your hacker friends.

If you’re interested, please email our jobs line and include:

  • One example post written in the voice of Hackaday. Include a banner image, at least 150 words, the link to the project, and any in-links to related and relevant Hackaday features. We need to know that you can write.
  • Details about your background (education, employment, interests) that make you a valuable addition to the team. What do you like, and what do you do?
  • Links to your blog/project posts/etc. that have been published on the Internet, if any.

What are you waiting for? Ladies and Gentlemen, start your applications!

The How And Why Of Tungsten Carbide Inserts, And A Factory Tour

It seems a touch ironic that one of the main consumables in the machining industry is made out of one of the hardest, toughest substances there is. But such is the case for tungsten carbide inserts, the flecks of material that form the business end of most of the tools used to shape metal. And thanks to one of the biggest suppliers of inserts, Sweden’s Sandvik Coromant, we get this fascinating peek at how they’re manufactured.

For anyone into machining, the video below is a must see. For those not in the know, tungsten carbide inserts are the replaceable bits that form the cutting edges of almost every tool used to shape metal. The video shows how powdered tungsten carbide is mixed with other materials and pressed into complex shapes by a metal injection molding process, similar to the one used to make gears that we described recently. The inserts are then sintered in a furnace to bind the metal particles together into a cohesive, strong part. After exhaustive quality inspections, the inserts are ground to their final shape before being shipped. It’s fascinating stuff.

Coincidentally, [John] at NYC CNC just released his own video from his recent jealousy-inducing tour of the Sandvik factory. That video is also well worth watching, especially if you even have a passing interest in automation. The degree to which the plant is automated is staggering – from autonomous forklifts to massive CNC work cells that require no operators, this looks like the very picture of the factory of the future. It rolls some of the Sandvik video in, but the behind-the-scenes stuff is great.

Continue reading “The How And Why Of Tungsten Carbide Inserts, And A Factory Tour”

Apollo 12 Was The Lucky Number Among Apollo Disasters

I recently saw Apollo 13 again — this time with the score played live by the Houston Symphony. What a crazy coincidence that thirteen has long been considered an unlucky number and that Apollo 13 would be the one we almost lost. However, Apollo 12 almost became a disaster which — after the ordeal with flight 13 — was largely forgotten.

When all was said and done, Apollo 12 would result in a second manned moon landing in November 1969, just four months after Apollo 11. Commanded by Pete Conrad, Alan Bean accompanied Conrad to the surface while Richard Gordon, Jr. kept the getaway vehicle running. But less than a minute after launch something happened that could have been a disaster. Lightning struck the vehicle.

Continue reading “Apollo 12 Was The Lucky Number Among Apollo Disasters”

Don’t Look Now, But Your Necklace Is Listening

There was a time when the average person was worried about the government or big corporations listening in on their every word. It was a quaint era, full of whimsy and superstition. Today, a good deal of us are paying for the privilege to have constantly listening microphones in multiple rooms of our house, largely so we can avoid having to use our hands to turn the lights on and off. Amazing what a couple years and a strong advertising push can do.

So if we’re going to be funneling everything we say to one or more of our corporate overlords anyway, why not make it fun? For example, check out this speech-to-image necklace developed by [Stephanie Nemeth]. As you speak, the necklace listens in and finds (usually) relevant images to display. Conceptually this could be used as an assistive communication technology, but we’re cool with it being a meme display device for now.

Hardware wise, the necklace is just a Raspberry Pi 3, a USB microphone, and a HyperPixel 4.0 touch screen. The Pi Zero would arguably be the better choice for hanging around your neck, but [Stephanie] notes that there’s some compatibility issues with Node.js on the Zero’s ARM6 processor. She details a workaround, but says there’s no guarantee it will work with her code.

The JavaScript software records audio from the microphone with SoX, and then runs that through the Google Cloud Speech-to-Text service to figure out what the wearer is saying. Finally it does a Google image search on the captured words using the custom search JSON API to find pictures to show on the display. There’s a user-supplied list of words to ignore so it doesn’t try looking up images for function words (such as “and” or “however”), though presumably it can also be used to blacklist certain imagery you might not want popping up on your chest in mixed company.

We’d be interested in seeing somebody implement this software on a Raspberry Pi powered digital frame to display artwork that changes based on what the people in the room are talking about. Like in Antitrust, but without Tim Robbins offing anyone.