When we look back to the 1970s it is often in a light of somehow a time before technology, a time when analogue was still king, motor vehicles had carburettors, and telephones still had rotary dials.
In fact the decade had a keen sense of being on the threshold of an exciting future, one of supersonic air travel, and holidays in space. Some of the ideas that were mainstream in those heady days didn’t make it as far as the 1980s, but wouldn’t look out of place in 2018.
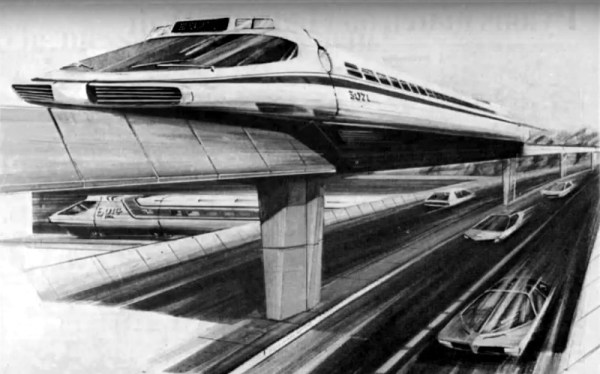
The unlikely setting for todays Retrotechtacular piece is the Bedford Levels, part of the huge area of reclaimed farmland in the east of England known collectively as the Fens. The Old Bedford River and the New Bedford River are two straight parallel artificial waterways that bisect the lower half of the Fens for over 20 miles, and carry the flood waters of the River Ouse towards the sea. They are several hundred years old, but next to the Old Bedford River at their southern end are a few concrete remains of a much newer structure from 1970. They are all that is left of a bold experiment to create Britain’s first full-sized magnetic levitating train, an experiment which succeeded in its aim and demonstrated its train at 170 miles per hour, but was eventually canceled as part of Government budget cuts.
A track consisting of several miles of concrete beams was constructed during 1970 alongside the Old Bedford River, and on it was placed a single prototype train. There was a hangar with a crane and gantry for removing the vehicle from the track, and a selection of support and maintenance vehicles. There was an electrical pick-up alongside the track from which the train could draw its power, and the track had a low level for the hangar before rising to a higher level for most of its length.
After cancellation the track was fairly swiftly demolished, but the train itself survived. It was first moved to Cranfield University as a technology exhibit, before in more recent years being moved to the Railworld exhibit at Peterborough where it can be viewed by the general public. The dream of a British MagLev wasn’t over, but the 1980s Birmingham Airport shuttle was hardly in the same class even if it does hold the honour of being the world’s first commercial MagLev.
We have two videos for you below the break, the first is a Cambridge Archaeology documentary on the system while the second is a contemporary account of its design and construction from Imperial College. We don’t take high-speed MagLevs on our travels in 2018, but they provide a fascinating glimpse of one possible future in which we might have.
It does make one wonder: will the test tracks for Hyperloop transportation break the mold and find mainstream use or will we find ourselves 50 years from now running a Retrotechtacular on abandoned, vacuum tubes?
Continue reading “Retrotechtacular: A Very British MagLev” →