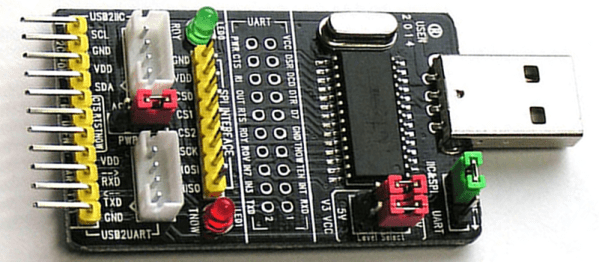
There was a time when USB to serial hardware meant one company: FTDI. But today there are quite a few to choose from and one of the most common ones is the WCH CH341. There’s been support for these chips in Linux for a while, but only for use as a communication port. The device actually has RS232, I2C, SPI, and 8 general purpose I/O (GPIO) pins. [ZooBaB] took an out-of-tree driver that exposes the GPIO, and got it working with some frightening-looking CH341 boards.
He had to make a slight mod to the driver to get six GPIOs in /sys/class/gpio. Once there though, it is easy to manipulate the pins using a shell script or anything that can write to the virtual files corresponding to the GPIO pins.
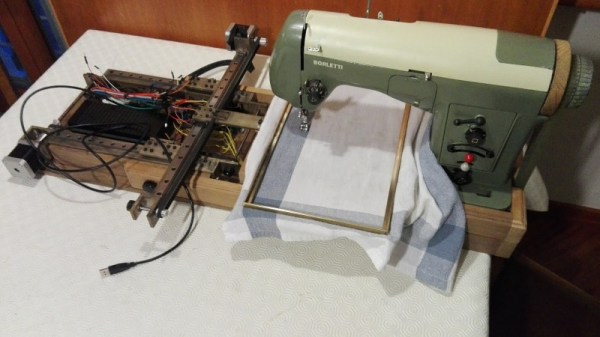
It is February of 2018. Do you remember what you were doing in December of 2012? If you’re [juppiter], you were starting your CNC Embroidery Machine which would not be completed for more than half of a decade. Results speak for themselves, but this may be the last time we see a first-generation Raspberry Pi without calling it retro.
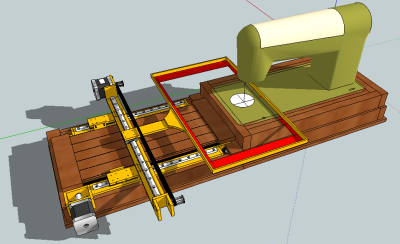
The heart of the build is a vintage Borletti sewing machine, and if you like machinery porn, you’re going to enjoy the video after the break. The brains of the machine are an Arduino UNO filled with GRBL goodness and the Pi which is running CherryPy. For muscles, there are three Postep25 stepper drivers and corresponding NEMA 17 stepper motors.
The first two axes are for an X-Y table responsible for moving the fabric through the machine. The third axis is the flywheel. The rigidity of the fabric frame comes from its brass construction which may have been soldered at the kitchen table and supervised by a big orange cat. A rigid frame is the first ingredient in reliable results, but belt tension can’t be understated. His belt tensioning trick may not be new to you, but it was new to some of us. Italian translation may be necessary.
The skills brought together for this build were vast. There was structural soldering, part machining, a microcontroller, and motion control. The first time we heard from [juppiter] was December 2012, and it was the result of a Portable CNC Mill which likely had some influence on this creation. Between then, he also shared his quarter-gobbling arcade cabinet with us.
As a civilization, we are proficient with the “boil water, make steam” method of turning various heat sources into power we feed our infrastructure. Away from that, we can use solar panels. But what if direct sunlight is not available either? A team at MIT demonstrated how to extract power from daily temperature swings.
Running on temperature difference between day and night is arguably a very indirect form of solar energy. It could work in shaded areas where solar panels would not. But lacking a time machine, or an equally improbable portal to the other side of the planet, how did they bring thermal gradient between day and night together?
This team called their invention a “thermal resonator”: an assembly of materials tuned to work over a specific range of time and temperature. When successful, the device output temperature is out-of-phase with its input: cold in one section while the other is hot, and vice versa. Energy can then be harvested from the temperature differential via “conventional thermoelectrics”.
Power output of the initial prototype is modest. Given a 10 degree Celsius daily swing in temperature, it could produce 1.3 milliwatt at maximum potential of 350 millivolt. While the Hackaday coin-cell challenge participants and other pioneers of low-power electronics could probably do something interesting, the rest of us will have to wait for thermal resonator designs to evolve and improve on its way out of the lab.
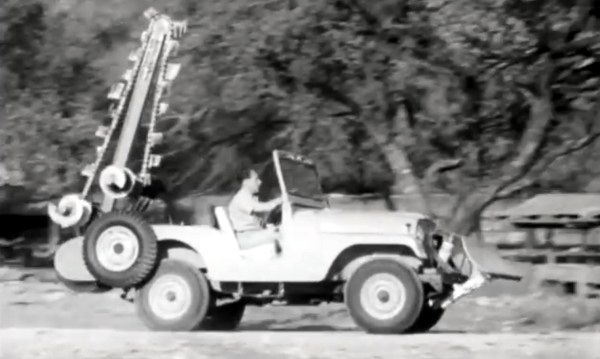
How often do we find ourselves thankful for advertising? When it comes to Hackaday’s Retrotechtacular column it’s actually quite often since it snapshots a moment in culture and technology. Today’s offering is a shining example, where we get a great look into vehicular utility of the day that is rarely seen in our modern lives.
The origin story of the Jeep is of course its prominence in World War II when more than half a million were produced. GIs who drove the vehicles constantly during the war greatly appreciated the reliability and versatility and wanted one for their own when returning home and a market rose up to satisfy that need. The modern equivalent would be the Hummer fad that started in the 1990’s. Humvee, the early ancestor of the Hummer, replaced the Jeep in the US military in the 1980’s and a version called Hummer entered the consumer market in ’92. But that was more of a comfort-meets-icon proposition, where the Jeep of the 1950’s (seen in the commercial below) delivered — even over delivered — on a promise of utility.
In this ad, the case is made for Jeep as farm implement, acting as plow, mower, even post hole digger. As a firefighting implement the announcer boasts that “One man with a Jeep can do the work of 100 men with shovels” by cutting fire breaks into the soil. It’s sold as the workhorse of cemeteries, ranches, county service crews, and anything else their marketing gurus could write into copy. We think the metrics are dubious but certainly the inexpensive build, versatile nature, and need for power equipment across the countryside brought these Jeeps into widespread rural and industrial service in myriad roles.
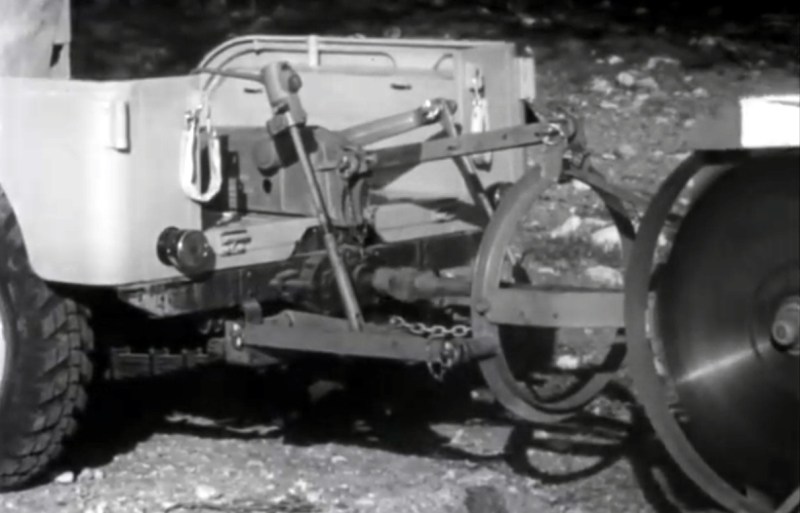
Power take off driving shaft to power circular saw. You can also see the hydraulics that lift and lower the saw.
What makes most of this possible is the existence of a power take-off (PTO). This is a mechanical connection from the engine of the vehicle to external components that can be switched out. Once connected, the speed of the engine can be controlled to adjust the power take-off operation. In conjunction with a hydraulic system that can lift and lower the implement, it becomes a remarkably versatile system. We begin to wonder the American vernacular includes the saying “it’s like the Swiss Army knife of…” rather than calling everything that’s insanely useful a Jeep.
Connect a pump to the PTO and you have a fire-fighting Jeep. Connect a generator and you can drive electric tools like the chainsaw used to cut down a tree in the video and to power an arc welder. There’s a gnarly-looking circular saw blade, and you’re going to spill your coffee when you get to the “Jeep-a-trench”. That’s right, a trenching attachment gives the vehicle’s suspension a rough workout. It boasts the ability to dig down six feet and complete the footings for an ordinary house in just three hours.
Willy’s MB, the company behind the Jeep must have employed a crew of hackers. What a blast it would have been to be in the research and development sessions to come up with 1,001 more uses for the equipment. The company has a bit of Jeep history you can peruse, but we’d really love to hear about the addon equipment ideas that didn’t make the cut. Are there any readers who have some stories along these lines? Let us know in the comments below.
Ah, the autorouter. Inside every PCB design tool, there’s a function called the ‘autorouter’. This function, when used correctly, is able to automagically lay traces between pads, producing a perfect board in under a minute. The trouble is, no one uses it. We have been told not to trust the autorouters and we hear a lot of other dire warnings about it. The autorouter never works. The autorouter will put traces everywhere. The autorouter doesn’t consider floorplanning, and sometimes you’re going to get traces that go right through the edge of your board. Is avoiding the autorouter sound advice?
For this week’s Hack Chat, we’re talking about trusting the autorouter. The autorouter is just a tool, and like any tool, it will do exactly what you tell it. The problem, therefore, is being smart enough to use the autorouter.
Our guest for this week’s Hack Chat is Ben Jordan, Director of Community Tools and Content at Altium. Ben is a Computer Systems engineer, with 25 years experience in board-level hardware and embedded systems design. He picked up a soldering iron at 8, and wrote some assembly at 12. He’s also an expert at using an autorouter successfully.
In this Hack Chat, we’re going to talk to Ben about Altium, Circuit Maker, and how to get the best performance out of an autorouter. How do you set the autorouter up? How do you test your settings? What, actually, is the technology and math that goes into an autorouter? What is the best way to design a multilayer board? How do you do multiboard designs? And what’s the deal with mixed signals?
[Matt Obal] had a problem. The local skatepark was too far to skateboard, but close enough to bike. Carrying a skateboard on a bicycle is a rather awkward (and unsafe) maneuver. [Matt’s] answer to the problem is Truck Stop, a bicycle mounted skateboard carrier he developed and is manufacturing himself.
[Matt’s] work on Truck Stop began about a year ago, with his purchase of a 3D printer. He designed a seat back mounted device that secures the skateboard by wedging between the truck and the board itself. The design is printed in PLA and is hollow. Truck Stop’s strength comes from being filled with resin and fiberglass cloth.
If you’ve worked with resin, you probably know that some formulas get hot while they harden. This caused a few melted prints until [Matt] figured out that a dunk in cold water at the right time would allow the resin to complete it’s hardening process while keeping the heat below the melting temperature of PLA. He’s since switched to a different resin formula that generates less heat.
[Matt] is selling the Truck Stop at his website, and spent quite a bit of time working on a silicon mold so he could cast as many mounts as he wanted. The problem was fiberglass poking through the final cast part. In the end, he decided to stick with the resin filled PLA of his prototypes.
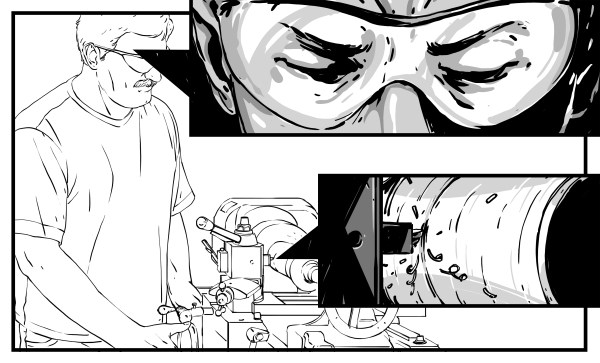
The lathe is known as the King of Machine Tools for a reason. There are very few things that you can’t make with one. In fact, people love to utter the old saw that the lathe is the only machine tool that can make itself. While catchy, I think that’s a bit disingenuous. It’s more accurate to say that there are parts in all machine tools that (arguably) only a lathe can make. In that sense, the lathe is the most “fundamental” machine tool. Before you harbor dreams of self-replication, however, know that most of an early lathe would be made by hand scraping the required flat surfaces. So no, a lathe can’t make itself really, but a lathe and a skilled craftsperson with a hand-scraper sure can. In fact, if you’ve read the The Metal Lathe by David J. Gingery, you know that a lathe is instrumental in building itself while you’re still working on it.
We’re taking trip through the machining world with this series of articles. In the previous article we went over the history of machine tools. Let’s cut to the modern chase now and help some interested folks get into the world of hobby machining, shall we? As we saw last time, the first machine tools were lathes, and that’s also where you should start.