LED Triangle Looks Cool; Someone Tell Alt-J

For the average person, decorating at home is as simple as a few choice picks from the IKEA catalogue. Makers are a different breed, though – preferring something customized and glowing. This LED triangle is a particularly great example of the form, and the latest benchmark for excellence to come out of [scanlime’s] workshop.

Hailing from the recent past of 2014, it’s a design that is well-suited to the average makerspace. Built out of layers of lasercut chipboard and acrylic, it creates 16 seperate pockets for LEDs with very little bleed in between. A black bezel is fitted to complete the effect, along with frosted white acrylic diffusers for each triangle element.

The build uses WS2812B LEDs, controlled by [scanlime’s] Fadecandy controller. Fadecandy is a combination of hardware and software designed specifically for LED art projects, providing high-quality control of dithering and other effects to help make glowables prettier. It tends to turn up wherever head-turning visualizations are needed. In this application, it does a great job, with the pseudo-random flickering of the pixels being almost hypnotizing in nature.

It’s a great cyberpunk art piece, and we’d love to have one on our coffee table at home. If you’re sick of LED cubes, triangle-based builds may reignite your passion. Video after the break.

Continue reading “LED Triangle Looks Cool; Someone Tell Alt-J”

Hands-On: Queercon 16 Hardware Badge Shows Off Custom Membrane Keyboard

Year over year, the Queercon badge is consistently impressive. I think what’s most impressive about these badges is that they seemingly throw out all design ideas from the previous year and start anew, yet manage to discover a unique and addictive aesthetic every single time.

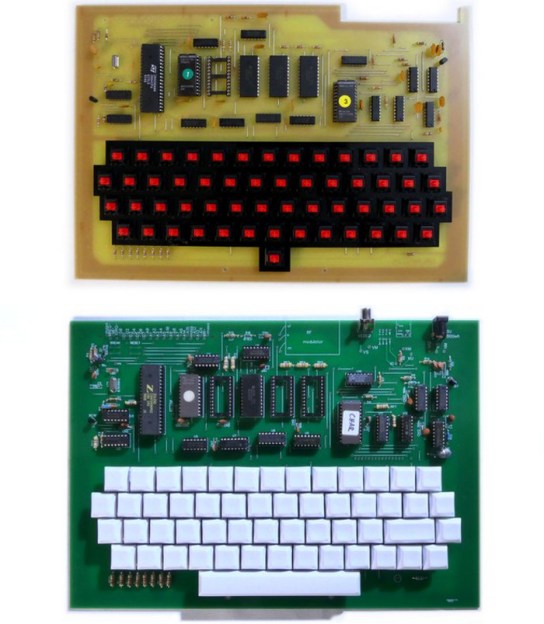
This year, there are two hardware badges produced by the team composed of Evan Mackay, George Louthan, Tara Scape, and Subterfuge. The one shown here is nicknamed the “Q” badge for its resemblance to the letter. Both get you into the conference, both are electronically interactive, but this one is like a control panel for an alternate reality game (ARG) that encourages interactivity and meaningful conversations. The other badge is the “C” badge. It’s more passive, yet acts as a key in the ARG — you cannot progress by interacting with only one type of badge, you must work with people sporting both badge types so that Queercon attendees who didn’t purchase the Q badge still get in on the fun.

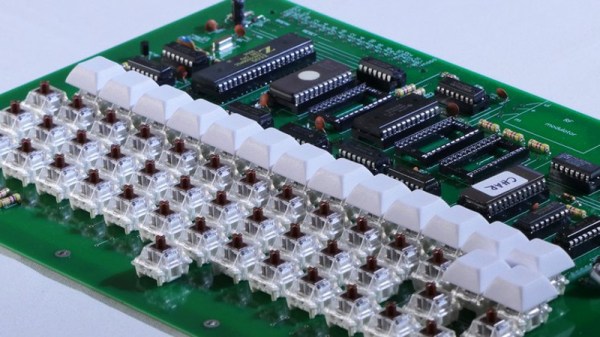
The most striking feature on this badge is a custom membrane keyboard tailored to playing the interactive game across all badges at the conference. But I find that the eInk screen, RJ12 jack for connectivity, and the LED and bezel arrangements all came together for a perfect balance of function and art. Join me after the break for a closer look at what makes this hardware so special.

Continue reading “Hands-On: Queercon 16 Hardware Badge Shows Off Custom Membrane Keyboard”

Spain’s First Open Source Satellite

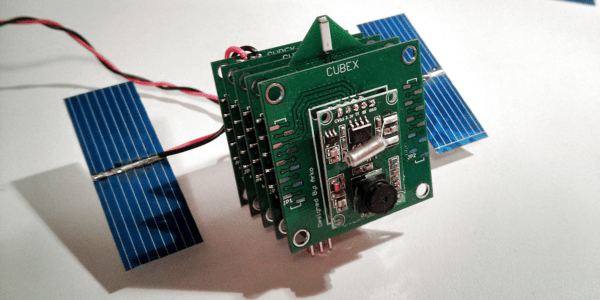
[Fossa Systems], a non-profit youth association based out of Madrid, is developing an open-source satellite set to launch in October 2019. The FossaSat-1 is sized at 5x5x5 cm, weighs 250g, and will provide free IoT connectivity by communicating LoRa RTTY signals through low-power RF-based LoRa modules. The satellite is powered by 28% efficient gallium arsenide TrisolX triple junction solar cells.

The satellite’s development and launch cost under EUR 30000, which is pretty remarkable for a cubesat — or a picosatellite, as the project is being dubbed. It has been working in the UHF Amateur Satellite band (435-438 MHz) and recently received an IARU frequency spectrum allocation for LoRa of 125kHz.

The satellite’s specs are almost as remarkable as the acronyms used to describe them. The design includes an onboard computer (OBC) based on an ATmega328P-AU microcontroller, an SX1278 transceiver for telecommunications, and an electric power system (EPS) based on three SPV1040 MPPT chips and the TC1262 LDO. The satellite also uses a TMP100 temperature sensor, an INA226 current and voltage sensor, a MAX6369 watchdog for single-event upset (SEU) protection, a TPS2553 for single-event latch-up (SEL) protection and various MOSFETs for the deployment of solar panels and antennas.

Up until this point the group has been tracking adoption of LoRa through the use of weather balloons. The cubesat project plans to test the new LoRa spread spectrum modulation using less than $5 worth of receivers. Ultimately with the goal of democratizing telecommunications worldwide.

The satellite is being built in a cleanroom at Rey Juan Carlos University and has undergone thermovacuum and vibration testing at the facility. The group has since developed an educational satellite development kit, which offers three main 40×40 mm boards that allow the addition of modifications. As their mission states, the group is looking to develop an open source project, so the code for the satellite is freely available on their GitHub.

Continue reading “Spain’s First Open Source Satellite”

Ping-Pong Ball Makes Great PID Example

It is a common situation in electronics to have a control loop, that is some sort of feedback that drives the input to a system such as a motor or a heater based upon a sensor to measure something like position or temperature. You’ll have a set point — whatever you want the sensor to read — and your job is to adjust the driving thing to make the sensor read the set point value. This seems easy, right? It does seem that way, but in realitythere’s a lot of nuance to doing it well and that usually involves at least some part of a PID (proportional, integral, derivative) controller. You can bog down in math trying to understand the PID but [Electronoobs] recent video shows a very simple test setup that clearly demonstrates what’s going on with an Arduino, a motor, a distance sensor, and a ping-pong ball. You can see the video below.

Imagine for a moment heating a tank of water as an example. The simple approach would be to turn on the heater and when the water reaches the setpoint, turn the heater off. The problem there is though that you will probably overshoot the target. The proportional part of a PID controller will only turn the heater fully on when the water is way under the target temperature. As the water gets closer to the right temperature, the controller will turn down the input — in this case using PWM. The closer the sensor reads to the setpoint, the lower the system will turn the heater.

Continue reading “Ping-Pong Ball Makes Great PID Example”

RTL-SDR: Seven Years Later

Before swearing my fealty to the Jolly Wrencher, I wrote for several other sites, creating more or less the same sort of content I do now. In fact, the topical overlap was enough that occasionally those articles would get picked up here on Hackaday. One of those articles, which graced the pages of this site a little more than seven years ago, was Getting Started with RTL-SDR. The original linked article has long since disappeared, and the site it was hosted on is now apparently dedicated to Nintendo games, but you can probably get the gist of what it was about from the title alone.

An “Old School” RTL-SDR Receiver

When I wrote that article in 2012, the RTL-SDR project and its community were still in their infancy. It took some real digging to find out which TV tuners based on the Realtek RTL2832U were supported, what adapters you needed to connect more capable antennas, and how to compile all the software necessary to get them listening outside of their advertised frequency range. It wasn’t exactly the most user-friendly experience, and when it was all said and done, you were left largely to your own devices. If you didn’t know how to create your own receivers in GNU Radio, there wasn’t a whole lot you could do other than eavesdrop on hams or tune into local FM broadcasts.

Nearly a decade later, things have changed dramatically. The RTL-SDR hardware and software has itself improved enormously, but perhaps more importantly, the success of the project has kicked off something of a revolution in the software defined radio (SDR) world. Prior to 2012, SDRs were certainly not unobtainable, but they were considerably more expensive. Back then, the most comparable device on the market would have been the FUNcube dongle, a nearly $200 USD receiver that was actually designed for receiving data from CubeSats. Anything cheaper than that was likely to be a kit, and often operated within a narrower range of frequencies.

Today, we would argue that an RTL-SDR receiver is a must-have tool. For the cost of a cheap set of screwdrivers, you can gain access to a world that not so long ago would have been all but hidden to the amateur hacker. Let’s take a closer look at a few obvious ways that everyone’s favorite low-cost SDR has helped free the RF hacking genie from its bottle in the last few years.

Continue reading “RTL-SDR: Seven Years Later”

Hackaday Podcast 028: Brain Skepticism Turned Up To 11, Web Browsing In ’69, Verilog For 7400 Logic, 3D Printing In Particle Board

Hackaday Editors Mike Szczys and Elliot Williams cover the most interesting hacks over the past week. So much talk of putting computers in touch with our brains has us skeptical on both tech and timeline. We celebrated the 40th Anniversary of the Walkman, but the headphones are the real star. Plus, Verilog isn’t just for FPGAs, you can synthesize 7400 circuits too! Elliot is enamored of an additive/subtractive printing process that uses particle board, and we discuss a couple of takes on hybrid-powered drones.

Take a look at the links below if you want to follow along, and as always tell us what you think about this episode in the comments!

Take a look at the links below if you want to follow along, and as always, tell us what you think about this episode in the comments!

Direct download (60 MB or so.)

Continue reading “Hackaday Podcast 028: Brain Skepticism Turned Up To 11, Web Browsing In ’69, Verilog For 7400 Logic, 3D Printing In Particle Board”

A Multi-Layered Spin On Persistence Of Vision

By taking advantage of persistence in human vision, we can use modest bits of hardware to create an illusion of a far larger display. We’ve featured many POV projects here, but they are almost always an exploration in two dimensions. [Jamal-Ra-Davis] extends that into the third dimension with his Volumetric POV Display.

Having already built a 6x6x6 LED cube, [Jamal] wanted to make it bigger, but was not a fan of the amount of work it would take to grow the size of a three-dimensional array. To sidestep the exponential increase in effort required, he switched to using persistence of vision by spinning the light source and thereby multiplying its effect.

The current version has six arms stacked vertically, each of which presents eight individually addressable APA102 LEDs. When spinning, those 48 LEDs create a 3D display with an effective resolution of 60x8x6.

We saw an earlier iteration of this project a little over a year ago at Bay Area Maker Faire 2018. (A demo video from that evening can be found below.) It was set aside for a while but has now returned to active development as an entry to Hackaday Prize 2019. [Jamal-Ra-Davis] would like to evolve his prototype into something that can be sold as a kit, and all information has been made public so others can build upon this work.

We’ve seen two-dimensional spinning POV LED display in a toy top, and we’ve also seen some POV projects taking steps into the third dimension. We like where this trend is going.

Continue reading “A Multi-Layered Spin On Persistence Of Vision”