Scanner Captures View-Master Discs As Glorious 3D Videos

The toys of the past may have been cheesy, but you can’t deny the creativity needed to build something engaging without any electronics. One stalwart toy from this category is View-Master, the little stereoscopic slide viewer that brought the world to life in seven vibrant scenes. And digitizing these miniature works of art is the purpose of this neat View-Master reel scanner project.

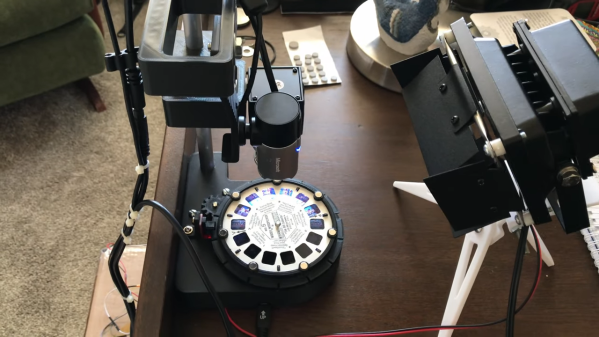
If you haven’t had the pleasure of using a View-Master, the gist is that a flat cardboard disc ringed with 14 color transparencies was inserted into a plastic viewer. Binocular eyepieces showed scenes from opposing pairs of slides, which were illuminated by a frosted screen and room lighting. The scenes were photographed from slightly different angles, leading to a stereoscopic image that was actually pretty good quality.

In the video below, project creator [W. Jason Altice] describes View-Master as “the YouTube of the 1950s.” We partially agree; with only seven frames to tell a story, we’d say it’s more like TikTok than YouTube. Regardless, capturing these mini-movies requires quite a bit of complexity. All the parts for the reel carousel are 3D-printed, with a small stepper to advance the reel and an optical sensor to register its position. A ring of RGB LEDs beneath the reel illuminates the slides; being able to control the color of the light helps with color balancing for slides with faded colors. An 8-megapixel camera captures each slide, and some pretty slick software helps with organizing the image pairs, tweaking their alignment, capturing the captions from the disc, and stitching everything into a video.

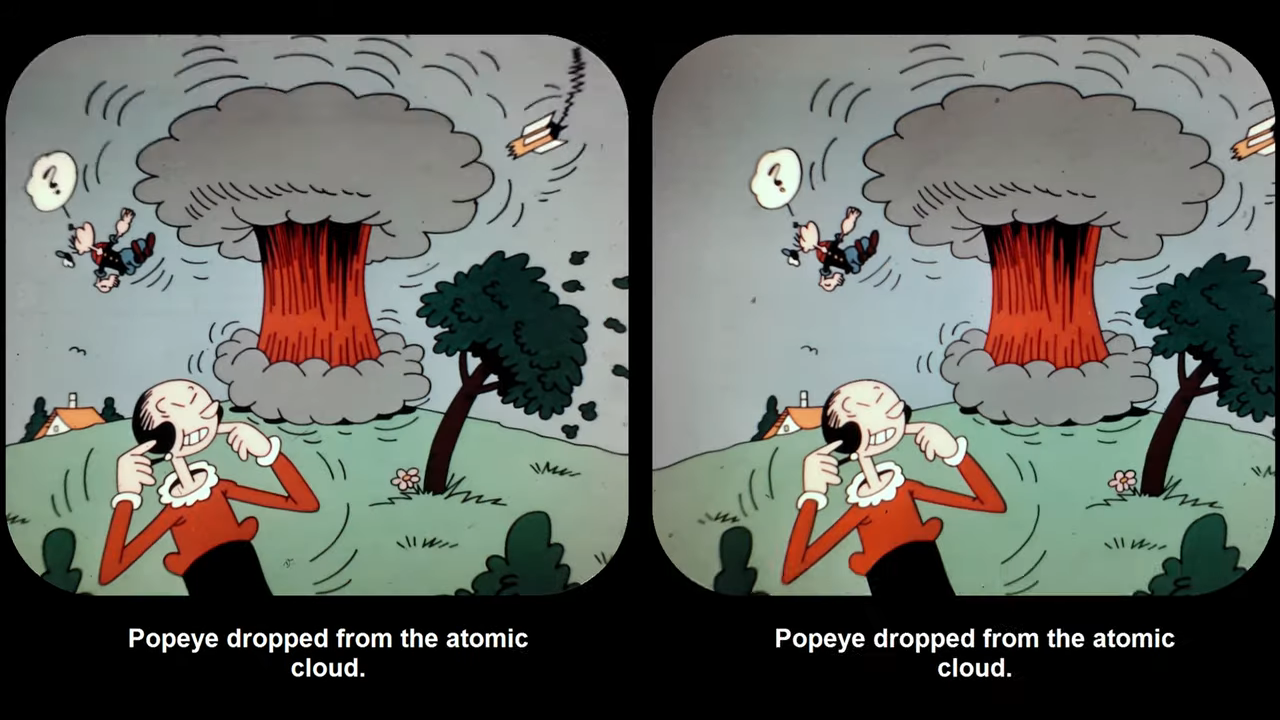
There’s a whole YouTube channel devoted to View-Master captures, which are best viewed with a Google Cardboard or something similar. Even without the 3D effect, it’s still pretty cool to watch [Popeye] beat up a nuke again.

Continue reading “Scanner Captures View-Master Discs As Glorious 3D Videos”

Sinclair BASIC For Today

If you are of a certain age, your first exposure to computer programming was probably BASIC. For a few years, there were few cheaper ways to program in BASIC than the Sinclair ZX series of computers. If you long for those days, you might find the 1980-something variant of BASIC a little limiting. Or you could use SpecBasic from [Paul Dunn].

SpecBasic is apparently reasonably compatible with the Spectrum, but lets you use your better hardware. For example, instead of a 256×192 8-color screen, SpecBas accommodates larger screens and up to 256 colors. However, that does lead to certain incompatibilities that you can read about in the project’s README file.

Continue reading “Sinclair BASIC For Today”

TrueTape64 Is A PC Interface For Your C64 Datasette

Back in the distant past of the 1980s, software was distributed on audio tape. Ones and zeroes were encoded as tones of different frequencies, and tapes were decoded by specialised hardware which could then spit out raw digital data to an attached computer. While software methods now exist to simply record audio from old tapes and turn them into data, [Francesco] wanted to do it the hardware way, and built a PC interface for his Commodore 64 Datasette.

The TrueTape64, as it has been named, is built around an Atmel ATTiny2313 microcontroller. This interfaces with the original Datasette hardware which takes care of reading the analog tape output and turning it into digital data. From there, the microcontroller communicates with an FTDI232 serial-to-USB adapter to get the data into a modern PC, where it’s compiled into a TAP image file via some Python magic.

It’s a barebones build, which goes so far as to run the Datasette’s motor off the USB power supply via a boost converter; those facing issues with the tape mechanism might do well to look there first. However, it does work, and a done job is a good job at the end of the day. We’ve seen similar hacks before, too – it’s great to see the community keeping cassette software alive!

Ello Is A Tiny Computer With A C — Interpreter?

When we talk about a retrocomputer, it’s our normal practice to start with the hardware. But with [KnivD]’s ELLO 1A while the hardware is interesting enough it’s not the stand-out feature. We are all used to microcomputers with a BASIC interpreter, but how many have we seen with a C interpreter? The way C works simply doesn’t lend itself to anything but a compiler and linker, so even with a pared-down version of the language it still represents a significant feat to create a working interpreter.

The hardware centres around a PIC32MX, and has onboard SD card, VGA, sound, and a PS/2 keyboard port. The PCB is a clever design allowing construction with either through-hole or surface-mount components to allow maximum accessibility for less advanced solderers. Full information can be found on the project’s website, but sadly for those wanting an easy life only the PCB is as yet available for purchase.

We’re privileged to see a huge array of retrocomputing projects here at Hackaday, but while they’re all impressive pieces of work it’s rare for one to produce something truly unexpected. This C interpreter certainly isn’t something we’ve seen before, so we’re intrigued to see what projects develop around it.

VME Reverse Engineering

With some free time on his hands waiting for delayed parts to arrive, [Rik] set out to reverse engineer an old VME system he had acquired. VMEbus computers are based on the standard Eurocard PCB format, which defines a wide range of card sizes — the most common being 6U height like [Rik]’s system. They usually consist of a rack-mounted card cage with a passive backplane. Originally, Motorola 68000-based CPU cards were used in VMEbus systems, but any processor could be used as long as you provided the right signals and timings to the system bus. Eurocard systems are less common these days, but are still used in some applications. In fact, if you’re into synthesizers, you may be using Eurocards today — the Eurorack standard is based on the standard 3U card size.

Back to [Rik]’s project, he had no idea what this system was nor how to use it. A bit of probing around and he found two UARTs, a system monitor, and a way to load and dump S-record files. He documents the process quite well, as the internal layout and memory map of the system is unlocked piece by piece. We also like his method of instrumenting the VMEbus signals — logic analyzers are so small today, you can just mount one inside the rack.

Spoiler alert: [Rik] succeeds in mapping out the memory, writes some small programs in 68k assembly language, and even builds his own LED accessory card so he can blink some lights (as one must do).

We wrote about modularity recently, and VMEbus + Eurocard systems are good examples of modular design. You could quickly put together a robust assembly using entirely off-the-shelf cards, or mix in your own custom cards. But technology advancements in clock speeds and miniaturization have made these card cage, passive backplane systems less and less relevant today. Do any of you still use the VMEbus, or have you designed with them in the past? Let us know down in the comments below.

Commodore 64 Emulator In VR Delivers A Full 80s Experience

The simulated color CRT monitor looks surprisingly convincing in VR.

One way to play with vintage hardware without owning the hardware is to use an emulator, but [omni_shaNker] announced taking it to the next level by using VR to deliver a complete Commodore 64 system, in its full glory, complete with a native 80s habitat playset! This is a pretty interesting angle for simulating vintage hardware, especially since the emulator is paired with what looks like a pretty convincing CRT monitor effect in VR, not to mention a virtual 5.25″ floppy drive that makes compellingly authentic sounds.

The project is hosted on GitHub and supports a variety of VR hardware, but for owners of Oculus headsets, the application is also available on SideQuest for maximum convenience. SideQuest is essentially an off-the-books app store for managing software that is neither approved nor distributed by Facebook. Oculus is owned by Facebook, and Facebook is keen to keep a tight grip on their hardware.

As functional as the application is, there are still improvements and optimizations to be made. To address this, [omni_shaNker] put out a call for beta testers on Reddit, so if that’s up your alley be sure to get in touch. A video demonstration and overview that is chock-full of technical details is also embedded below; be sure to give it a watch to see what the project is all about.

Continue reading “Commodore 64 Emulator In VR Delivers A Full 80s Experience”

The Amiga 2000 You Always Wanted

Back in the late 1980s, Commodore pulled the masterstroke of selling several models and generations of Amiga that were all powered by essentially the same speed 68000 and associated chipset. Sure, there were differences in the RAM and other options you could fit and later models had a few extra graphics modes. Still, the entry-level A500 did substantially the same as the high-end A2000. No matter, we the fans all wanted a 2000 anyway, though we typically found ourselves unable to afford one. It’s 2021 now though, so if you never achieved the dream of owning your own A2000, now you can build one of your own! It’s the task [Drygol] has taken on, with an A2000 made entirely from new components, save for a few salvaged Commodore-specific chips and connectors.

At its heart is a beautiful recreation of the original PCB that we’re guessing will be of great interest to owners whose NiCd batteries have leaked and corroded their originals. It’s all through-hole, but the sheer size of a motherboard still makes it a daunting prospect to solder by hand. There are a huge quantity of decoupling and ESD components that all have to be held with tape before the board is flipped over for soldering, and then all the chips are socketed. A Fat Agnes address generator was fitted on a RAM expansion daughterboard, leading to some significant problems as it proved not to be compatible and had to be removed.

The whole is put in a very low-profile PC case with appropriate risers for the Zorro slots, and then in goes a set of upgrades probably not seen in the same place since about 1993. We don’t recognize them all, but we can see accelerators, a floppy emulator, an HDD emulator using a CF card, and is that a network card we spy? This machine is still a work in progress, but we can guarantee it would have been an extreme object of desire thirty years ago. See it in action in the video below the break.

If rebuilding an Amiga interests you, we took a look at the state of the remanufactured parts scene for the platform last year.

Continue reading “The Amiga 2000 You Always Wanted”