A bit ago I wrote an article called, “Death To The 3.5mm Audio Jack, Long Live Wireless.” A few readers were with me, a few were indifferent, many were vehemently against me, and there was a, not insubstantial, subset in a pure panic about the potential retirement of a beloved connector. Now I used a lot of opinionated language dispersed with subjectively evaluated facts to make a case that the connector is out. Not today maybe, but there is certainly a tomorrow not so far off where there are more wireless headsets at the electronics store than wired ones.
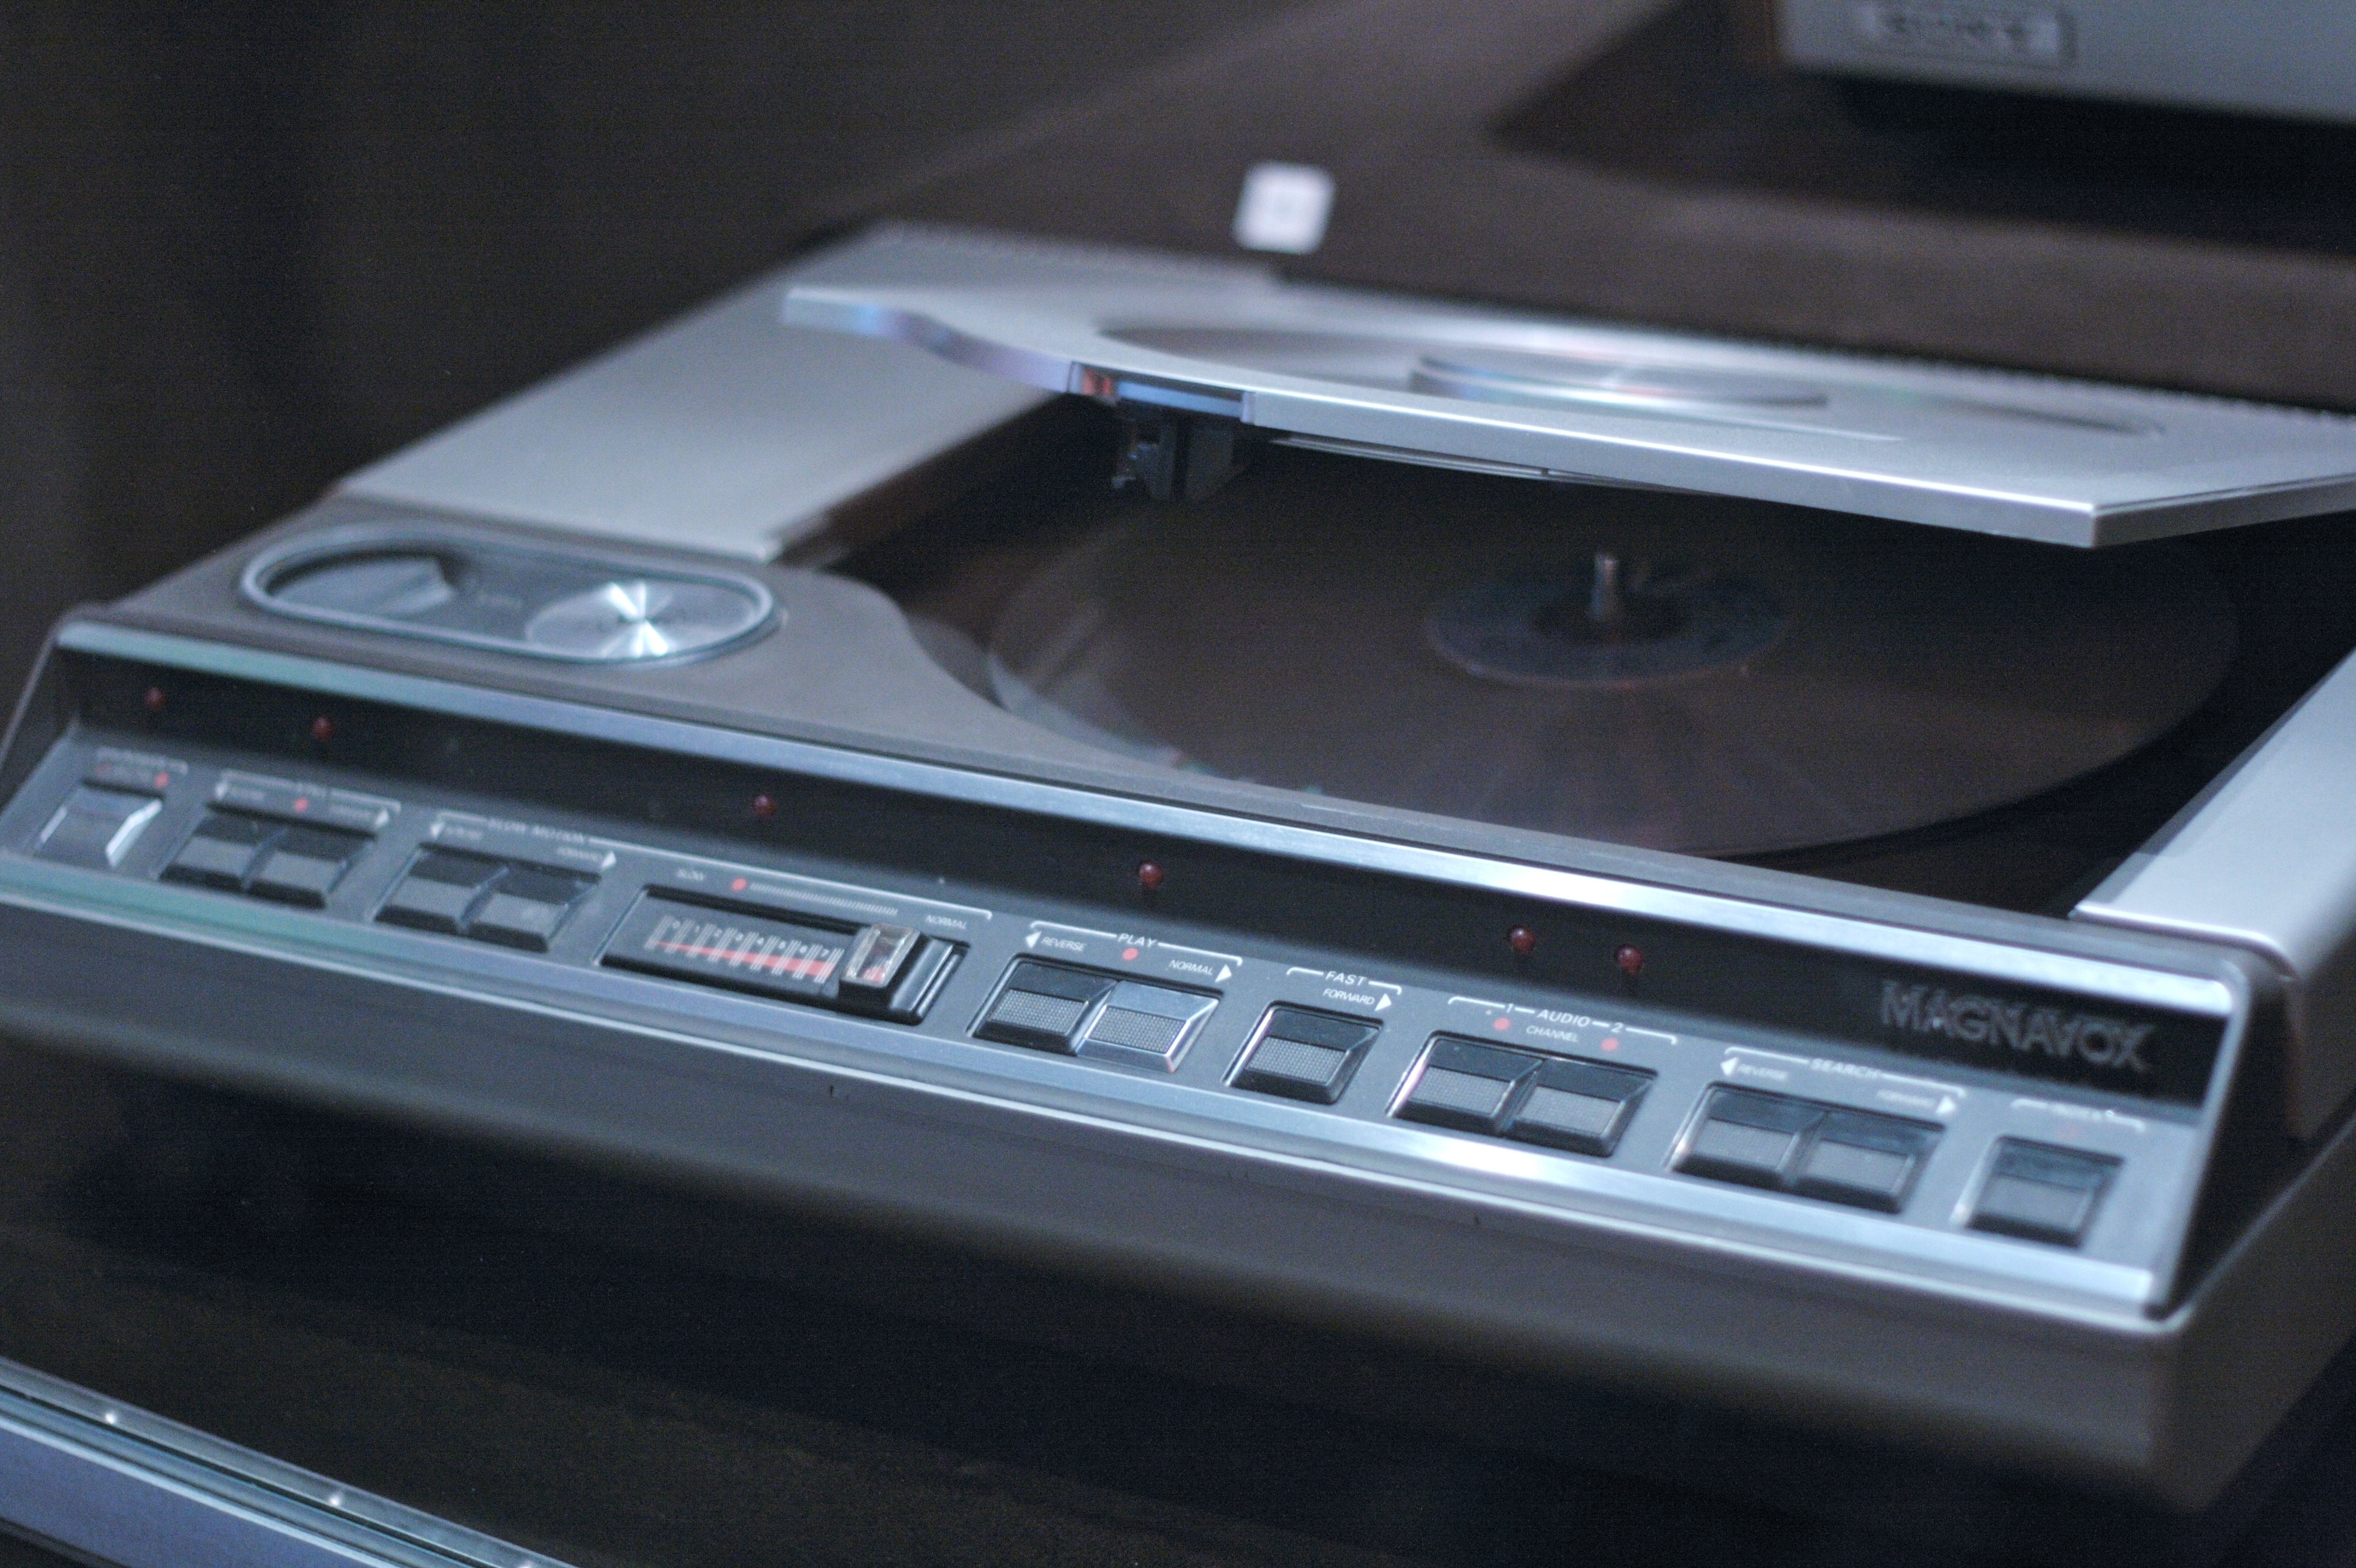
I think I saw a Laserdisc player in operation exactly once.
Dtto, a modular robot designed with search and rescue in mind, has just been named the winner of the 2016 Hackaday Prize. In addition to the prestige of the award, Dtto will receive the grand prize of $150,000 and a residency at the Supplyframe Design Lab in Pasadena, CA.
This year’s Hackaday Prize saw over 1,000 entries during five challenge rounds which asked people to Build Something that Matters. Let’s take a look at the projects that won the top five prizes. They exemplify the five challenge themes: Assistive Technologies, Automation, Citizen Scientist, Anything Goes, and Design Your Concept.
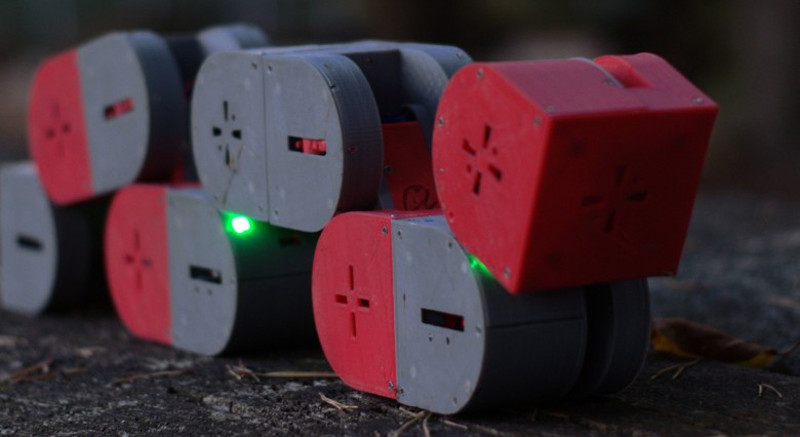
Grand Prize Winner ($150,000 and a residency at the Supplyframe Design Lab): Dtto is modular robot built with 3D printed parts, servo motors, magnets, and readily available electronics. Each module consists of two boxes, rounded on one side, connected by a bar. The modules can join with each other in many different orientations using the attraction of the magnets. Sections can separate themselves using servo motors.
Dtto is groundbreaking in its ability to make modular robots experimentation available to roboticists and hobbyists everywhere by sidestepping what has traditionally been a high-cost undertaking. While it’s easy to dismiss this concept, the multitude of different mechanisms built from modules during testing drives home the power of the system.
Where do you stand on one of the eternal questions of metalwork: brazing, or welding? As your Hackaday writer, and the daughter of a blacksmith, it’s very much on the welding side here. Brazed joints can come apart too easily, which is why in the territory this is being written in at least, they are not permitted for the yearly vehicle roadworthiness test. If you’ve ever had to remove a brazed-on patch with an angle grinder, you’ll know which one you’d trust in a crisis.
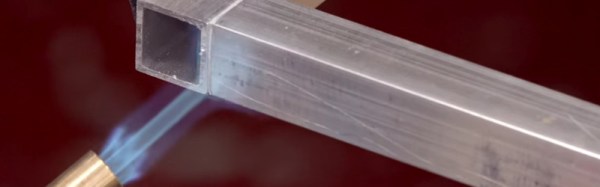
What if the metal in question is aluminum? [George Graves] sends us a link to a forum discussion on the subject from a few years ago, and to a YouTube video which we’ve embedded below the break. Miracle brazing rods claim astounding toughness, but the world divides into those who favour TIG’s strength versus those who point to brazing’s penetration far between the surfaces of the metal to be joined. Having experimented with them a while back, we’ll admit that it’s true that aluminum brazing rods join broken parts impressively well. But yet again you won’t see this Hackaday writer riding a bike that wasn’t welded with the trusty TIG torch.
Take a look at the video, and see what you think. Even if it’s not a joint you’d stake your life on it’s still a technique that’s a useful addition to your workshop arsenal.
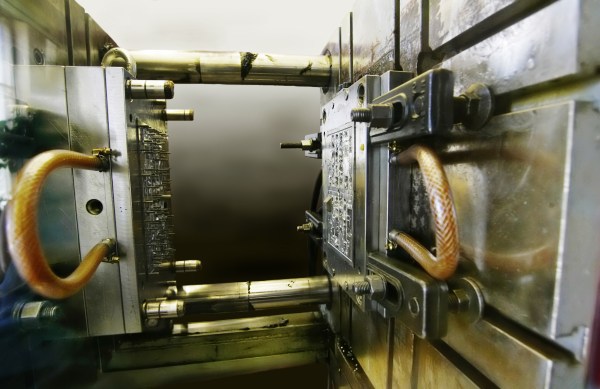
Having finished the Tools of the Trade series on circuit board assembly, let’s look at some of the common methods for doing enclosures. First, and possibly the most common, is injection molding. This is the process of taking hot plastic, squirting it through a small hole and into a cavity, letting it cool, and then removing the hardened plastic formed in the shape of the cavity.
The machine itself has three major parts; the hopper, the screw, and the mold. The hopper is where the plastic pellets are dumped in. These pellets are tiny flecks of plastic, and if the product is to be colored there will be colorant pellets added at some ratio. The hopper will also usually have a dehumidifier attached to it to remove as much water from the pellets as possible. Water screws up the process because it vaporizes and creates little air bubbles.
Next the plastic flecks go into one end of the screw. The screw’s job is to turn slowly, forcing the plastic into ever smaller channels as it goes through a heating element, mixing the melted plastic with the colorant and getting consistent coloring, temperature, and ever increasing pressure. By the time the plastic is coming out the other end of the screw, and with the assistance of a hydraulic jack, it can be at hundreds of tons of pressure.
Finally, the plastic enters the mold, where it flows through channels into the empty cavity, and allowed to sit briefly to cool. The mold then separates and ejector pins push the part out of the cavity.
Thankfully it’s rare that we report on something as tragic as the death of a 17-year old, but the fact that the proximate cause was a 3D printer makes it all the worse and important for us to discuss.
The BBC report tells of a recently concluded coroner’s inquest into the December death of a young man in a fire at his family’s magic shop in Lincolnshire. The building was gutted by the fire, and the victim died of smoke inhalation. The inquest found that he had been working with a 3D printer in the shop and using hairspray to prepare the bed, a tip he apparently picked up from forums and blogs.
Unfortunately for this young man and his family, the online material didn’t mention that hairspray propellant contains volatile hydrocarbons like propane, cyclopropane, n-butane and isobutane — all highly flammable. Apparently the victim used enough hairspray in a small enough space to create an explosive mixture of fuel and air. Neighbors reported a gigantic fireball that consumed the shop, which took 50 firefighters to control.
While the inquest doesn’t directly blame the 3D printer as the source of ignition — which could just as easily have been a spark from a light switch, or a pilot light on a water heater — it does mention that the hot end can reach 300C. And the fact remains that were it not for the 3D printer and the online tips, it’s unlikely that a 17-year old boy would be using enough hairspray in an enclosed space to create what amounted to a bomb.
By all accounts, the victim was a bright and thoughtful kid, and for this to have happened is an unmitigated tragedy for his family and friends. This young man probably had a bright future and stood to contribute to the hacker community but for a brief lapse of judgment. Before anyone starts slinging around the blame in the comments section, think about it — how many time haves you done something like this and gotten away with it? This kid got badly unlucky and paid the ultimate price. Maybe we should make his death worth something by looking at what we do that skates a little too close to the thin edge of the ice.
The Economist is an interesting publication, a British weekly newspaper that looks for all the world like a magazine, and contains pithy insights into world politics and economic movements. It’s one of those rare print news publications that manages to deliver fresh insights even to hardened web news junkies despite its weekly publication date.
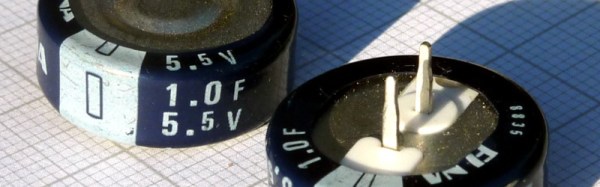
It was typical then of their wide-ranging coverage of world industries to publish a piece recently on the world of supercapacitors, with particular focus on Estonia’s Skeleton Technologies. This is an exciting field in which the products are inching their way towards energy density parity with conventional batteries, and news of new manufacturing facilities coming online should be of interest to many Hackaday readers.
Exciting though it may be it was not the news of a new capacitor plant in Germany that provided the impetus for this piece. Instead it was the language used by the Economist writer delicately skirting the distinction between the words “Supercapacitor” and “Ultracapacitor”. Images of flying crimefighters in brightly coloured capes spring instantly to mind, as Captain Ultra and Superman battle an arch-villain who is no doubt idly bouncing a piece of burning Kryptonite against the wall in readiness for the final denouement.
[Ryzee119]’s GBA might not look so different at first glance. The screen is way better than you remember, but that may just be your memory playing tricks on you. The sound comes out of the speakers. It feels the right weight. It runs off AA batteries. Heck, even the buttons feel right.
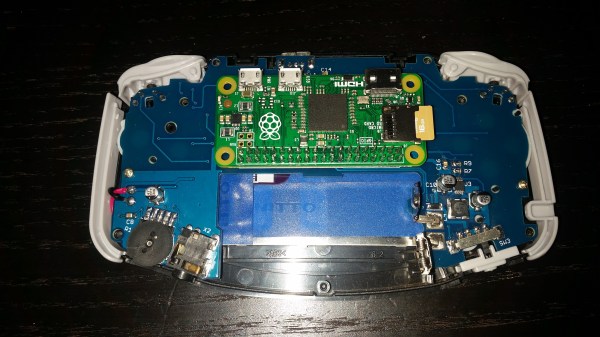
It’s not until you notice that it really shouldn’t be playing any games without a cartridge inserted that you know something is not right in the Mushroom Kingdom. When you look inside you see the edge of a Raspberry Pi Zero instead of the card edge connector you expected.
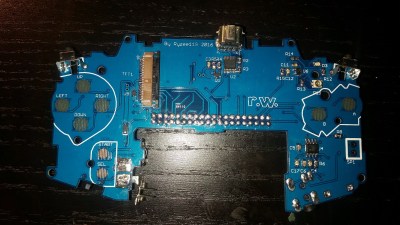
It took a lot of work for [Ryzee119] to convert a dead, water damaged, GBA to a thriving emulation station based around a Pi Zero. The first step was desolder the components he couldn’t find anywhere else. The LR buttons, the potentiometer, and even the headphone jack. The famously hard to see screen, of course, had to go. It was replaced by a nice TFT. Also, the original speaker was too corroded from the water and he sourced a replacement.
Custom replacement PCB
Next he took a good photo of the GBA’s circuit board. We wonder if he used the scanner method mentioned in the comments of this article? He spent a lot of time in Dassault’s DraftSight, a 2D CAD program, outlining the board. Then, after thoroughly verifying the size of the board for the Nth time he imported the outlines to EagleCAD.
He managed to cram quite a bit onto the board while remaining inside the GBA’s original envelope. The switches, potentiometer, and jack went back to their original locations. Impressively, he made his own pad traces for the A, B, and D-Pad buttons. The mod even handles slowly decreasing battery voltages better than the original.
In the end it all snaps together nicely. He’s configured it to boot into the emulator right at start-up. If you’d like one for yourself, all his files are open source.




 It’s not until you notice that it really shouldn’t be playing any games without a cartridge inserted that you know something is not right in the Mushroom Kingdom. When you look inside you see the edge of a Raspberry Pi Zero instead of the card edge connector you expected.