Thermoelectric Generator Shines Where The Sun Doesn’t

For off-grid renewable electricity, solar seems to make sense. Just throw some PV panels on the roof and you’re all set to stick it to the man, right? But the dirty little secret of the king of clean energy is that very few places on the planet get the sort of sunshine needed to make residential PV panels worth their installation cost in the short term, and the long-term value proposition isn’t very good either.

The drearier places on the planet might benefit from this high-power thermoelectric generator (TEG) developed and tested by [TegwynTwmffat] for use on a wood burning stove. The TEG modules [Tegwyn] used are commercially available and rated at 14.4 volts and 20 watts each. He wisely started his experiments with a single module; the video below shows the development of that prototype. The bulk of the work with TEGs is keeping the cold side of the module at a low enough temperature for decent performance, since the modules work better the higher the difference in temperature is across the module. A finned heatsink and a fan wouldn’t cut it for this application, so a water-cooled block was built to pump away the heat. A successful test led to scaling the generator up to 10 modules with a very impressive heatsink, which produced about 120 watts. Pretty good, but we wonder if some easy gains in performance would have come from using heat sink compound on the module surfaces.

Using thermal differences to generate electricity is nothing new, but a twist on the technique is getting attention lately as a potential clean energy source. And who knows? Maybe [TegwynTwmffat]’s or one of the other Hackaday Prize 2018 entries will break new ground and change the world. What’s your big idea?

Continue reading “Thermoelectric Generator Shines Where The Sun Doesn’t”

The Internet Of Three-Pointers

When tossing something into the rubbish bin, do you ever concoct that momentary mental scenario where you’re on a basketball court charging the net — the game’s final seconds ticking down on the clock — making a desperate stretch and flicking some crumpled paper perfectly into the basket only for no one to notice your awesome skills? Well, now you can show off how good you are at throwing out garbage.

Well, not strictly garbage. The genesis of this IoT basketball hoop was in fact an inflatable ball on [Brandon Rice]’s desk that he felt would be more fun to fidget with if he could keep score. The hoop and backboard were laser cut on his Epilog cutter, and sport a Particle Photon to track and upload his running point tally to the Internet. An Arduino and IR sensor detect objects passing through the hoop — ultrasound proved to be too slow to keep up with [Rice]’s shots.

Continue reading “The Internet Of Three-Pointers”

Improved camera slider controls

Improving Controls For A Camera Slider Kit

We’ve all gone through it. You buy a kit or even an assembled consumer item, and it’s either not quite right or it’s only a part of what you need. Either you do a fix, or you add to it. In [Jeremy S. Cook’s] case, he’d been working for a while with a camera slider kit which came with just the slider. He’d added a motor and limit switches but turning it on/off and reversing direction were still done by manipulating alligator clips. Now he’s put together some far better, and more professional-looking controls.

He started by replacing the DC motor with a servo motor modified for continuous rotation. Then he built a circuit around an Arduino Nano for controlling the motor and put it all in a carefully made box which he bolted to the side of the slider. A switch built into the box turns it on and off, and a potentiometer sets the direction of the slider. While not necessarily new, we do like when we see different approaches being taken, and in this case, he’s using magnets to not only hold the case’s cover on for easy access, but also a couple of them to hold the 9-volt battery in place. Check out his construction process and the new slider in action in the video below.

Continue reading “Improving Controls For A Camera Slider Kit”

A Brushless Motor On A PCB, Made From PCB

At Hackaday, we really appreciate it when new projects build on projects we’ve featured in the past. It’s great to be able to track back and see what inspires people to pick up someone else’s work and bring it to the next level or take it down a totally new path.

This PCB brushless motor is a great example of the soft collaboration that makes the Hackaday community so powerful. [bobricius] says he was inspired by this tiny PCB BLDC when he came up with his design. His write-up is still sparse at this point, but it looks like his motor is going to be used to drive a small robot. As with his inspiration, this motor has the stator coils etched right into the base PCB. But there are some significant improvements, like increasing the stator coil count from six to eight, as well as increasing the overall size of the motor. [bobricius] has also done away with the 3D-printed rotor of the original, opting to fabricate his rotor from stacked PCBs with cutouts for 5-mm neodymium magnets. We like the idea of using the same material throughout the motor, and it also raises the potential for stacking a second stator on the other side of the rotor, which might help mechanically and electrically. Even still, the prototype seems to hold its own in the video below.

This is [bobricius]’ second entry in the 2018 Hackaday Prize so far, after his not-a-Nixie tube display. Have you entered anything yet? Get to it! Prizes, achievements, and glory await.

Continue reading “A Brushless Motor On A PCB, Made From PCB”

Solve 2D Math Equations Colorfully

Electronics can be seen as really just an application of physics, and you could in turn argue that physics is the application of math to the real world. Unfortunately, the way most of us were taught math was far from intuitive. Luckily, the Internet is full of amazing texts and videos that can help you get a better understanding for the “why” behind complex math topics. Case in point? [3Blue1Brown] has a video showing how to solve 2D equations using colors. If you watch enough, you’ll realize that the colors are just a clever way to represent vectors and, in fact, the method would apply to complex numbers.

Honestly, we don’t think you’d ever solve equations like this by hand — at least not with the colors. But the intuitive feel this video can give you for how things work is very valuable. In addition, if you were trying to implement an algorithm in software this would be tailor-made for it, although you wouldn’t really use colors there either we suppose.

Continue reading “Solve 2D Math Equations Colorfully”

Lasers, Mirrors, And Sensors Combine In An Optical Bench Game

Who would have thought you could make a game out of an optical bench? [Chris Mitchell] did, and while we were skeptical at first, his laser Light Bender game has some potential. Just watch your eyes.

The premise is simple: direct the beam of a colored laser to the correct target before time runs out. [Chris] used laser-cut acrylic for his playfield, which has nine square cutouts arranged in a grid. Red, green, and blue laser pointers line the bottom of the grid, with photosensors and RGB LEDs lining the grid on the other three sides. Play starts with a random LED lighting up in one of the three colors, acting as a target. The corresponding color laser comes on, and the player has to insert mirrors or pass-through blocks in the grid to create a path to the target. The faster you hit the CdS cell, the higher your score. It’s simple, but it looks really engaging. We can imagine all sorts of upgrades, like lighting up two different targets at once, or adding a beamsplitter block to hit two targets with the same color. Filters and polarizers could add to the optical fun too.

We like builds that are just for fun, especially when they’re well-crafted and have a slight air of danger. The balloon-busting killbots project we featured recently comes to mind.

Continue reading “Lasers, Mirrors, And Sensors Combine In An Optical Bench Game”

Emulating Handheld History

There’s a certain class of hardware only millennials will cherish. Those cheap ‘LCD Video Games’ from Tiger Electronics were sold in the toy aisle of your old department store. There was an MC Hammer video game. There was a Stargate video game. There was a Back To The Future video game. All of these used the same plastic enclosure, all of them had Up, Down, Left, Right, and two extra buttons, and all of them used a custom liquid crystal display. All of them were just slightly disappointing.

Now, there’s an effort to digitize and preserve these video games on archive.org, along with every other variety of ancient handheld and battery powered video game from ages past.

Double Dragon. You remember this, don’t you?

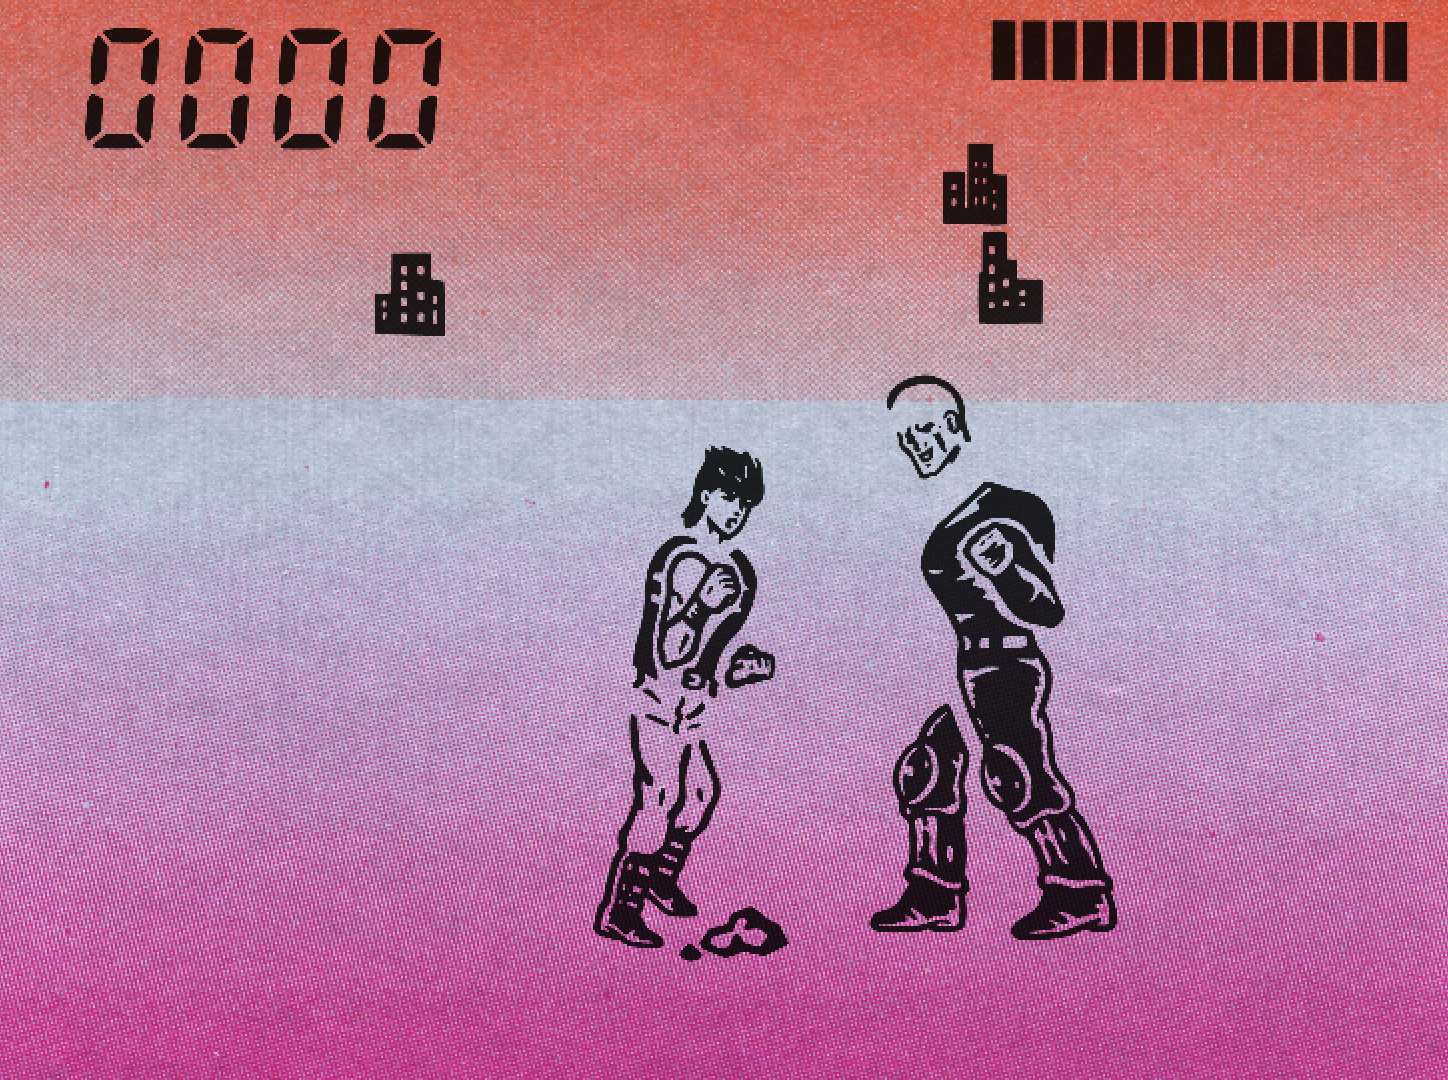
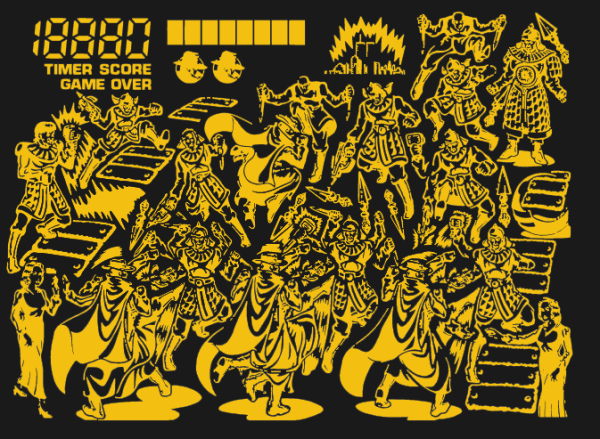
This is an effort from volunteers of the MAME team, who are now in the process of bringing these ‘LCD Video Games’ to the Internet Archive. Unlike other games which are just bits and bytes along with a few other relatively easily-digitized manuals and Peril Sensitive Sunglasses, preserving these games requires a complete teardown of the device. These are custom LCDs, after all. [Sean Riddle] and [hap] have been busy tearing apart these LCDs, vectorizing the segments (the game The Shadow is seen above), and preserving the art behind the LCD. It’s an immense amount of work, but the process has been refined somewhat over the years.

Some of these games, and some other earlier games featuring VFD and LED displays, are now hosted on the Internet Archive for anyone to play in a browser. The Handheld History collection joins the rest of the emulated games on the archive, with the hope they’ll be preserved for years to come.